When you import external files into Excel, it is possible that the data contains merged values, insignificant information, redundant texts, and so on.
To clean such a messy spreadsheet, you will find the need to Truncate Text in Excel. Be it extracting texts from left, right, middle, and specific positions. Or, splitting texts into separate columns.
Nonetheless, you can quickly Truncate text in Excel with these effective functions and tools.
Using LEFT Function
If you need to Truncate Text from the left, there’s a LEFT function dedicated to this.
The LEFT function returns the total character you specify in the Num_chars which is from the left part.
Syntax: LEFT(text, num_chars)Example:
Suppose, I have lists of Product IDs in Column B. Let’s extract the first two codes in a new cell using the LEFT formula.
=LEFT(B3, 2)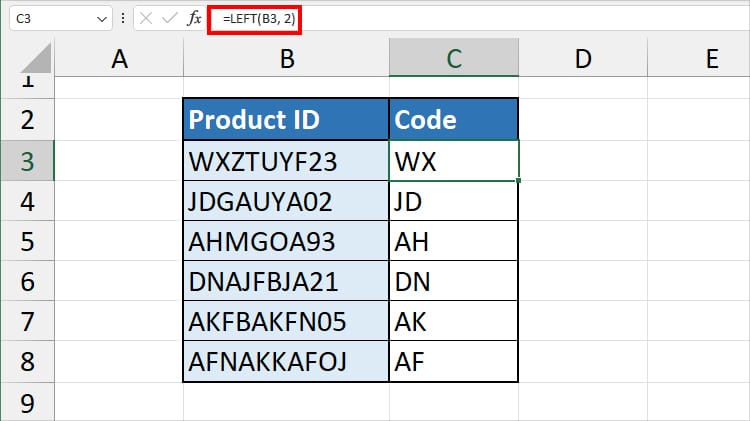
In the formula, I have specified cell B3 as Text and 2 num_chars. So, I got WX. After that, extend the Flash-fill to copy down the formula.
Using RIGHT Function
Next, to truncate the Text from the Right side, there’s a RIGHT function.
It is kind of similar to a LEFT function that extracts the number of characters specified in the text – but from the right.
Syntax: RIGHT(text, [num_chars])Example:
In Column B, I have lists of User Emails. Let’s use the RIGHT function to pull out the domain extension only. I used the formula as
=RIGHT(B2, 4)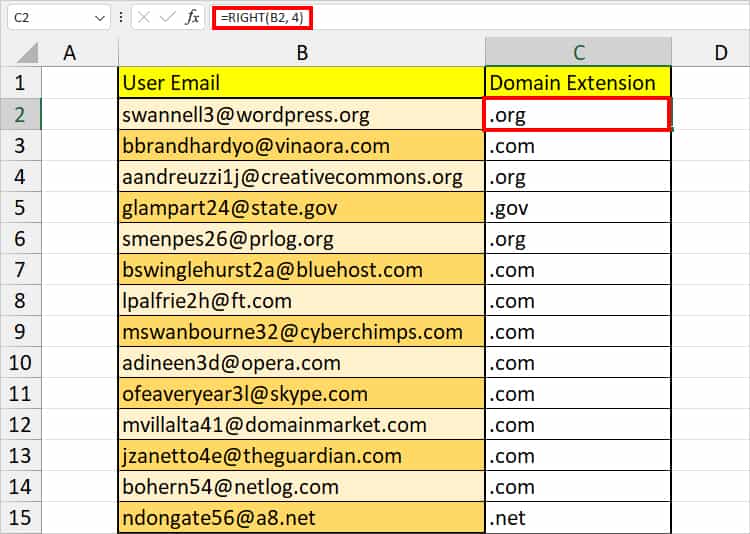
The RIGHT formula returns the first 4 characters from the right part of the text string in B2. I got .org as output. Then, using the Flash-fill, I applied the formula to the entire column.
Using MID Function
If you need to extract the character from a specific position in lengthy texts, use Excel’s MID function.
In this function, you can define the position and number of characters to extract.
Syntax: MID(text, start_num, num_chars)Example:
Here, I have merged texts with all kinds of categories in one cell. Since we have important information in the center, let’s truncate text from the middle.
=MID(B1, 7, 6)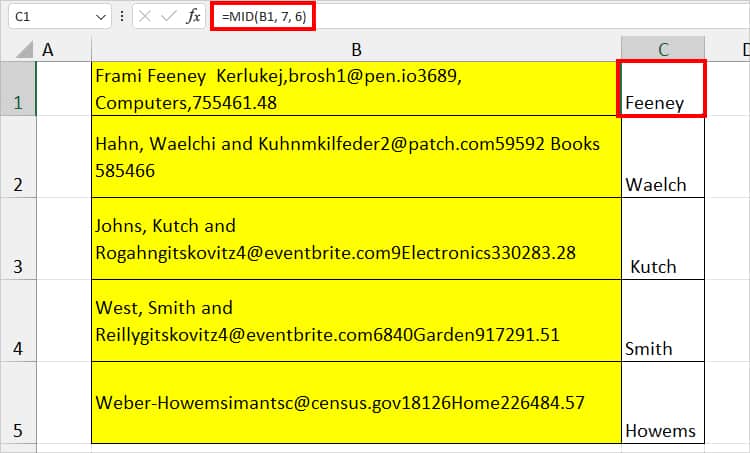
In the above formula, we have specified to return the 6 characters from the 7th position of text in B1.
Using Formula
Now, let us dive more into the truncating text with a condition. Here, I’ll use several nested functions and discuss the examples for each criterion.
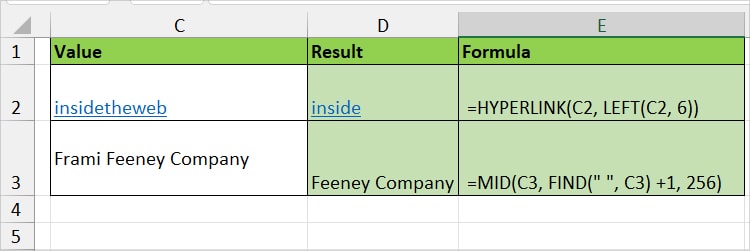
| Condition | Functions Used | Formula | Output | Description |
| Truncate Hyperlink Text | =HYPERLINK(Link_location, LEFT(text, num_chars)) | =HYPERLINK(C2, LEFT(C2, 6)) | inside | Returned the 6 characters from the value in C2 with Hyperlink. |
| Truncate Text After Space | =MID(text, FIND(find_text, within_text, start_num), start_num, num_chars) | =MID(C3, FIND(” “, C3) +1, 256) | Feeney Company | Returns all characters after the space of the first position. |
Using Text to Column
Sometimes, rather than extracting characters individually, you might find the need to truncate all texts at once. During that case, consider using the Text to Columns feature.
This method is especially helpful when you have combined texts separated by a delimiter. For example, to separate addresses, names, dates, date and time, etc.
I personally use this trick to clean my data in the fastest way possible.
- Firstly, select your Cell range with texts.
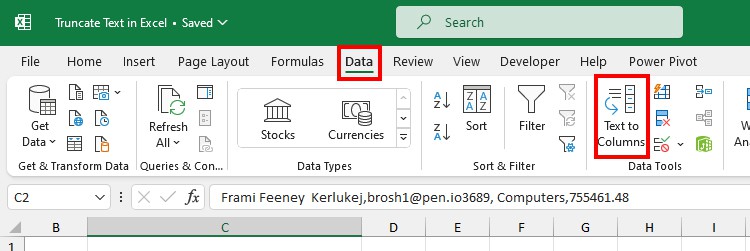
- Then, from the Data Tab, choose Text to Columns.
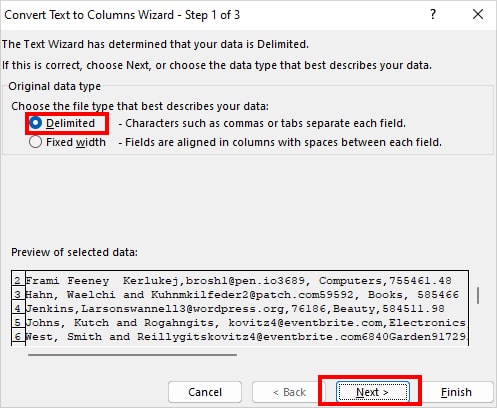
- On the Convert Text to Columns Wizard window, hit Next.
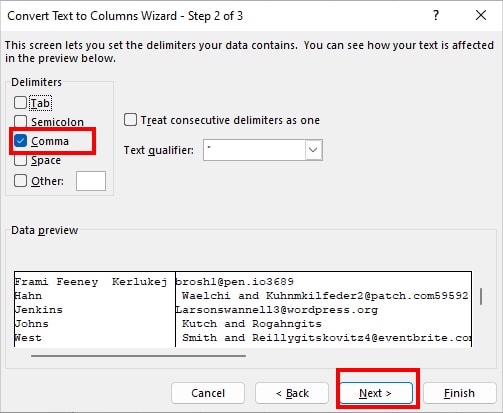
- In the Step 2, tick the Delimiters option. Since my value is separated by a (,), I chose Comma. Click Next.
- In Step 3, you can check and modify these menus as needed. When done, hit Finish.
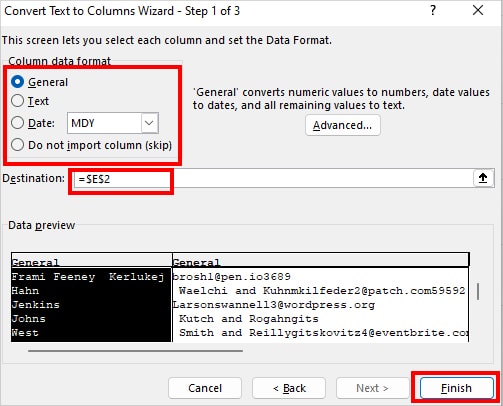
- Column data format: Choose how you want to format text when importing.
- Do not import column: Select a Column and choose this option to skip loading certain columns on your sheet.
- Destination: Select an area on your sheet to import data.
Using TEXTSPLIT Function
You can also use the TEXTSPLIT function as an alternative to the Text to Columns.
The best part about formulas is the result updates automatically when you edit the value.
So, I recommend you opt for the formula if you need to change the text.
Syntax: TEXTSPLIT(text, col_delimiter, [row_delimiter], [ignore_empty], [match_mode], [pad_with])Example:
Using the TEXTSPLIT function, I will split the texts with a comma delimiter into different columns. For that, I entered the formula as
=TEXTSPLIT(B4, ",")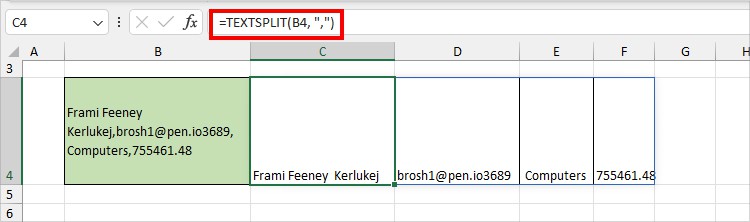
The formula returned the values in separate columns.
Keep in Mind, since it is an array formula, the formula will result in #SPILL! Error when there is no space to load the results.
Using Power Query
While importing external files in Excel, we mostly use the Power Query tool.
You can truncate texts in the Power Query itself before loading them onto your sheet.
While you can also use this method after you’ve imported the file, here, I’ll be focusing on transforming the data prior to loading it.
Suppose, I am importing a CSV file into Excel and I chose Transform Data in the Power Query Editor window.
In the Power Query Editor window, you can Split Columns or Extract Text Strings.
Split Column
Go to the Home Tab in the Power Query Editor window. Expand Split Column and choose any one option.
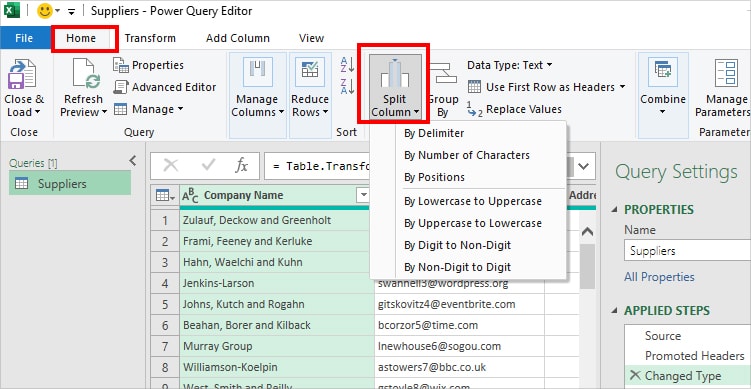
- By delimiter: Separate a Column by a delimiter. Here, you can also choose to split at the left-most, right-most, each occurrence, or special character.
- By Number of Characters: Separate values based on number of characters. You can pick to split from left, from right, or repeatedly.
- By Positions: Split by position of text like 3,6,8, etc.
- By Lowercase to Uppercase: From Lowercase to Uppercase
- By Uppercase to Lowercase: From uppercase to Lowercase
- By Digit to Non-Digit: Separate Texts from Number
- By Non-Digit to Digit: Split Numbers and Texts
Extract Text
To Extract Text, head to the Transform Tab. In the Text Column section, expand Extract menu and pick any one option.
- First Characters: Extract the number of text characters from the Left.
- Last Characters: Return the specified number of characters from the Right.
- Range: Choose the location and number of characters to extract.
- Text Before Delimiter: Extract values before the delimiter you specify.
- Text After Delimiter: Extract texts after a certain delimiter.
- Text Between Delimiter: Draw out texts between the start delimiter and an End Delimiter.
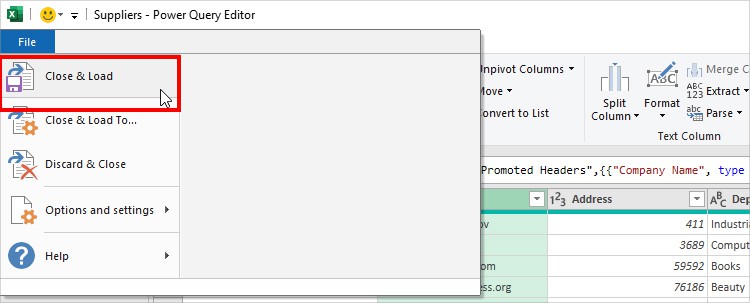
Once you’re done truncating texts in a Column, head to File Tab and pick Close & Load.