Do you often find yourselves managing emails all day long? Yet, they just keep on piling up in your inbox.
If yes, then you are probably doing things manually and haven’t utilized the app’s potential to the fullest.
Not anymore!
Today, we’ll uncover a list of several essential tips and tricks which will help you become an Outlook professional much quicker. Even if you are a professional, you might still discover some new tricks. So, let’s get going.
- Efficient email management
- Automate repetitive manual tasks and actions
- Keep the inbox clean
- Get things done faster
- Boost overall productivity
Create Rules
Rules are one of the most important features if you want to organize your incoming emails.
As you get multiple emails, possibly even hundreds, they will eventually pile up and take up your entire Outlook mailbox storage.
However, with a rule, Outlook can automatically move each type of particular email to a specified folder. So, you can create a rule to forward all the unwanted emails coming from a particular email to directly end up in the trash.
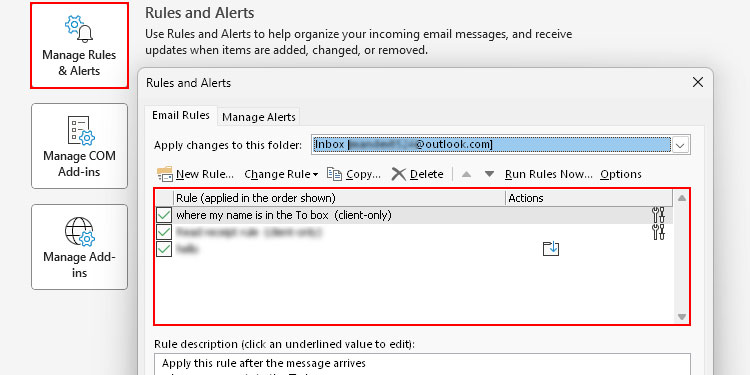
The good news is that Outlook provides a list of several conditions that you can apply to both incoming and outgoing mail according to your specific needs. Therefore, the possibilities are pretty much endless.
Use Conditional Formatting
Conditional formatting is similar to rules, except that it highlights certain types of emails/calendar events and makes them stand out visually.
For instance, you can create a conditional formatting rule to highlight certain types of emails, like from a colleague or client with a specific font or color. Once you do so, you can easily recognize the type of mail/event before even opening it.
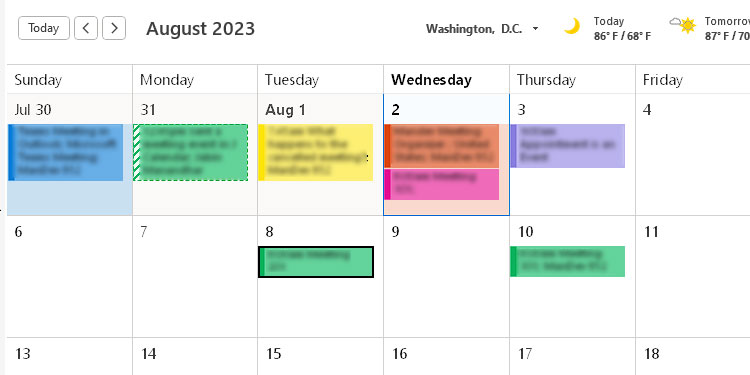
You can create such rules by going to View > Current View > View Settings > Conditional Formatting.
Automate Actions with Quick Steps
When working in Outlook, we usually repeat the same set of actions like moving an email to a particular folder, sending meeting invites to specific people, and so on.
To automate such tasks, you can use the Quick Steps feature.
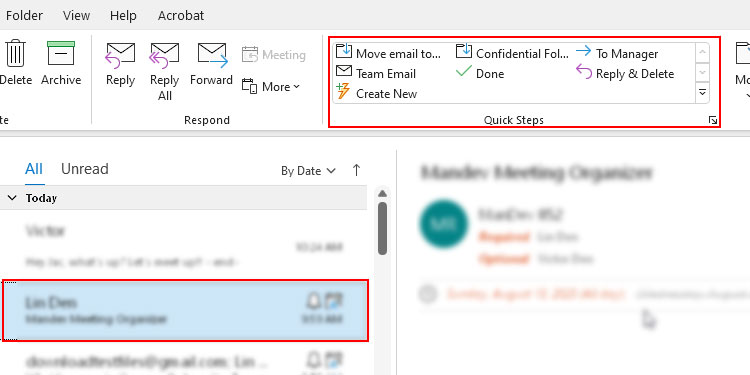
As the name suggests, Quick Steps allows us to execute one or more actions with a single click of a button. Alternatively, it also provides the option to assign a keyboard shortcut to an action. On top of it, you can run multiple actions in your preferred sequence.
However, don’t confuse them with the rules. While a rule applies one or more action (s) only after meeting specific criteria, you can execute a Quick Step action whenever you want.
Also, a quick step action isn’t limited to performing an action on an email message. It can even do other things like categorizing the selected message, creating a meeting/appointment with specific details, and so on.
To create a Quick Steps action, click Create New inside the Quick Steps section under the Home tab.
Declutter Your Inbox
Decluttering your inbox mainly includes two things — deleting/moving out old emails and preventing unwanted emails from flooding your inbox.
Rather than managing all incoming emails, it’s better to block ones that you don’t need such as spam and promotional emails.
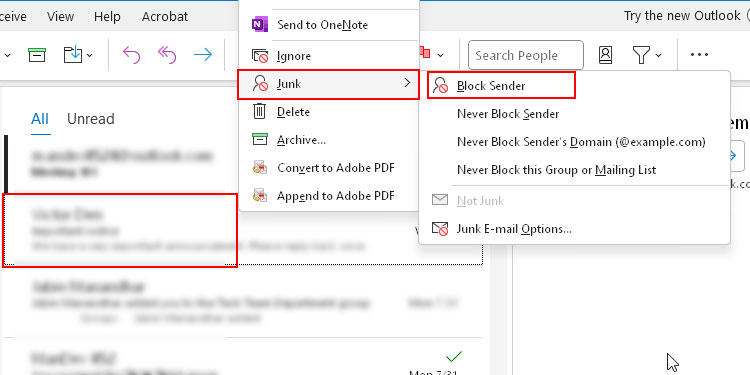
To block a sender in Outlook, right-click on one of his/her emails and select Junk > Block sender. If you need to block multiple senders, select Junk email options and add them under the Block Senders tab. Also, consider unsubscribing to newsletters to stop receiving mails from them.
Now, apart from preventing emails, it’s also a good idea to manage existing emails that are old and unnecessarily lying in the inbox. For this, you can either archive or delete such emails.
Even better, you can automate this process by configuring the AutoArchive settings. Then, Outlook will automatically archive, delete or move emails on a periodic basis for you.
Add Useful Commands to the Quick Access Toolbar
Even if you are fairly familiar with the Outlook interface, you need to reach out to at least two places to click a command.
However, with Outlook’s Quick Access Toolbar feature, you can customize the interface to make frequently used commands much more accessible.
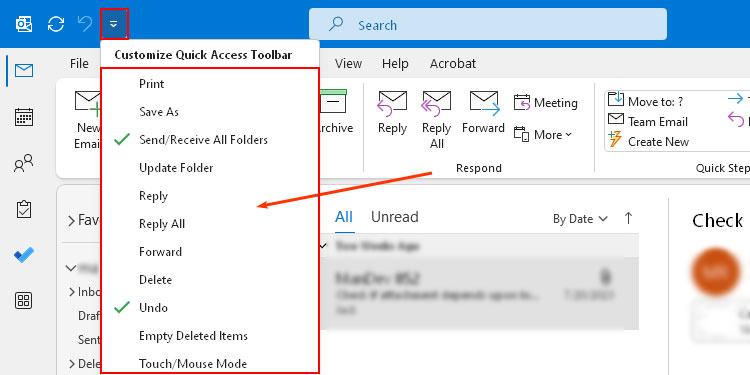
For this, click the Down arrow icon at the top left corner. Then, choose the preferred commands on the left and click Add to add them to the Quick Access Toolbar.
Create and Use Templates
If you often find yourselves writing the same text time and again, then it’s better to have a template.
Once you create a template, you won’t ever have to start writing from scratch.
Such templates aren’t only limited to text in an email message. You can even create a template for appointments/meetings that already include details like attendees, start /end times, location, or text inside the message body.
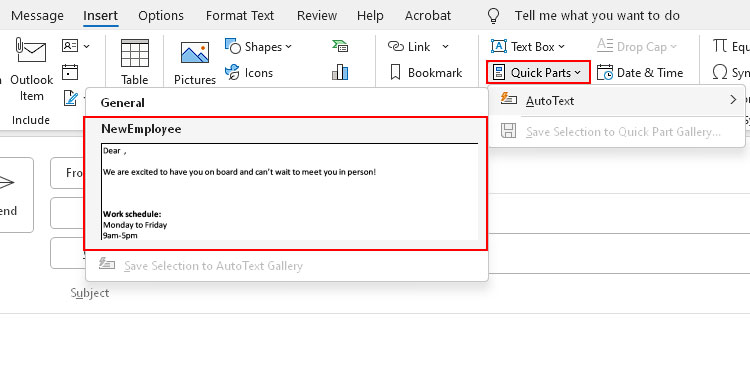
Similarly, you can attach an email signature inside the message to save time while composing messages. Or, use the Quick Parts feature to insert a specific template in the message body.
Also, you can set up an option to autocomplete long words or phrases that you use frequently with few letters.
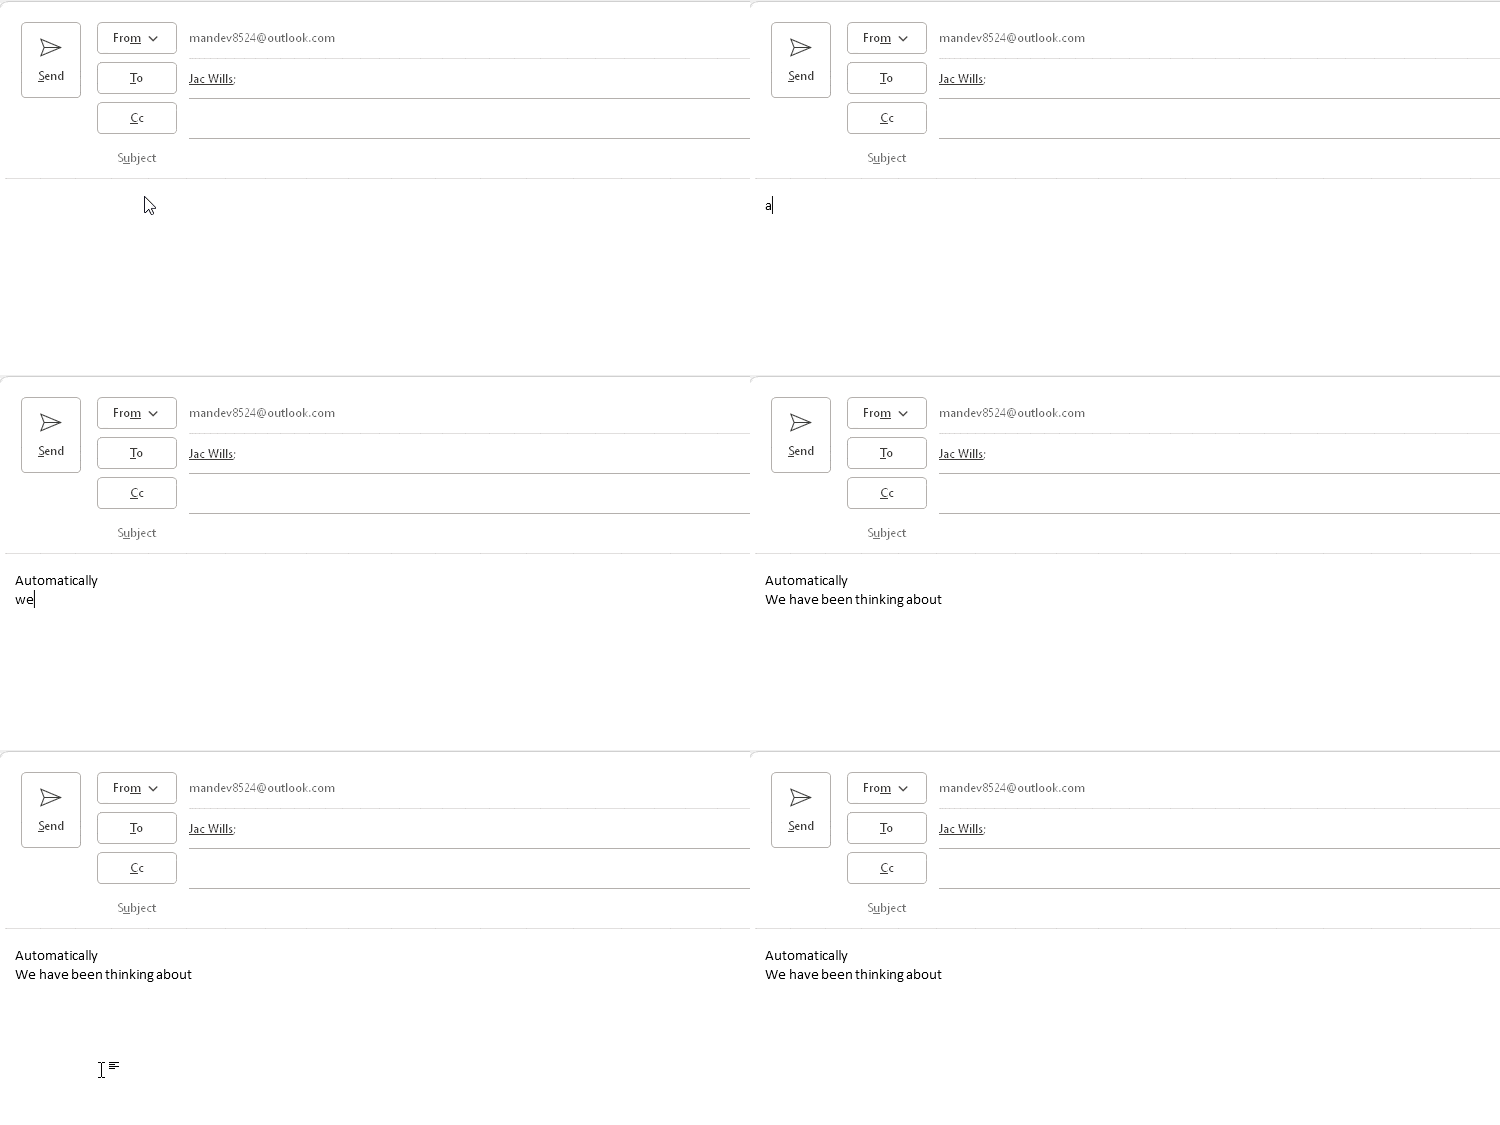
For this, go to File > Options > Mail > Spelling and Autocorrect > Proofing. Then, click AutoCorrect Options and enter the long words/phrases you want to autocomplete.
Create a Contact Group
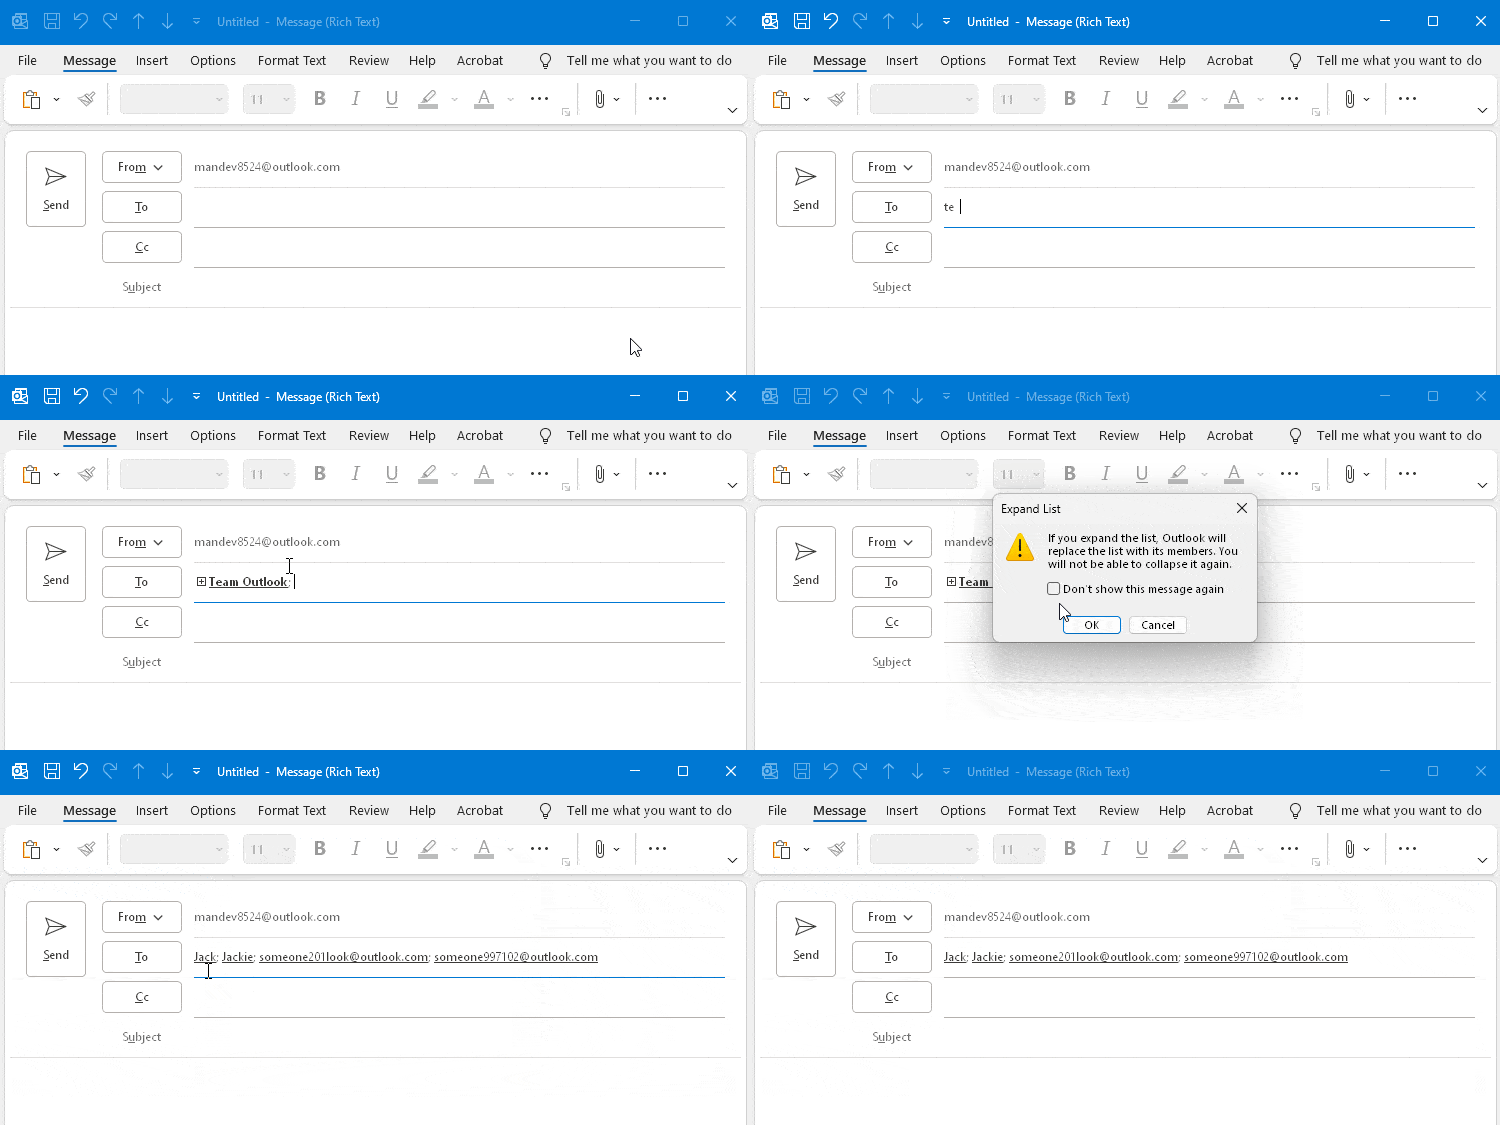
More often than not, we deal with the same group of people like our colleagues or team members. But, it isn’t efficient to manually type out each of their names. Even worse, imagine having to type out a full email address or name of hundreds of people.
To avoid such issues, you can create a contact group (also known as the distribution list) after which you only have to type out the group name. Then, Outlook will automatically include all the members that are part of the same group.
Create Custom Search Folders
Although Outlook has a handy search bar, it isn’t enough when you have to find something that exactly matches multiple criteria.
For instance, you will have a hard time searching for all folders from a particular email that contains attachments of a certain size with the typical search bar.
For such cases, you can create search folders and save searches. Unlike the typical search function which only displays search results, it places them into a separate folder. As a result, you just need to open the search folder to view a specific type of search result.
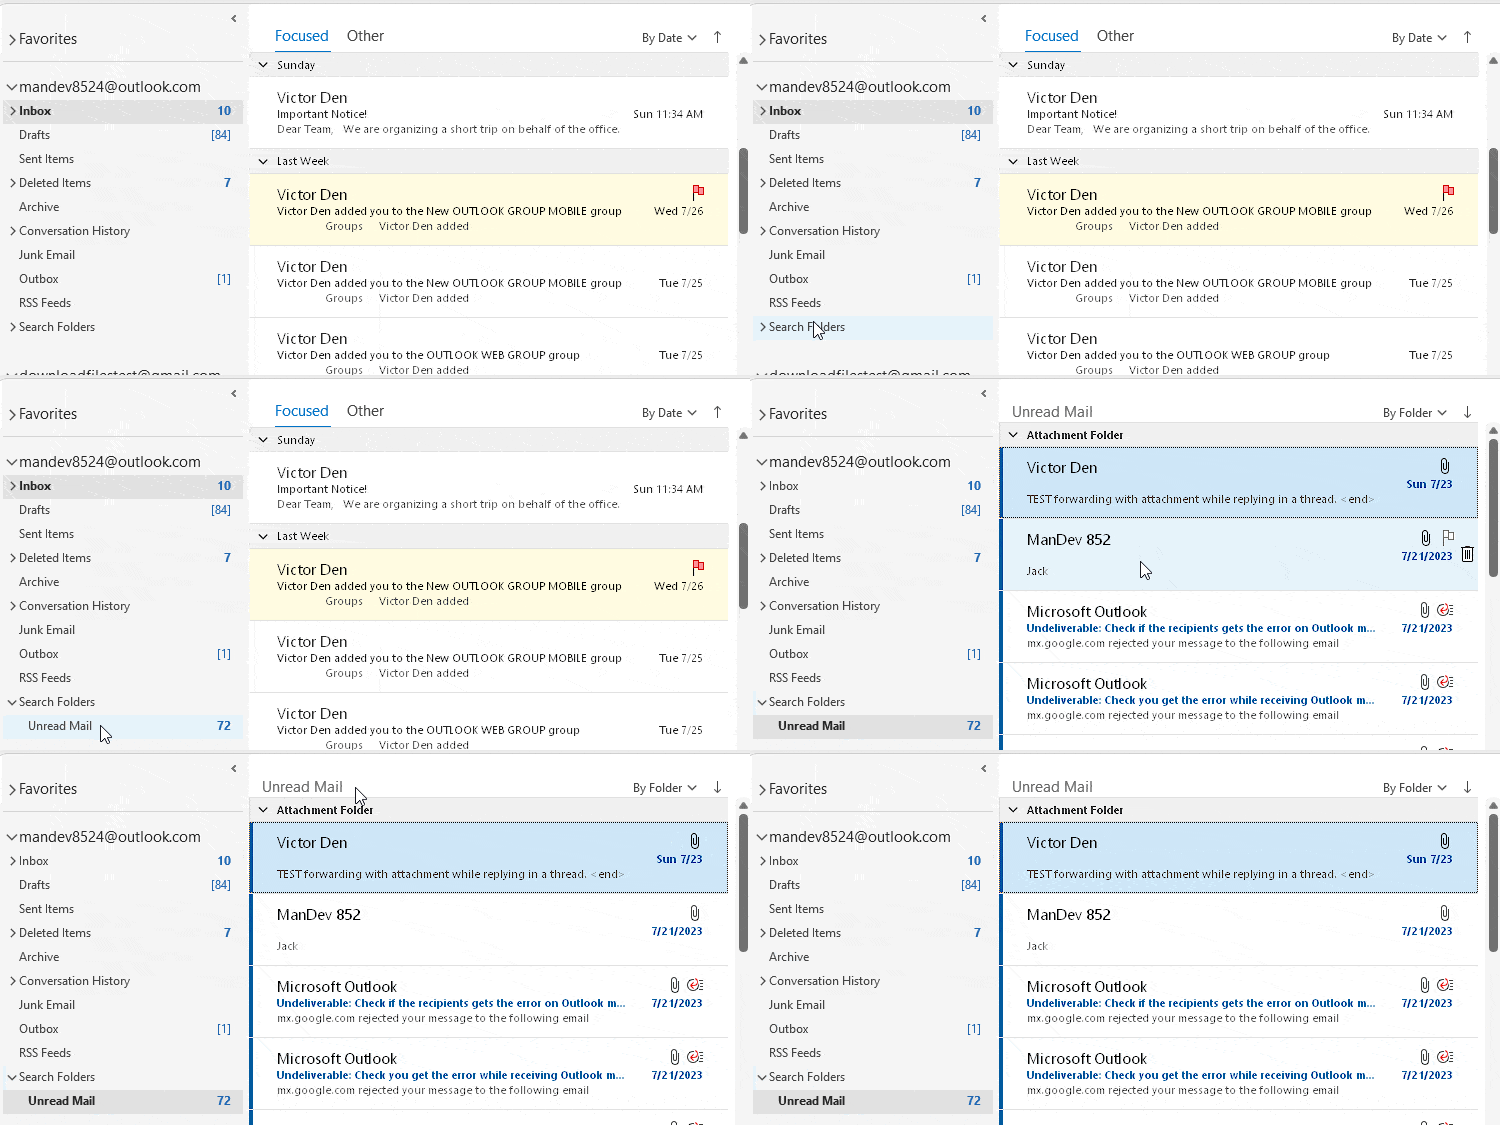
Outlook already provides various search folders like unread emails, emails with attachments, mail with specific words, and many more. Along with the built-in ones, you can further create a custom search folder that matches your specific criteria.
Use Keyboard Shortcuts
If you really want to speed up your workflow, using a shortcut key is the way to go. Even better, cultivate a habit of using them wherever possible.

Having said that, it’s quite impractical and inefficient to memorize all the keyboard shortcuts. So, I suggest you learn some of the most basic and essential shortcuts that you use every day. Then, learn more about them later on as per your needs.
Recall a Message
Oftentimes, we hit the Send button, only to realize later that the message was sent to the wrong person or some details weren’t correct.
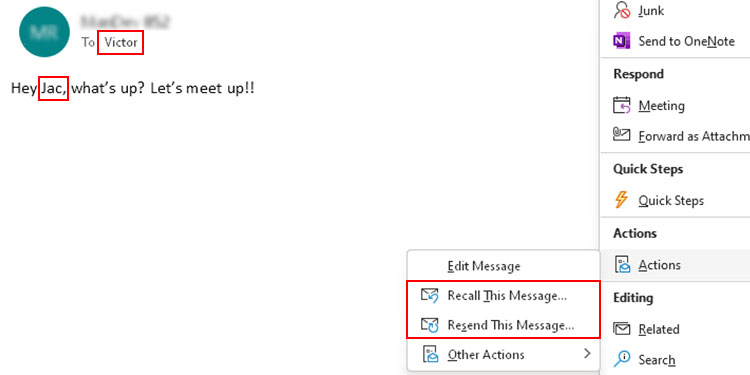
In such situations, you can still recall a sent message and choose to either delete or replace it with a new message.
Set up Automatic Office Replies
Whenever you are busy or don’t have time to reply to an email message, you can use the out-of-office reply feature to automatically respond with an email message.
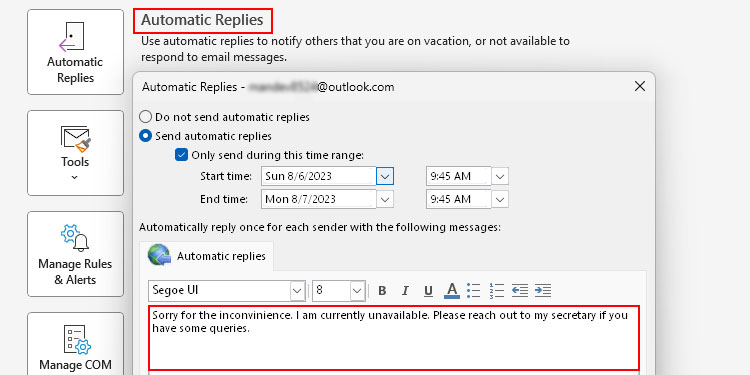
This way, you can inform the other person trying to reach out, without having to be physically present.
Recover Deleted Emails
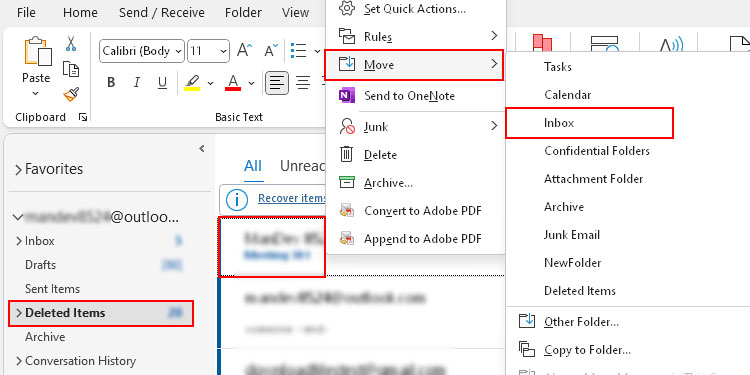
When working in Outlook, you may sometimes accidentally delete an important email. Luckily, you can recover it from the Deleted Items folders.
Share Calendars with Others
Whenever you need to collaborate with others or vice-versa, it’s a good idea to share calendars. That way, one can view all the appointments/meeting events and adjust the calendar events accordingly.
While sharing the calendar, you can choose to share it with limited access like only viewing events. Or, you could provide full access to edit the calendar events and even conduct meetings on your behalf.
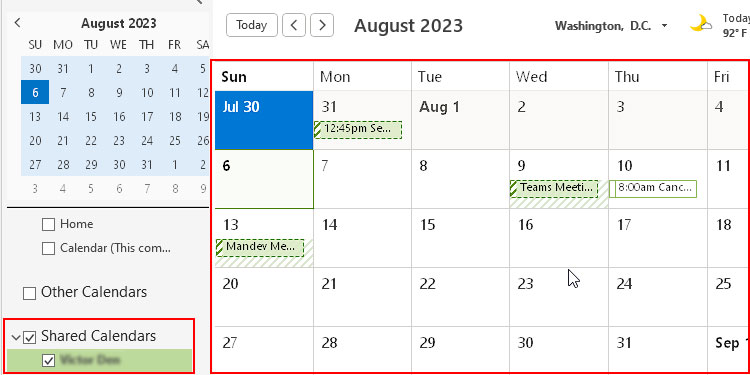
Alternatively, you can print the calendar in PDF format and share it with others as well.
Manage Emails with Flags and Tasks
Among many emails that you receive, some are extremely important and require you to take immediate action like holding a meeting or sending a message to a particular client.
However, sometimes these emails may require you to perform a specific task at a later date and time. In such cases, there’s a high chance that you might forget about it.
To avoid it, you can flag such an email to follow up later and mark it as complete when done. Additionally, you can add a reminder to get notified before you hit the due date/deadline.
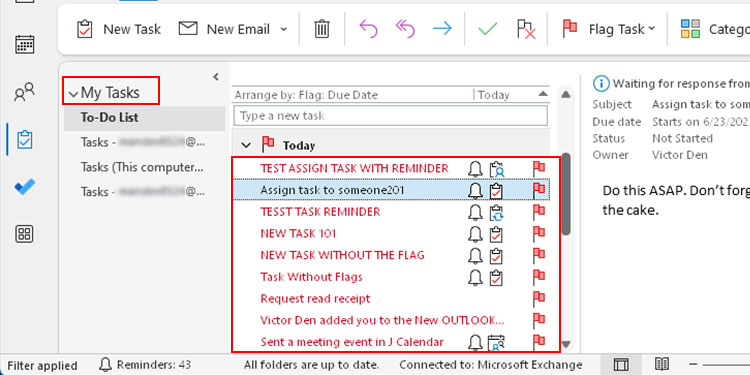
Along with flags, you can also create a task list so that you can focus on your most important tasks for the day.
If you use Outlook with a Microsoft 365 subscription, it already comes with a built-in task management app known as Microsoft To Do. With it, you can create tasks and find all your flagged emails in one place.
Add Multiple Time Zones
Whenever you need to work with clients from different parts of the world, it’s quite inconvenient to schedule meetings because of different time zones.
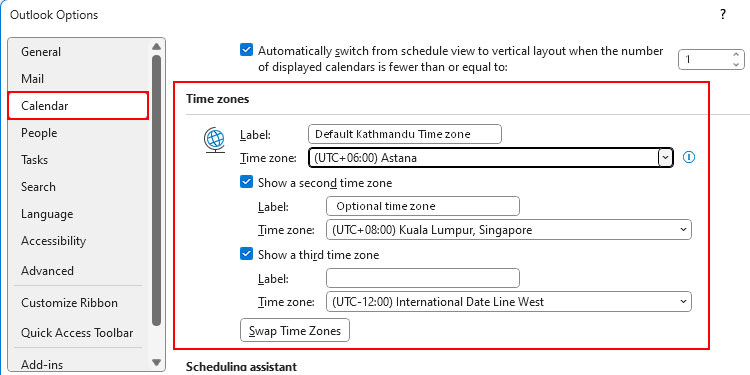
For this very purpose, Outlook already provides an option to add multiple time zones. Using it, you can easily plan out an appropriate time slot that works for both parties without having to convert time zones manually.
You can find such an option by going to File > Options > Calendar > Time Zones.
Extra Tips to Consider
- Add email to calendar
- Proofread email messages
- Schedule send your messages
- Set up the calendar properly
- View multiple calendars
- Use BCC to protect the privacy of the recipients
- Use Focused mode
- Use the Scheduling assistant to view availability and choose an appropriate time to conduct meetings.
Bonus!!!
While all the above tips are useful, it isn’t a good approach to try to learn everything at once.
Instead, focus on the ones that you apply most of the time while working in Outlook. Then, keep learning more according to your needs.