If you’ve grouped multiple data in a single cell, you might face issues during data analysis. You can resolve such issues by splitting cells into multiple rows.
You can split Excel cells into two rows using Excel’s ability to transpose data. Either split the data into two columns using Text to Columns or create a formula using TEXTSPLIT and TRANSPOSE.
Additionally, for advanced Excel users, we’ve included methods to split Excel cell into rows using Power Query and a VBA-based macro.
Split the Cell Into Columns And Transpose Data
You can swap the alignment of columns to rows and vice-versa in Excel. We will utilize this feature to split Excel cells into two rows.
For this method, we’ll use Text to Column to split the cell into columns. Then, we’ll copy the columns and use Paste Options to paste the transposed data.
- Select your cell and head to the Data tab.
- From the Data Tools section, select Text to Column.
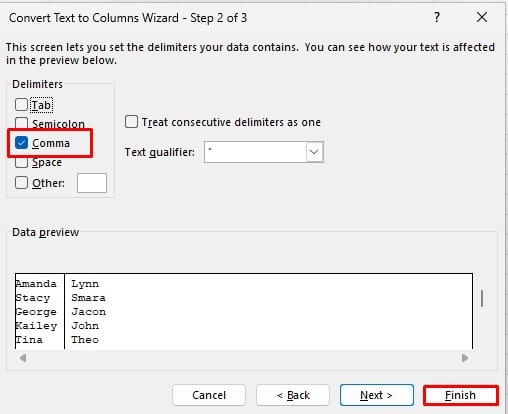
- In the Step 1 of 3 window of Text to Column, select Delimited > Next.

- Next, specify the separator under Delimiter > Finish.
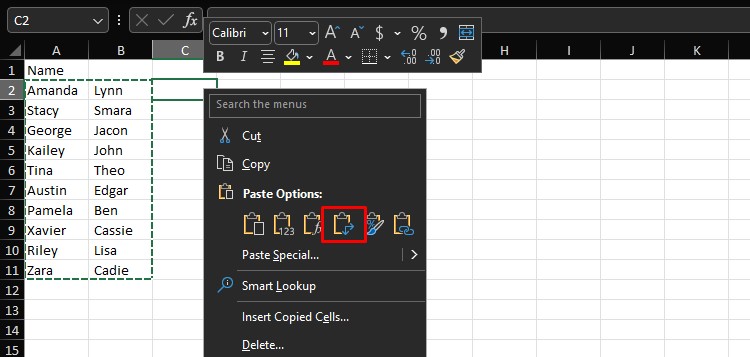
- Select the two columns and hit Ctrl + C.
- Click on an empty cell and right-click on it.
- Click on Transpose under the Paste Options.
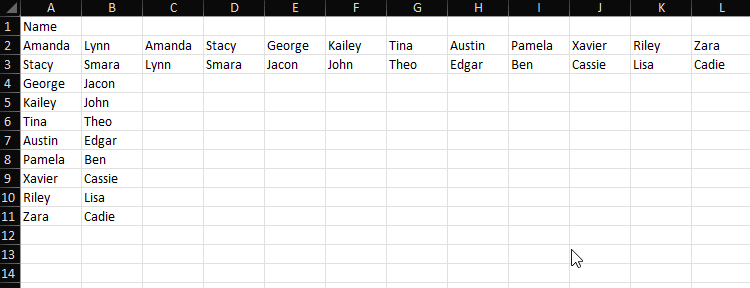
- After you’ve pasted the transposed copy, remove the source data column (Ctrl + -).
Use TRANSPOSE and TEXTSPLIT Function
| Function Used | Data Type | Syntax |
| TRANSPOSE | LOOKUP & REFERENCE | =TRANSOPOSE(array) |
| CHAR | MATH & TRIG | =CHAR(number) |
| TEXTSPLIT | TEXT | =TEXTSPLIT(text, col_delimiter, [row_delimier],[ignore_empty],[match_mode],[pad_with]) |
We can also create a formula that splits Excel cells into two rows.
We’ll be using TEXTSPLIT which separates the cell using a delimiter, and TRANSPOSE which switches the alignment to a row.
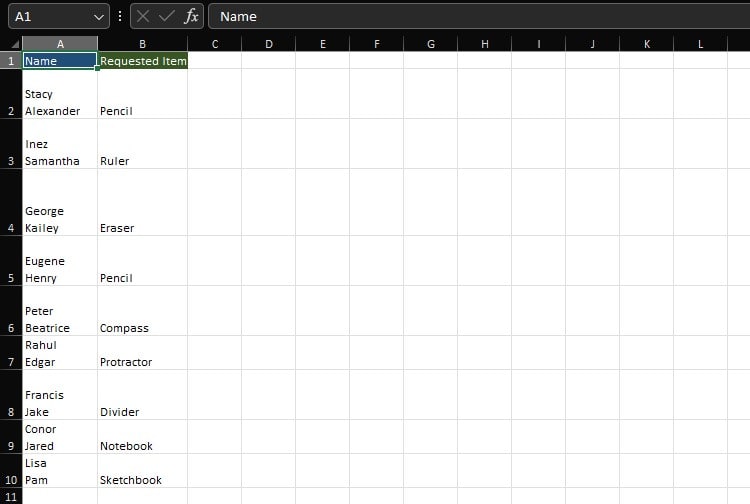
Let’s separate range A2:A11 into two rows in this table.
As Flash Fill uses relative referencing, we will have to break the task into two formulas. The first formula will only split the even-numbered cell while the second formula will only split the odd-numbered cell.
In cell C2, enter the following formula:
=TRANSPOSE(TEXTSPLIT(A2,CHAR(10)))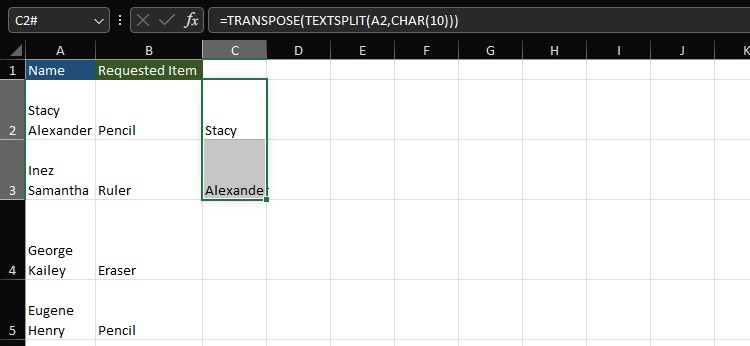
Select cells C2 and C3 and use the fill handle to apply the formula till C11.
To transpose the rest of the items, enter the following formula on cell C12:
=TRANSPOSE(TEXTSPLIT(A3,CHAR(10)))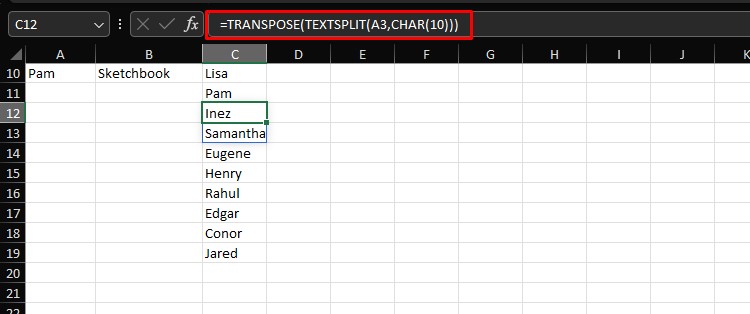
Select cells C11 and C12 and apply the formula till C22.
Use Power Query
The Power Query utility is a powerful automation tool in Excel. If you’re using Excel 2016 or later, Power Query comes built-in with your Excel program.
Using Power Query, easily split a cell into rows by specifying a delimiter.
- Select your table/range.
- Go to the Data tab and select From Table/Range in the Get & Transform Data section.

- If prompted, select OK in the Create Table pop-up.
- Select your column in the Power Query window.
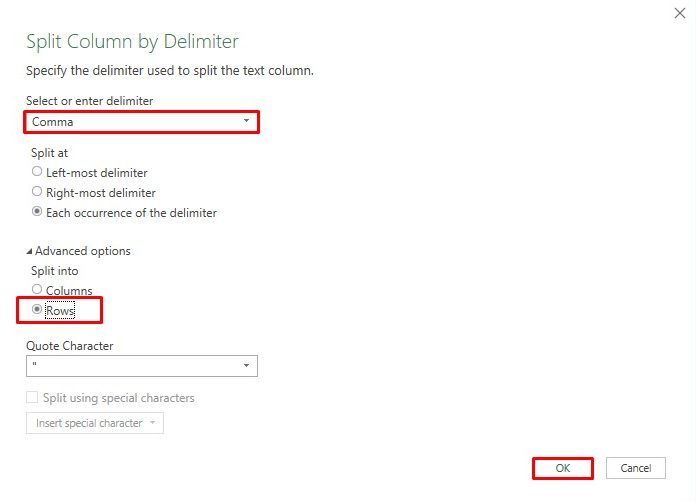
- From the Transform section, select Split column > By Delimiter.

- Under Select or enter delimiter, choose your separator.
- Expand Advanced options.
- Under Split into, select Rows > OK.
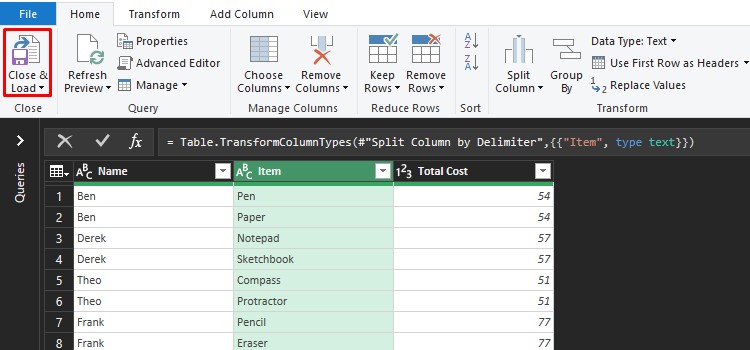
- Choose Close & Load from the Home tab.
Create a Macro Using VBA
Create a macro to automate splitting an Excel cell into two rows.
Before you head on, make sure you’ve enabled the Developer tab from Excel options. Without the Developer tab, you won’t be able to edit macro code in the future.
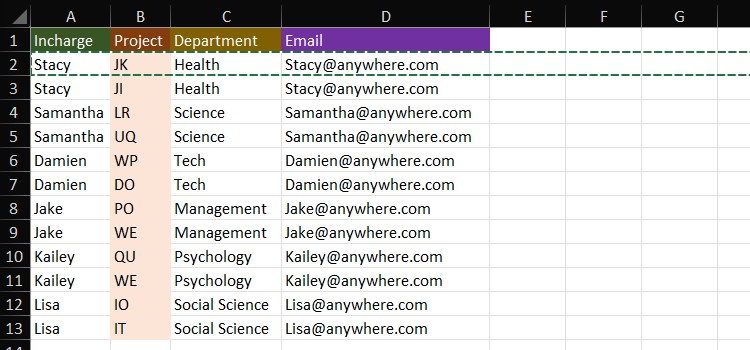
In this data table, we have a list of individuals that are in charge of different projects.
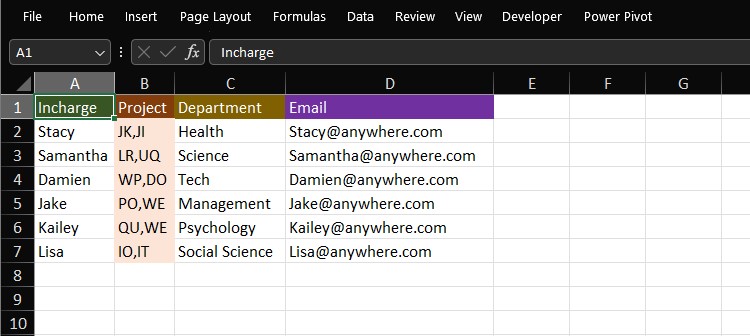
We’re looking to split our rows based on column B. Here’s how we create and run our macro to unpivot the table:
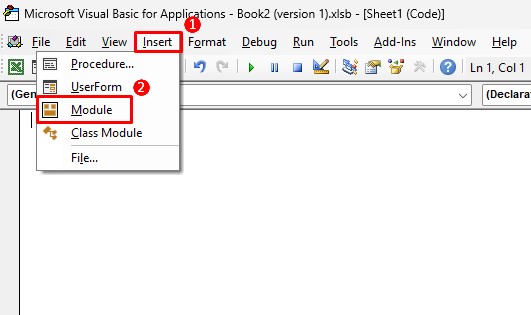
- Press Alt + F11 on your keyboard.
- Select Insert > Module.
- Copy-paste the following code. Remember to adjust the sheet name accordingly:
Sub splitByColB()
Dim r As Range, i As Long, ar
Set r = Worksheets("Sheet1").Range("B999999").End(xlUp)
Do While r.Row > 1
ar = Split(r.Value, ",")
If UBound(ar) >= 0 Then r.Value = ar(0)
For i = UBound(ar) To 1 Step -1
r.EntireRow.Copy
r.Offset(1).EntireRow.Insert
r.Offset(1).Value = ar(i)
Next
Set r = r.Offset(-1)
Loop
End Sub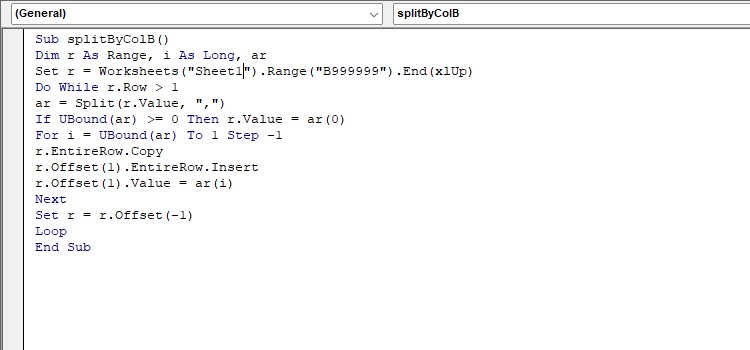
- Select F4 to run the macro.