By default, date and time functions like NOW() gives a timestamp like 2/22/2023 3:10:00 PM. Timestamps can help to find the exact time for data, however, may be insignificant for some documents. For instance, if you have a pivot table, Excel might not recognize the format as a date.
As a workaround, you can change the value to only date format. This way, you can still have access to timestamps to look up information whenever you need them. However, if you want to permanently get rid of them, you can use one of the Excel functions.
Change Date format
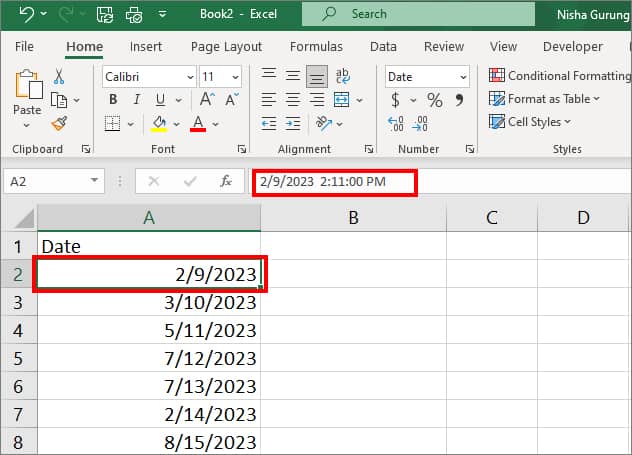
One of the easiest ways to remove timestamps is by converting your data format to a date. In this approach, you are simply hiding the timestamp and not actually deleting them.
Even if you no longer have a timestamp on your cell, it will still appear in the formula bar. So, this method is not for users who need to perform any calculations with the data.
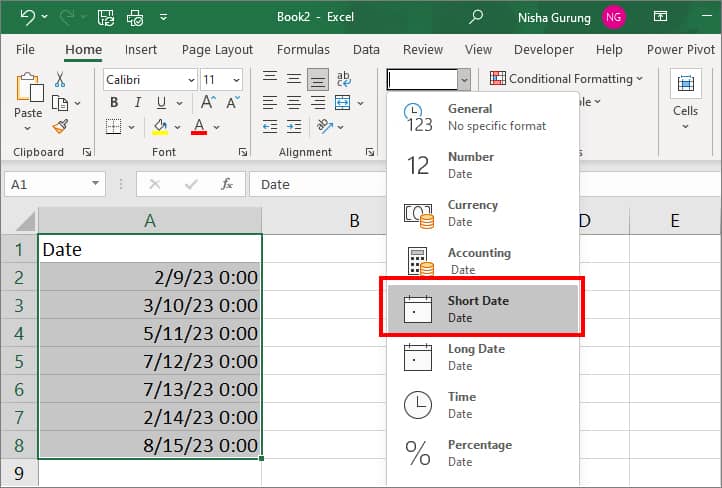
- Highlight the data range and go to Home Tab.
- On the Number group, click on the Drop-down list and pick Short Date.
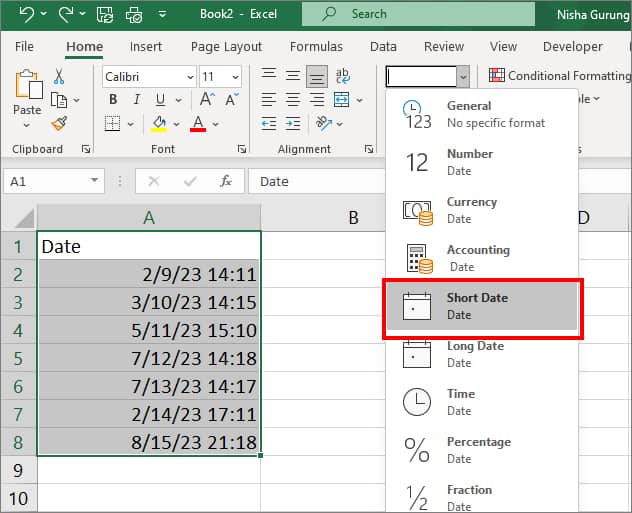
- It will hide the timestamp from cell.
If you do not like the short date, navigate to the format cell for more date formats.
- Select the Ranges with the date and timestamp and Right-click on it. Then, Choose Format Cells.
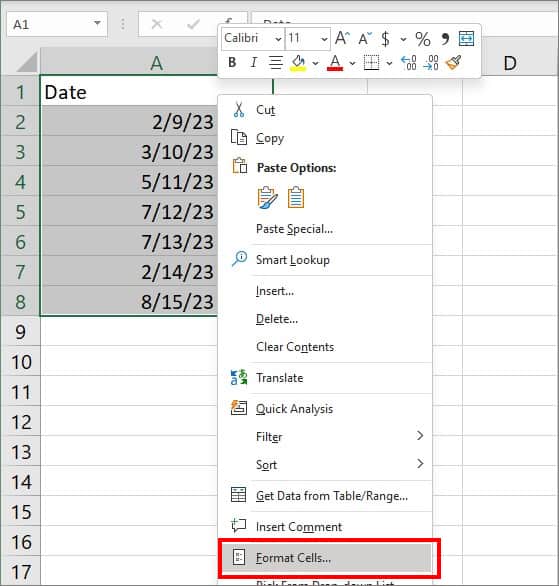
- On the Number Tab, go to Date category.
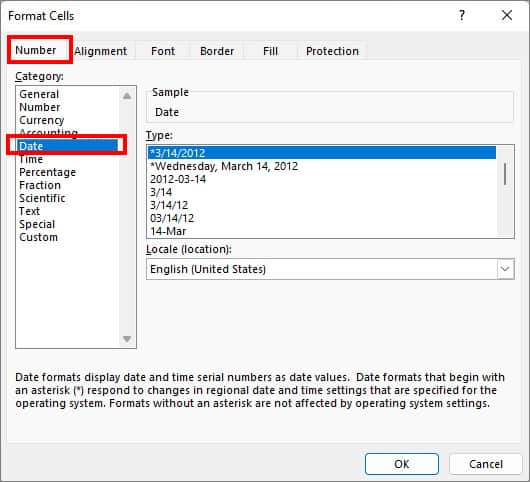
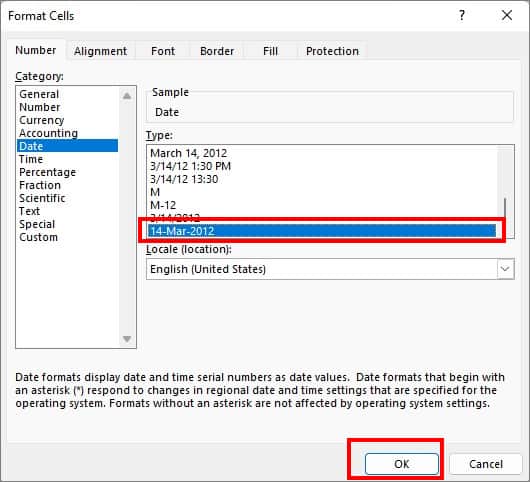
- Under Type, scroll for Date formats and apply one of them. Then, click OK.
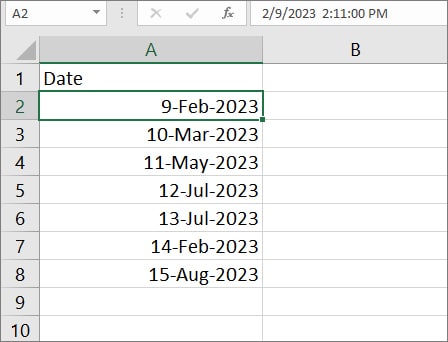
- Your data should look like this.
Using Find and Replace
Find and Replace is a handy tool in Excel that helps you locate anything on your worksheet promptly and replace it if needed. We will use this tool to replace the time with null.
To use this method, you must have a space between your date and time. However, there shouldn’t be any leading spaces.
- Select the Cell ranges you want to remove the time stamp from.
- From Home tab, select Find & Select > Replace.
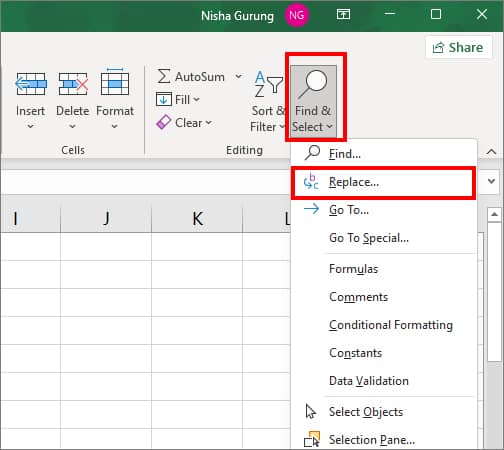
- On the Find what field, enter Space and type Asterisk (*).
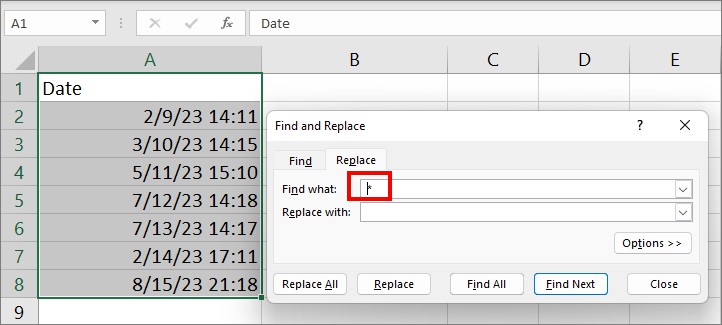
- Leave the Replace with field empty and click on Replace All.
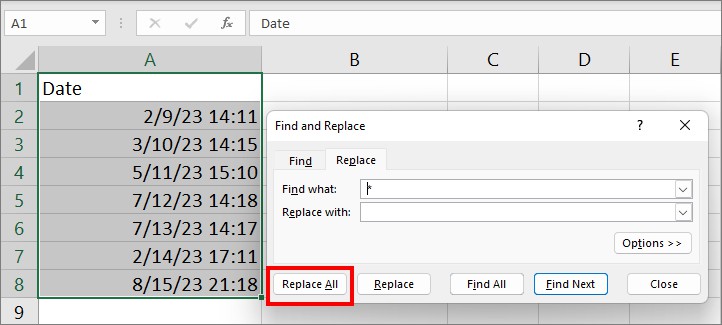
- You can also format the date to a Short date if you want to.
Using Text to Column Wizard
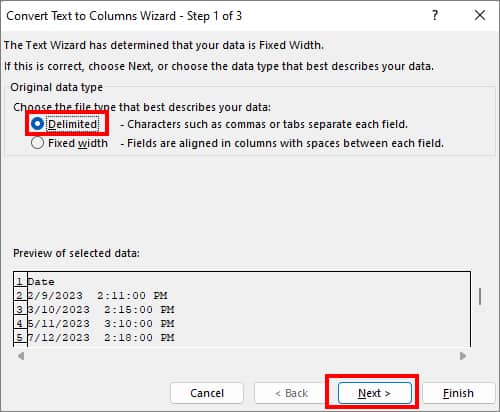
If you want to completely remove the timestamp format from the original data, this method is best for you. With Text to Column Wizard, you can split the date and timestamp into two different columns. Then, you can set the column with date to text format. If you do not want Time Stamp Column in your worksheet, choose the skip option while importing data.
- Select the Data with the time stamp you want to remove.
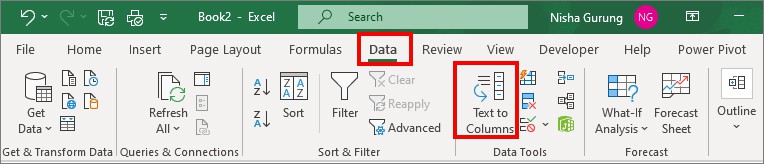
- Go to Data Tab. From Data Tools, select Text to Columns.
- Now, in the pop-up box, click on the Delimited option and select Next.
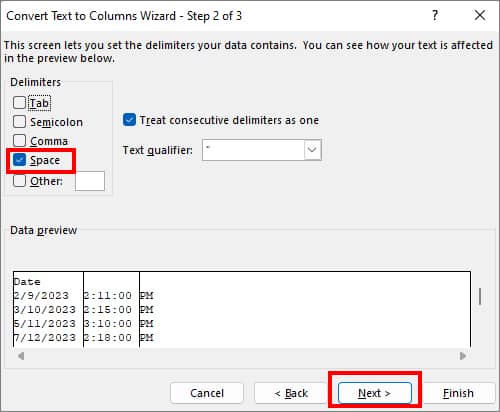
- Under Delimiters, check the box for Space and click Next to continue.
- On Data Preview section, click on the Column with Date. Then, go to Column data format and choose Text.
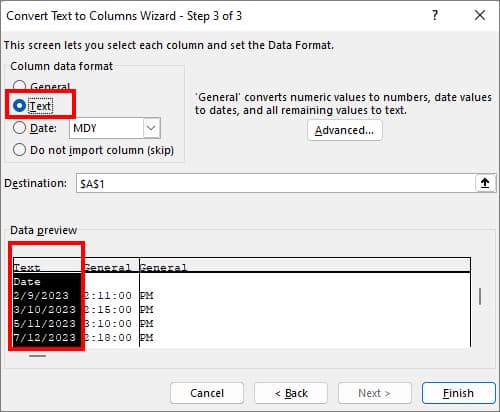
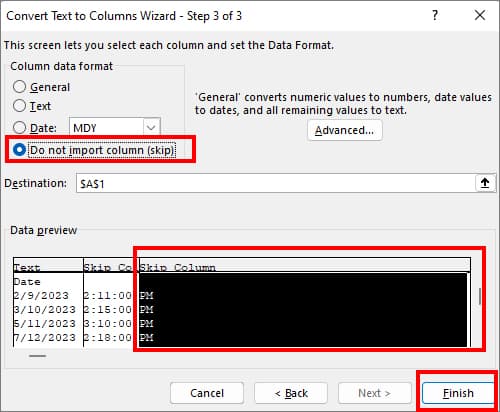
- Now, select the column with the Time Stamp and pick Do not import column (skip) on the Column data format.
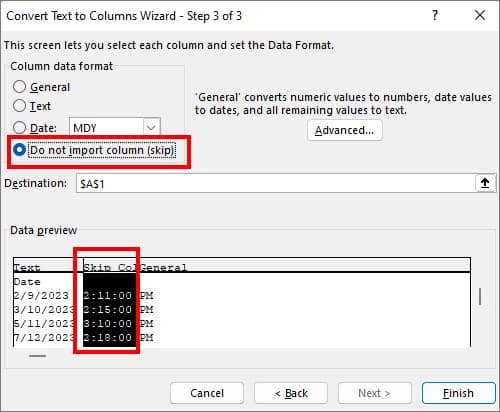
- Again, choose Do not import column (skip) option for another column and hit the Finish button.
Using Text Function
Text Functions are useful to change the numbers into a text format. You can use this function to permanently delete the timestamps from the data.
Its Syntax isTEXT(Value you want to format, “Format code you want to apply”)
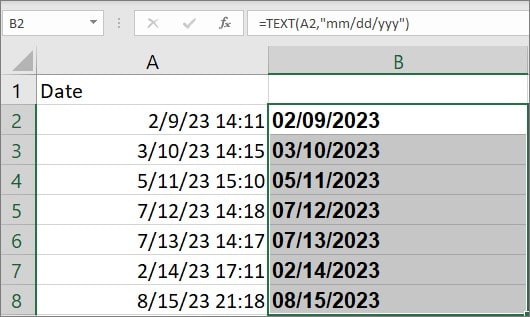
In the given example, we will use the =TEXT(A2,“mm/dd/yyy”) formula to convert the data into date format. Here, for A2, we are referring to cells with the date and timestamp. Then, we will apply “mm/dd/yyy” as format_text.
- Click on an empty cell and enter the given formula
=TEXT(A2,“mm/dd/yyy”).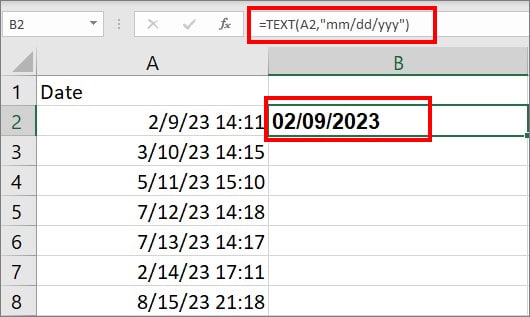
- Use an Auto-Fill handle to automatically apply the format for other data ranges.
Using DATE Function
The DATE function is used to combine values of the different cells to set up a new date. In our case, we will merge the year, month, and day of a specific cell to get only dates as a result. Thus, you will no longer have timestamps.
This function is especially effective for users who want to perform calculations with the date as it erases the timestamp formatting too.
Syntax: DATE(year,month,day)
- On the cell of your worksheet, enter
=DATE(YEAR(A2),MONTH(A2),DAY(A2))formula. (For A2, we are referring to the cell with date and timestamp)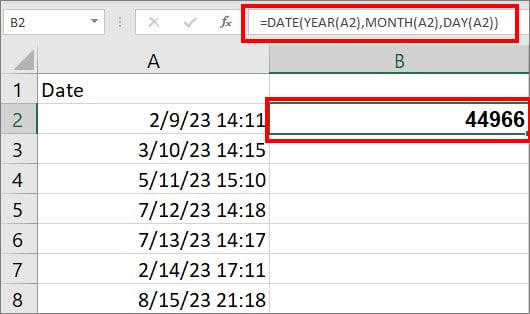
- Set the format to Date from the Number section.
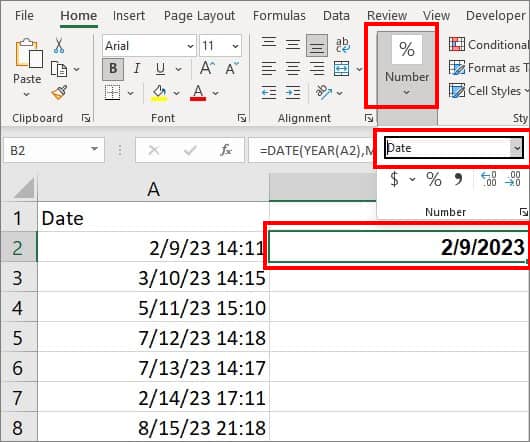
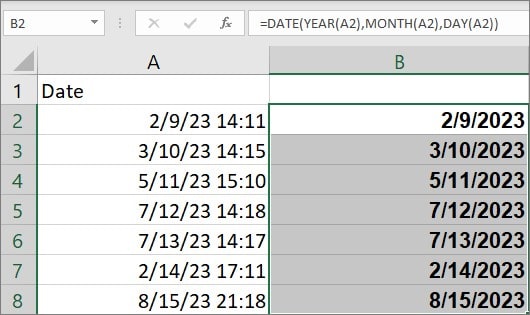
- Using the Auto-fill handle, apply the same format to other ranges.
Using INT Function
Since Excel stores date as integer values, you can also use the INT function to remove time. This function will return only integer values i.e. dates in our case.
Syntax:INT(number)
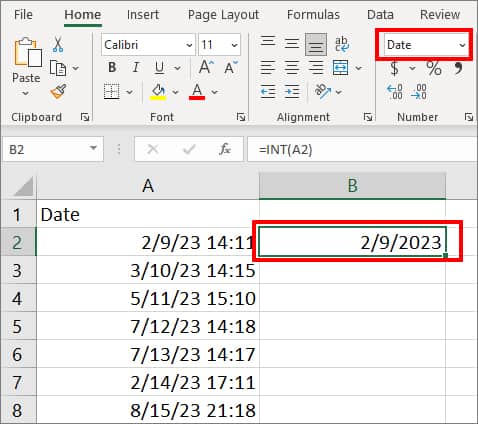
- Select a cell and enter
=INT(A2). (For A2, click on the date with the timestamp)
- You will get a number if your date is set to General. For this, set the format to Date from the Number section.
- Use the Fill-handle button to apply the same format to other ranges too.

- Copy the data and Paste as value if you just want the data.
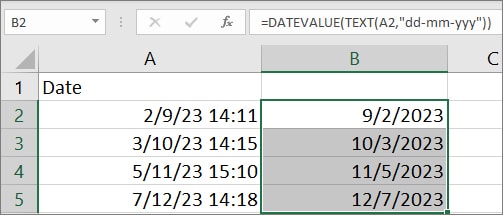
Using DATEVALUE Function
If your date is in text format, you can use the DATEVALUE Function to convert it into a date. In this function, you will get a serial number which Excel accepts as a date. For Instance, 45267 = 7/12/2023. So, even if your data is 7/12/2023 2:11:00 PM, you will only get a number that signifies the date.
Syntax:DATEVALUE(date_text)
Here, we will combine the DATEVALUE function with the TEXT function to ensure that the data is taken in text format. If you use the DATEVALUE function directly on the date, you will get #VALUE! error.
- On an empty cell range, type in
=DATEVALUE(TEXT(A2,“dd-mm-yyy”))and press enter. (For A2, select cell containing date and timestamp)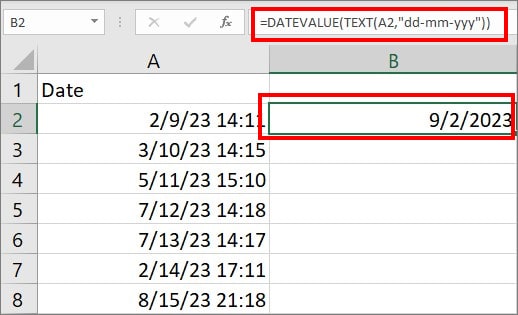
- Then, with the Fill-Handle, copy down the format to other ranges.