You can write dates in many ways. Excel, by default, formats the date in your system time date format. This might not always be feasible for you or may not align to your database’s theme.
For instance, you could be creating a spreadsheet for an organization that follows a standardized format or a different format according to its location.
Regardless of the reason, Excel has made it pretty convenient for users to use different date formats. You could choose date formats depending on the region or even create a custom date format. Stick with us as we go into detail about how you can format dates in Excel.
Change Format to Long or Short Dates
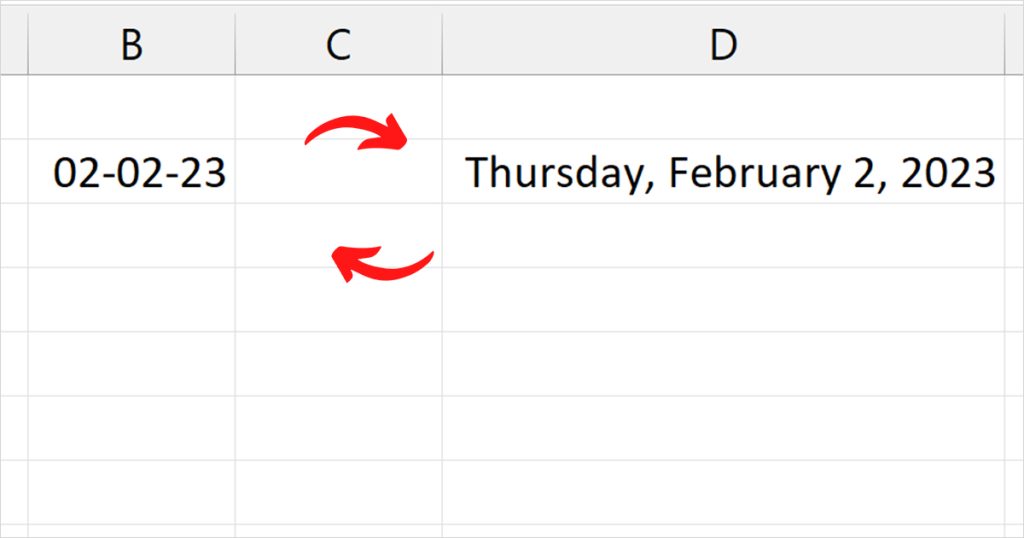
If you’re okay with your system format but just want the dates to remain longer or shorter, you can make this change from the Home tab of your Excel program. For example, if you’ve entered your short date as 02-02-23, changing the date to a longer format will look something like Thursday, February 2, 2023.
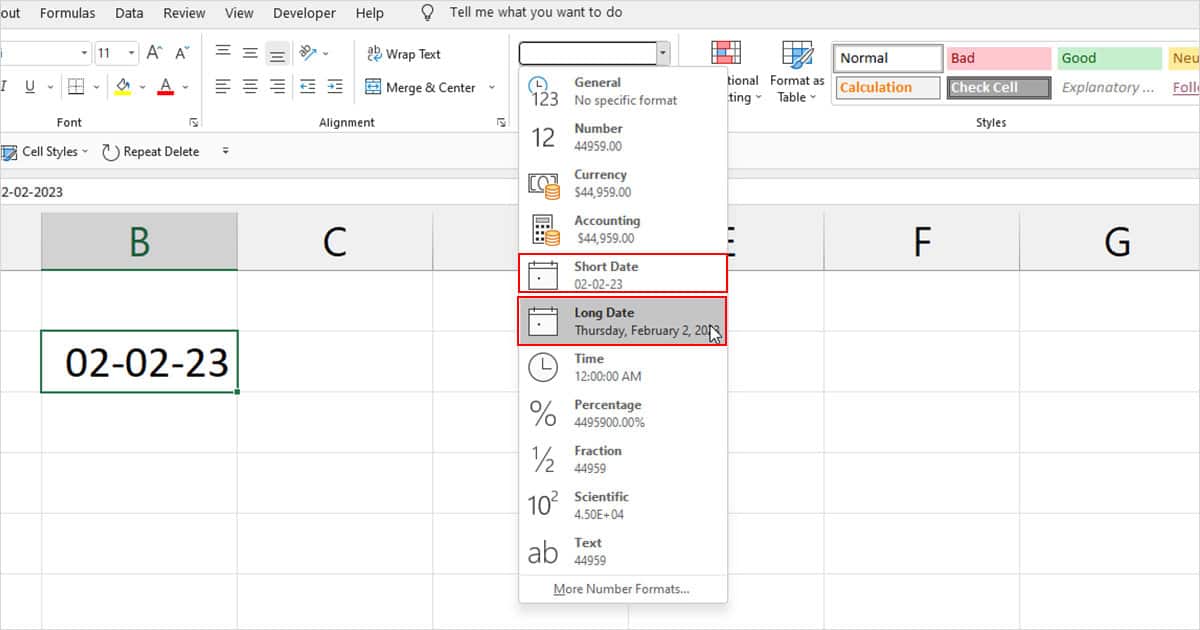
- Select your cell or cell range from the grid.
- Head to the Home tab to locate the Number section.
- Select the drop-down menu and choose either Short Date or Long Date.
Choose a Library Date Format
Excel offers plenty of library formats you could choose from. If you’re looking to convert your dates into one of the popular formats, you can look for the format in the library options.
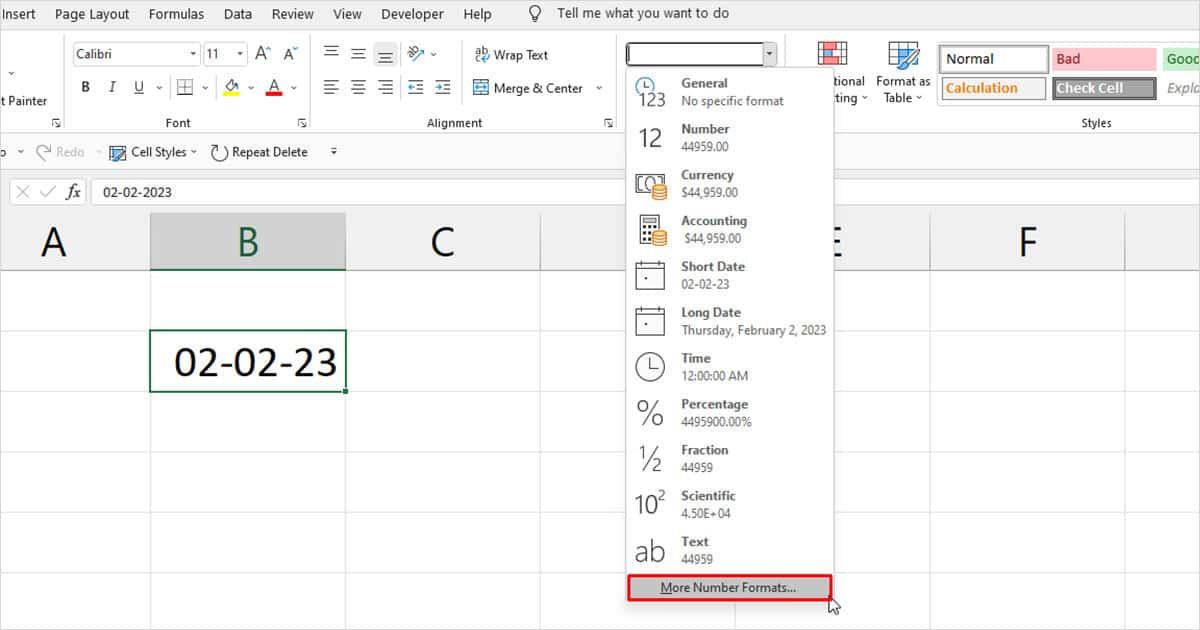
- Select the fly-out menu in the Number section of the Home ribbon.
- Choose More Number Formats.
- Under Category, select Date.
- Specify the locale under Locale (location).

- Select a date format under Type.
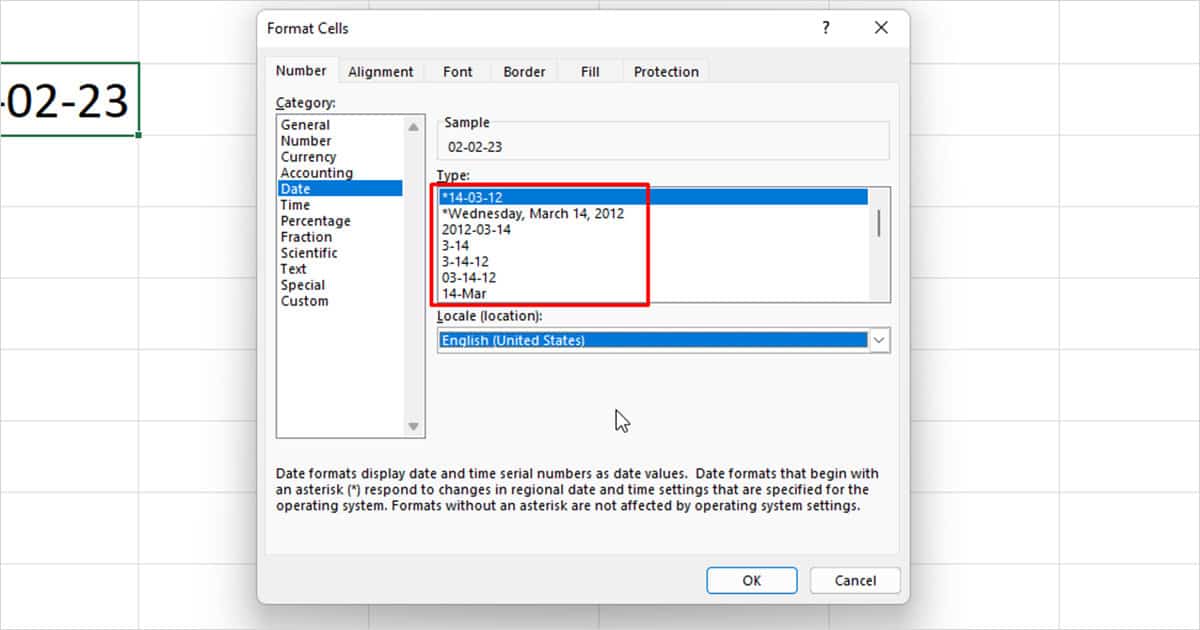
- Click OK.
Create Custom Date Format
If you have a specific format in mind, you might just have to create your own date format. As challenging as this might sound, the steps are actually pretty simple. All you have to do is take note of what the character code means while entering your own custom format.
Here is what different characters mean while creating your date format
| Character | Meaning | Example (2nd February 2023) |
| d | Single Digit Day | 2 |
| dd | Double Digit Day | 02 |
| m | Single Digit Month | 2 |
| mm | Double Digit Month | 02 |
| mmm | Abbreviated Month Name | Feb |
| mmmm | Long Month Name | February |
| mmmmm | Initial Letter of a Month | F |
| yy | Last Two Digits of a Year | 23 |
| yyyy | Full Year | 2023 |
Once you’re familiar with these characters, here’s how you can create your custom date format:
- Select the cell/cell range you wish to apply the formatting.
- On your keyboard, use Ctrl + 1.
- Under Category, select Custom.
- Enter your character under Type. You can use separators like ‘/’, ‘-’ to separate your dates.
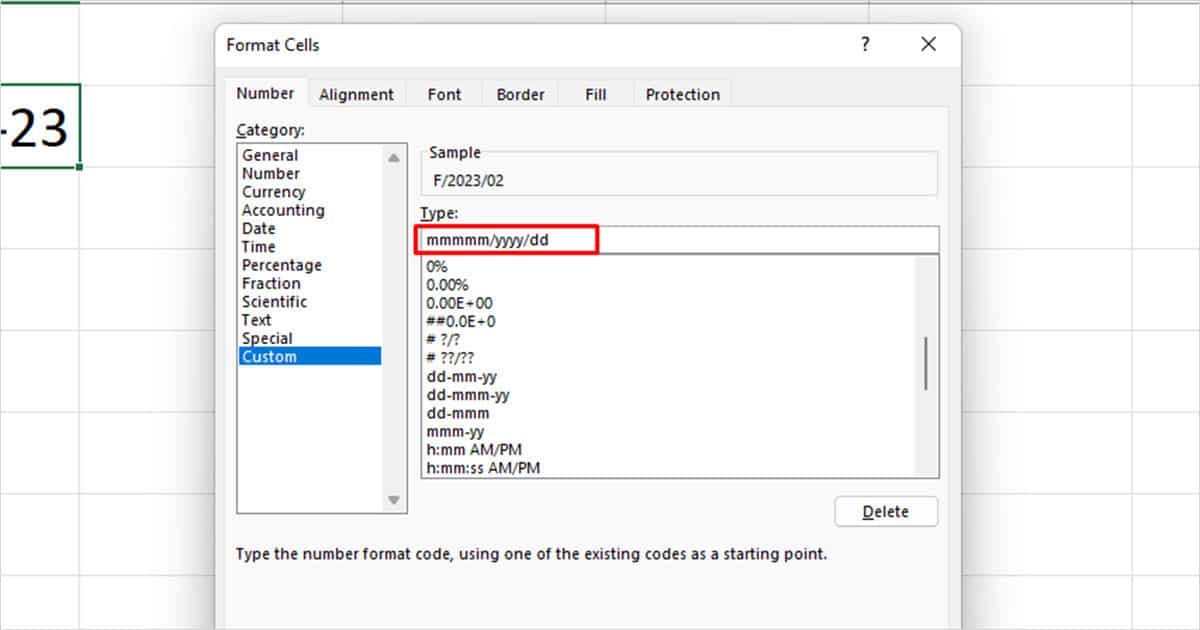
- Check the preview of your format under Sample.
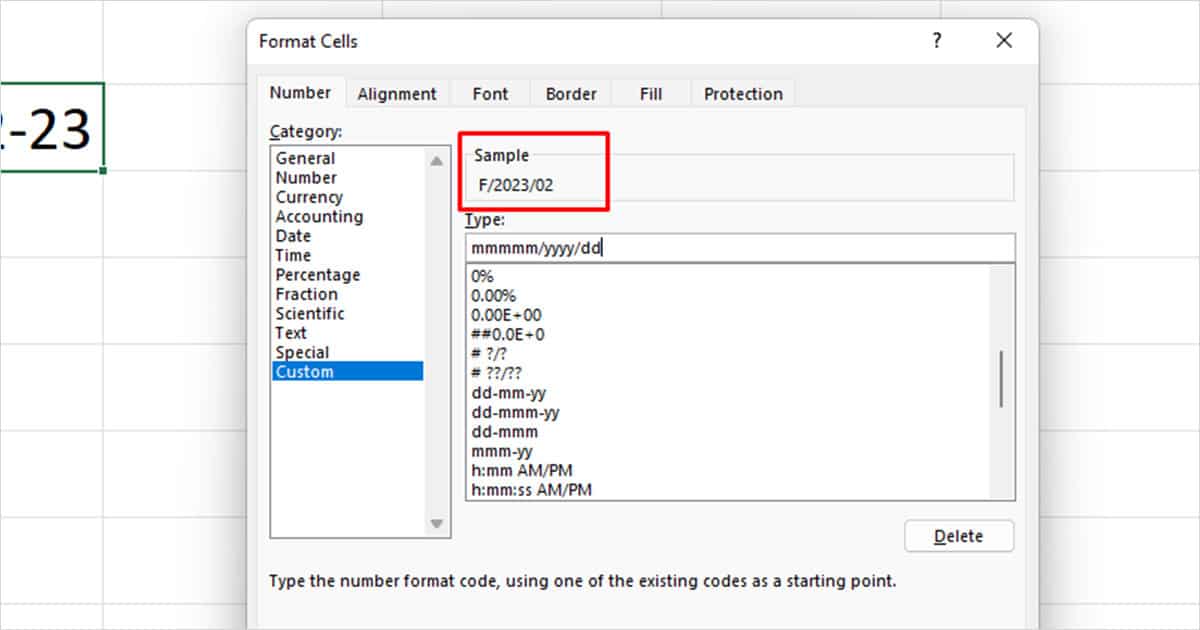
- Click OK.
Use TEXT() Function
You can also use the TEXT() function to convert your date format. This method is only useful if you’re looking to convert pre-existing data from your grid.
In an empty cell, enter the TEXT function in the following format:
=TEXT(cell, format)
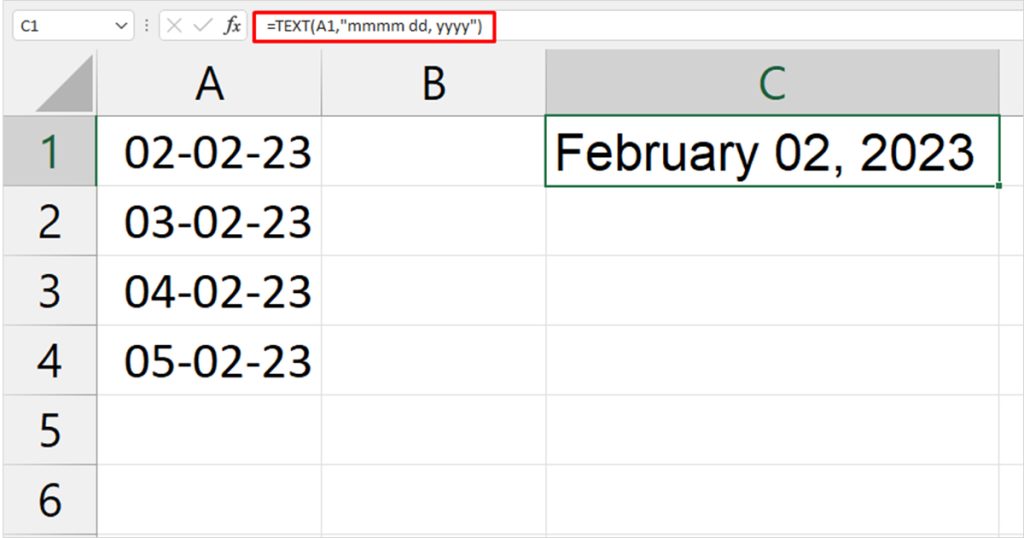
In this example, we’re converting 02-02-23 into February 02, 2023. To obtain the following result, we used this formula:
=TEXT(A1, “mmmm dd, yyyy”)
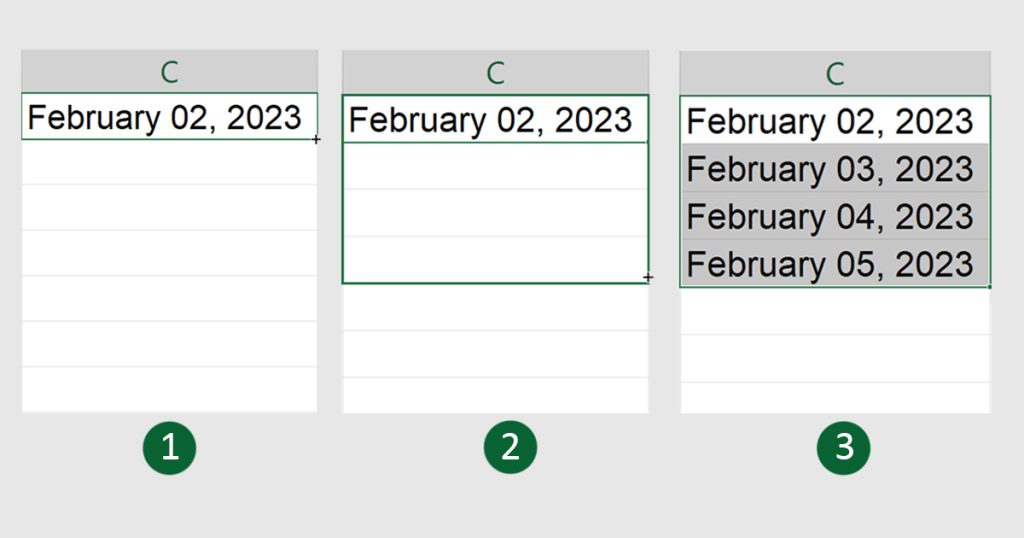
To convert the remaining range, select the cell you entered your formula in. Place your cursor on the bottom-right corner of the cell, then drag and release it. This method is called Flash Fill.
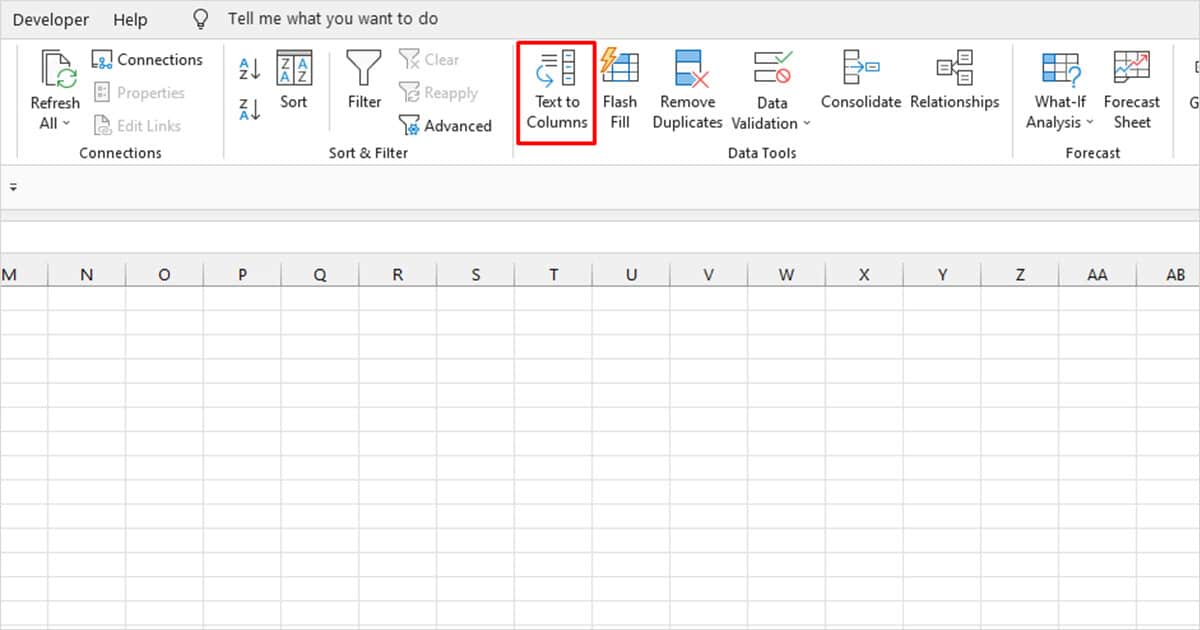
Text to Columns
Text to Columns is a great tool to use when you’re looking to convert a bigger data set at the same time. The utility is, however, limited to only a few generic formats so if you’re looking for something unique, this might not be the best method for you.
- Select your data range.
- Head to the Data tab and select Text to Columns.
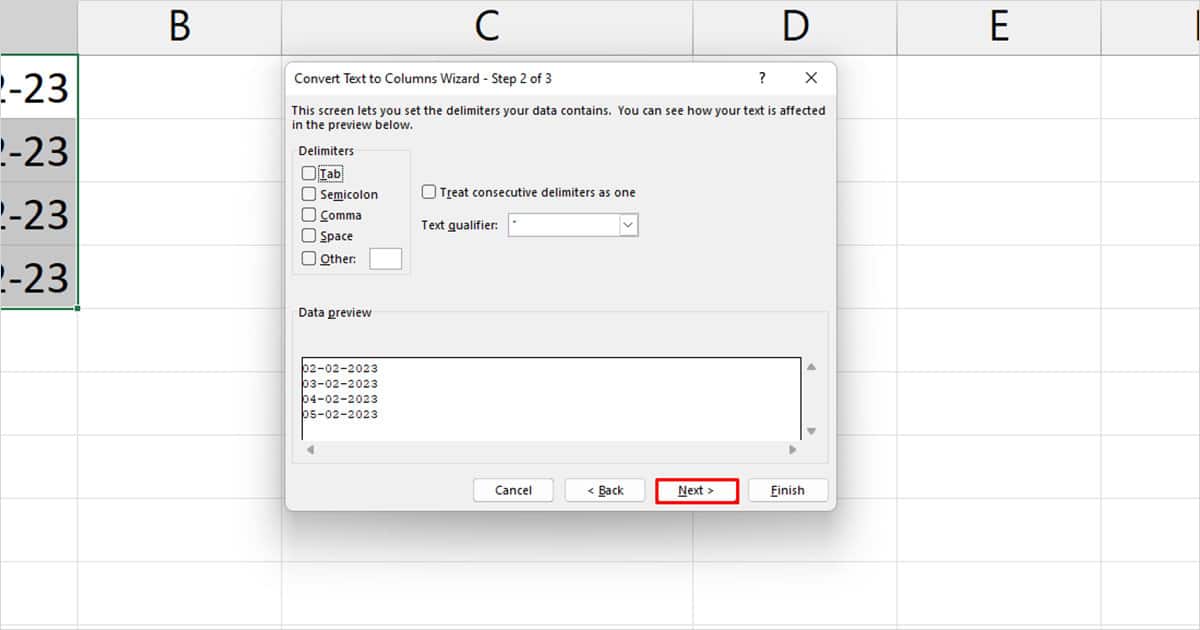
- In Step 1 of 3, choose Delimited.

- In Step 2 of 2, deselect all boxes.
- In Step 3 of 3, select Date, then click on the fly-out menu to pick a format.
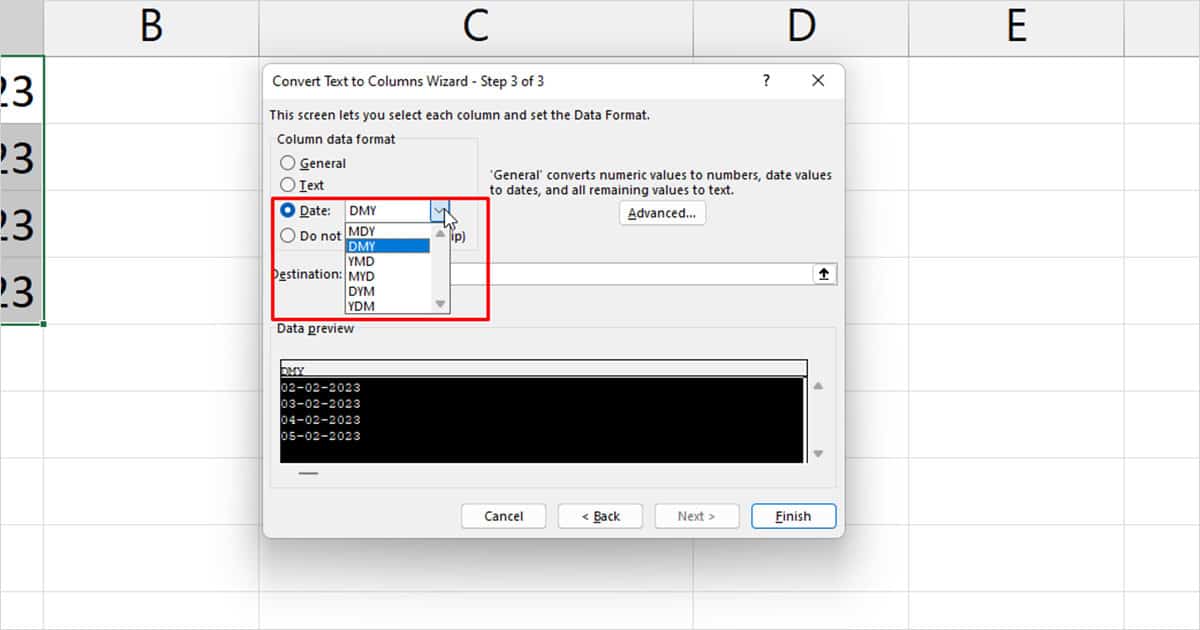
- Click Finish.
Text to Columns may not work if Excel fails to understand the way your date is formatted in. For example, it may confuse days for months, and vice-versa. So, we only recommend you use this method if you’re looking to change the formatting of dates with days exceeding 12.
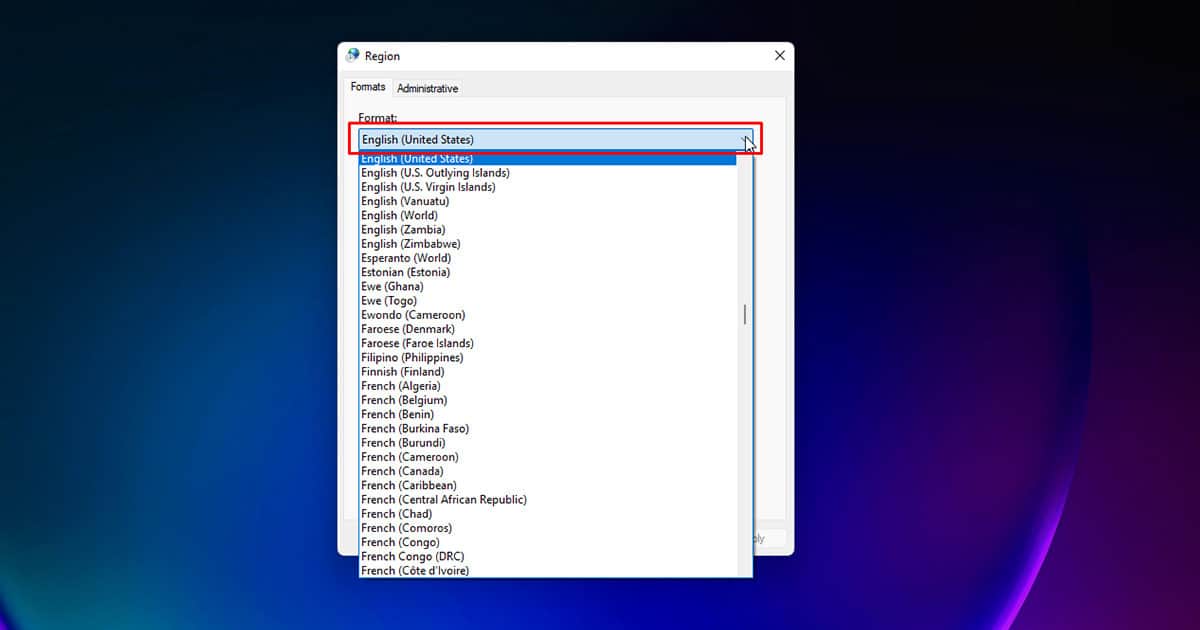
Change Default Date Format
If you normally use the date format you’re looking to convert your dates into, it would be better if you changed the default date format of your system. This will save you from the hassle of changing formats every time you make an entry in Excel.
- Open the Run command (Windows key + R).
- In the search box, enter
intl.cplthen hit Enter.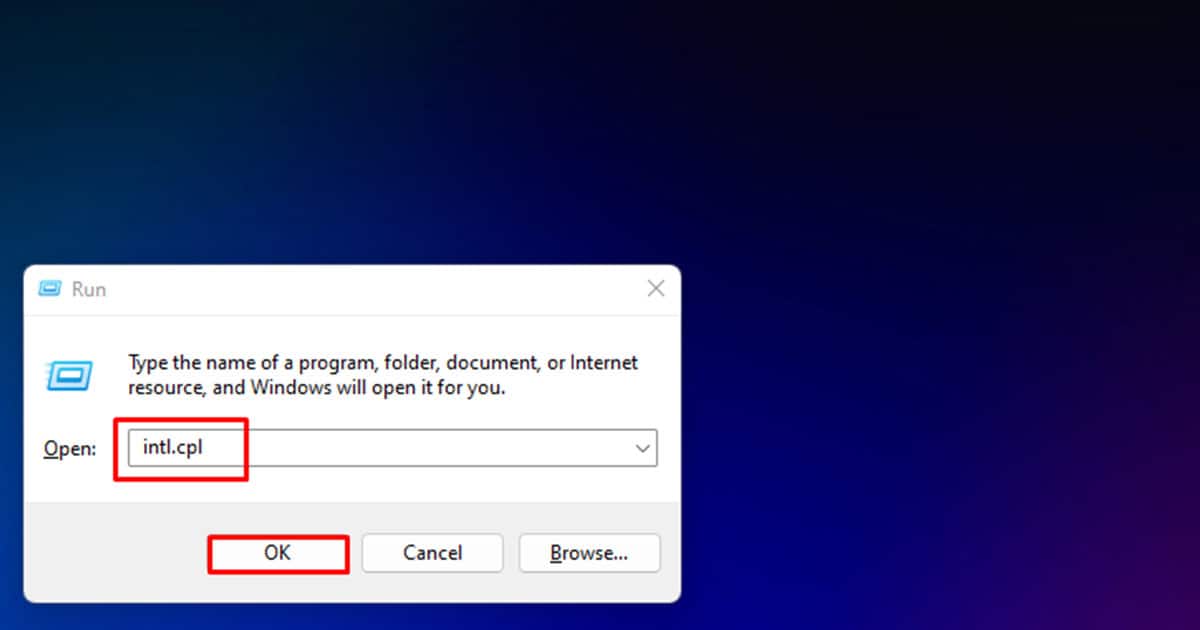
- Select a Format.
- Under Date and time formats, locate short and long dates.
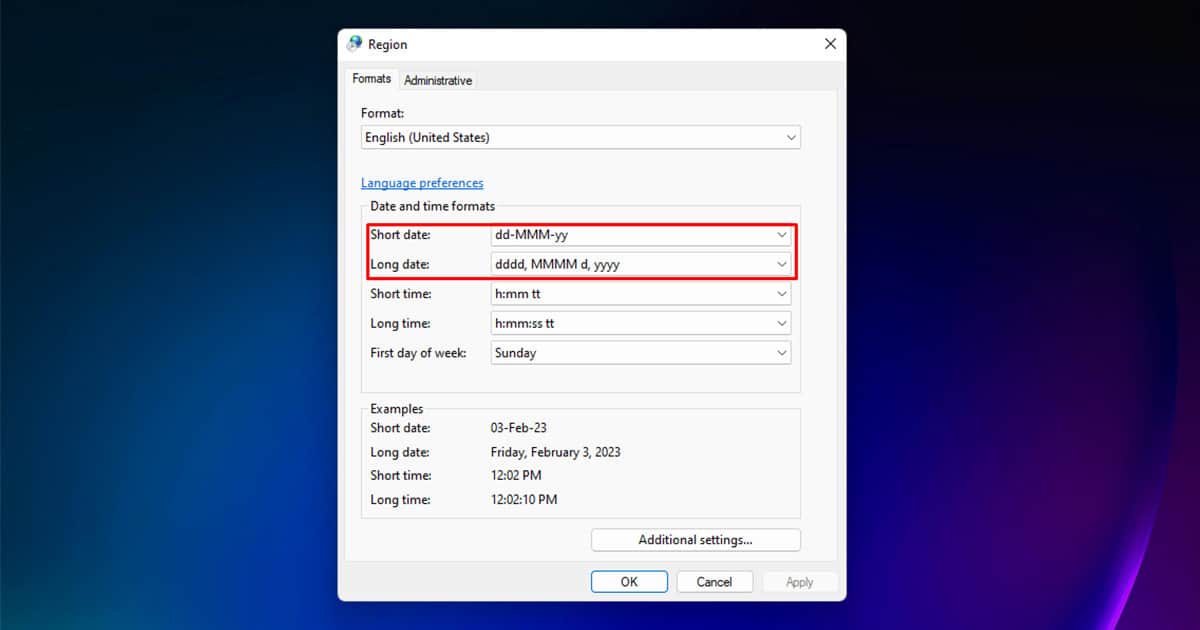
- Click on the fly-out menu and choose a date format for these options.
- Click OK to save changes.