If you insert a date in the Excel spreadsheet, you will get a full date format like March 15, 2023.
But, sometimes, you may find the need to extract only a particular date from the given date. For example, separate March month from the full date to sort the data according to the month.
While you can enter the months, days, and years in separate columns one by one, it can be very time-consuming. But, Excel always has the smartest ways to get the job done easily. As a workaround, you can separate the dates into different columns using Excel’s built-in tools and functions.
Using Flash Fill
If you want to separate dates without putting on much effort, Flash Fill is perfect for you. As the name itself indicates, this tool will help you to extract dates within a flash.
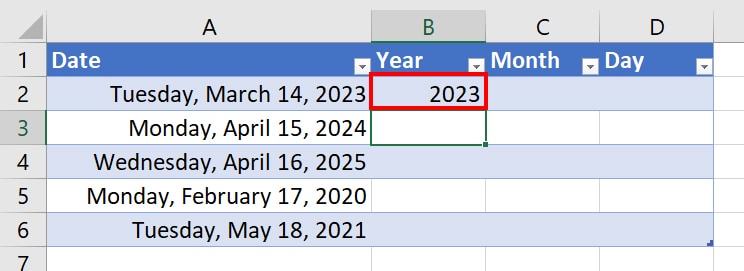
Firstly, you need to manually enter data, let’s assume, 2023 in a new cell. Then, when you start typing 2024 in the next row, Flash fill identifies a pattern and auto-fills the data for you. You just have to press enter to confirm them.
- On your worksheet, select the Date Column and Adjacent columns to have Splitted Dates.
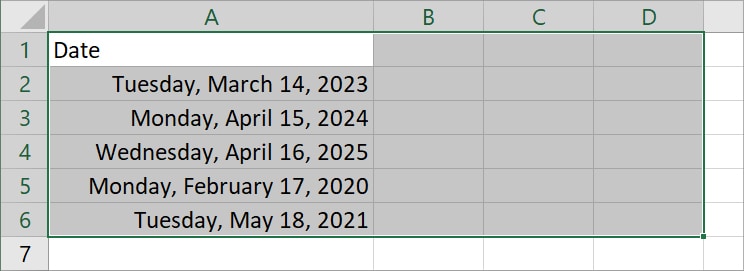
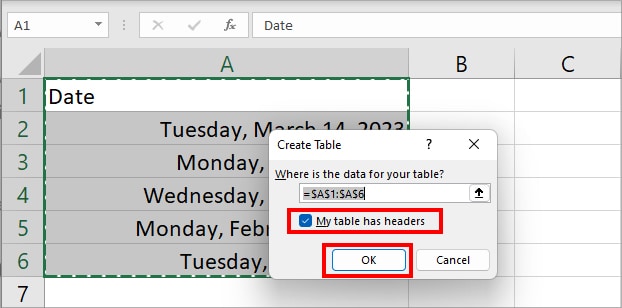
- Enter Ctrl + T to format selected data as Table. On Create Table window, pick My table has headers. Hit OK.
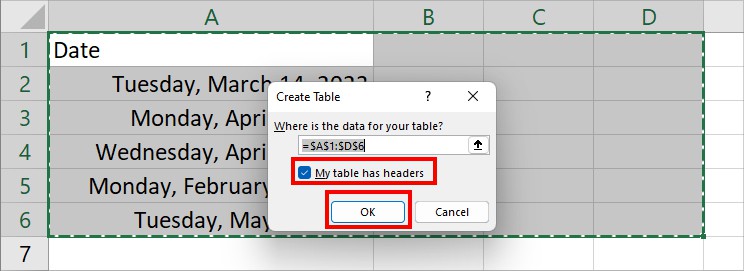
- Rename the header as your wish. Now, on the Year column, enter 2023 to extract the year from the date.
- Click on the second cell of the Year Column and start typing 2024. Excel auto-fills the rest of the data. Press Enter to confirm.
Or press Ctrl + E.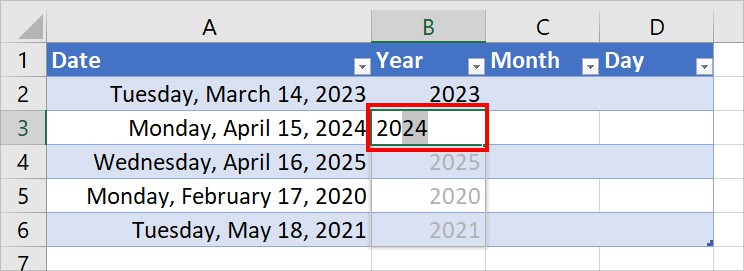
- Repeat steps 3 and 4 for Month and Day Columns too.
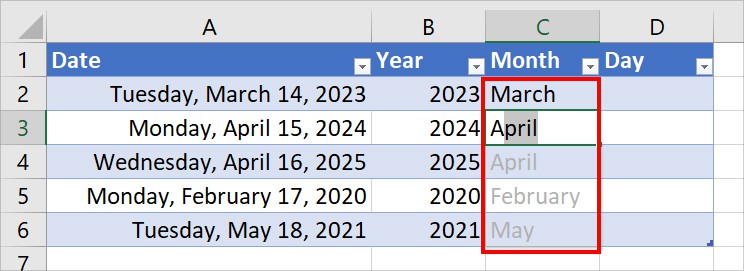
Using YEAR, MONTH, and DAY Function
You can also use Excel’s YEAR, MONTH, and DAY Functions to extract only a particular date format from the data.
These are three separate functions. Here, the YEAR function returns only the Year, the MONTH function extracts only the month number, and the DAY function returns only the number of days from the date. Based on the information you need, you can choose to use all three functions or only one of them.
This function is beginner-friendly and anyone can use it. After entering the formula, you can even extend the fill handle to copy them to other ranges.
Let’s assume, we need to extract Year, Month, and Day from the date Tuesday, March 14, 2023 in three separate columns. For this, enter each formula mentioned in table.
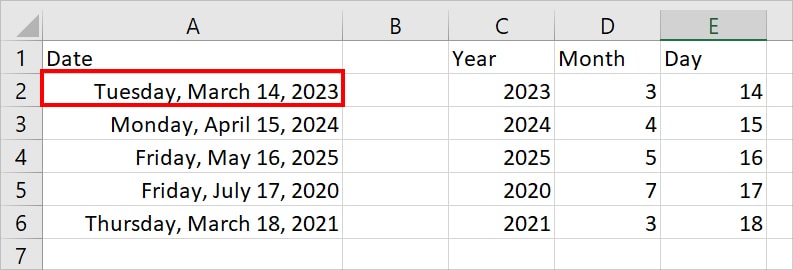
| Function | Syntax | Formula | Result | Description |
| YEAR | YEAR(serial_number) | =YEAR(A2) | 2023 | It returns the Year 2023 from Tuesday, March 14, 2023. |
| MONTH | MONTH(serial_number) | =MONTH(A2) | 3 | It returns 3 as Month from Tuesday, March 14, 2023. |
| DAY | DAY(Serial_number) | =DAY(A2) | 14 | This formula returns 14 as Day from Tuesday, March 14, 2023. |
Using Power Query
In the above methods, we learned how to extract year, month, and day by separating each of them individually in columns. But, instead of this, you could directly split date columns into three separate columns. It is convenient when you want to extract all date formats at once.
To do so, we will be using Excel’s Power Query tool. With this tool, you can split the date columns based on the delimiter, positions, number of characters, and many more.
- Select the Dates range.
- Hover over Data tab. Then, click From Table/Range.

- Tick the box for My table has headers and hit OK to proceed.
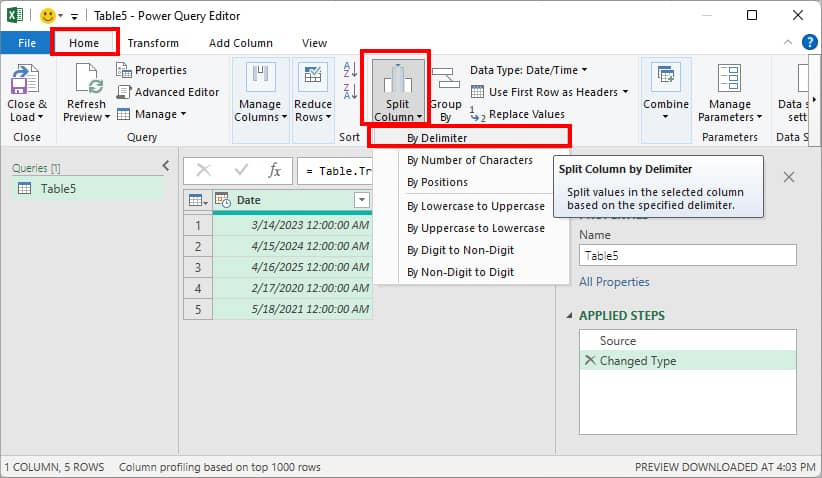
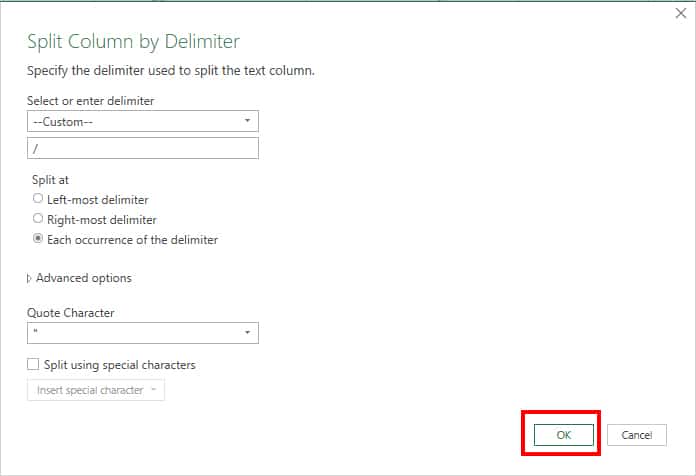
- This will open Power Query Editor Window. From Home Tab, click on Split Column > By Delimiter.
- Click OK.
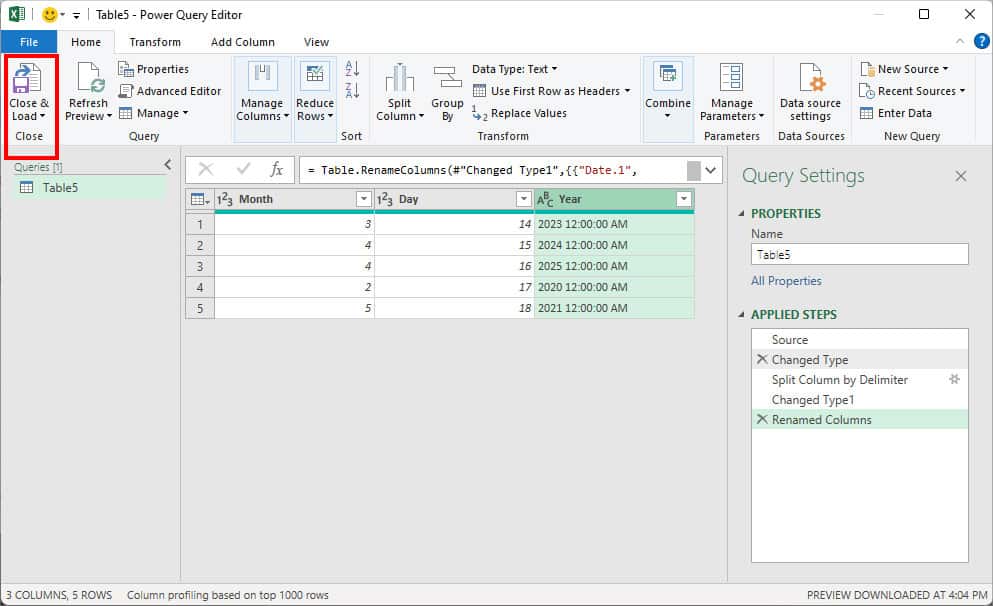
- On the Preview, rename the Column headings. Then, click on Close & Load.
Using Text to Columns
Text to Columns is another tool dedicated to splitting one column into multiple columns. Here, you can separate columns only based on Delimiters. As dates have (/) or (,) delimiters, this tool can be effective to extract data in different columns.
- Select Dates on your worksheet.
- On Data Tab, click Text to Columns.

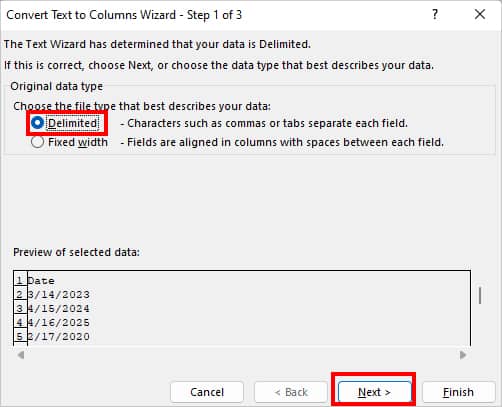
- Convert Text to Columns Wizard window will appear. Select Delimited and click Next.
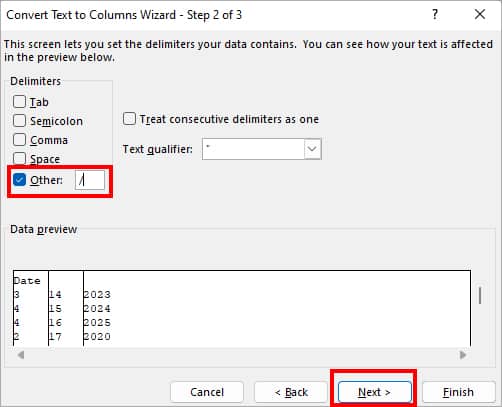
- On Step 2, pick Other option and enter / in the box. Hit Next to continue. (Ensure to uncheck other options)
- On Step 3, set the Date format as per your preference.
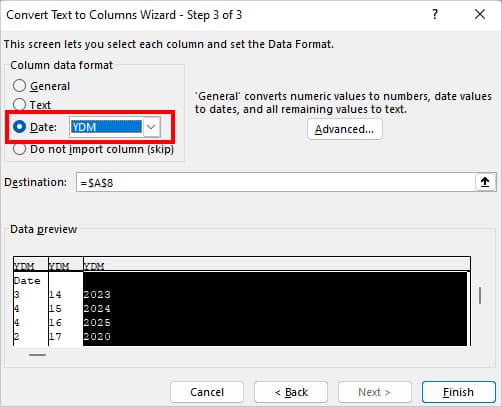
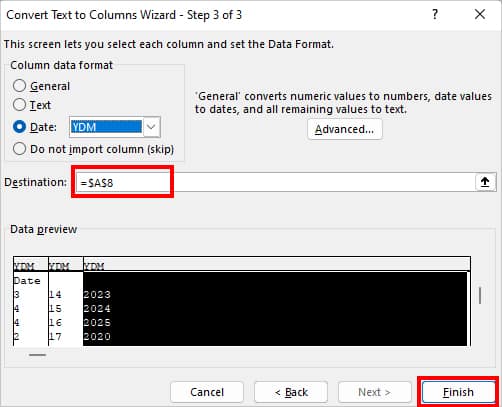
- Select a Cell reference on Destination. Finally, hit Finish.
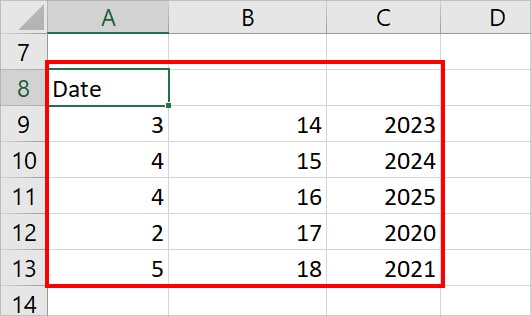
- You can see the Dates are split into three Columns.
Using TEXTSPLIT Function
TEXTSPILT Function is basically the formula version of the Text to Column tool. You can use this formula specifically to split the start date and end dates of a column into two. However, you can find this function only on Office 365 or Excel’s web version.
To split the single-column date, enter =TEXTSPLIT(A2,“,”) formula in a new cell. Here, the TEXTSPLIT function separates the dates of cell A2 with a comma delimiter into multiple columns.
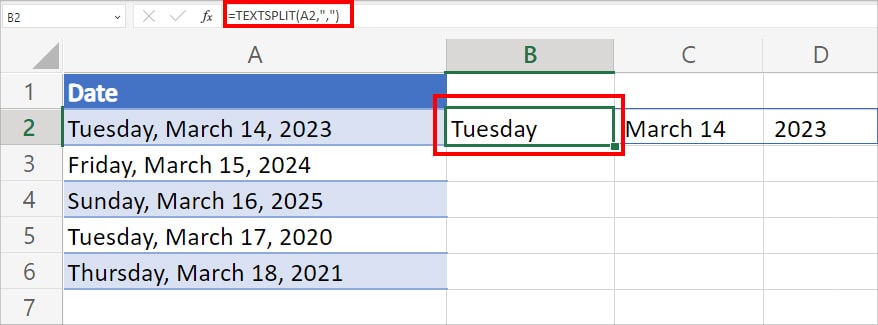
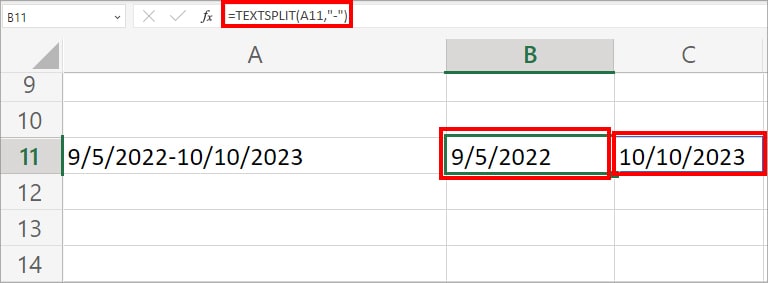
To split the start and end dates into separate columns, enter =TEXTSPLIT(A11,"-") formula. This formula splits the dates of A11 cell on the basis of dash delimiter.
Related Questions
How to Separate Dates From Time in Excel?
Sometimes, your date may have a timestamp like 3/15/2023 11:58. If you want to separate dates from the time, simply format them as a short date. To do so, from Home Tab, go to Number section and pick Short Date in the drop-down list. Besides, you could also check out 6 other ways to remove time from date in Excel.