When composing an email, you must incorporate extra elements to draw in more clicks from users. According to Statista, users are more likely to click personalized emails over “to whom it may concern” mails.
For such cases, you can use Mail Merge in MS Word from sources like Excel or spreadsheet. This way you can automate the mails without losing that personal touch.
Things to Consider Before Using Mail Merge
Data plays a significant role during mail merge. You can import contacts from sources such as Gmail to Excel or manually create a contact list in Excel.
Before you mail merge from Excel, make sure your data is well constructed with proper table headers. Here’s an example:
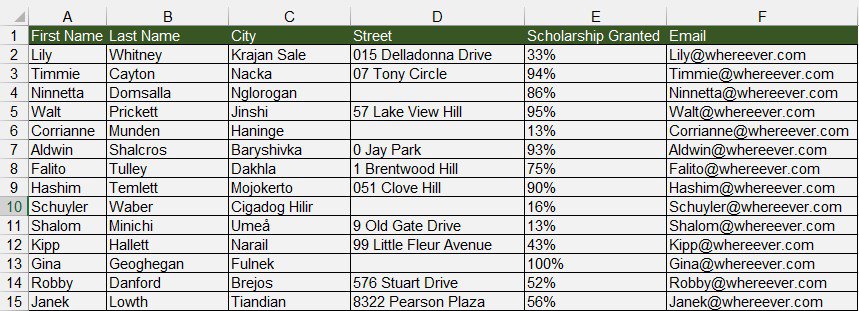
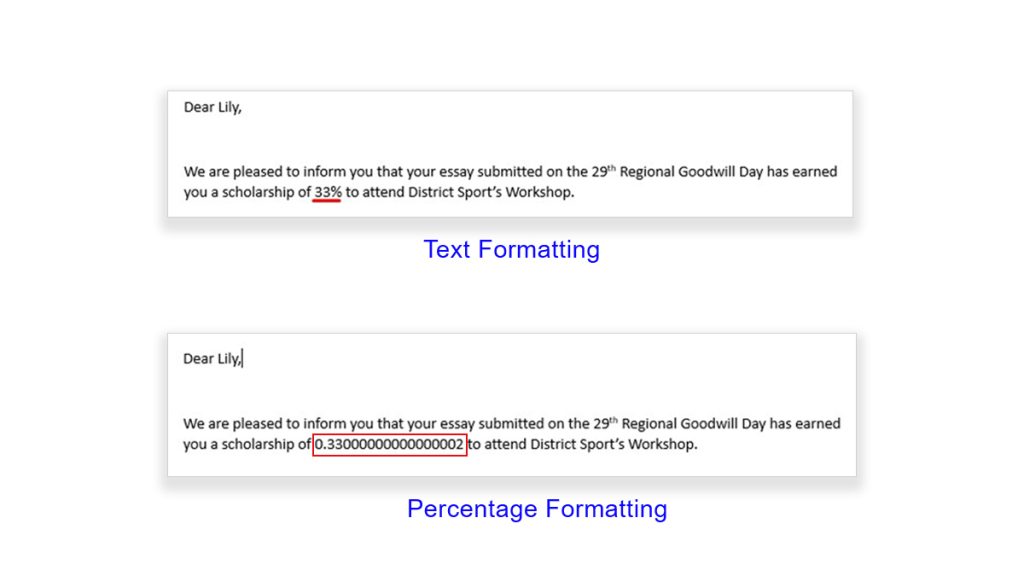
If your fields include values with leading zeros or percentages, convert them to Text. Mail merge identifies them as numbers, removing leading zeros and converting percentages into numbers.
As sending out big batches of email isn’t common, Outlook may view your activity as suspicious.
If Outlook temporarily blocks your account from sending emails, verify your account. This generally resolves the issue.
Mail Merge from Excel to Word Using Mail Merge Wizard
The Step-by-Step Mail Merge Wizard is helpful if you’re using Mail Merge for the first time. The wizard contains six steps using which you can incorporate mail merge into your email.
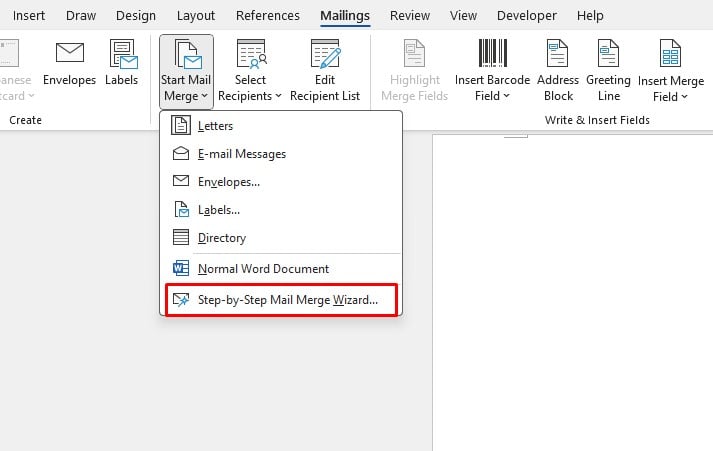
Here’s how to access the Wizard:
- Open MS Word then select Blank Document.
- Go to the Mailings tab.
- In the Start Mail Merge section, select Start Mail Merge.
- Choose Step-by-Step Mail Merge Wizard.
We will now be following each step from the wizard to create a perfectly personalized mail sourced from MS Excel.
Step 1: Preparing Your Document
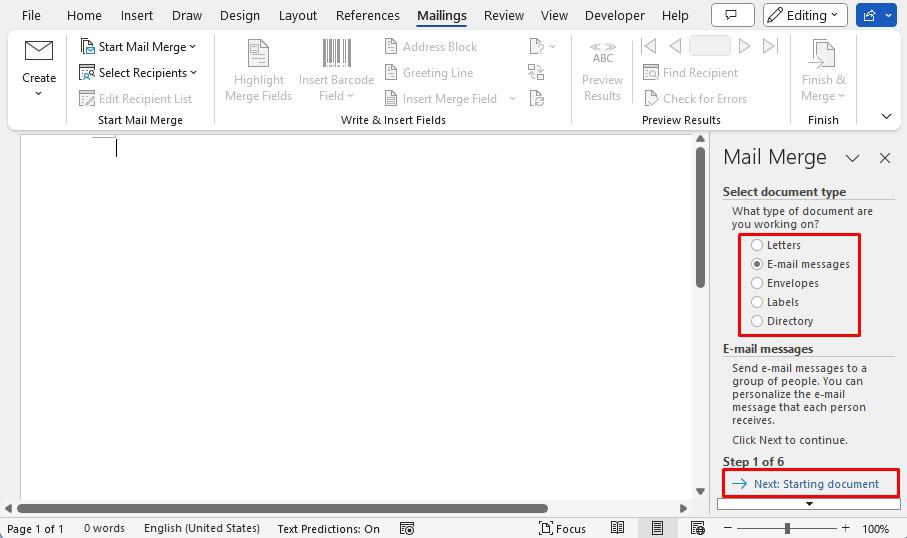
To begin mail merge, select the document type first. As our document is an email, select the button next to E-mail messages > Next.
Step 2: Start the Document
If you already have the email ready, you can start the mail merge process from the existing template or document.
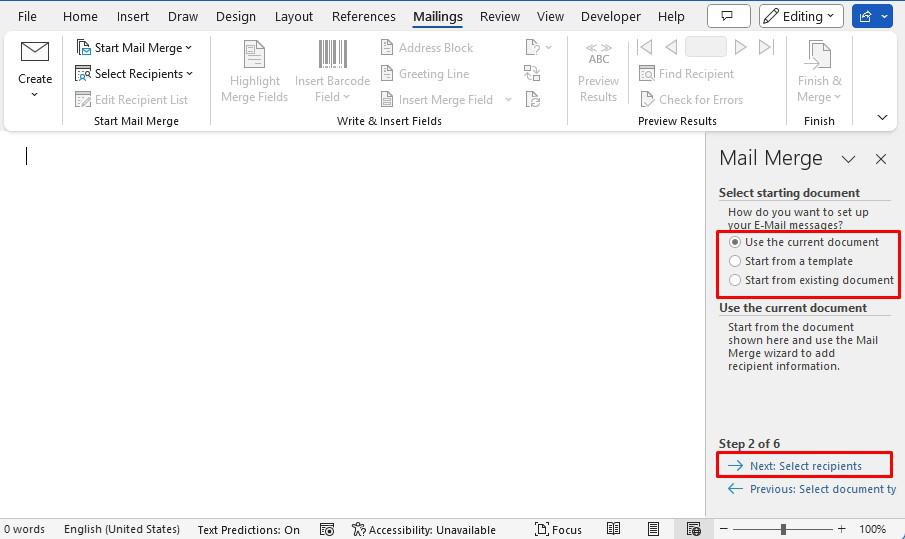
If you don’t have your email ready, select Use the current document. Then, select Next.
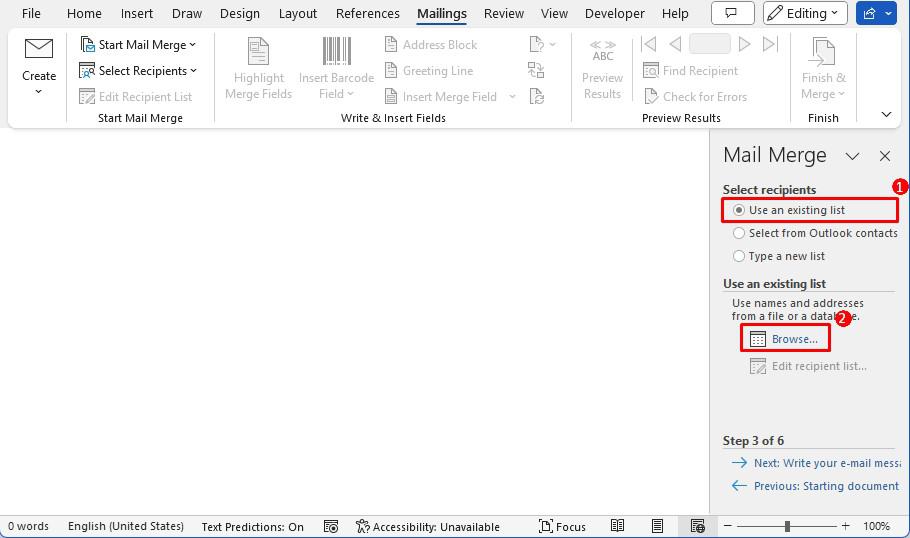
Step 3: Select Recipients
After selecting the document type, we will now source our Excel sheet. Before we select the recipients from Excel, make sure you close the source spreadsheet.
- Choose Use an existing list.
- Select Browse.
- Navigate to the location of your Excel file and select it.
- Click Open.
- If your sheet has multiple worksheets or data tables, the Select Table will display multiple options. Choose your source table.
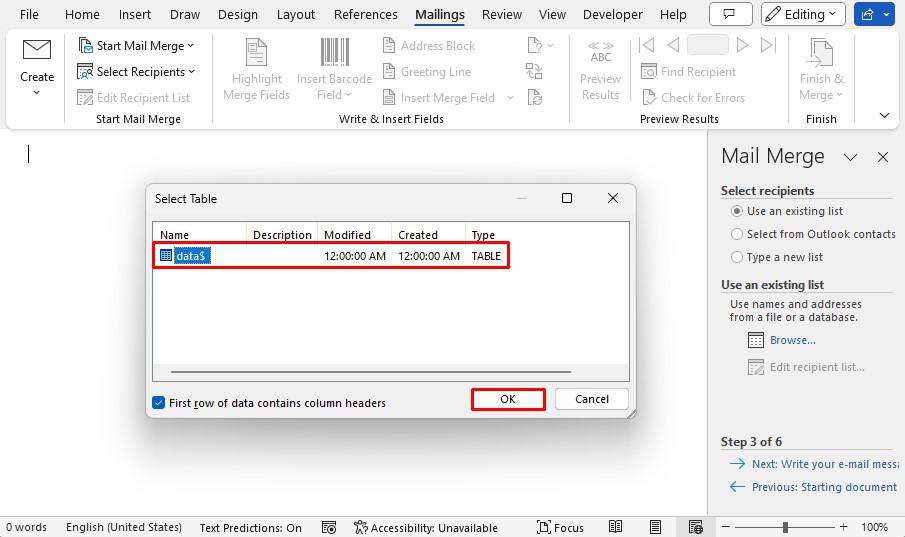
- Click OK.
- The next window will be useful if you wish to Refine recipient list. If you wish to exclude a data set, simply uncheck the box next to it.
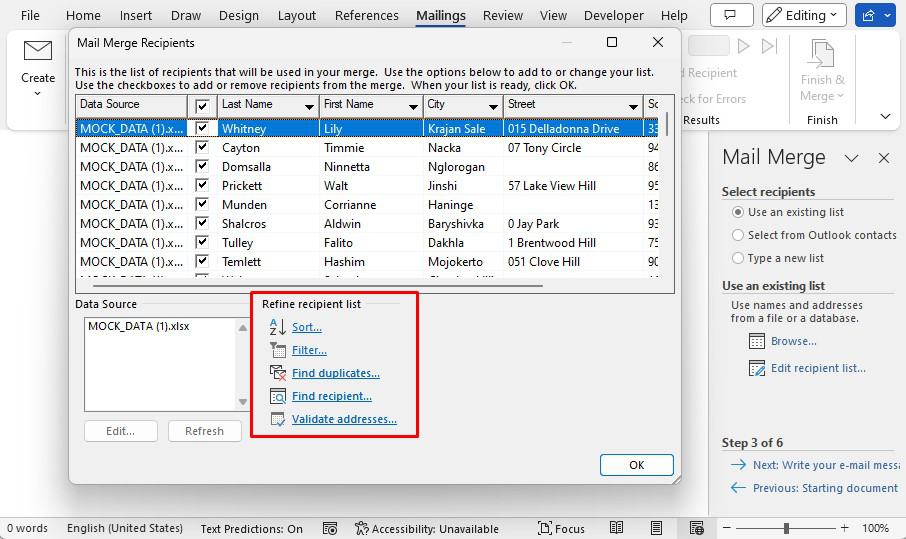
- Once you’re done, select OK.
- Click Next.
Step 4: Composing your Email
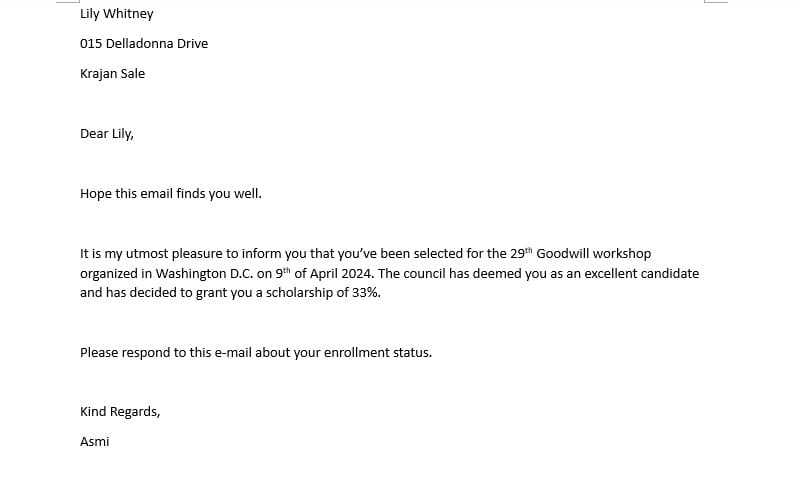
If you haven’t already, start writing your email. Here’s an email template we’ll be using as an example:
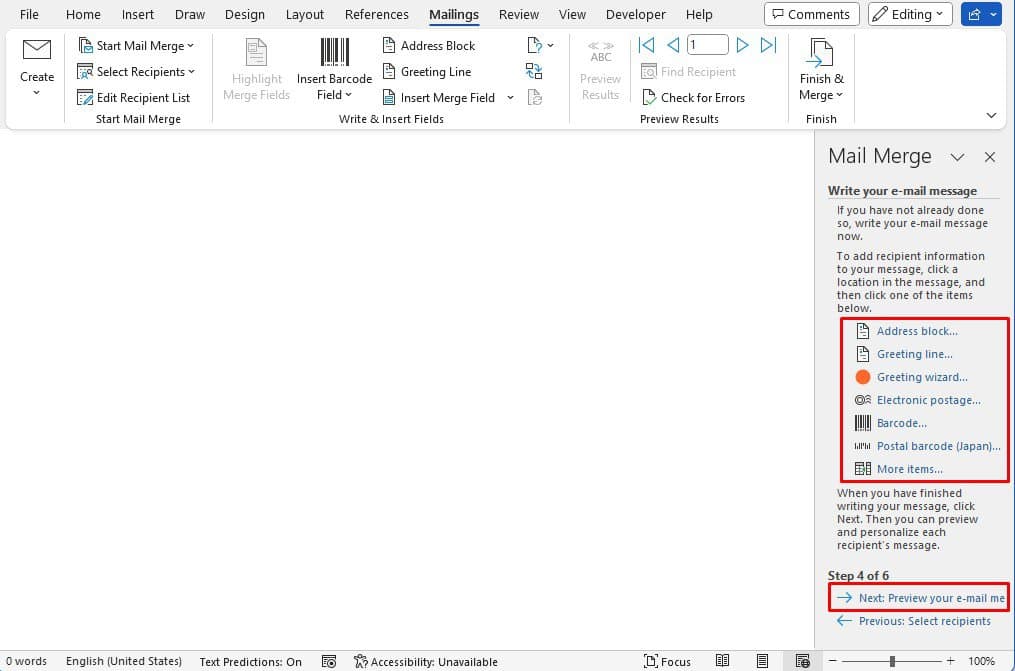
After you’ve selected recipients, MS Word will automatically identify information like names, company names, and addresses.
Using the identified information, we can automate inserting addresses and greetings in our email.
To enter the address section, click on Address block from the pane:
- Choose the name format of the address.
- If the preview isn’t what you expected, select Match Fields.
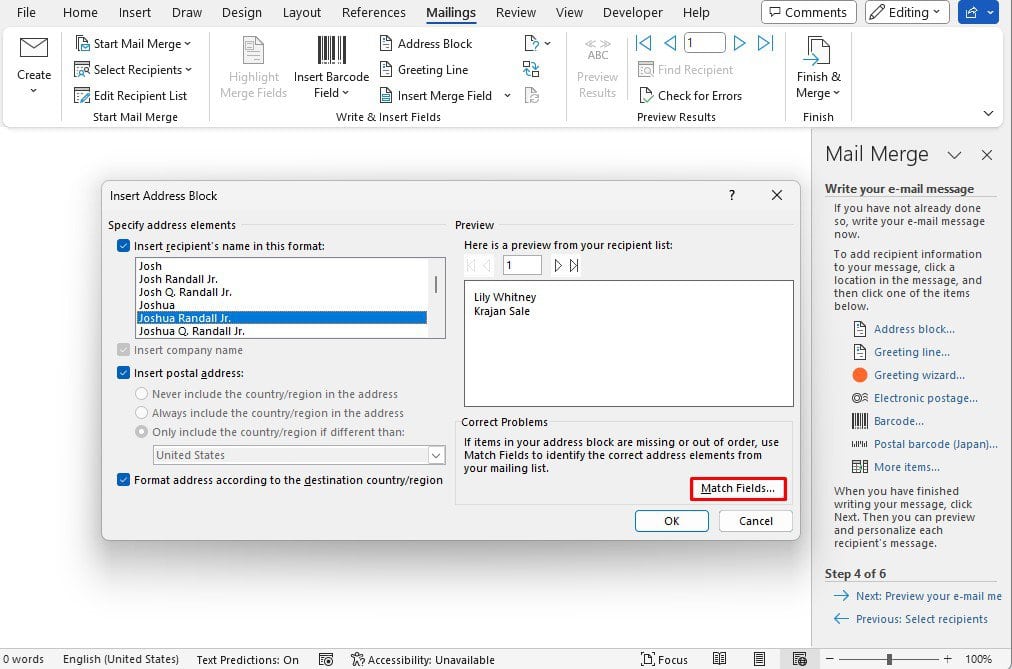
- Select the fly-out next to the address and choose a field. Word will use information from that field to enter into the address block.

- Click OK > OK.
Add a line break using Shift + Enter after the address. To add the salutation, click on the Greeting line option.
- Under Greeting line format, create a greeting format.
- Next, choose what to do if the recipient’s name is invalid or empty under the Greeting line for invalid recipient names section.
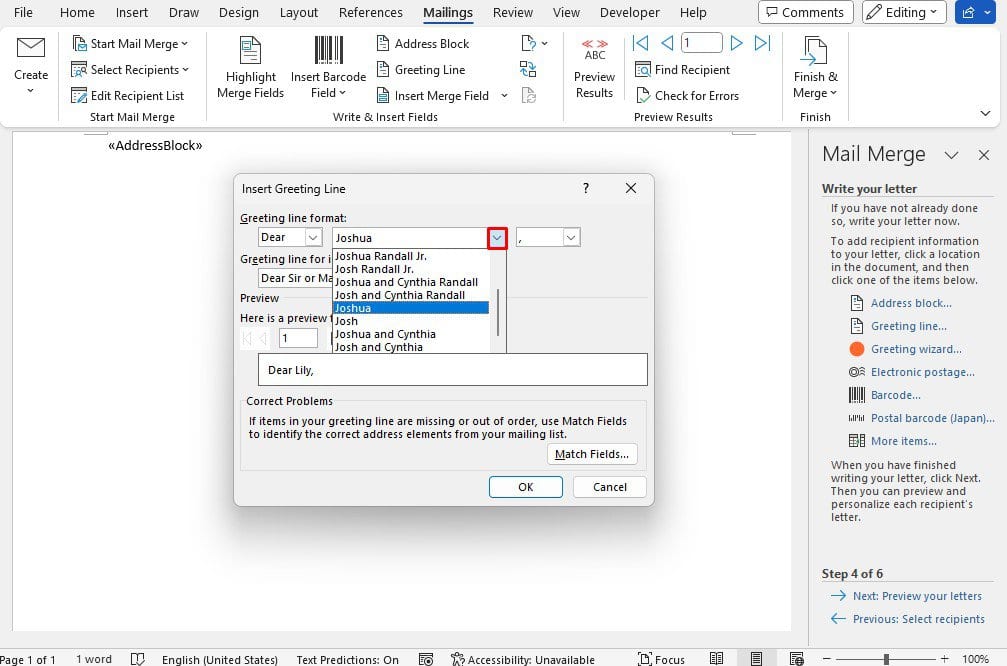
- Preview your format. If you wish to switch the fields, select Match Fields.
- Click OK.
- Finish writing your email.
The other options in the fourth step of the Mail Merge wizard are optional.
The email we’ve written has an extra personalized element, which is the scholarship percentage. To insert the field, select More items > select your field > Insert.
Step 5: Preview Email
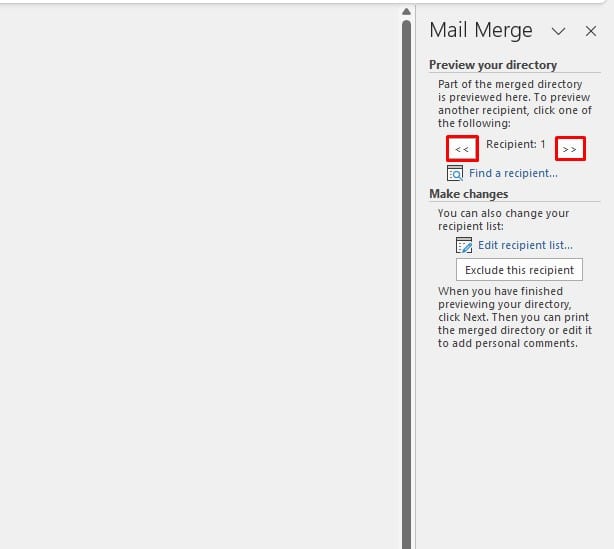
After you’re done writing your email, preview it to make sure everything looks right. Use the front and back arrows to switch between the emails.
To preview a specific email, select Find a recipient. Similarly, if you wish to make changes to your source list, select Edit recipient list. This button will take you back to the Mail Merge Recipients window from Step 3.
Select Next.
Step 6: Finish Mail Merge
Now that we’re done setting up our emails, we can start sending them out.
- Open the Outlook app.
- On MS Word, Select the Electronic Mail option.
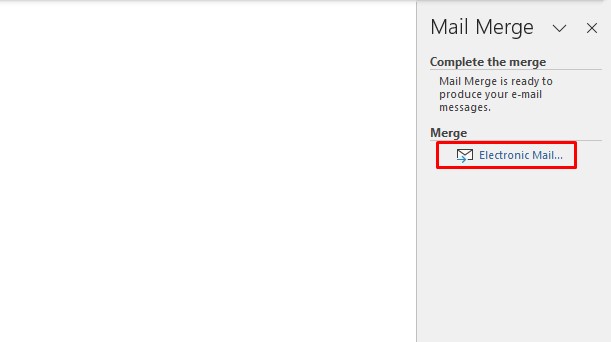
- Click on the fly-out next to To and choose the field with the emails.
- Enter the subject in the Subject line section.
- Choose a Mail format.
- You can either send out all records, the current record, or sequential records.

- Click OK.
Word will use the address you’re signed into to send out the emails. You can track the emails from the Sent Items section of Outlook.
Mail Merge from Excel to Word without the Wizard
After you’ve learned how to mail merge, you don’t always have to use the wizard.
You can find the tools we used to send out the emails using the Step-by-Step Mail Merge Wizard in the Mailings tab of MS Word.
- Go to Mailings.
- From Start Mail Merge, select Select Recipients.
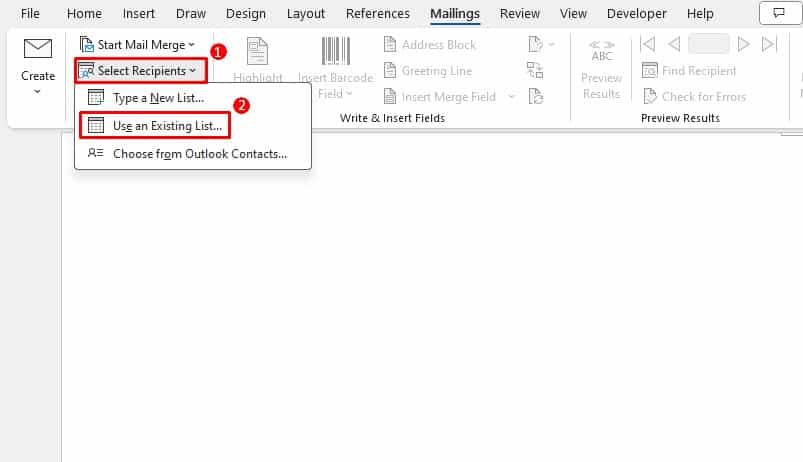
- Choose Use an Existing List.
- Locate and Open your file.
- If your workbook has multiple worksheets and data tables, select the source table then click OK.
- To insert the address, click on Address Block from the Write & Insert Fields section.
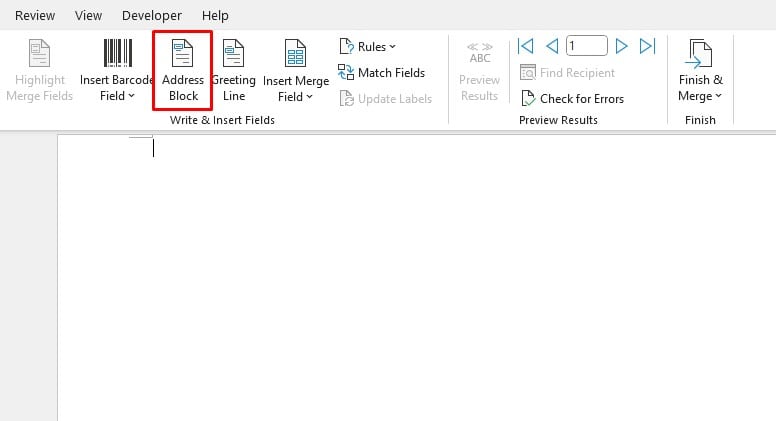
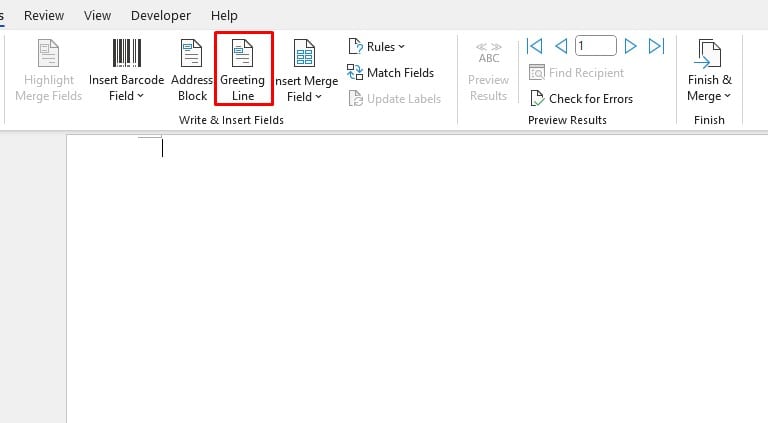
- Select Greeting Line to insert the salutation.
- To insert a field, select Insert Merge Field from the Write & Insert Fields section.

- After you’re done composing your email, select Preview Results.
- To send out the emails, click Finish & Merge from the Finish section.
- Select Send Email Messages.

- Configure Message options and the number of records you wish to send out.
- Click OK.