Adding Checkboxes makes our To-Do Lists so much more interactive and organized. I personally feel accomplished every time I tick a box for the task to mark it as Done.
In Excel, there’s a built-in Form Control in the Developer Tab to add checkboxes.
However, some users might find it a hassle as you need to draw check boxes, link it to the cell, and again use the linked cell in the formula. Especially, for simple Check Lists like Grocery List.
So, let’s learn how to insert checkboxes more easily and quickly without the Developer Tab.
Draw Manual Check Box
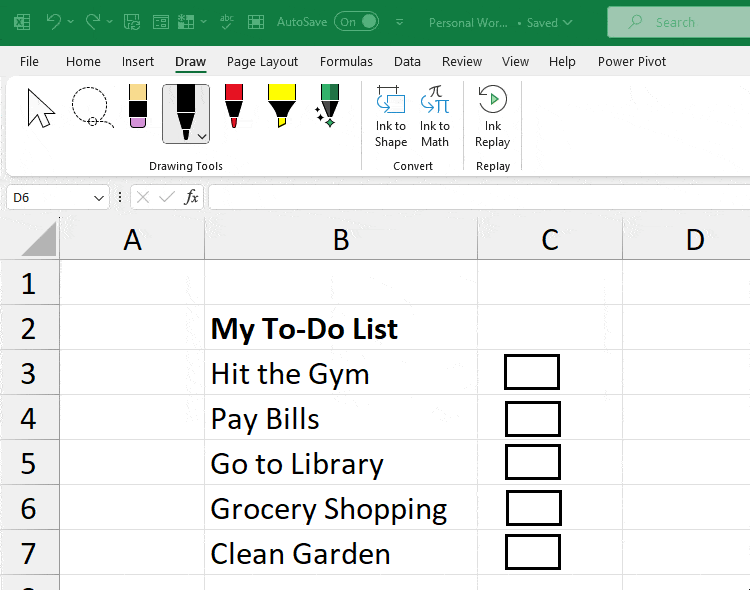
If you do not want dynamic or linked checkboxes, here’s an effortless way to create one. You can manually create the rectangular box and draw a tickmark to assign it as a checkbox. But, of course, keep in mind that this isn’t an interactive checkbox.
Since Excel Online cannot run a Macro, you could use this approach as an alternative. However, here, I have mentioned the steps for Excel 365.
Step 1: Load the Draw Tab
- On your sheet, click File > Options.

- Go to Customize Ribbon. Head to the Main Tabs section and tickmark the Draw option.
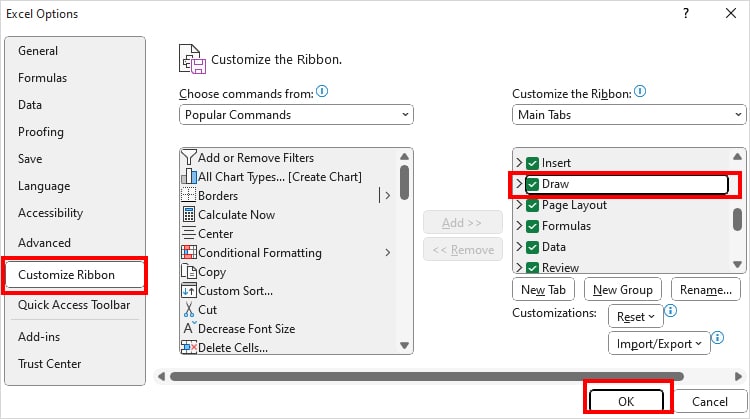
- Hit OK.
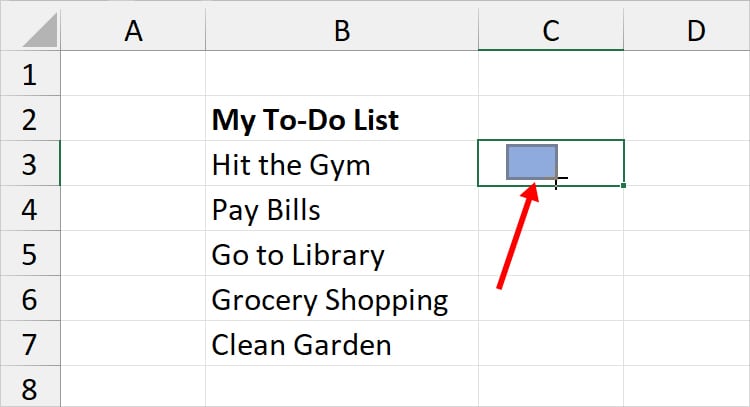
Step 2: Insert Box
- From the Insert tab, click on Shapes and choose Rectangle.

- Using the Plus icon, draw the Rectangle shape on your sheet.
- Now, while the box is still selected, head to the Shape Format tab. Set the Shape Fill to No Fill. Similarly, choose a Black Colour for the Shape Outline.

- Select the Box and enter Ctrl + C to copy it. Then, press Ctrl + V to paste the box. Repeat the Copy-Paste for as many boxes as you want.
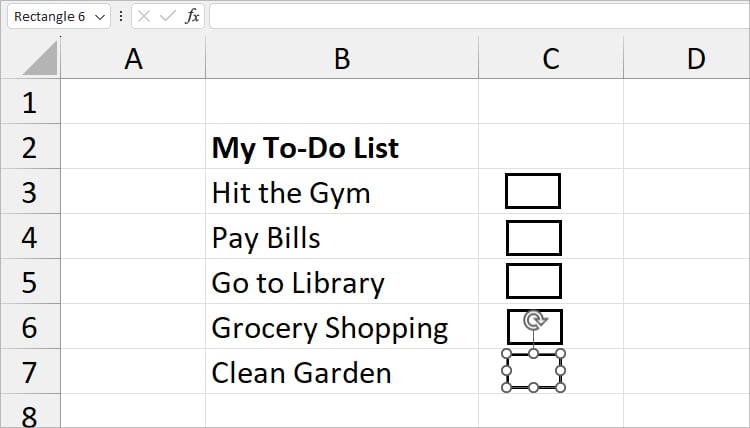
- After you’re done, line up the boxes in cells.
Step 3: Draw the Tickmark
- Navigate to the Draw Tab.
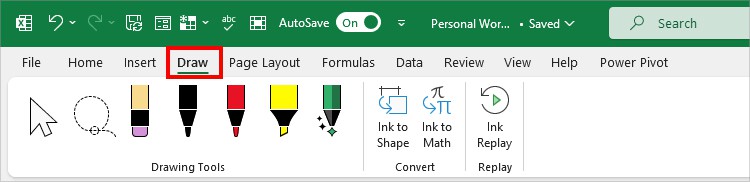
- From the Drawing Tools, choose Pen. Then, draw a Tick on the Boxes to turn it into a Check Box.
Using VBA
For users who want to insert interactive checkboxes just like the one from the Developer tab, I have a VBA code for this.
And Yes! You do not need to use the Developer tab to run the Macro. The best part about this code is it’ll insert a 3D Check box and a dynamic TRUE/FALSE value when you tick the box.
You just need to specify the cell range where you want to insert the checkboxes.
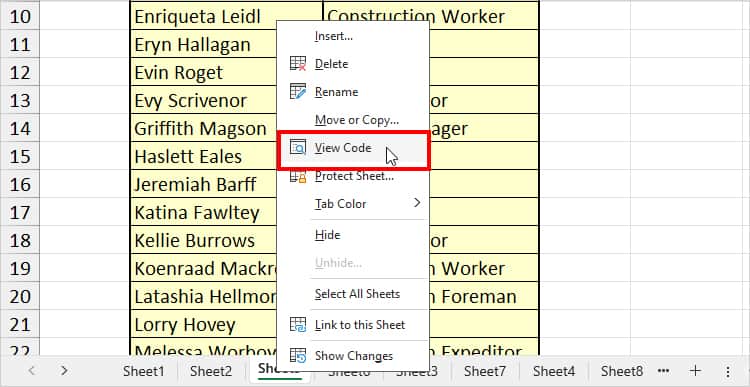
- Right-click on the Sheet name and choose View Code.
- Then, copy and paste this code.
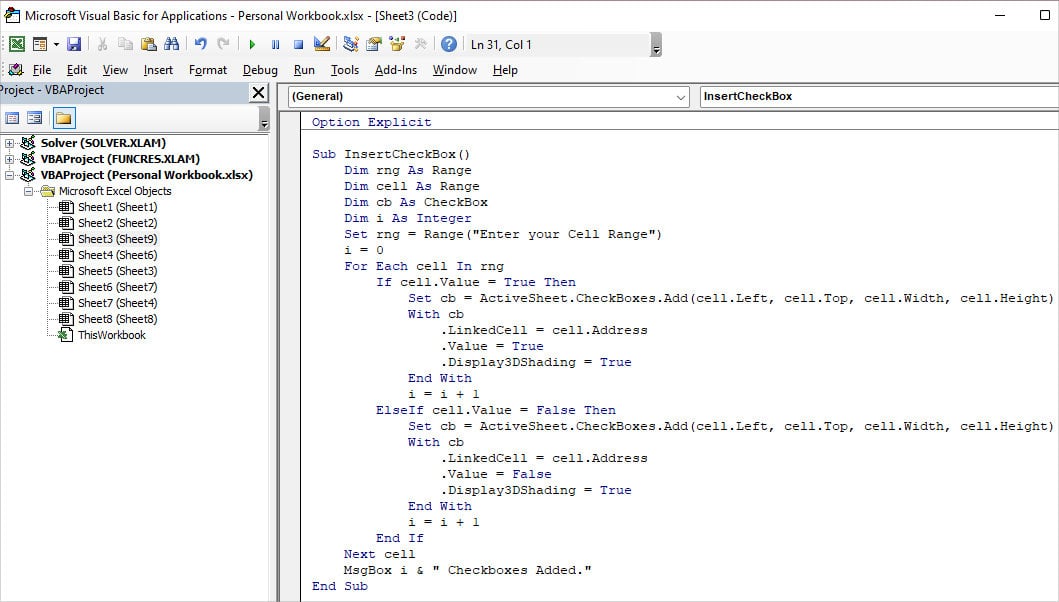
Sub InsertCheckBox()
    Dim rng As Range
    Dim cell As Range
    Dim cb As CheckBox
    Dim i As Integer
    Set rng = Range("Enter your Cell Range")
    i = 0
    For Each cell In rng
        If cell.Value = True Then
            Set cb = ActiveSheet.CheckBoxes.Add(cell.Left, cell.Top, cell.Width, cell.Height)
            With cb
                .LinkedCell = cell.Address
                .Value = True
                .Display3DShading = True
            End With
            i = i + 1
        ElseIf cell.Value = False Then
            Set cb = ActiveSheet.CheckBoxes.Add(cell.Left, cell.Top, cell.Width, cell.Height)
            With cb
                .LinkedCell = cell.Address
                .Value = False
                .Display3DShading = True
            End With
            i = i + 1
        End If
    Next cell
    MsgBox i & " Checkboxes Added."
End Sub- Now, notice the
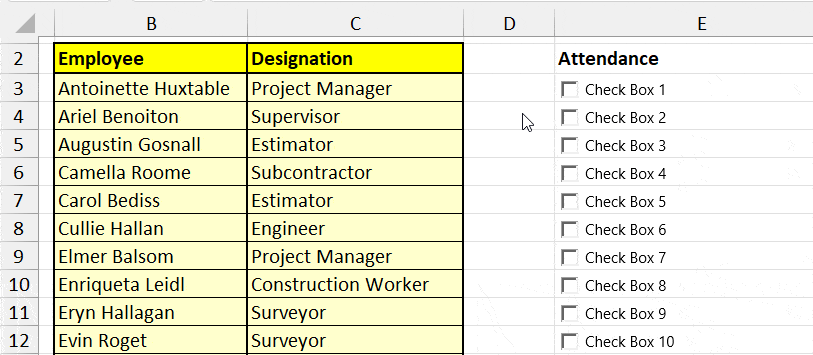
Set rng = Range("Enter your Cell Range")line in VBA? Type your cell range to add checkboxes. Here, my cell range is E2:E29.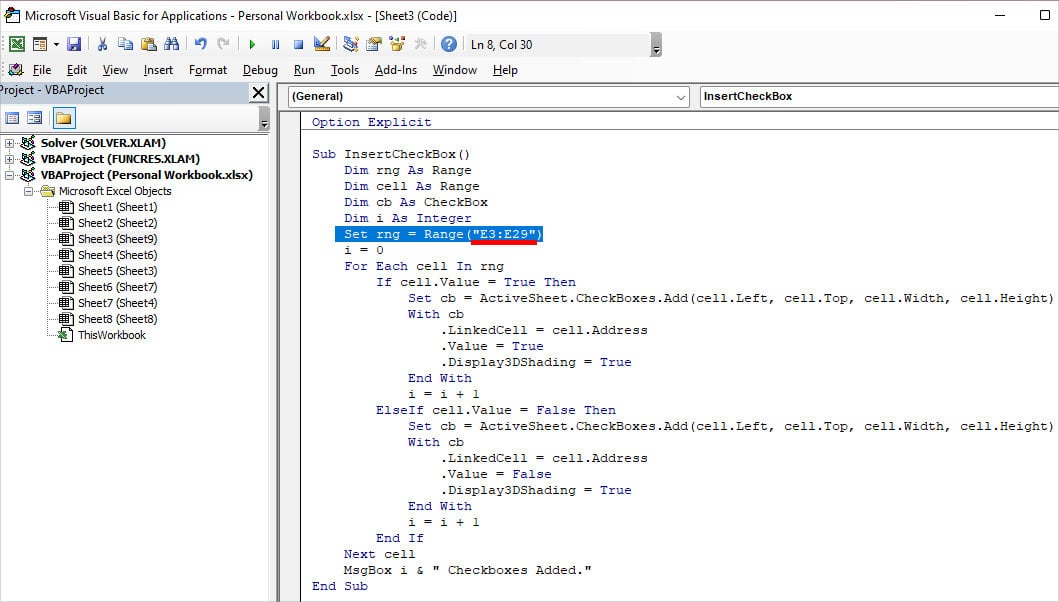
- Enter F5 key to run. The code will insert checkboxes in your worksheet.
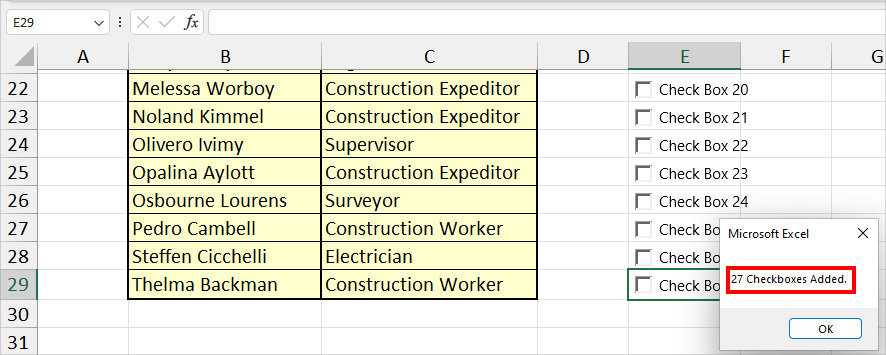
- Now, when you tick the box, it’ll display TRUE. Similarly, you’ll see FALSE when you untick.
- To change the name, right-click and double-click on the Check box. Then, type a New Name. Or, if you don’t want any names, select texts and delete them.
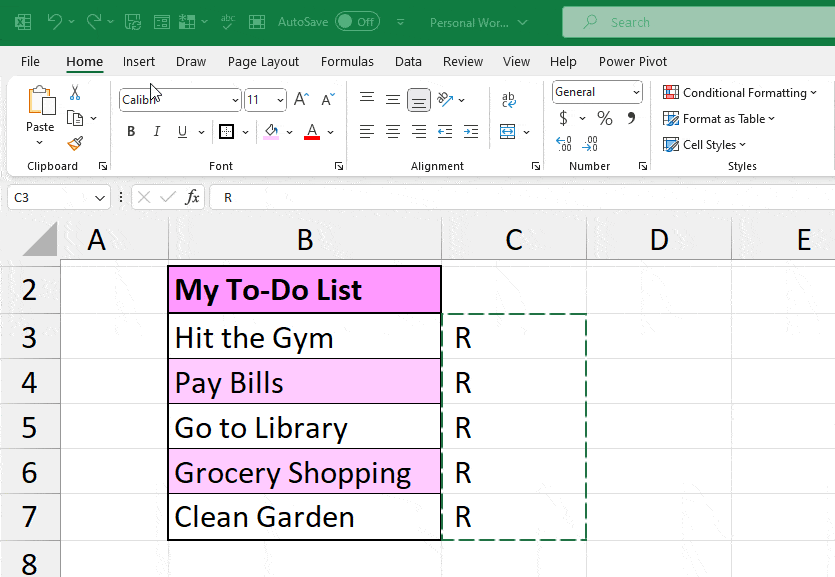
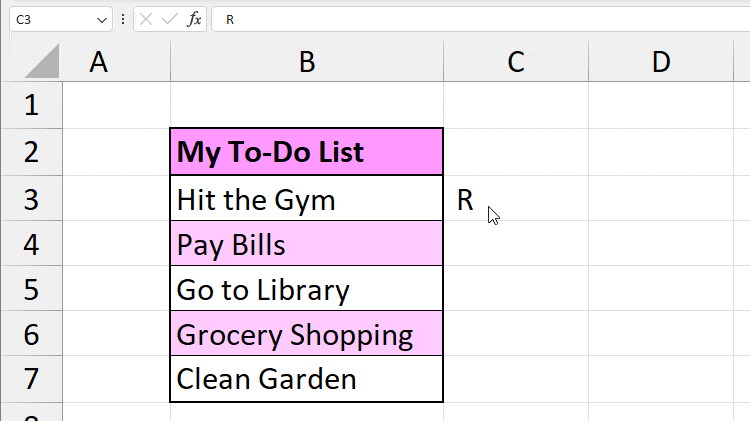
Using Windings 2 Font
Assuming you just want to add the checkboxes for aesthetic purposes. For such basic usage, you can opt for the Windings 2 Font.
Here, the trick is when you change the R letter to Windings 2 Font, you’ll have a checkbox in a cell. But, remember, this box isn’t interactive nor can you tick it.
In a cell type R. Then, using the Flash-fill copy the letter to the entire column.
Now, select the Range. From the Home Tab, expand the Font menu and pick Windings 2.