Excel’s keyboard shortcuts can be a GAME CHANGER if you know how to use them to your advantage and boost your productivity skills. Whether you’re just a beginner or an intermediary, shortcuts can make you an Excel ninja in no time.
While there are 200+ default Excel shortcuts, it isn’t possible to memorize them all. But, what if you could create your own shortcut for the most repetitive tasks? It would be easier to get the hang of custom shortcuts, wouldn’t it?
Unlike Microsoft Word, you cannot find the Customize Keyboard options for Excel. But, there are two effective workarounds to create shortcuts.
Create Shortcuts from Quick Access Toolbar
Excel’s Quick Access Toolbar, located at the top of the ribbon, has several commands you can use with just one go. Commands like AutoSave, Undo, Redo, and Save are readily available in the Quick Access Toolbar.
But you might not be using this toolbar on its full potential. You can customize them to add your preferred Ribbon commands such as Freeze Pane, Data Entry Form that you use on daily basis.
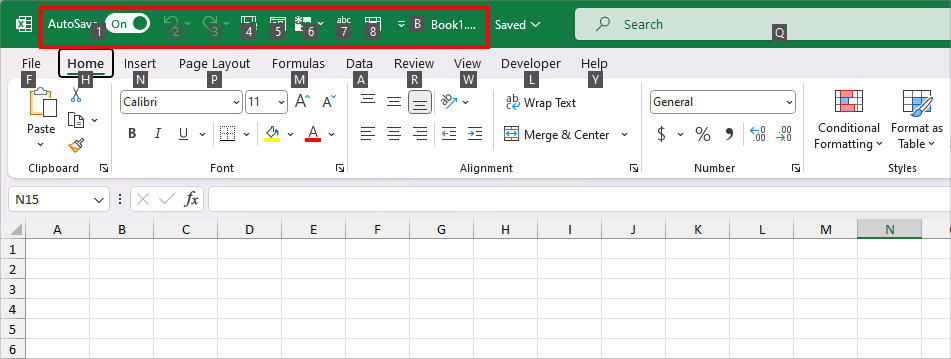
Once you customize the Quick Access toolbar, you can use the easiest keyboard shortcut .i.e Alt and Numbers. For example, press Alt and1, Alt and 2, or Alt and 3, and so on.
- Launch Excel.
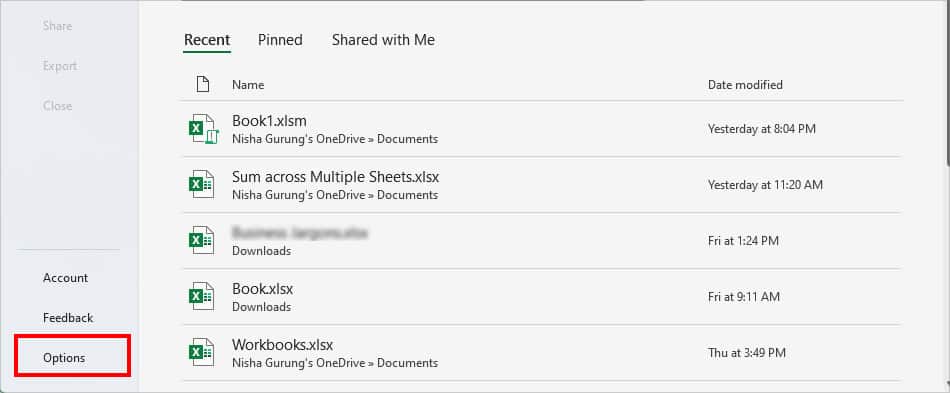
- Click on the Options menu at the bottom.
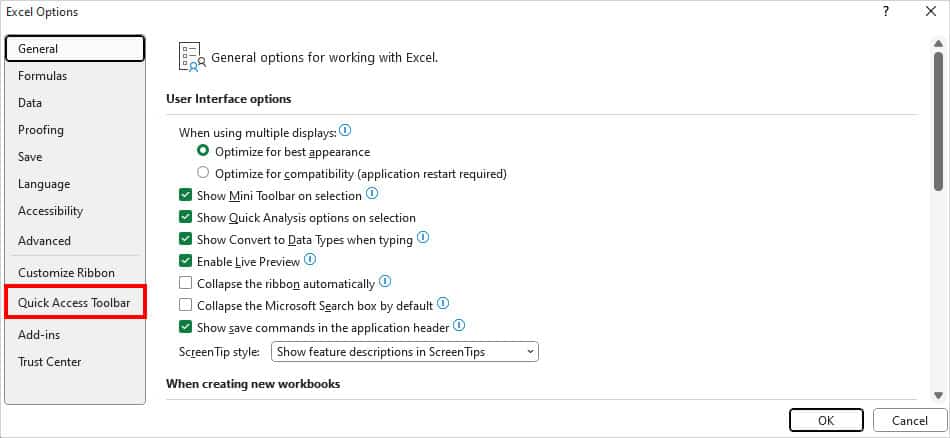
- On the Excel Options window, go to the Quick Access Toolbar category on the left.
- On Choose commands from, select a Specific Tab.
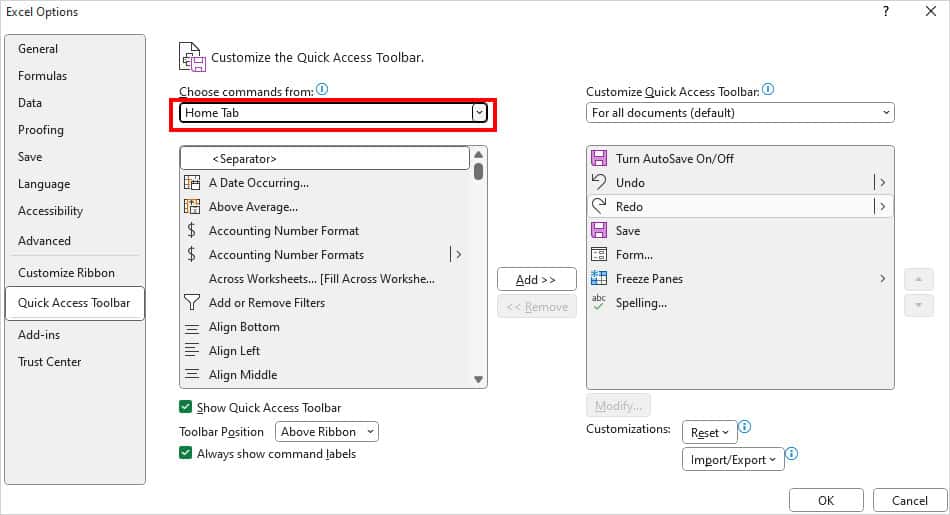
- Then, choose Command and click Add.
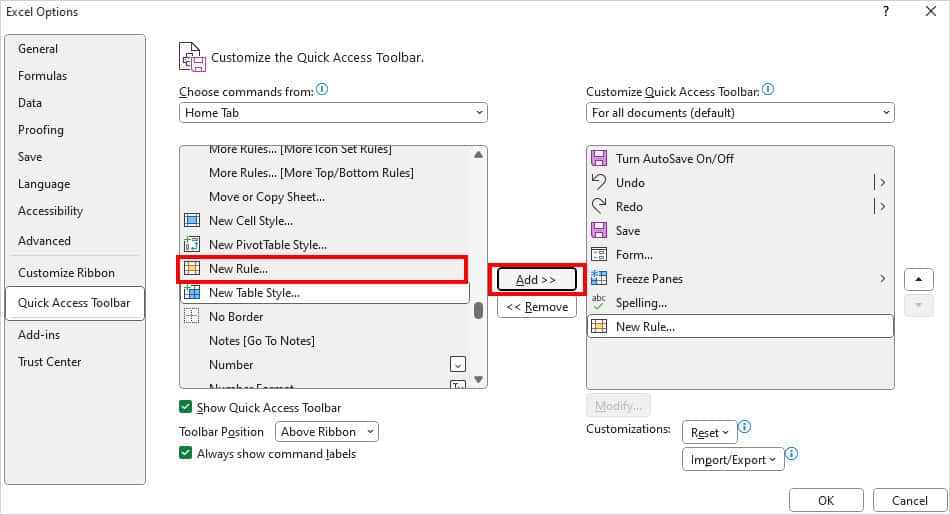
- Repeat Step 4 and 5 if you wish to add multiple commands.
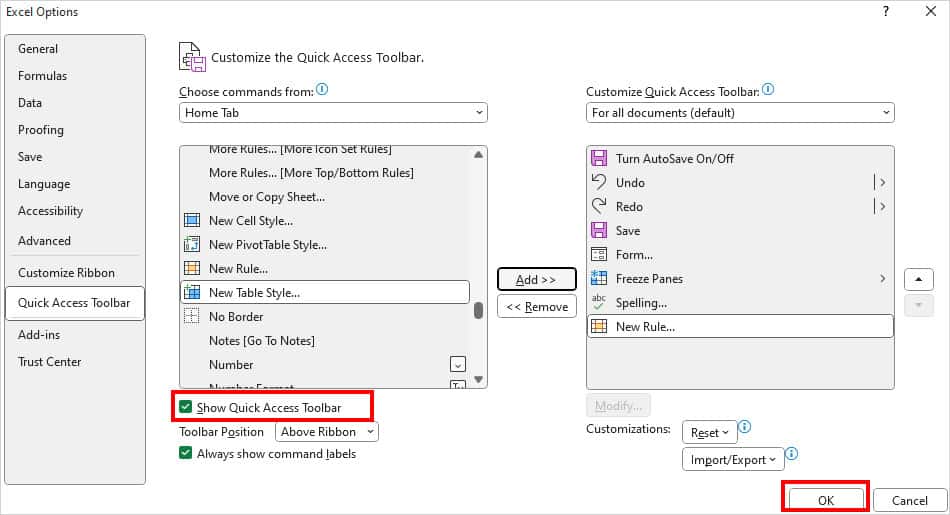
- Make sure the Show Quick Access Toolbar option is checked mark and click OK.
- Now, open a Workbook and press the Alt key. You should see numbers 1,2,3,4,5 etc in the commands of the Quick Access Toolbar. Press any Number to use the command.
Record Macro
If you want to create your own custom keyboard shortcut, you can do it by recording the Macro. I’d definitely say that this method is a win-win approach for you because you can assign a custom keyboard and also run the Macros at once.
Macros are the set of actions you capture and use to automate repetitive tasks. Before you record a Macro, you’ll have options to rename the Macro, set the Shortcut key, choose Macro location, and enter a description.
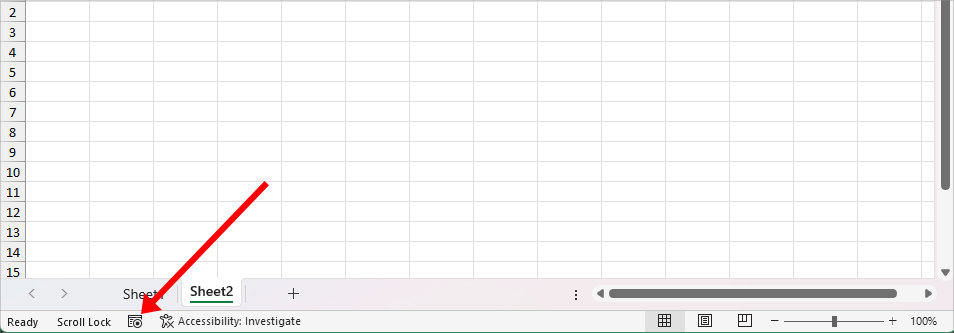
The quickest way to record Macros is from Excel’s status bar at the bottom. So, we will use this Macro button such that even the users without the Developer Tab can easily perform this. But, if you want to explore all the Macro Menus, I do suggest you add the Developer Tab.
Before you start, make sure you have enabled Macros in your workbook. Else, you cannot record, run, or use any of the Macros feature. If you already have, you’re good to go.
- On your sheet, hover over the status bar at the bottom and click on the Record Macro button.
- On Record Macro, enter the Name for Macro name.
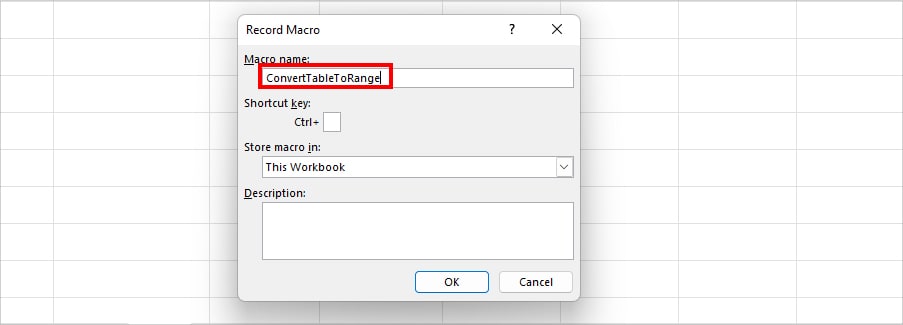
- Below the shortcut key, enter either the Lowercase or Uppercase key.
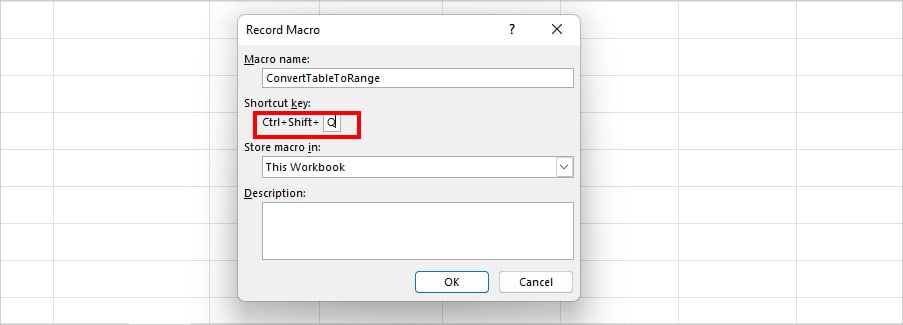
- Lowercase Key: Shortcut key will be Ctrl + Letter
- Uppercase Key: Shortcut key will be Ctrl + Shift + Letter
- On Store macro in, choose your Location. Enter a Macro Description and click OK.
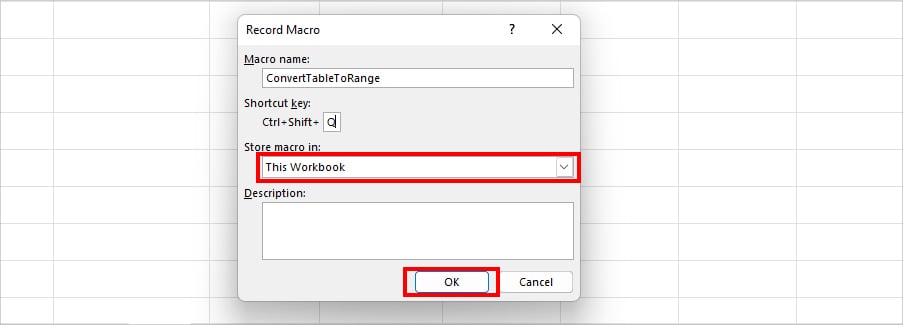
- Macros will immediately start recording. Perform the actions you want to create the shortcut key for.
- When you’re done, click on the Stop Recording button at the bottom.
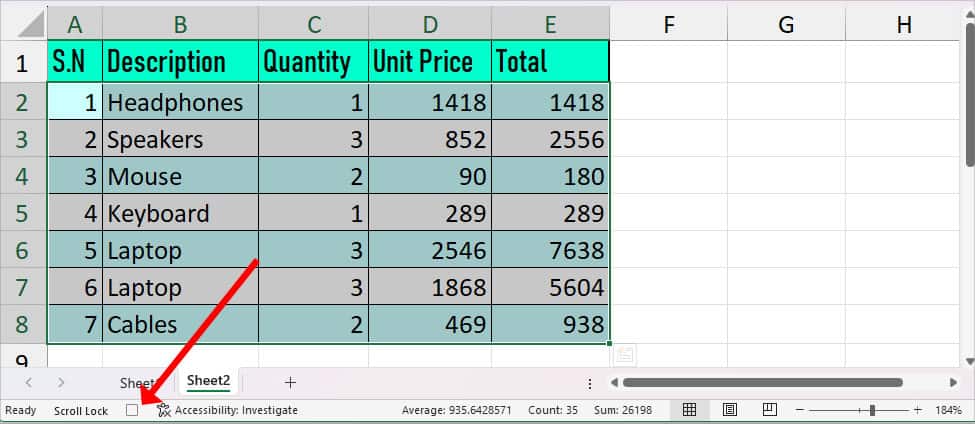
- Now, if you press the Shortcut key you created earlier, it’ll run the recorded Macro.
Can You Customize Excel’s Default Keyboard Shortcut?
Unfortunately, No! Excel does not allow you to customize the default shortcut. However, if you’ve created the shortcuts using the Macros, you could modify them.
To perform these steps, you need to load Developer Tab first.
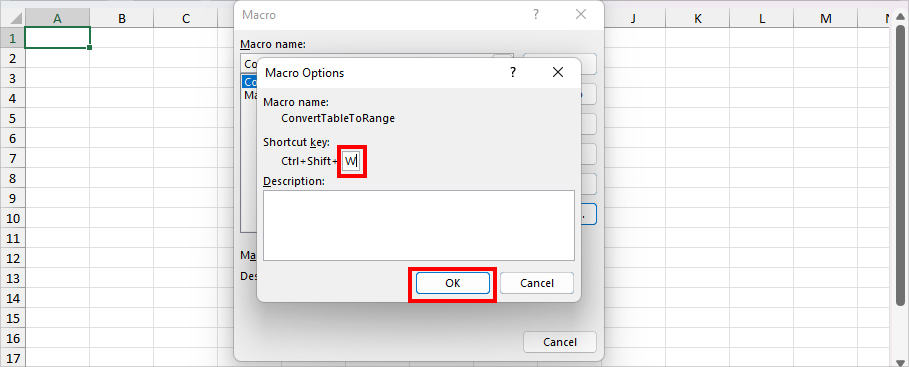
- To edit Macro shortcuts, go to the Developer tab.

- From the Code section, click on Macros.

- Select Macro and hit Options.
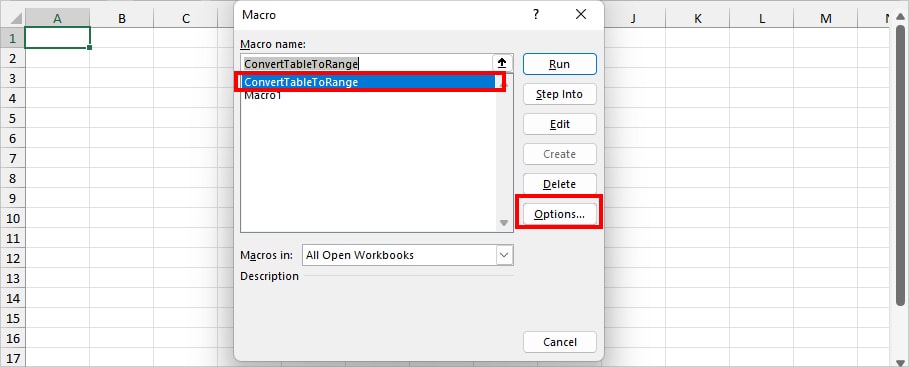
- On Shortcut key, assign a New key and hit OK.
