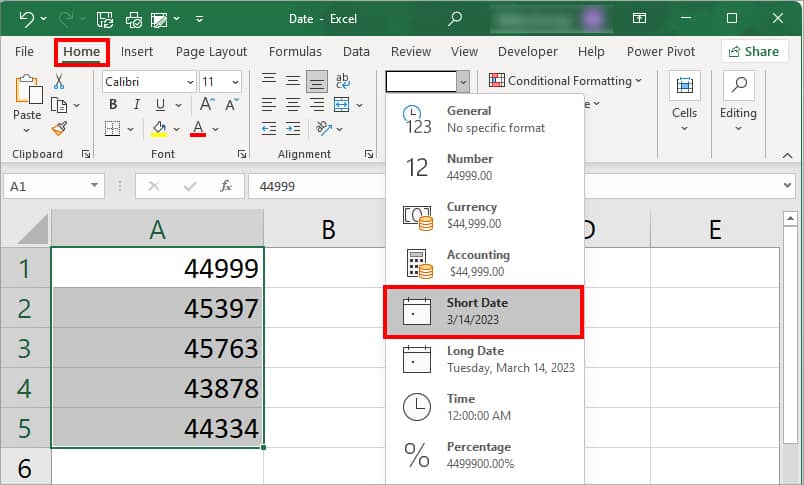
If you’ve formatted your cell as numbers, entering date values will change them into serial numbers. So, when you enter 2023/03/14, Excel would return 44999.
Your dates will also be registered as numbers if your day, month, and year values are missing delimiters like ‘/’ and ‘-’.
To operate on such cells( e.g. adding days to the date, etc ), you must convert your values to date.
How Excel Assigns Serial Numbers?
Excel assigns serial number for all date values starting from January 1st, 1900. If you convert the number “1” to date, this will return you January 1st, 1900, and vice-versa. Here are a few examples:
| Serial Number | Date |
| 2 | 1900-01-02 |
| 10000 | 1927-05-18 |
| 70000 | 2091-08-25 |
How to Convert These Numbers To Dates?
Apply Short Date Format
Let’s convert the serial numbers in the range A1:A5 to a short date in Excel.
- Select range A1:A5.
- In the Home ribbon, navigate to the Numbers section.
- Select the fly-out menu and choose one of Short Date/ Long Date.
If you like using shortcuts, you can use the following shortcut to convert the active cell to dates in Excel:
Ctrl + Shift + #Use Format Cells to Convert Number to Date
Another way to change the date format is by using the Format Cells window. From Format Cell, you not only can switch the data type to date, but also choose from multiple date formats.
While Excel has plenty of date formats to choose from, you can also create a custom date format.
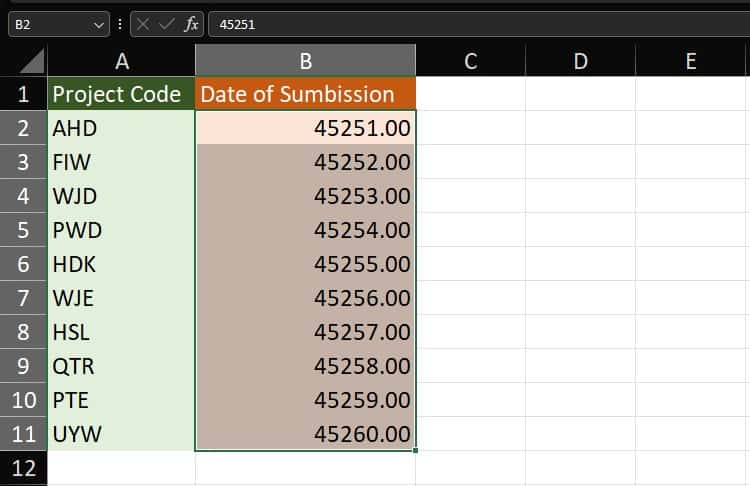
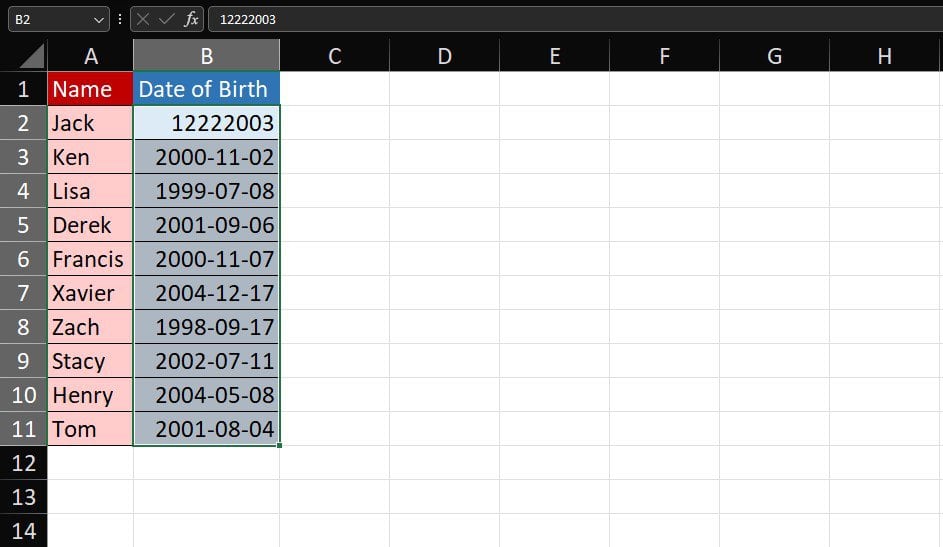
In the following spreadsheet, we will be converting serial numbers in B2:B11 to date in a custom, mmmm-dd-yyyy format.
- Select range B2:B11.
- On your keyboard, select Ctrl + 1.
- Go to the Number tab and do one of the following.
- To apply pre-built Excel date formats, click on Date Category. Then, pick any Date Format.

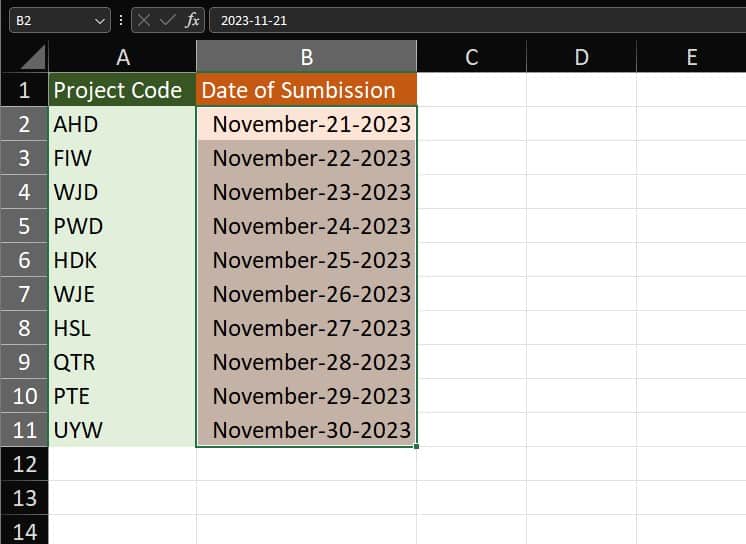
- To enter a Custom format, click Custom at the bottom. Below Type, enter mmmm-dd-yyyy.
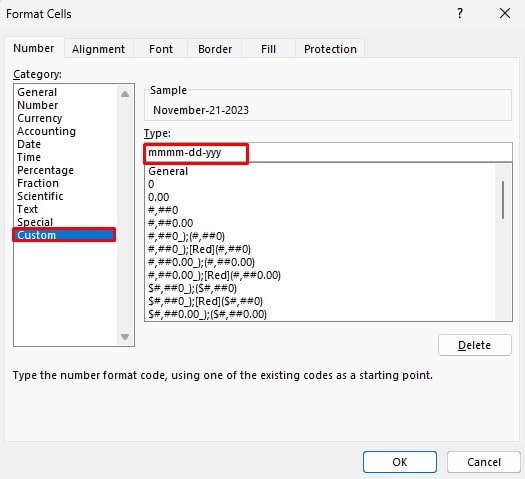
- Check the date under Sample then, click OK.
Use Text to Columns
Text to Columns comes handy when converting a larger data set. However, make sure all your dates follow the same date format. Otherwise, the process might fail.
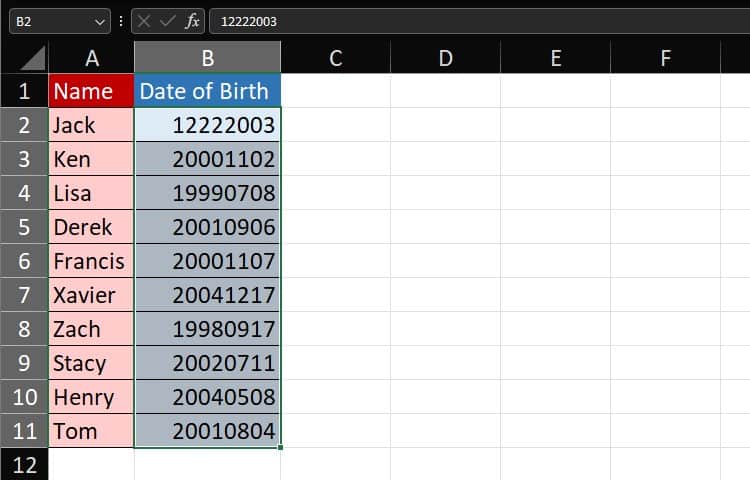
In the following example we are converting contents of column B into dates:
- Select range B2:B11.
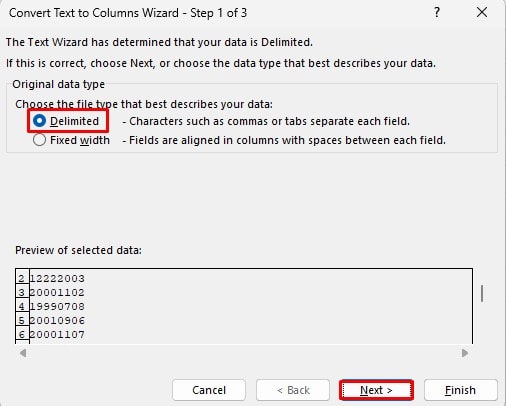
- Head to the Data tab and select Text to Columns.
- In Step 1 of 2, select Delimited > Next.
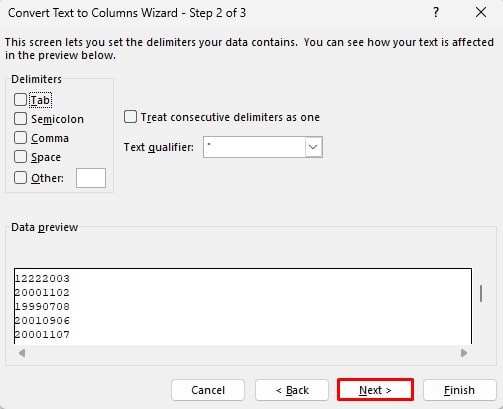
- If you have a symbol separating your numbers, include it in Step 2 of 3 windows. If there are no separators, uncheck all tabs.
- In the last window, select the option next to Date and click on the fly-out menu.
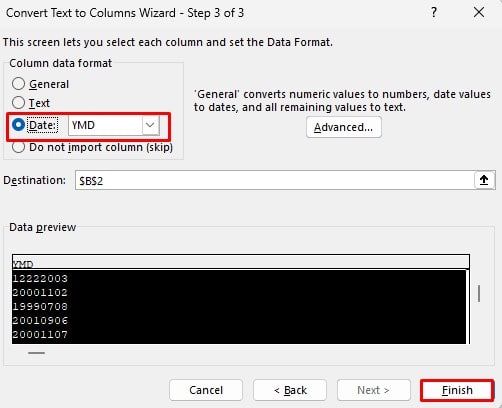
- Choose how your date is arranged. Our date is arranged in the YMD format.
- Select Finish.
Notice how Text to Column did not convert the number in B2 as a date. This is due to a formatting error.
In Step 2 of 3, we set the format as YMD. According to this format, the month value of this date returns 20. As there is no 20th month, the tool ignores this value. The correct format for this date should be MDY.
Use DATE to Convert Numbers in Separate Cells to Date
If you’ve separated your day, month, and year values, you can use the DATE function to convert numbers in separate cells to date.
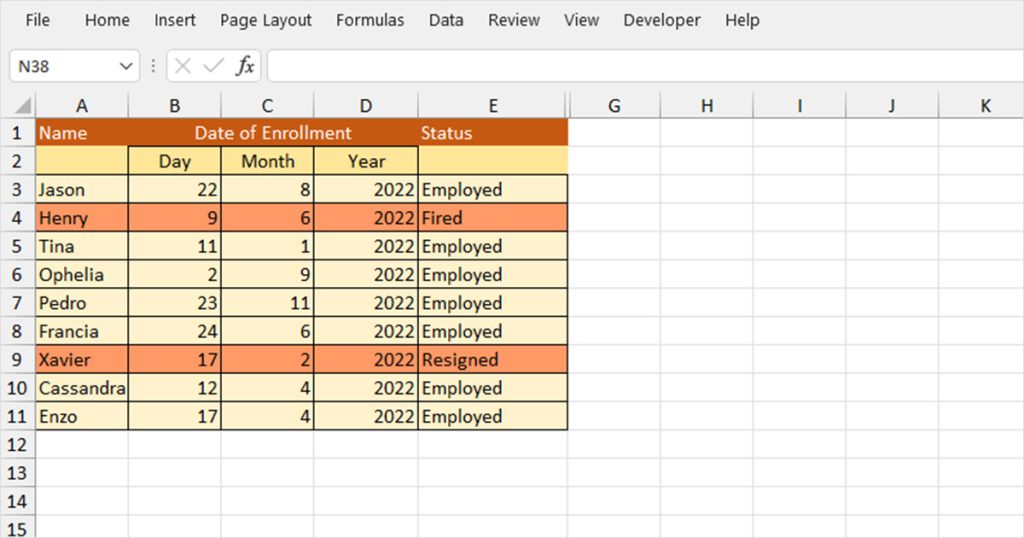
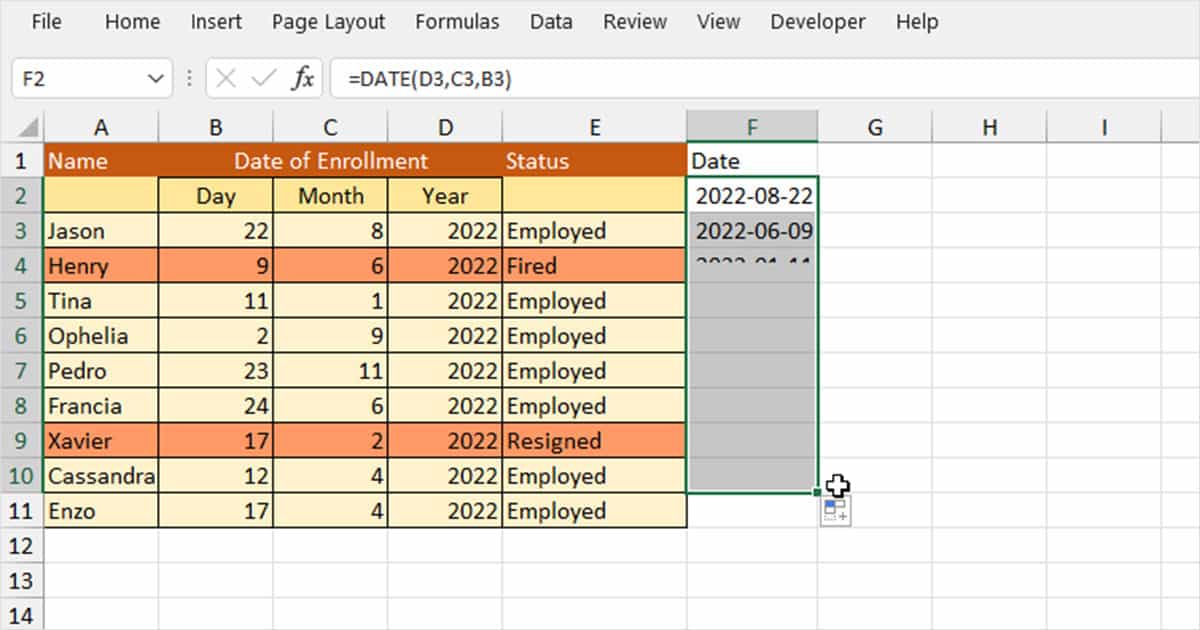
=DATE(year, month, day)The following spreadsheet has the date values separated in column B, C, and D. As these values are all numeric, we will be using the DATE function to merge and convert the final value to date.
Here are the steps we used to convert these numerical data to dates:
- On cell F2, we entered the following formula:
=DATE(D3,C3,B3)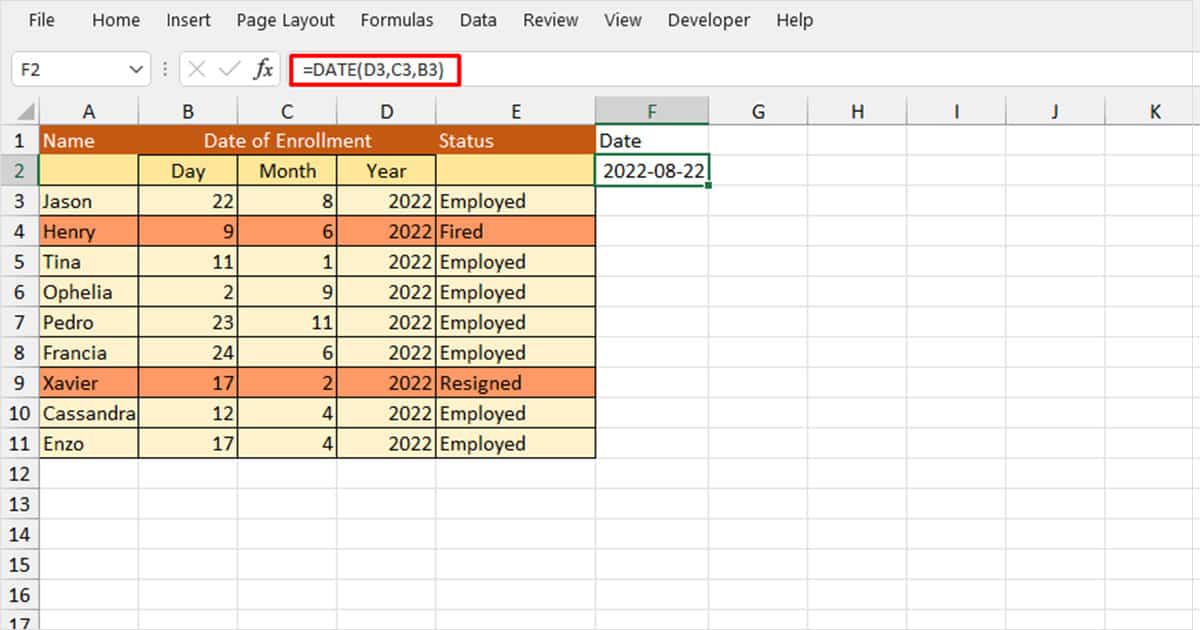
- Use Flash Fill to convert the rest of the values.
- Copy the data, right-click on it, and click on the V key on your keyboard. This will only paste the values, removing the formula.
Now that we’ve converted the results to values, delete the source columns.
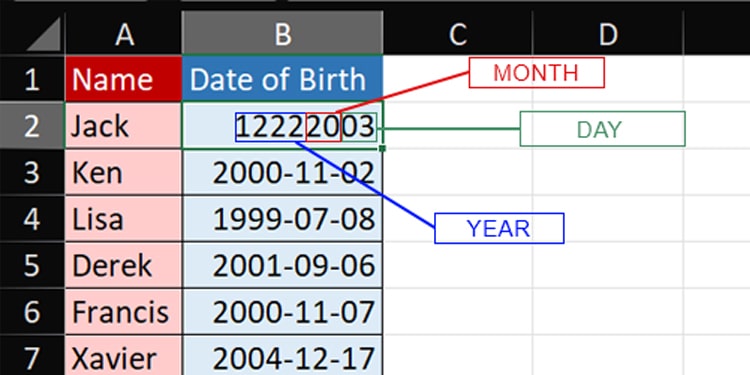
Nest DATE and MID functions to Convert Dates in the Same Cell
If your date value is in the same cell, you must first extract the day, month, and year values and then convert them to dates.
To extract the substring, use the LEFT, MID, and RIGHT functions then convert the value to dates using the DATE function.
| Function | Date Type | Syntax |
| LEFT | TEXT | =LEFT(text,[num_char]) |
| MID | TEXT | =MID(cell,start_num, num_char) |
| RIGHT | TEXT | =RIGHT(text,[num_char]) |
Here,
- text: The cell with the target data.
- start_num: The position in the cell content you wish to extract data from. For example, if you want to extract E from DREAM, the start_num value will be 3.
- num_char: The number of characters you wish to extract from the start_num value. For example, if you want to extract EA from DREAM, your num_char value will be 2.
Here’s how you create and use the formula to convert numbers in the same column to dates:
- Enter the following formula in a new column:
=DATE(LEFT(B2,4),MID(B2,5,2),RIGHT(B2,2))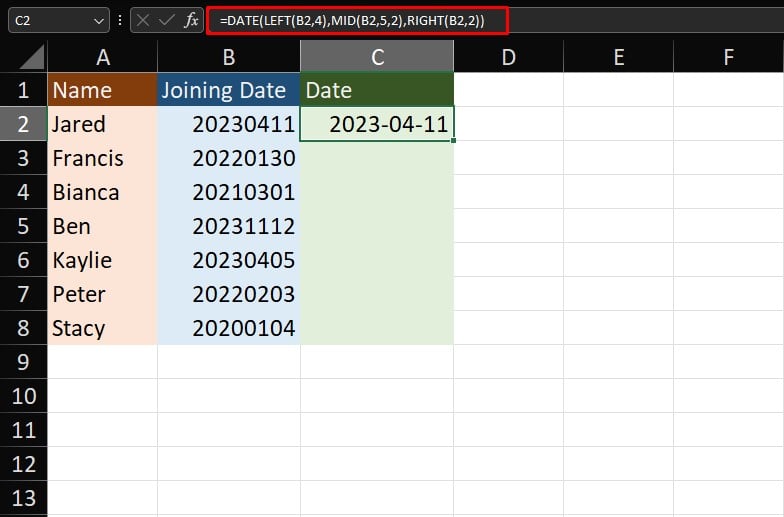
- Use Flash Fill to convert the remaining values.
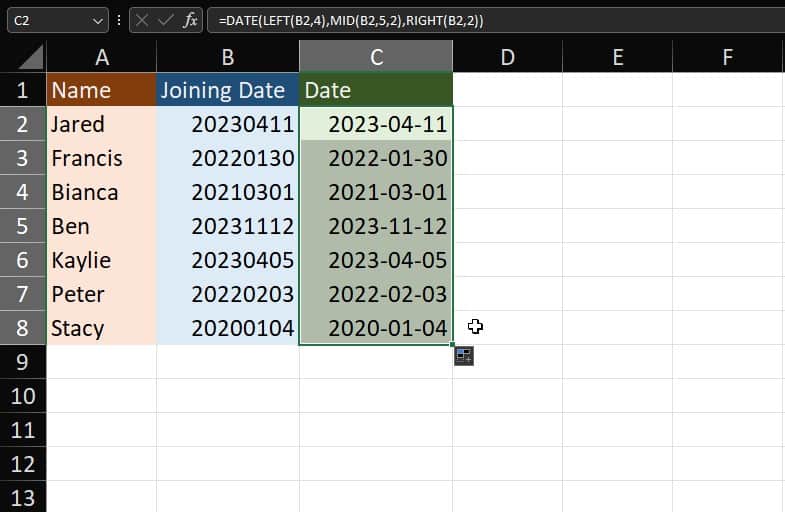
- Convert the results into values. Select the range > Ctrl+C > Ctrl+Shift+V.
- Move the new column to column B.
- Click OK to confirm.
This is the formula for if your date is in the yyyy-mm-dd format. If you follow a different format, use LEFT, MID, and RIGHT functions to extract year, month, and day inside the DATE function.
Use TEXT Function to Change to System Date Format
Sometimes, even if you enter the full date, Excel will mark it as numbers and not dates. This is because Excel identifies and stores dates according to your system time date format.
Excel’s TEXT function returns the value in the applied format as text. You can use this function to convert serial numbers and numbers to date value.
Syntax: TEXT(Cell Reference, Format)Example 1: Convert Serial Number to Date
Let’s assume, you need to format 44999 as a YMD date. For this, enter the formula as.
=TEXT(A1,"yyyy/mm/dd") 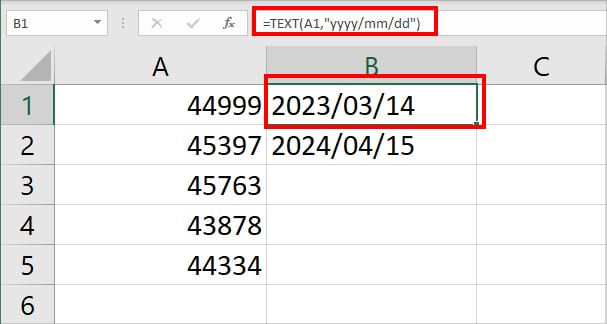
The above formula returns the value of cell A1 in “yyyy/mm/dd” date format and we get the 2023/03/14 date. You can replace the date format as per your preference.
Example 2: Change Number Format to Date
Serial numbers are dates. Therefore, TEXT identifies the year, month, and day values. If you’re looking to convert 20200512 to 2020/05/12, you’ll have to use a different TEXT formula.
For this, enter TEXT in the following formula:
=TEXT(A1,"0000\/00\/00")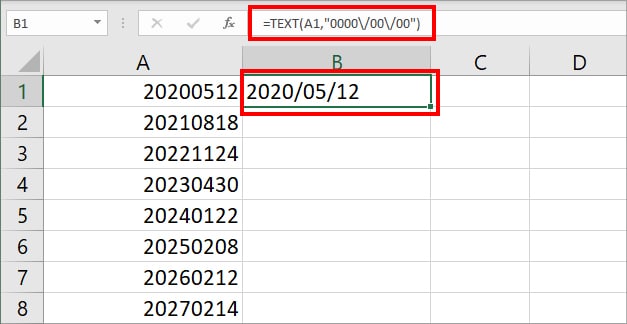
This formula takes the A1 value and returns in the year, month, and day format i.e. 2020/05/12.
If you enter the format as yyyy/mm/dd, TEXT returns a #VALUE! error as it does not recognize day, month, and year values from the number.