Adding Footers on your Excel sheet can give it a more professional touch and include handy information such as page number, date and time, file path, workbook/sheet’s name, etc.
However, Excel does not include Headers and Footers in your worksheet by default, so you will need to set them up manually.
You can either insert a predefined Excel footer or create a customized footer with your own text and graphics or even use dynamic elements like date and time.
So, let’s start.
Insert Footer Via Insert Tab
The basic way to add a footer to your worksheet is through the Insert Tab from your Excel. I have discussed different types of footers you can add to your worksheet using this method.
Adding a Page Number
Page numbers are the most commonly used footers for any document. It is useful when you need to sort out the pages in a systematic way. Here’re the steps to add a page number.
- Open Excel.
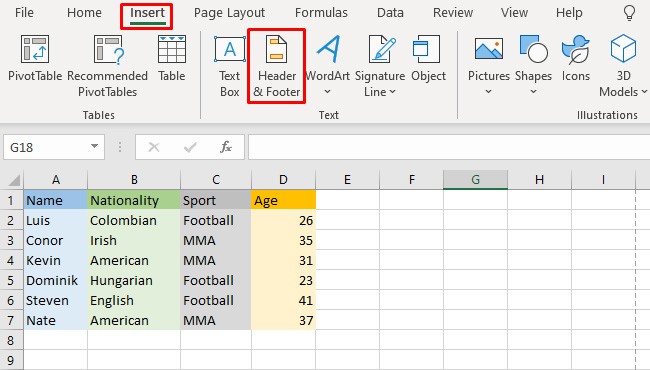
- Go to Insert Tab > Header & Footer. This will switch the worksheet to the Page Layout view.
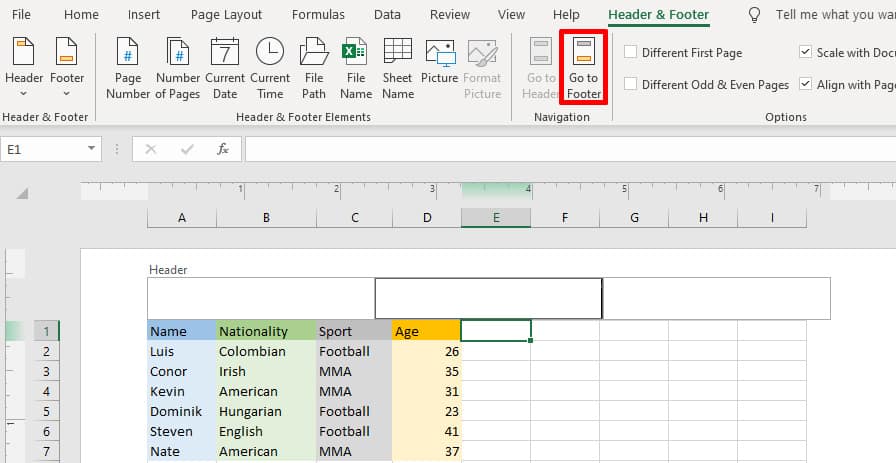
- Click on Go to Footer.
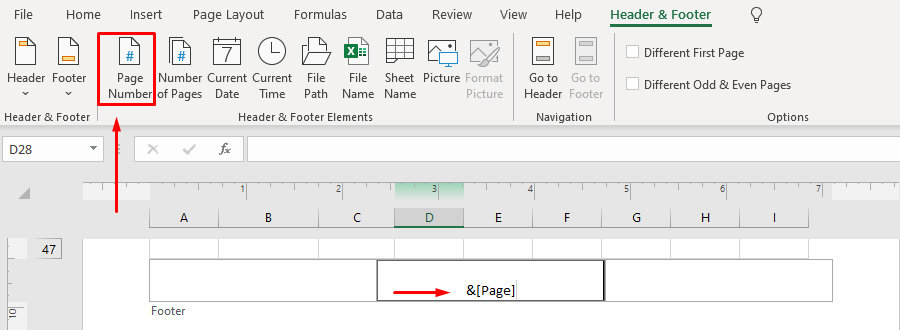
- At the bottom of your spreadsheet, you will see that the footer is divided into three segments. Select your desired segment and click on Page Number, which will add a formula.
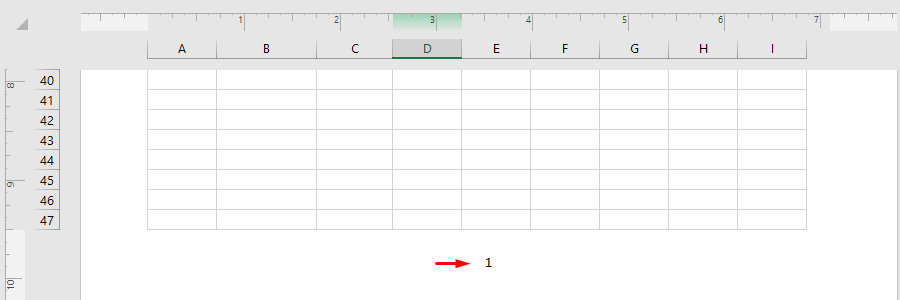
- Finally, click anywhere on the document for your changes to take place.
The same process can be used to add other elements in the footers, such as number of pages, current date, current time, file path, file name, and sheet name.
Adding a Picture/Logo in the Footer
On certain occasions, you might want to add a custom image or your company logo to your worksheet footer. Excel provides the option to import and insert images from cloud data, hard drives, or the Internet.
- Open your worksheet.
- Click on Insert Tab > Header & Footer.
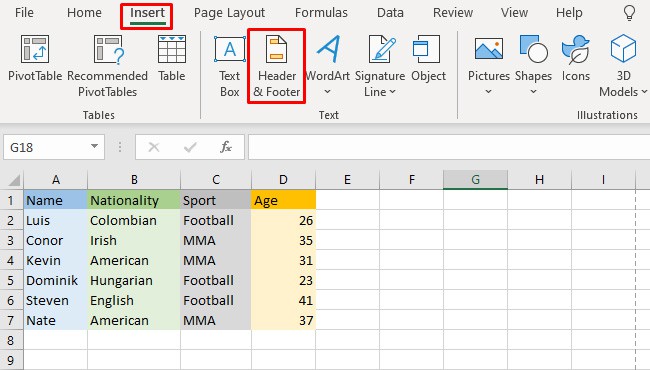
- Click on Go to Footer and click Picture. Excel will show several options where you can insert your desired image from.

- Click on Browse under From a file section, if you want to import a file from your computer.
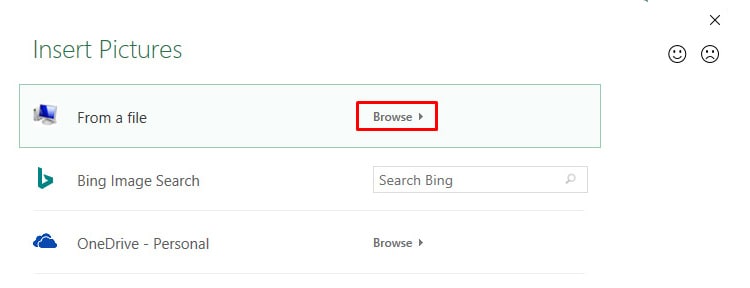
- Locate the picture you want to insert into the footer from your drive.
- Click Insert and click anywhere in the document for the changes to take place.
If your selected picture is too big for the spreadsheet, then follow these steps to resize your picture.
- Click on the image at the Footer.
- Go to Headers and Footers and click on Format Picture.
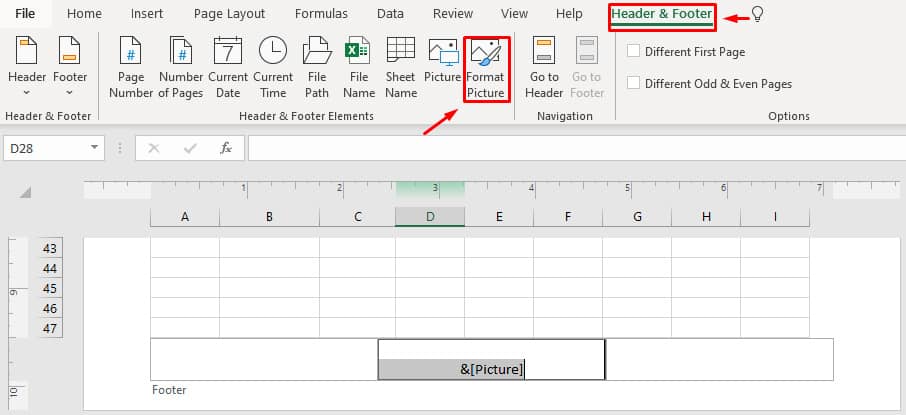
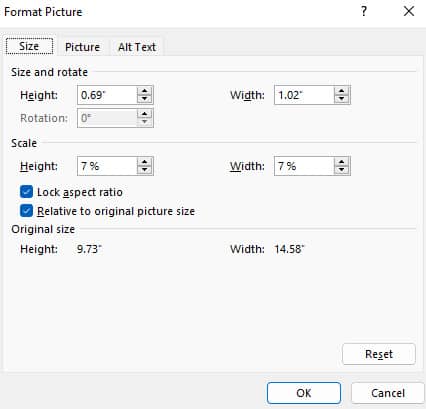
- Find the scale and set the Height to 7% (for reference) and the width will automatically be updated to 7% as well.
- If your logo/picture still seems to be overlapping the spreadsheet, you can resize the border from the left margin.

Adding a Custom Text in Your Footer
Let’s assume you are working on a school assignment on your worksheet and you want to add your assignment title to the footer. Follow these steps to add custom text to your footer.
- Go to Insert Tab > Header & Footer.

- Select the footer section where you want to add your text.
- Type your text in the selected footer section.

- Click anywhere in the spreadsheet to save your changes.
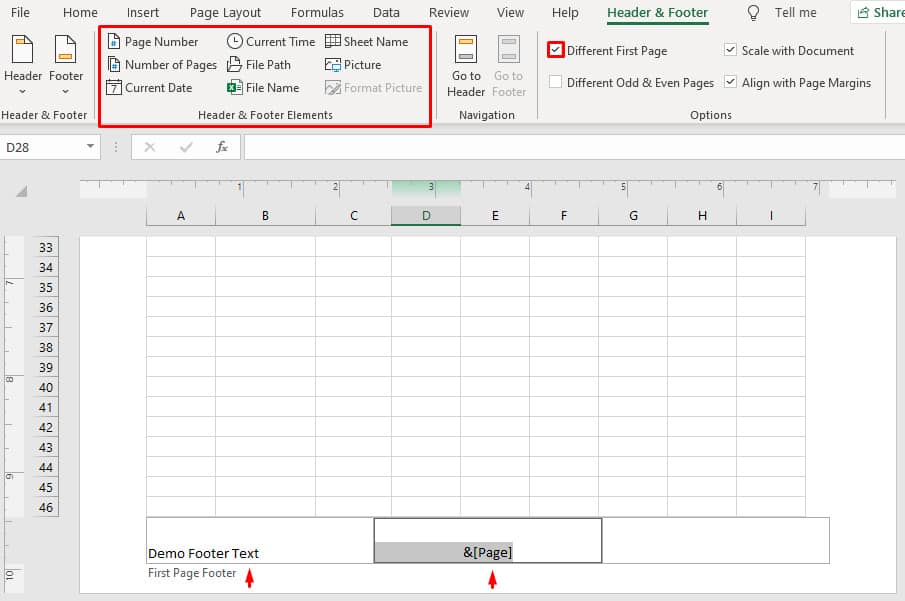
Make a Different Footer for the First Page
There may be times when you want a different Footer for the first page of your spreadsheet. Suppose the first page is a cover page for the sheet. Thus, they might not require a footer at all or require a different footer.
Here’re the steps to create a different footer for the first page.
- Click on the Footer of the first page.
- Click Header & Footer and select Different first page.
- Insert or Delete your desired page number, text, or even an image as your footer for the first page.
Insert Footer Via Page Setup Dialog Box
If you want to create a footer for a single sheet or several sheets at the same time, the page setup dialog box option can be suitable.
- Open your sheets in the Excel window.
- To select multiple sheets, hold the Ctrl key and select the sheets you want to add footers to. If you want to add a footer in the current sheet only, go to Step 3.

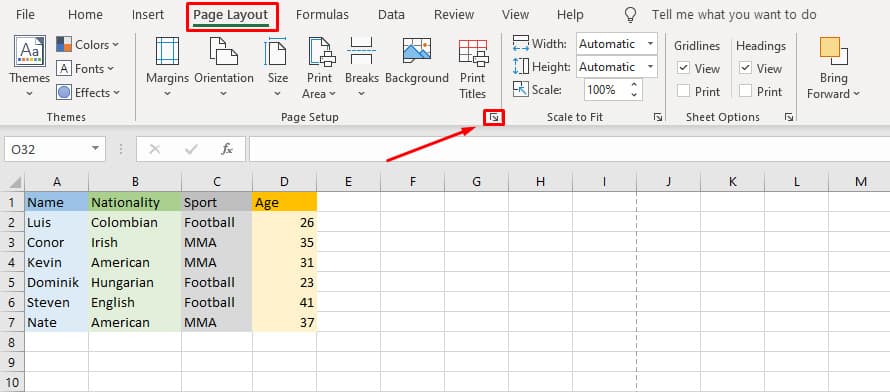
- Go to Page Layout and click on the small arrow beside Page Setup.
- On the pop-up, select the Footer tab and click on the drop-down menu to select your desired footer.
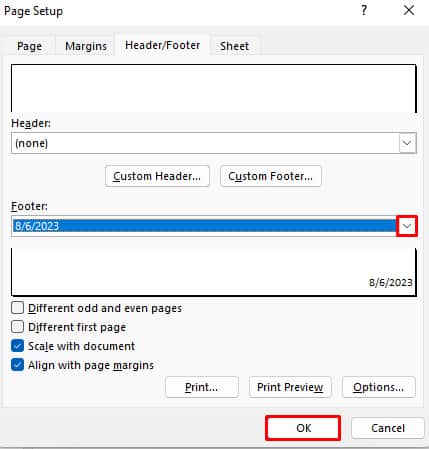
- Click OK to apply the changes.
In cases where you want to add a custom footer for your worksheet, follow the steps mentioned below.
- Open the Excel worksheet.
- Go to Page Layout and click on the small arrow beside Page Setup.
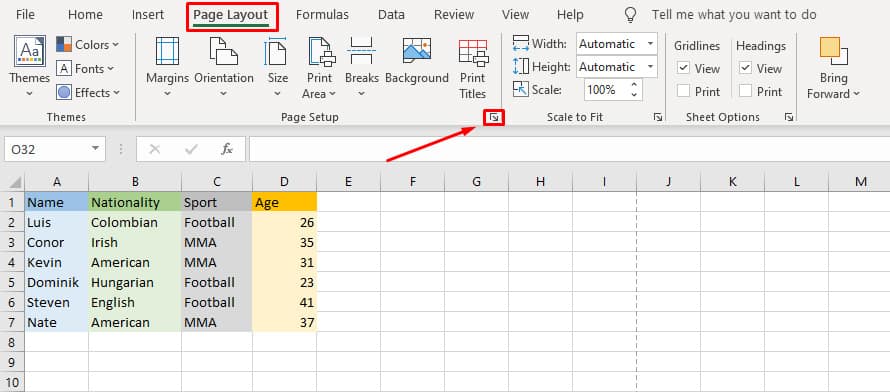
- On the popup, click on Custom footer.
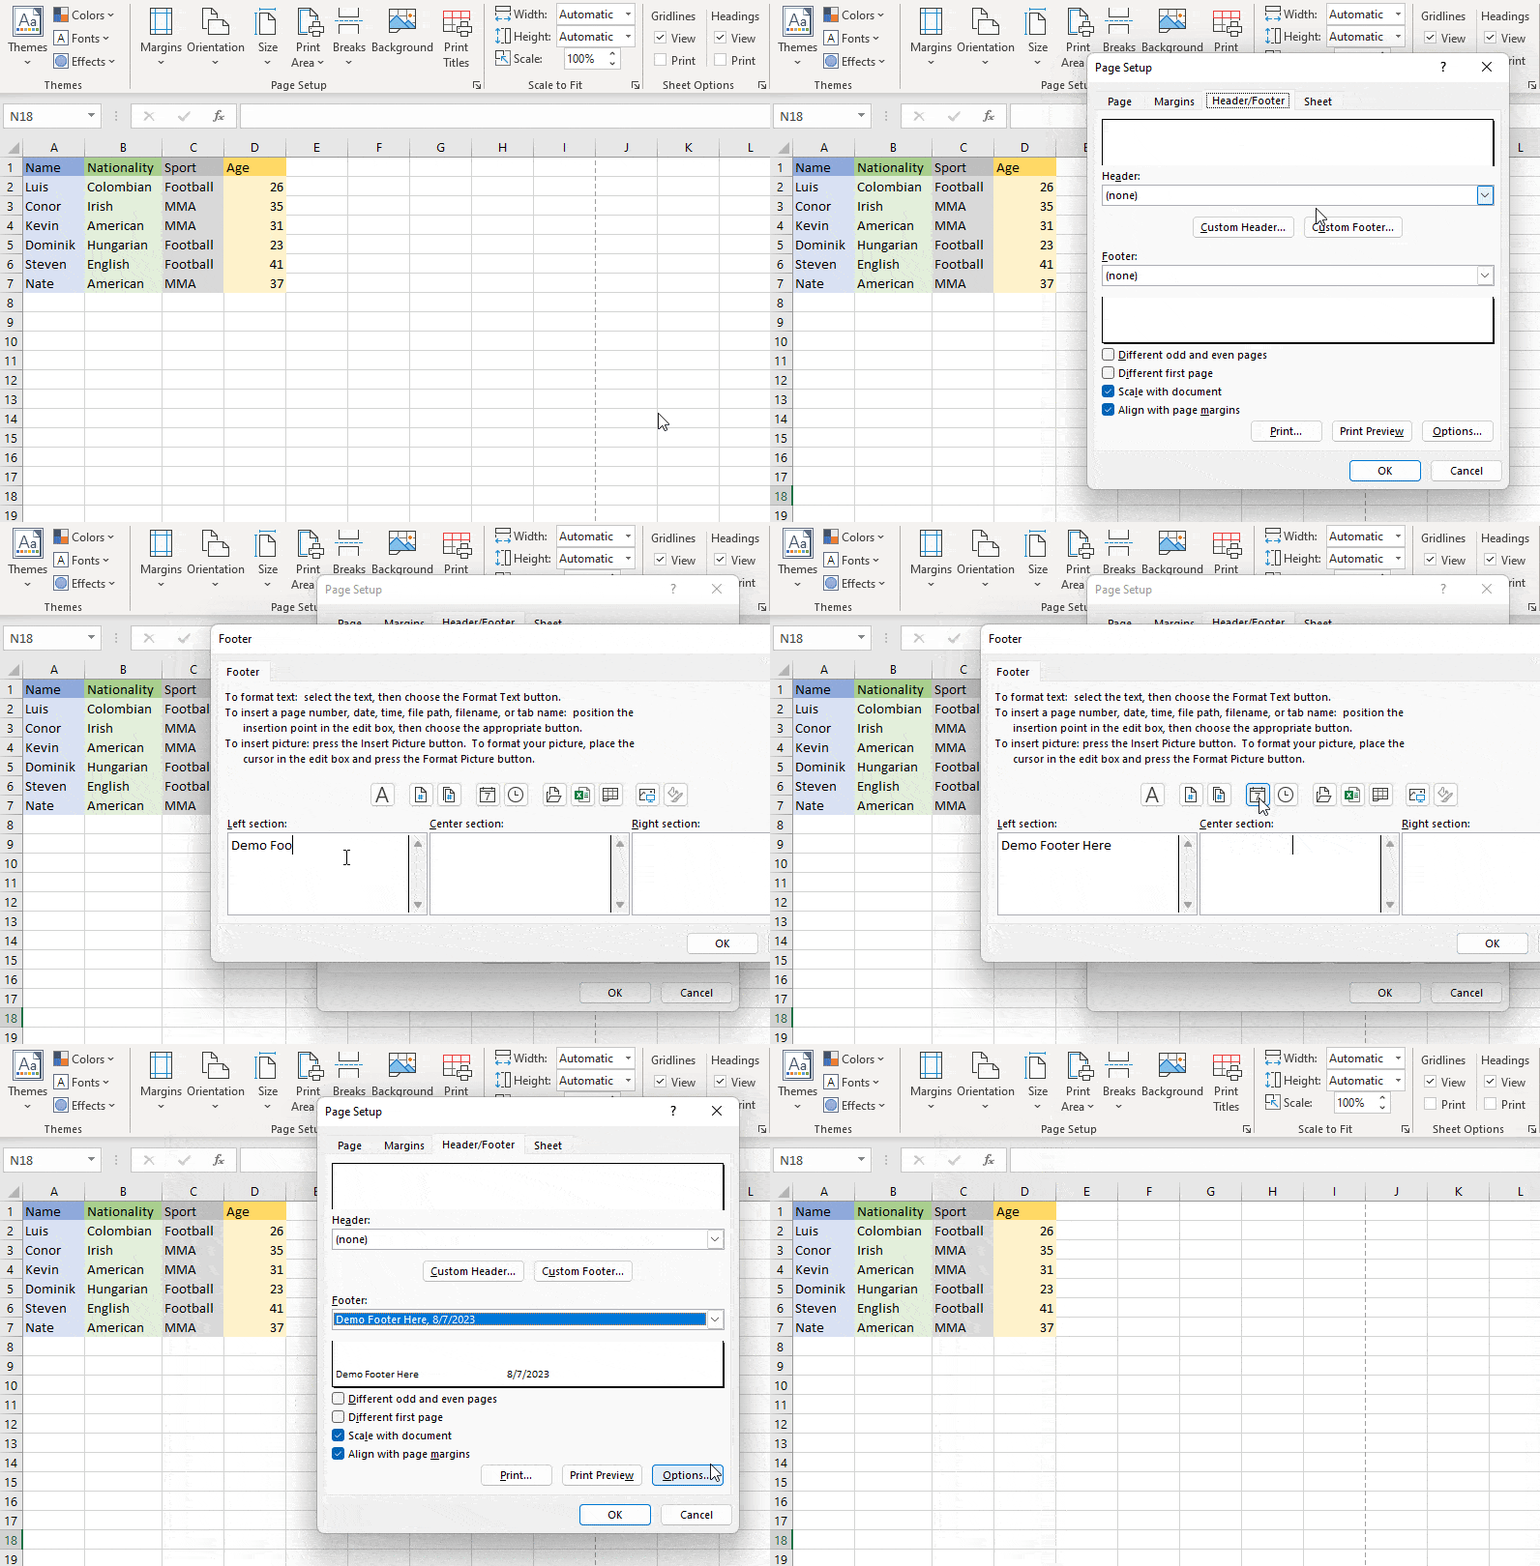
- Select your desired section and add your text, picture, or date. Bear in mind that the date added in this method will automatically be synced with the current date of your device.
- Click OK which will redirect you to the page setup dialog box.
- Click OK to apply changes.
Headers and Footers are only visible in the page layout view, and you may not be seeing the recent changes if you’re in normal view. To switch to page layout view:
- Go to View.
- Click Page Layout under Workbook views.
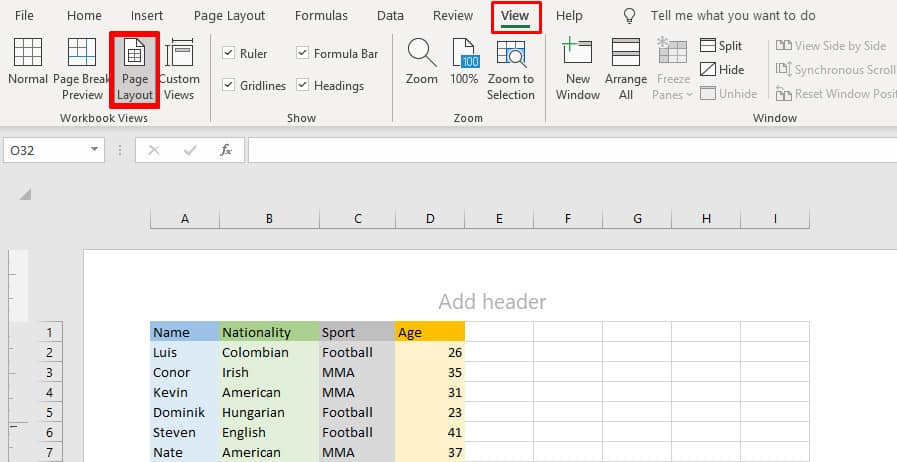
- Your footer will now be visible at the bottom of your worksheet.