When a formula does not give the intended result or returns errors such as VALUE!, #REF!, or #NAME?, it’s possible that it’s not referring to the correct cells. This can especially happen if are using different types of cell references or have a long complex formula.
Also, if you are opening a worksheet after a long time or using a shared workbook, it isn’t always obvious which cells are used in the formula. As a result, unless such cells are found first, detecting the source of error becomes difficult.
While you can check the formula bar to identify the problem, a better alternative is to use the Trace Precedents feature in Excel.
Trace Precedents is an auditing tool that visually displays all of the cells that have an impact on the formula (also known as precedent cells). This will assist you in tracing the source of your error and make your auditing job easier.
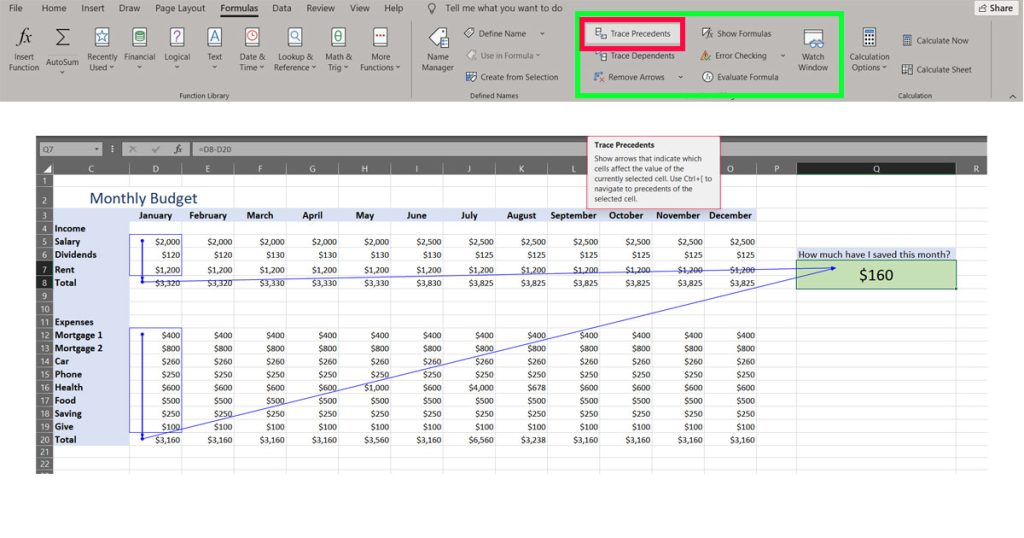
As shown in the example, Trace Precedents uses dots and arrows to get a visual representation of which other cells a particular cell is referring to in its formula.
How to Use Trace Precedents in Excel?
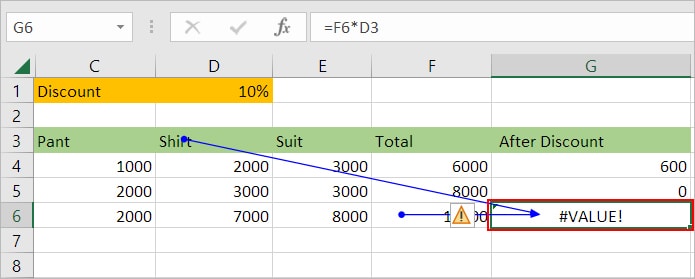
For demonstration purposes, let’s take a look at an example, where we are selling pants, shirts, and suits to our customers. We have already calculated the total price for each customer. But, we are getting a #VALUE! error while calculating the discounted price.
While the error seems to be in one cell, it’s possible that a value from a precedent cell is affecting the formula. To track the source of error, we can use the Trace Precedent feature as follows.
- Select the cell containing the formula.
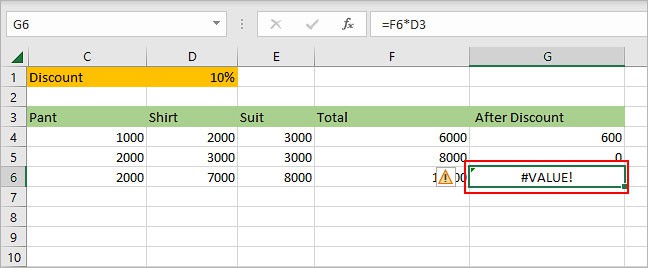
- Then, click Trace Precedents under the Formulas tab. Or, directly use the shortcut key Alt + M + P.

- Now, we can visually analyze that the G6 is having the
#VALUEerror as it’s trying to multiply a number (1000) with a string (Shirt).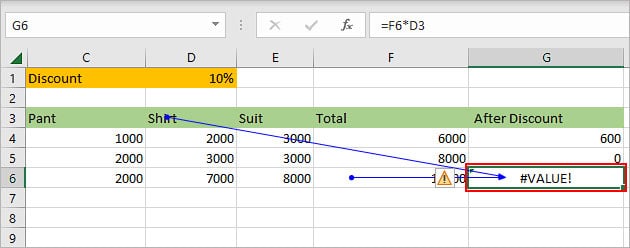
- Repeat the above steps to trace precedents for another cell containing the formula.
Pro Tip: If you want to select the precedent cells you could click Ctrl + [. To view cells with particular types of formulas, press Ctrl + G, click Special and choose an appropriate Formula option.
Use Trace Precedents for Multiple Cells
Excel only allows us to track precedents for one cell at a time. Even if you could do so, it would lead to more confusion as you would see all the arrows (maybe even hundreds) at once.
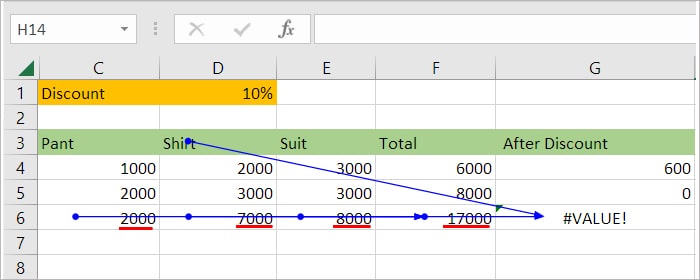
However, if you keep clicking Trace Precedents, Excel will display all the precedent cells of those precedent cells. In short, you can view every direct and indirect precedent cell of the selected cell at once.
For instance,
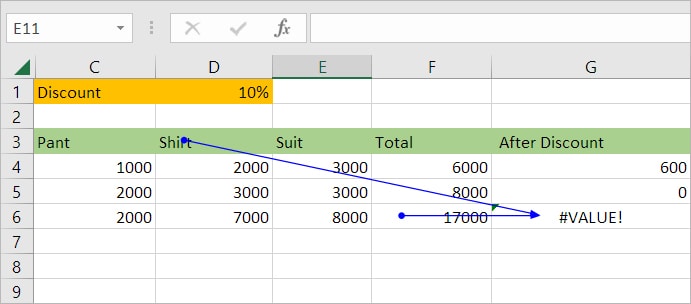
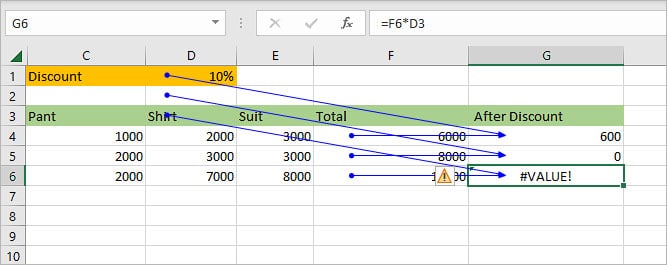
Here, we clicked the Trace Precedents button once on the G6 cell (under the After Discount column) and it initially pointed to cells with values Shirt and 17000.
But, as we kept clicking it, Excel further displayed precedent cells of 17000 which are 2000,7000, and 8000 as shown in the image below.
Use Trace Precedents Referring to Another Worksheet
If you trace precedents of a cell that refers to another worksheet in its formula, you will see a black dotted arrow with the worksheet icon instead of the blue arrow.
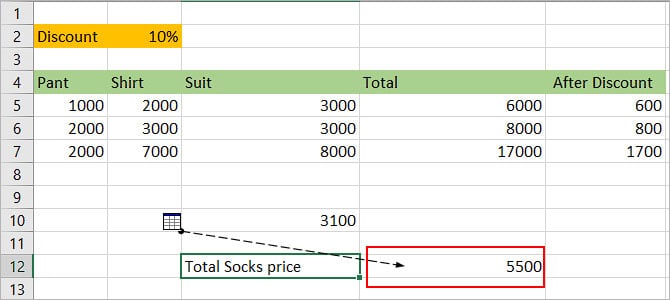
In that case, you can click anywhere on the dotted arrow. Then, Excel will display a Go To prompt, which contains all the precedent cell references with the Sheet name and cell address.
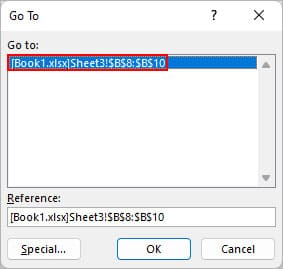
To redirect to a particular precedent cell, just select it and press Enter.
Quick tip: You can use the shortcut key Ctrl + [ to jump directly to the precedent cells. This also works if the cells are in another worksheet.Remove Arrows of Trace Precedents
After figuring out the precedent cells of the formula, you might want to remove the arrows. Here’s how to do it.
- Select the cell where the arrow is pointing.
- Select the Formulas tab.
- Click the down arrow next to Remove Arrows and select Remove Precedent Arrows.
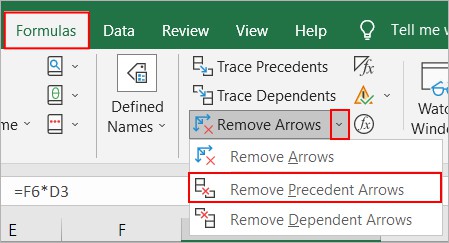
Note: You can also click the Remove Arrows option but it will remove arrows indicating both the Precedent and Dependent cells.