During data entry, you may place data you meant to put separately in the same column. This can be a bummer when you need to access these values individually as references. When this happens, you must split these values across multiple cells.
Although there are several ways to split cells in Excel, in this article, we will be looking at the methods to split cells according to different data types. These data types include texts, numbers, dates, and string values, so keep reading!
Split Cells with Text
You will commonly find the need to split cells with texts when dealing with values like Full names and addresses. When sharing the file with another user for data entry, they might accidentally enter these values in the same column. If you relate, fret not as you can use a number of different methods to separate these values.
One of my favorite methods to separate texts in Excel is using the TEXTSPLIT function. TEXTSPLIT is a dedicated function that is used to separate texts from a single cell into multiple, columns using a delimiter.
Here is the syntax TEXTSPLIT uses when creating a formula:
=TEXTSPLIT(text,col_delimiter,[row_delimiter],[ignore_empty],[match_mode],[pad_with])| Argument | Data Type | Description |
| text | TEXT | The text you wish to split. |
| col_delimiter | CHAR | Enter the characters separating the texts. The function will use this to place your values into separate columns. |
| [row_delimiter] | CHAR | If you wish to separate your values through different columns, enter the specific character to split them into rows. |
| [ignore_empty] | BOOLEAN | Enter TRUE to ignore empty cells and FALSE, if not. The default value is FALSE. |
| [match_mode] | BOOLEAN | Enter “1” to disable case sensitivity. You can enter “0” to disable it but it is enabled by default. |
| [pad_with] | TEXT | If there is a missing value, Excel will result in the #N/A error. You can enter a value in this section as a substitute for this error. |
Example Using TEXTSPLIT
In this sheet, I have ten full names entered in the same cell, A1. Some individuals have chosen not to Let’s use the TEXTSPLIT function to split this data into ten different columns and rows.
In cell A2, I entered the following formula:
=TEXTSPLIT(A1," ",",",FALSE,0,"")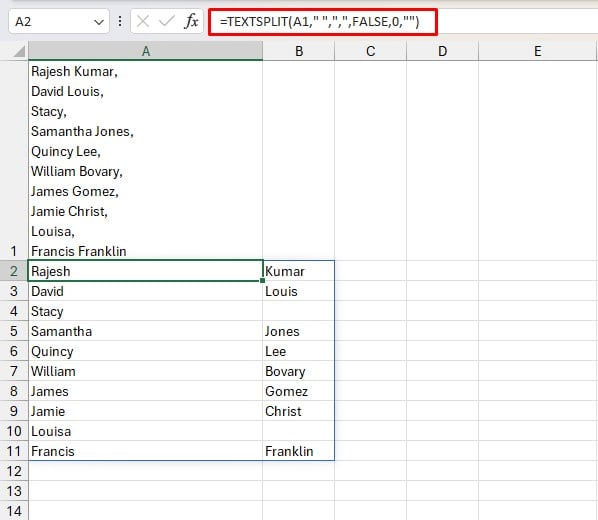
In this formula, I used the space “ ” as my column_delimiter and the comma “,” as my row_delimiter. While it was optional, I entered FALSE in the ignore_empty section and 0 in the match_mode section. As there are users who did not mention their last names, I entered “” in the pad_with section so I could avoid the #N/A error.
Split Cells with Numbers
You may be looking to separate number values like contact numbers with country codes. Numbers are usually tricky to separate considering there isn’t a real delimiter between number values.
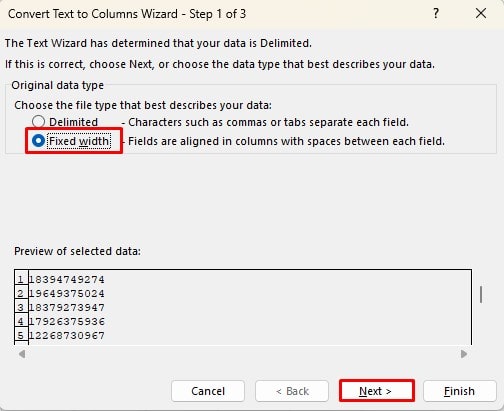
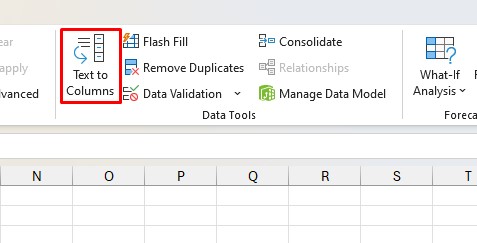
However, you can use the Text to Columns function to separate fixed-width numbers. This means if your number contains 12 digits, you can split two numbers out of the original 12-digit number.
- Select the range with your numbers.
- Go to the Data tab.
- From the Data Tools section, select Text to Columns.

- In Step 1 of 3, select Fixed Width > Next.
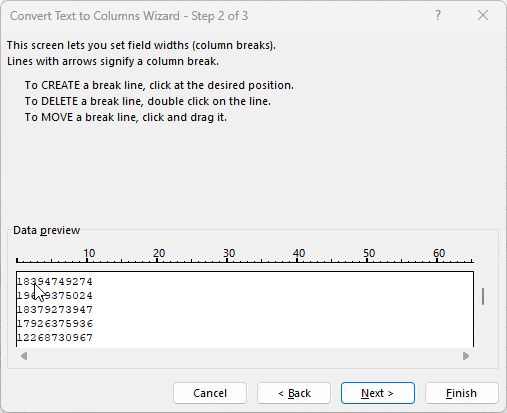
- In Step 2 of 3, click in between the numbers you wish to separate in different columns > Next.
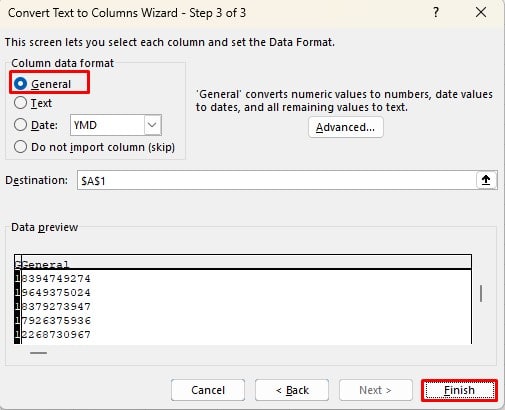
- In Step 3 of 3, make sure the Column data format is set to General > Finish.
Split Cells with Dates
It is relatively easier to split cells containing dates. You can use three functions to split dates according to year, month, and day. However, make sure you have used proper date separators like hyphens and slash for Excel to recognize your value as dates.
Here are the functions we will be using to separate cells with dates:
=YEAR(cell) // Extracts the year from the date=MONTH(cell) // Extracts the month from the date=DAY(cell) // Extracts the days from the dateExample Using the YEAR, MONTH, and DAY Functions
In range A2:A11, I have a total of ten cells with date values. Let’s use the YEAR, MONTH, and DAY functions to separate these values into three different columns.
In cell B2, I entered the following function to extract year values:
=YEAR(A2:A11)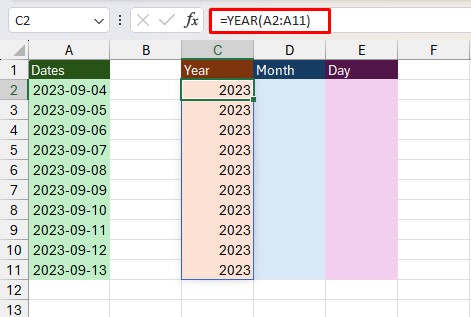
In cell C2, I entered the following function to extract month values:
=MONTH(A2:A11)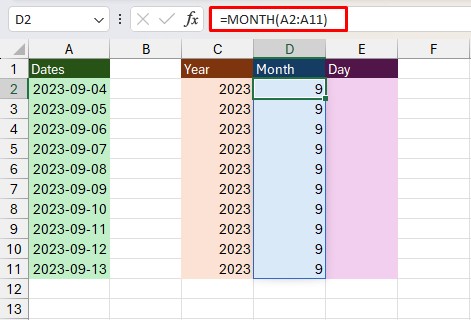
In cell D2, I entered the following function to extract day values:
=DAY(A2:A11)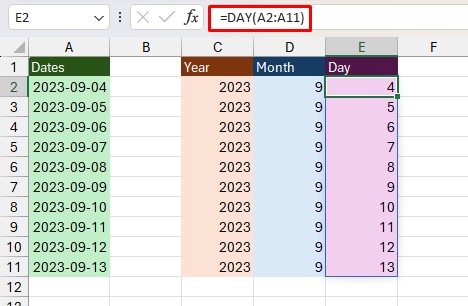
Split Cells with String Values
You may be looking to extract digits and non-digit values from a string into two different cells in Excel. If this is the case, you can use the Power Query to make this separation.
However, if you’re working on a string value that contains unnecessary special characters in the middle, using Power Query will be futile. This is because it will separate your data each time there’s an alphanumeric value in the middle.
For example, if your data is “123%$456”, Power Query will create three different columns with “123”, “%$”, and “456”. For this, I have created a function using VBA that extracts numbers from your string. If you want to do the opposite, check out our article on How to remove numbers from numbers.
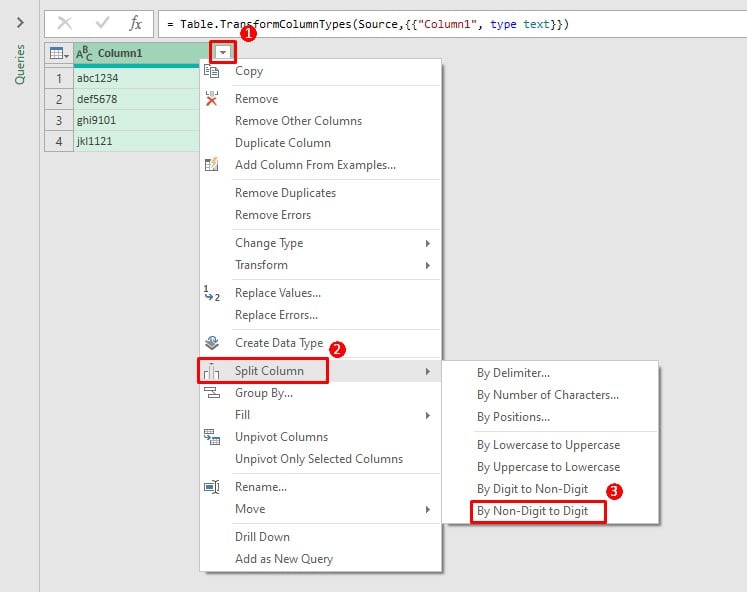
Separate Digits and Non-Digits
- Select your range/table.
- Go to the Data tab.
- From the Get & Transform section, select From Table/Range.
- If prompted, click OK on the Create Table window.
- From the Power Query editor, right-click on your column.
- Select Split columns.
- If your string begins with letters, select Non-Digit to Digit. If it’s the other way, select Digit to Non-Digit.
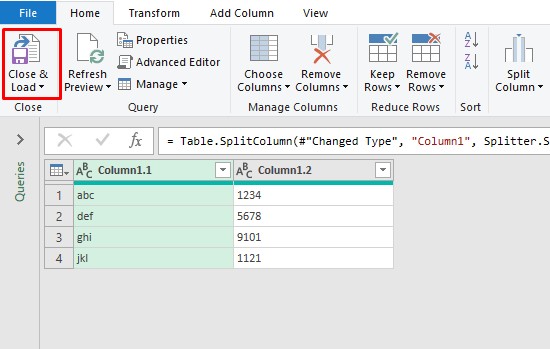
- Select Close & Load from the Home tab.
Create a Function to Extract Digits from String
- On your keyboard, use the Alt + F11 shortcut.
- Select Insert > Module.
- Enter the following code in the window:
Function NumString(cell As String) As Integer
Dim temp As String
Dim count As Integer
Dim Final As Integer
For count = 1 To Len(cell)
temp = Mid(cell, count, 1)
If IsNumeric(temp) = True Then
Final = Final & temp
End If
Next count
NumString = Final
End Function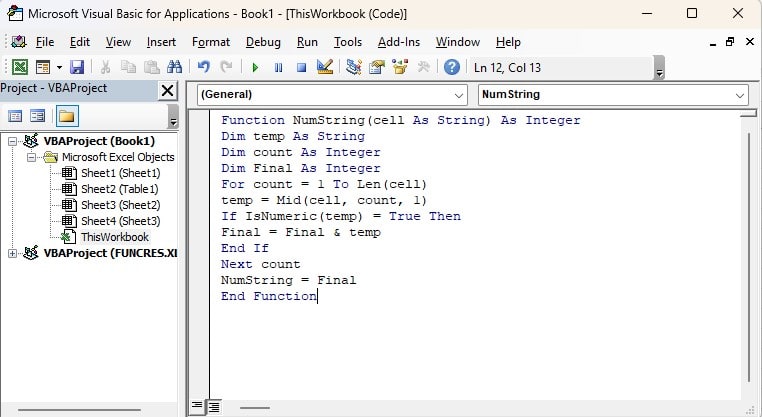
- In your sheet, select an empty cell and enter our newly created function in the following format:
=NumString(cell)