Name Box is primarily used to identify the name of the active cell or range in your spreadsheet. However, as you get a bit advanced in Excel, you might make out other implications of the tool.
For instance, I mostly use Name Box to set a name for the selected cell or range. This has saved me so much time from using the longer route of setting a name from the Name Manager tool.
Where Can I Find the Name Box?
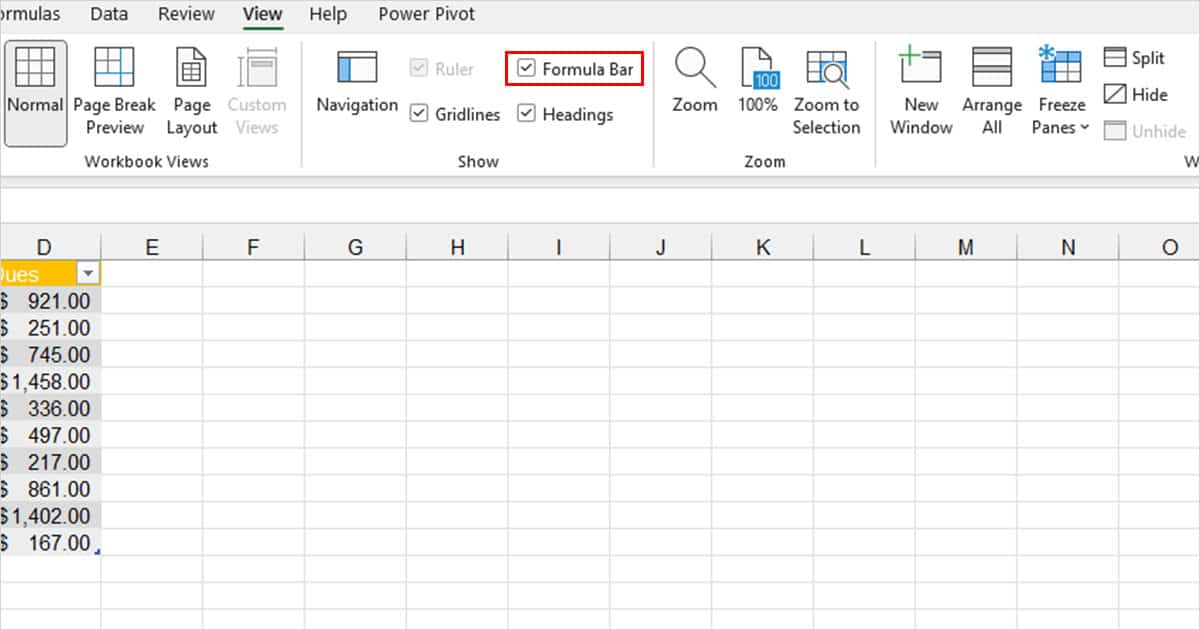
The Name Box is in the formula bar in Excel. You can access the Name box in the top-right corner, next to the formula bar in Excel. Until you haven’t disabled the formula bar from your sheet view, the box will automatically be available for you to use. If you have disabled your formula bar, follow these steps to bring the toolbar back on display:
- From the menubar, head to View.
- Select the box next to Formula in the Show section.
How to Use Name Box
You can use the Name Box as a tool for selection, naming the selected range, and navigating around cells and ranges throughout the sheet. In this section, we will be showing you all the tool’s applications.
Select One or Multiple Cells/Ranges
The Name Box is an excellent selection tool. You can select any cell or range inside the sheet with the tool. Additionally, the range can be a row, a column, or both. Here are some of the selections we’ve made using the Name Box to further clarify the concept:
Select Cell A7
Simply enter the name of the cell you want the Name Box to select. The name of your cell begins with the column alphabet followed by the row number. In this example, we are selecting cell A7; which is the cell in column A, row number 7.
Select Cell A12, Cell B12, and Cell C14
What’s interesting about the Name Box is that it can make multiple selections at the same time. All you need to do is enter your cell names and separate them using the comma (,) symbol. Here, we’re selecting cells A12, B12, and C14 using the Name Box as an example.
Select Column C
You can also use the Name Box to select the entirety of a column. To select a column, you will have to enter the column alphabet, the colon symbol (:), followed by the column alphabet again. Here is an example where we’ve selected column C using the Name Box.

Select Row 5
Similar to selecting a column, you can also select a row using the Name Box in Excel. The syntax for entering the row value is also similar to entering a column value. All you have to do is enter the row number, the colon symbol (:), followed by the row number. Take a look at how we’ve used the Name box to select row 5 in our spreadsheet:
Select Row 3 and Column A
Just as we selected multiple cells, we can also use a comma as a separator to select multiple rows and columns at the same time. Here’s an example of us selecting row 3 and column A at the same time using the name box.
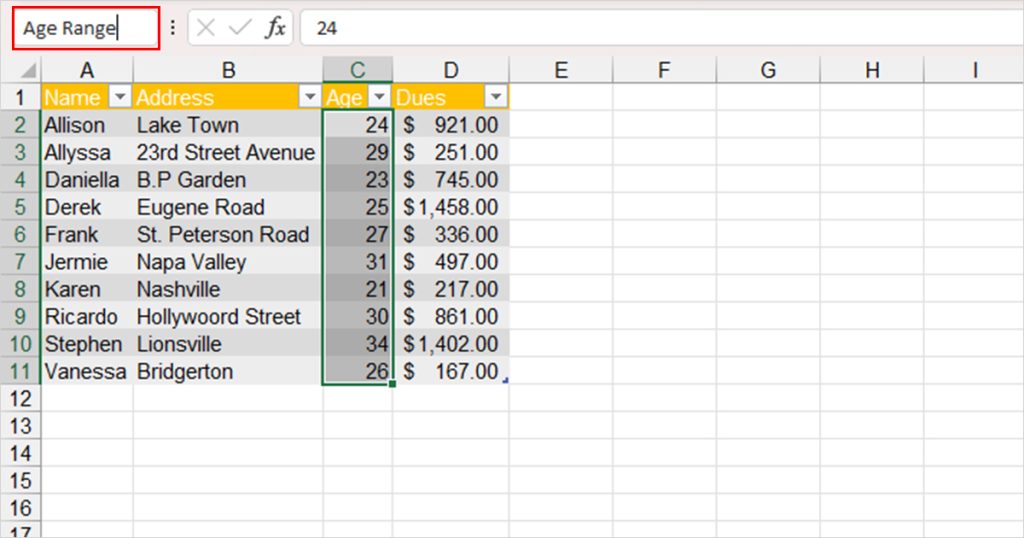
Name your Cell or Cell Range
I mostly use the Name Box to name my selected cell or range. Naming the range from the Name box is basically a shortcut from the longer route of accessing the Name Manager tool from the Data ribbon.
To give your range a name, select your cell or range from the spreadsheet. In the Name Box, enter the name you wish to give your cell or range. That’s it! Just like that, you have created a named range using the Name box!
You can then use the named range in any formula while specifying a range.
Locate a Named Range from the Cell
While analyzing a spreadsheet, you may see some named ranges references in formulas. While you can see the references from the Name Manager tool in the Data ribbon, you can also enter the name of the range in the Name Box and the tool will locate it for you.
- Select the fly-out menu in the name box.
- Choose the named range you wish to locate.
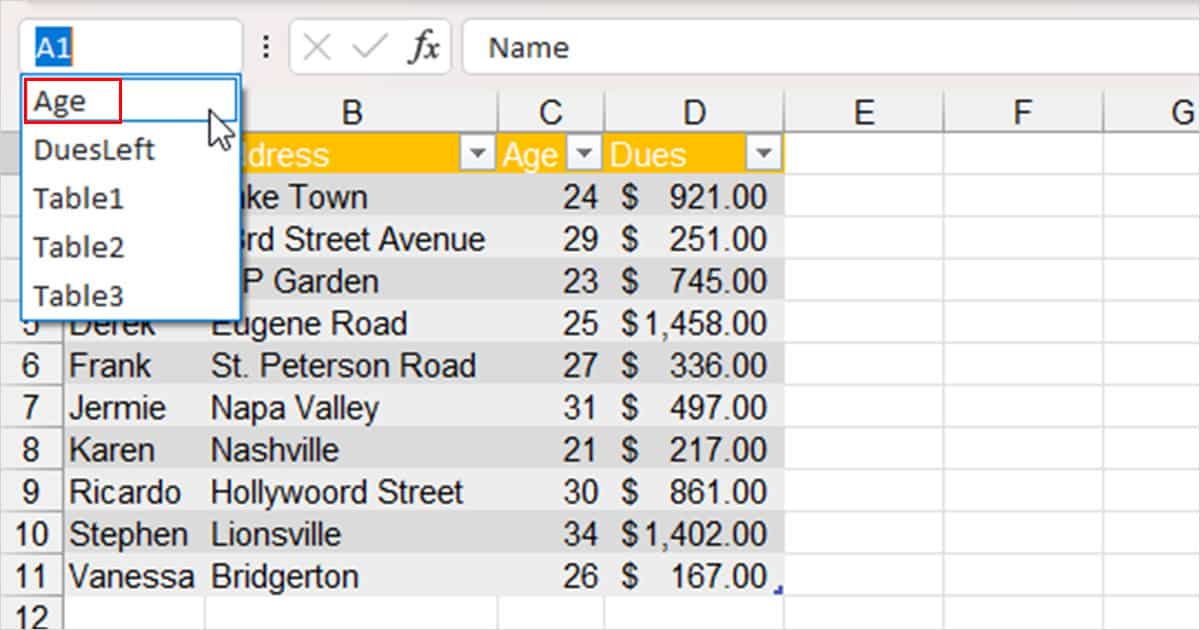
Once you select your range, Excel will automatically select the cells that fall under the Named Range.
Expand or Shrink the Name Box
One thing about Excel that I find really impressive is the customizability it offers. You can increase the width of the Name box from the formula bar. However, if you expand your Name box, note that this will shrink the Fx bar where you can enter your formula.
Place your cursor on the edge of the Name Box. When the cursor changes, drag the cursor and drop it to the position where you want to expand the Name Box. You can shrink the Name Box using the same drag-and-drop technique.