Before printing an Excel worksheet/file, whether electronically or in the actual paper, it’s better to review various print options such as margins to get the desired print output.
While margins are just the small gaps/spaces around your Excel data, they somewhat determine how the page is going to look and what part of the data is included while printing. And, sometimes you may even be explicitly asked to use a particular margin for a report format.
Using the Print Options
With this method, you can view all the print-related settings at once. Also, you can preview the page while adjusting the margin at the same time.
- Click File and select Print from the sidebar.
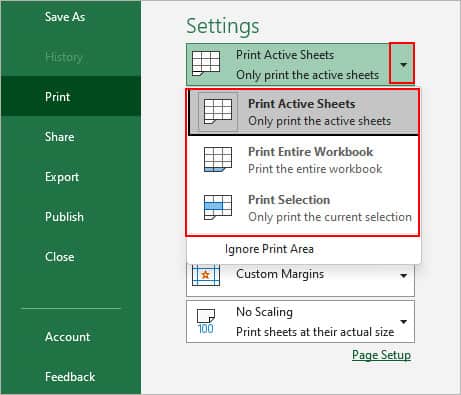
- By default, the margin settings will be applied to a single active worksheet only. So, select one of the following options under the Settings section for various options.
- Print Active Sheets: Preview the page layout of every selected worksheet
- Print Selection: Preview the page layout of the selected area of the worksheet
- Print Entire Workbook: Preview the page layout of all the worksheets of the open file
- Additionally select other preferred page layouts options like page orientation, scaling size, and paper size according to your preferences.
- Now, to adjust and set the preferred margin size, click Normal Margins and choose one of the pre-defined options; Wide and Narrow. If you have previously modified the margins, you will see the Last Custom Margins Setting option instead.
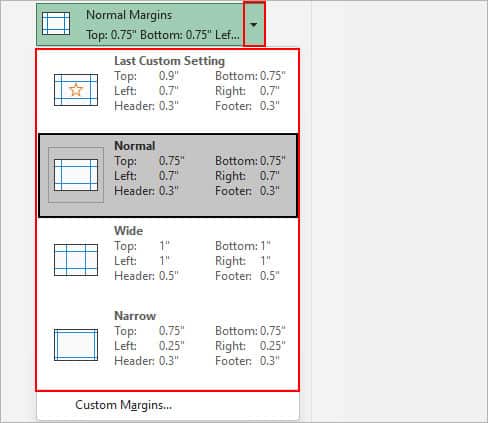
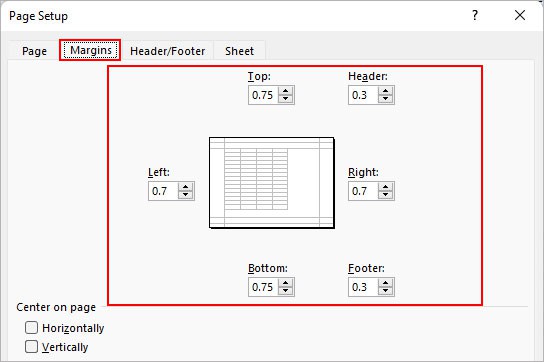
- To set a custom margin, select Custom Margins. Then, set different margin sizes for your worksheet page (s).
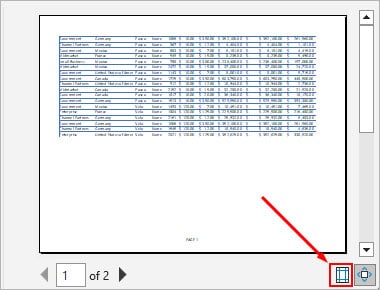
- Alternatively, click the Show Margins icon in the bottom right corner of the Print options window.
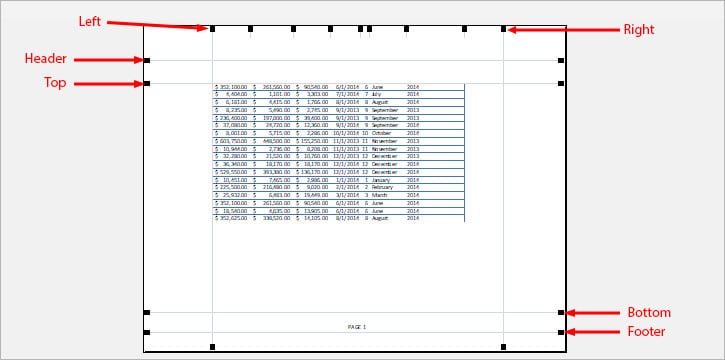
- Then, drag the little black dots to adjust different margins. This way you can preview how the page looks with respect to the changes to the margin size.
- Additionally, you can adjust the cell margin as well.
Note: Avoid setting the header/footer margin greater than the top and bottom margins respectively. Using the Page Layout Tab
Here, you get the same options as in the above method. However, after you change any margin value, you can see the dotted lines indicating page breaks that can help you visualize where each page starts/ends with different margin values.
- Select the worksheet you want to print. To select multiple non-adjacent worksheets, hold the Ctrl key.
- Click Margins under the Page Layout tab.
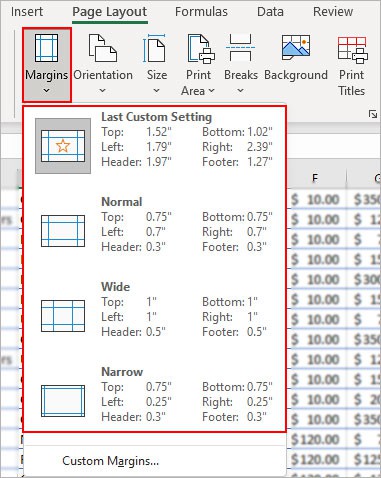
- Then, select the pre-defined option; Wide and Narrow depending upon your preferences.
- Alternatively, click Custom Margins to define a specific margin yourself. On the next prompt, adjust the margin size on the top, bottom left, and right. Also, adjust the header and footer margins if they exist on the page.
Using the Page Layout view
Another way you can adjust margins is to use the Page Layout view. Here, Excel displays rulers in both directions; horizontal and vertical so that it’s easier to know and calculate the exact size of each margin while adjusting.
- Select the View tab from the top bar.
- Enable the Page Layout option. Look for it inside the Workbooks Views section.

- Hover over the Start/End part of the horizontal until the cursor turns into a double-arrow icon.
- Then, drag the towards left, right, top, and bottom depending upon which margin you want to adjust.
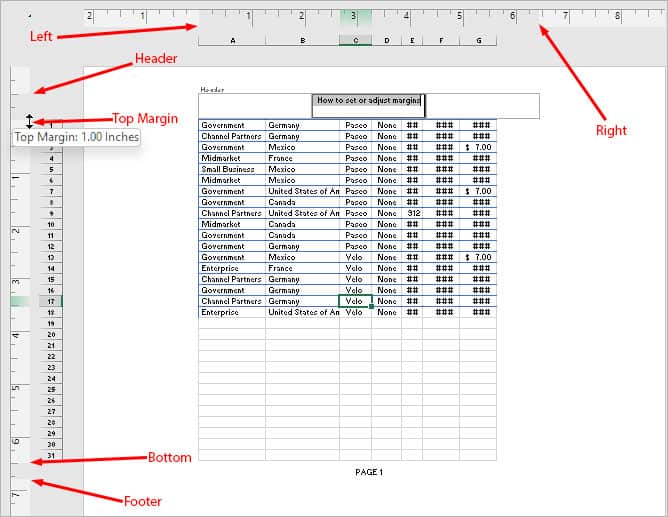
Note: To adjust the Header and Footer margin, you have to select the Header and Footer first.Related Questions
How to Change the Margin Units?
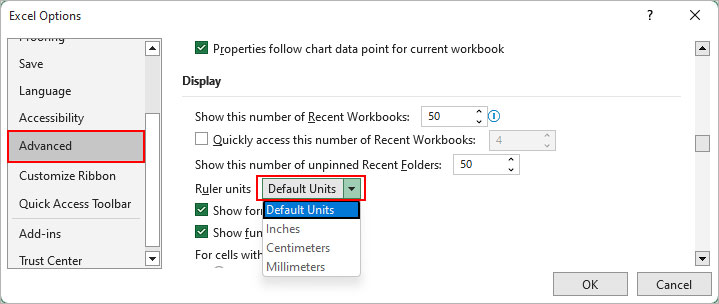
By default, the margin settings are in terms of inches. But, you can choose other units such as centimeters or millimeters as follows.
- Navigate to File > Options.
- Select the Advanced tab in the sidebar.
- Then, in the right pane, scroll down to the Display section.
- Select another unit using the dropdown next to Ruler units.
