You can store all kinds of data in Excel, even a to-do list! Excel allows you to insert checkbox that you can mark once a task is completed.
In this article, we’ve gathered the three types of checkboxes in Excel. These include interactive checkbox, static checkbox icons, and even drawing in your checkbox.
Create an Interactive Checkbox
Excel offers two control, the Form Control, and the ActiveX Control to insert interactive checkbox in your spreadsheet. You can access these controls only on the Developer tab so make sure you’ve enabled it from Excel Options.
Insert Checkbox from Form Control
The Form Control options are defaulted in Excel. You can use these controls on both Windows and Mac. As these controls are built into Excel, you don’t have to manually add your file to your computer’s trust center.
Additionally, you have extra control in Form Controls to link a cell with your check box. If your check box is selected, the linked cell will reflect TRUE, while when it is unchecked, the cell will show FALSE.
Insert Checkbox
- Go to the Developer tab.
- In the Controls section, select Insert.
- Under Form Controls, select the checkbox icon.
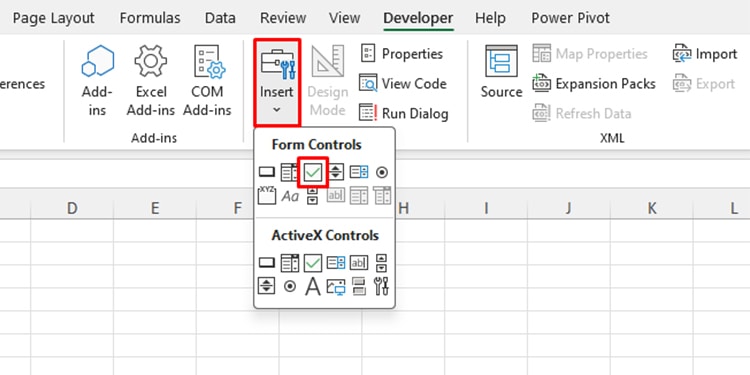
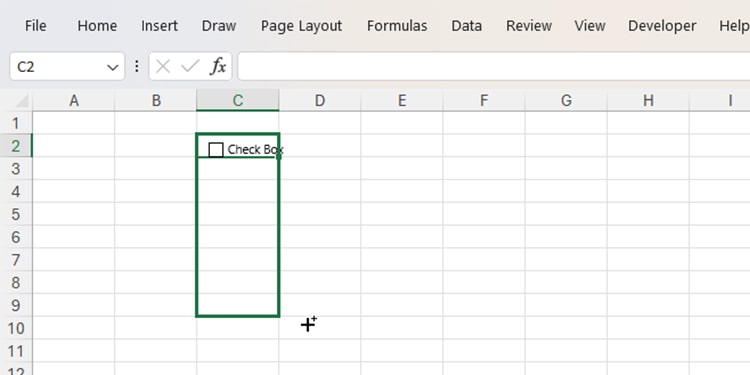
- Drag the handle on your spreadsheet to insert a checkbox.
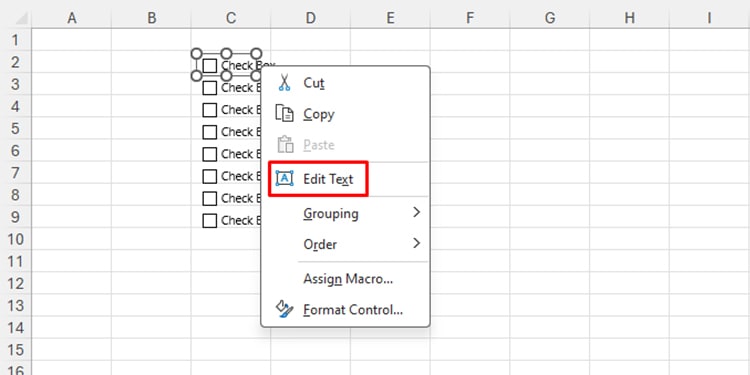
- Use Excel’s autofill to replicate the checkbox.
- To rename, right-click on it and select Edit Text.
Link Checkbox to a Cell
- Right-click on a checkbox.
- Select Format Control.

- Switch to the Control tab.
- Next to the Cell Link section, reference the cell you wish to link.

- Click OK.
Use Linked Cell in a Formula
You can use this linked cell with functions like COUNTA, COUNTIF, or even lookup functions! For my grocery list, I use the COUNTIF function and VLOOKUP to keep tabs on my list of items.
To make counts of your purchased items, use the COUNTIF function in the following formula:
=COUNTIF(C4:C10,"TRUE") // counts checked boxes
=COUNTIF(C4:C10,"FALSE") // counts unchecked boxes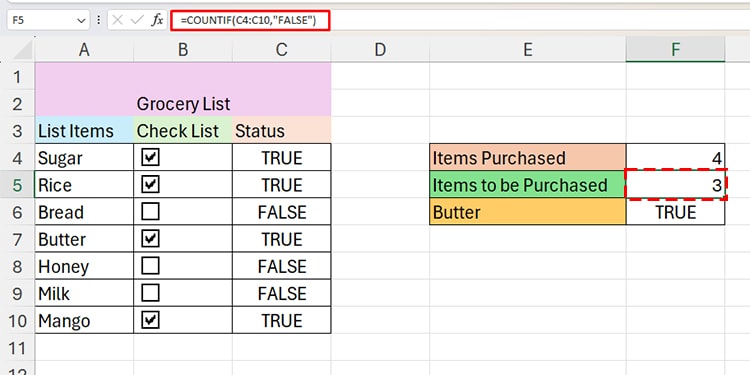
Similarly, use VLOOKUP to see if you’ve purchased a specific list item using this formula:
=VLOOKUP(E6,A3:C10,3,0) // TRUE indicates checked box, FALSE indicates unchecked box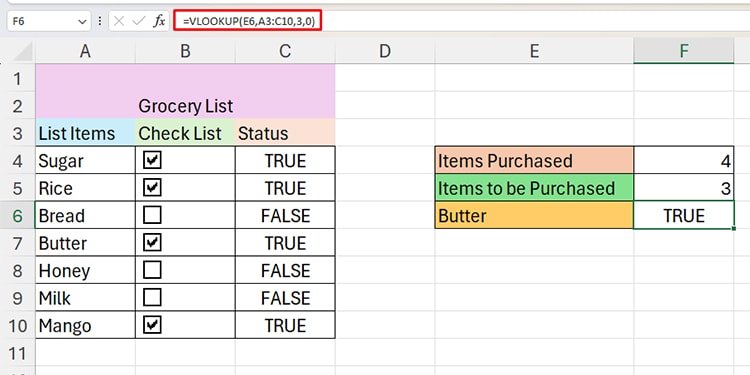
Insert Checkbox Using ActiveX
The ActiveX control is another way you can insert interactive checkbox in Excel. What differentiates ActiveX from Form Controls is that it is highly customizable. If you’re familiar with the Visual Basic code, you can make modifications as you wish.
The downside to ActiveX is that it is not available for Mac users. Additionally, you might have to manually trust the spreadsheet that has an ActiveX control. Therefore, if you’re looking to share your spreadsheet, make sure the recipient users are aware of these configurations.
Insert Checkbox from ActiveX Control
- Go to the Developer tab.
- Select Insert.
- Under ActiveX, select the checkbox icon.
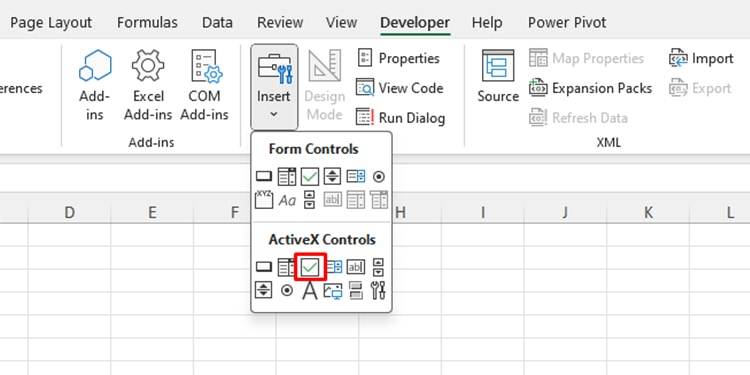
- Drag the handle to insert your checkbox.
- Use Autofill to copy-paste your checkbox.
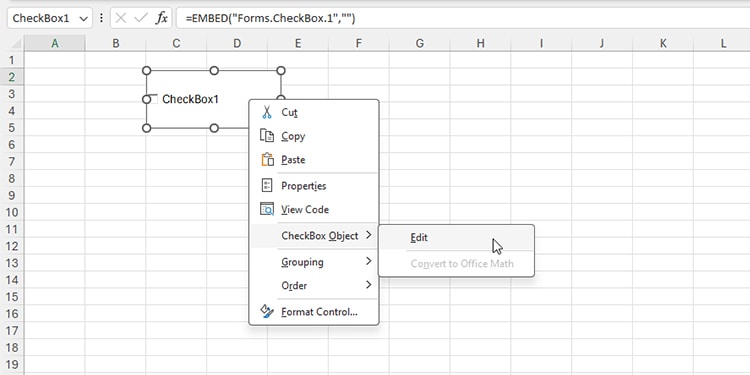
- To rename the checkbox, right-click on it
- Go to Checkbox Object > Edit.
Use Checkbox
Selecting the checkbox from ActiveX control looks a bit different than Form Controls. You will see that, when selecting the checkbox, instead of a check mark, your object gets selected.
To insert a checkbox, you will first have to exit the Design Mode.
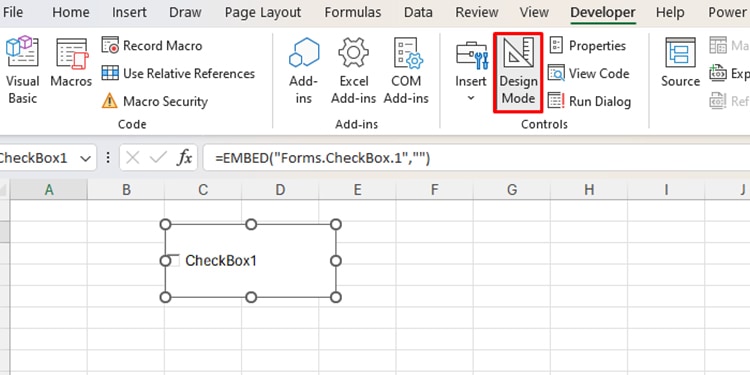
After you’re done inserting the checkbox, exit design mode by clicking on the Design Mode option from the Controls section. Once you’re out, you can click on the empty box to check your box.
Draw in Your Checkbox
This method will be especially handy if you like using Excel on a touch-screen device.
Although inserting checkbox using Excel’s controls is great, nothing beats the feeling of checking lists with pen and paper. You can replicate this experience by drawing in the check marks in boxes in Excel!
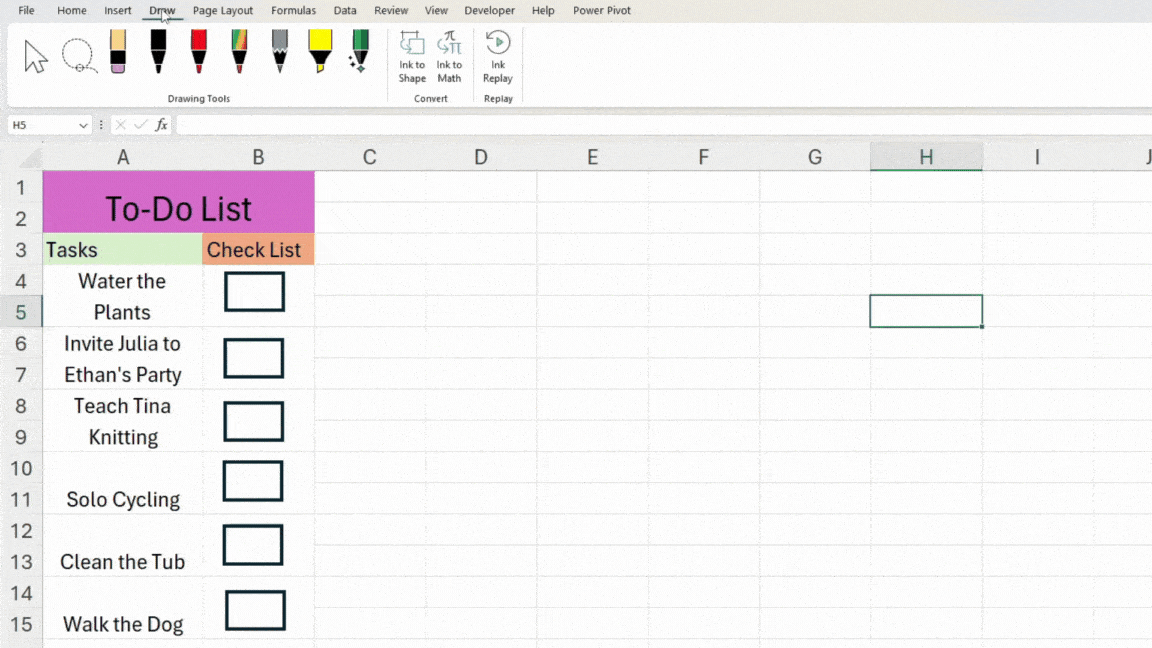
We will first create boxes in the spreadsheet and use the Draw ribbon to draw in our check marks.
Step 1: Enable the Draw Tab
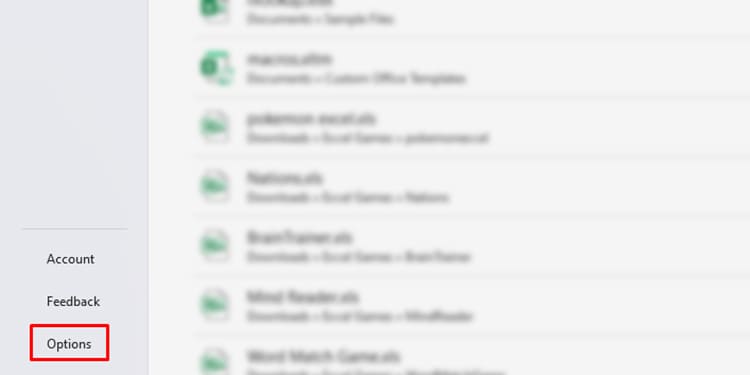
- Go to File > Options.
- Head to Customize Ribbons.
- Under Main tabs, enable Draw.
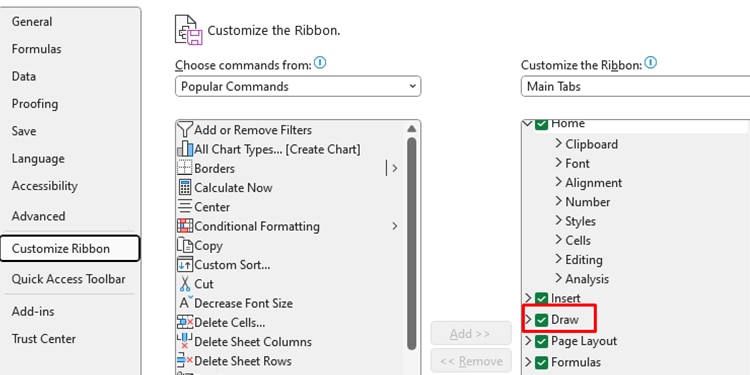
- Click OK.
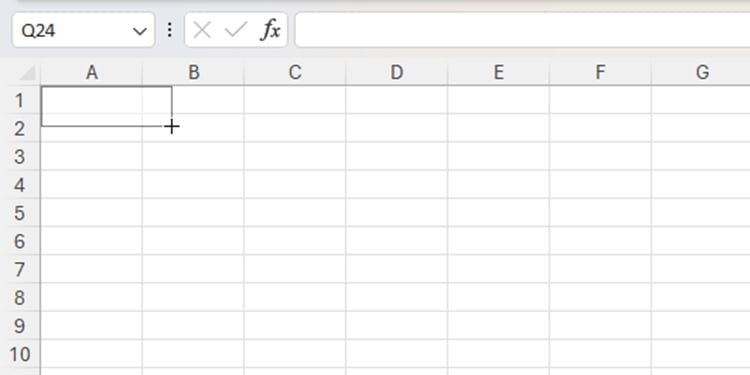
Step 2: Create Boxes
- Go to the Insert tab.
- Select Shapes.
- Choose the rectangle and place it on a cell.
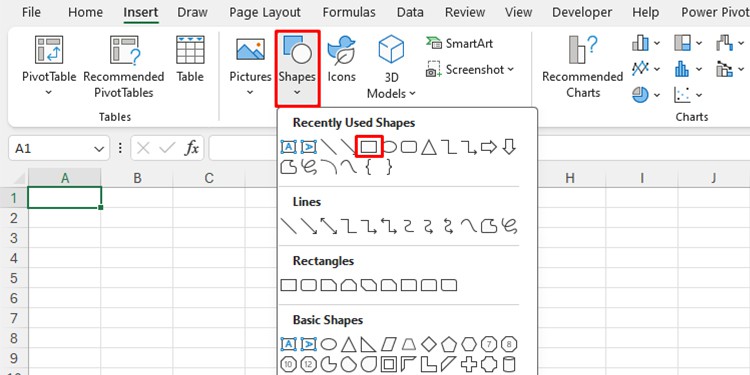
- Use Autofill to replicate the shape.
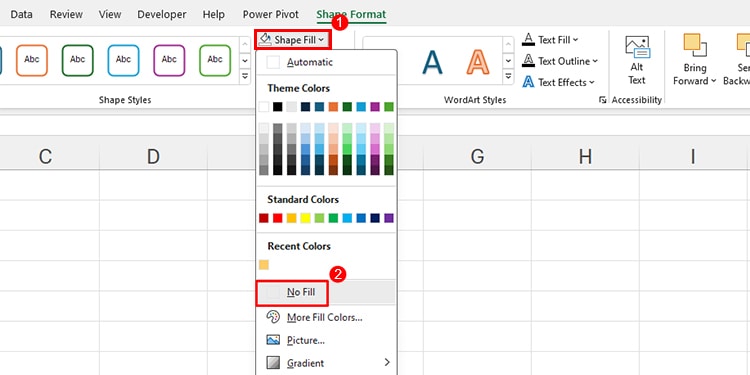
- Select the rectangle then go to Shape Format.
- In Shape Styles, click on Shape Fill > No Fill. To apply this to all of your shapes, select a rectangle, hold Ctrl then select other shapes. Then, apply this formatting.
Step 3: Draw the Check Mark
- Go to the Draw tab.
- Select a pen.
- Use your mouse to draw the check marks.
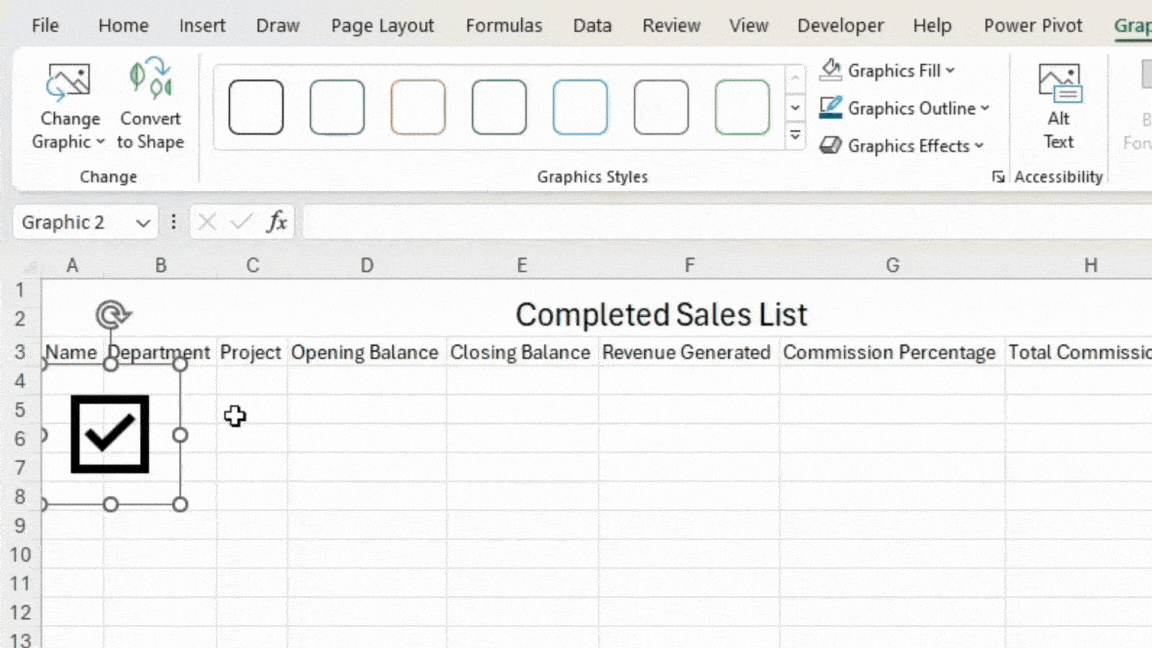
Insert Static Checkbox
If you’re looking to insert checkbox purely as a decorative element, you do not need to go through the hassle of creating interactive checkbox, or even drawing them. Instead, you can insert static checkbox as an icon.
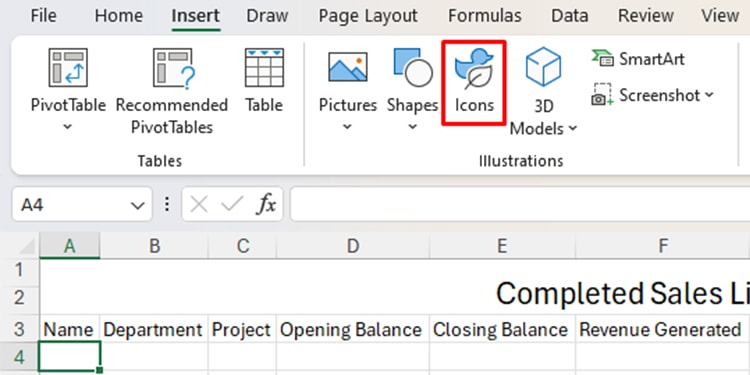
- Go to the Insert tab.
- Select Icons from the Illustration section.
- Type in Checkbox and hit enter.
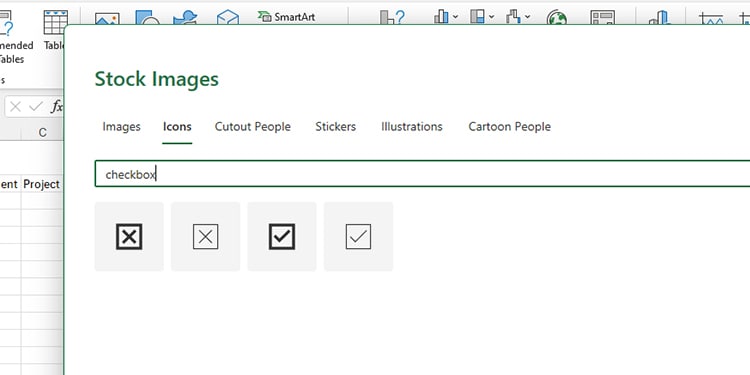
- Choose an icon and click Insert.
- Place your checkbox in your spreadsheet as you wish.