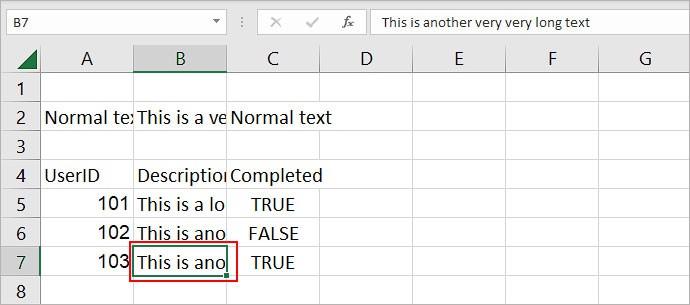
By default, the width of every Excel column is 8.43 characters. So, whenever you have a value that’s too long to fit inside a cell, Excel hides the remaining text, given that the cell right next to it isn’t empty or give you #### error.
While you could make such a text visible by adjusting the column width, the problem with doing so is that all other cells below it also take up the same column width.
Therefore, a better approach is to wrap the text into multiple lines, maintaining the same column width. Additionally, you can add line breaks too.
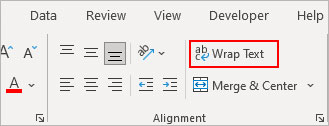
Using the Wrap Text Option
- Select the cell (s) whose texts are cut off. To select non-adjacent cells, use the Ctrl key.
- Click Wrap Text under the Home tab. Look for it inside the Alignment section.
Using Shortcut Key
- Select the cell with the long text.
- Press the Alt + H + W key.
Add a line break
While the long text becomes visible after using the Wrap Text feature, it might still be crammed. So, to make the text more readable, you can enter a line break and add some spacing between the lines.
- Double-click the cell with such text.
- Place the cursor where you want to insert a line break.

- Press Alt + Enter.