If your Excel data range is incomplete, you would not want to print the whole workbook with blank cells in it. Similarly, you might find the need to print only a selected area in your document if the rest contains private information.
In such cases, Excel’s Print Selection option comes in handy to print only the required section of the worksheet. This feature, however, can be tiring if you find yourself regularly printing the same thing from the document. To overcome this, you can set that area as your Print Area.
When you set a Print Area, Excel will choose only the set area in the worksheet for printing. This way, you can spare yourself from the lengthy process of making a selection each time you print your document.
Method 1: Set Print Area
When you choose particular cell ranges for printing, it will be the Print Area. Setting up a Print Area will only be useful if you print the fixed parts of the worksheet regularly.
There’s a default Set Print Area option in Excel Ribbon. Let’s check out the steps for it.
- Open Excel.
- Go to your Workbook.
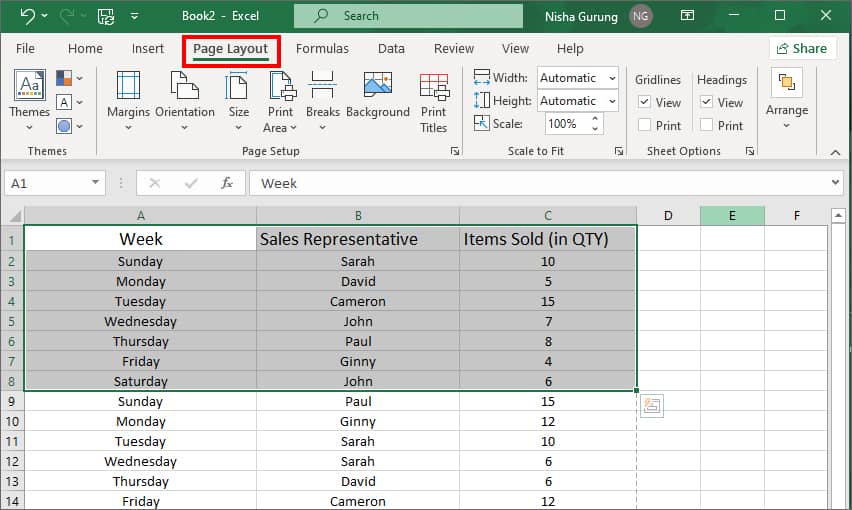
- Highlight the Cells you want to print. Then, Navigate to Page Layout tab at the top.
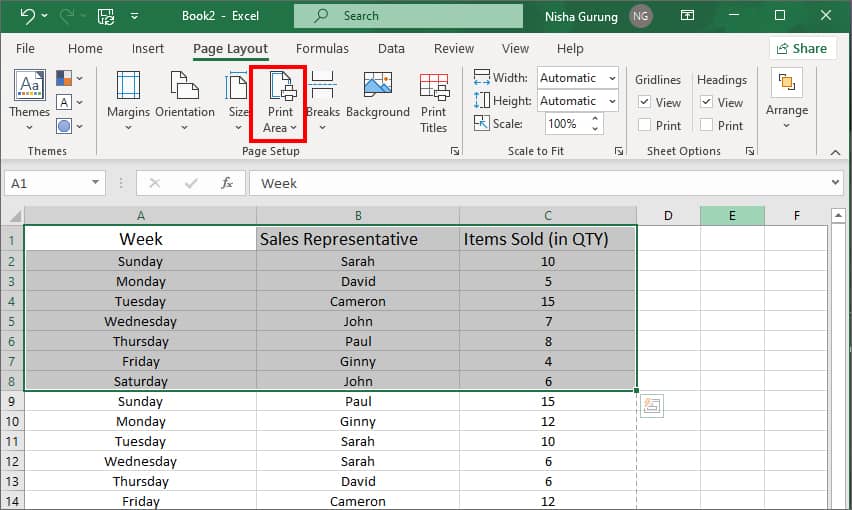
- Click on Print Area.
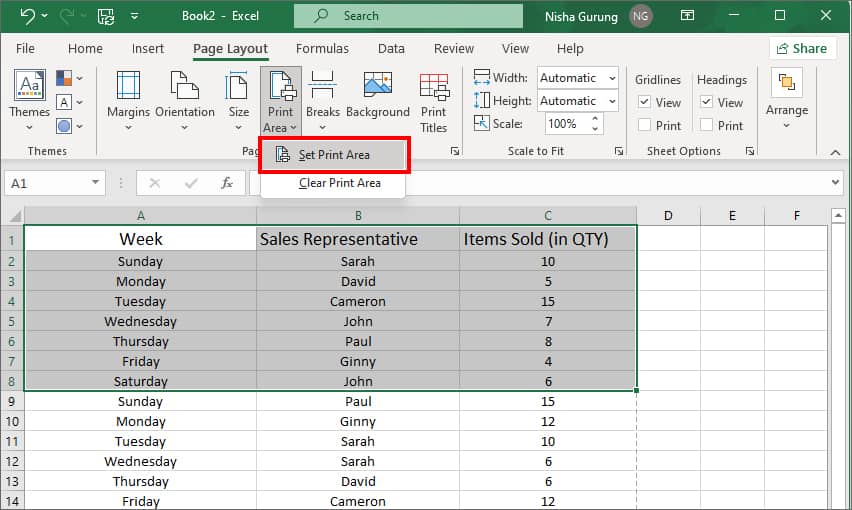
- Choose Set Print Area.
Alternatively, you can also use a shortcut to set a new Print Area on your worksheet. Highlight the cell range and press Alt + P + R keys together. Then, hit the Enter key.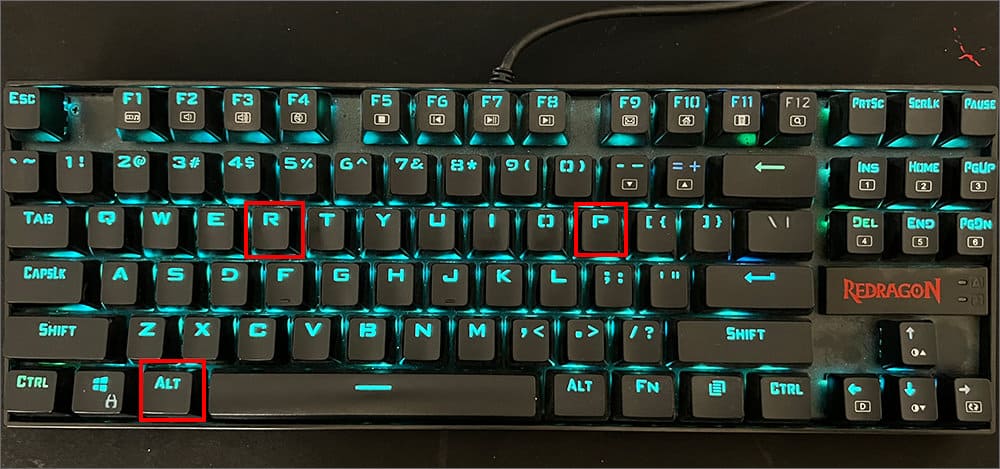
Method 2: Using Page Setup
While you can set up a new Print Area using the default option, it does not offer customizability. If you wish to customize your selection, you can use the Page Setup to make it presentable.
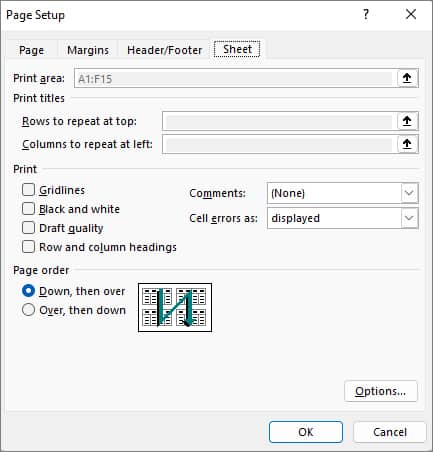
You can find Page Setup in Page Layout of the menu bar. The Page Setup consists of four tabs – Page, Margins, Header/Footer, and Sheet. You can use one of these tabs to design your page. But, since we are adding a Print Area, we will only refer to the Sheet Tab.
- Launch Excel.
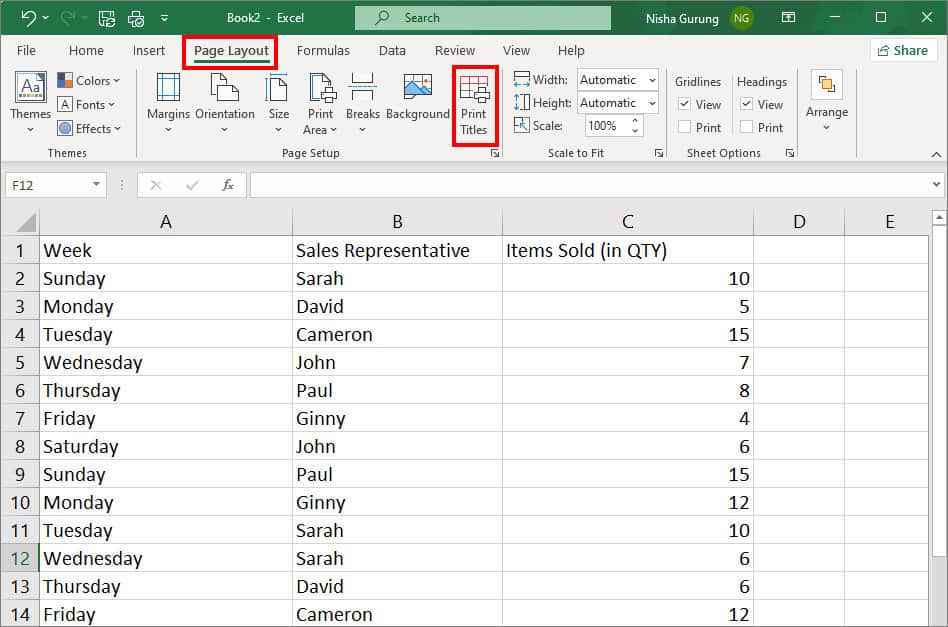
- On your workbook, go to Page Layout > Print Titles menu.
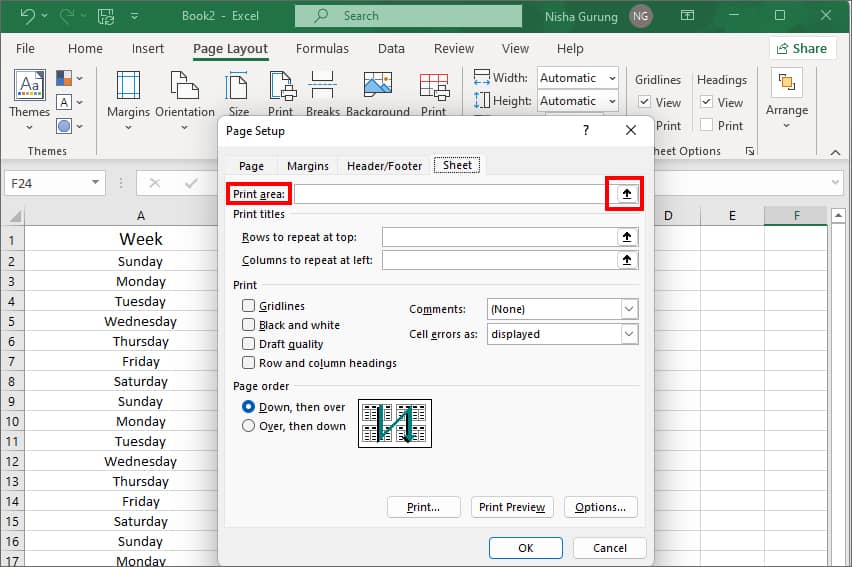
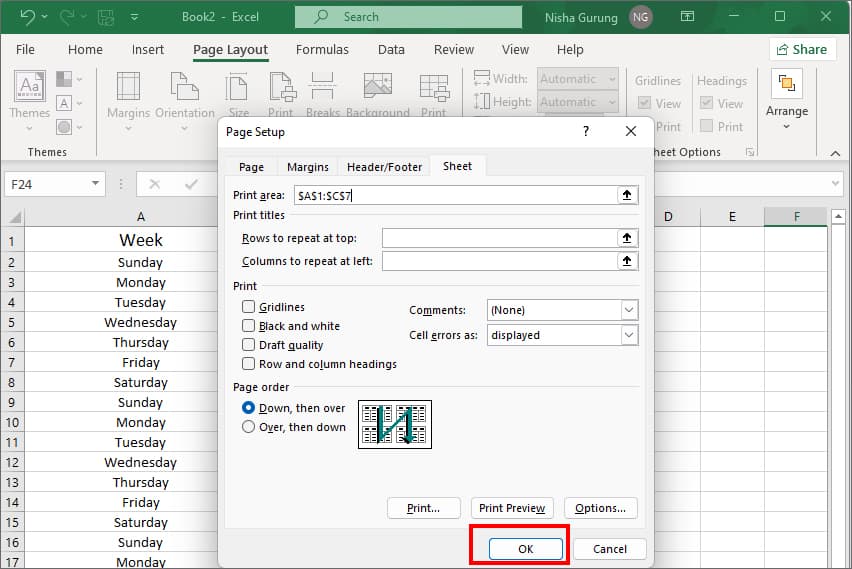
- On Sheet tab, next to Print area menu, click on Up Arrow icon.
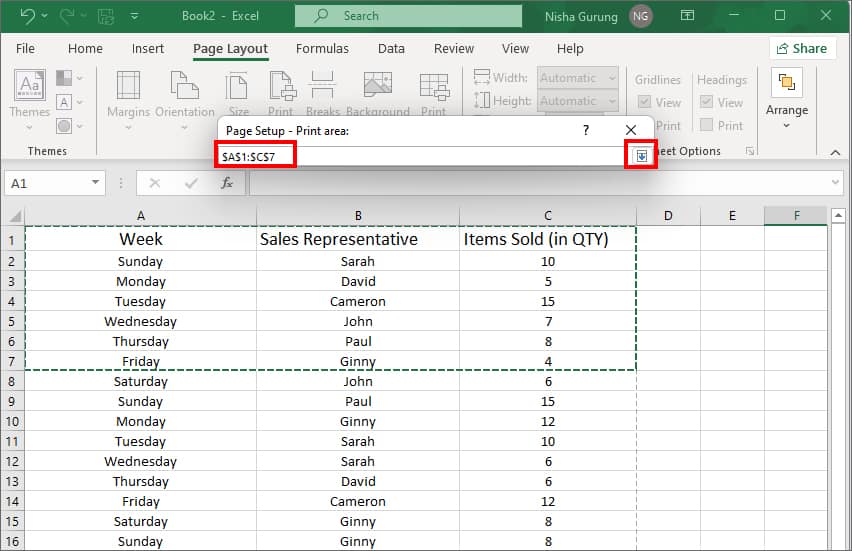
- Highlight the cells you want to print. Then, click on Down Arrow to exit.
- Click OK.
After creating Print Area, you can Repeat Columns or Rows to increase data readability. When the data is large, the print area of your worksheet spans. So, the second page may miss out on information that was on page one.
For example, the A1:E19 cell range is your Print Area. While printing, A1:C19 is on page 1 and D1:E19 is on page 2. But, there can be times when you need A1 data on the second page as well. 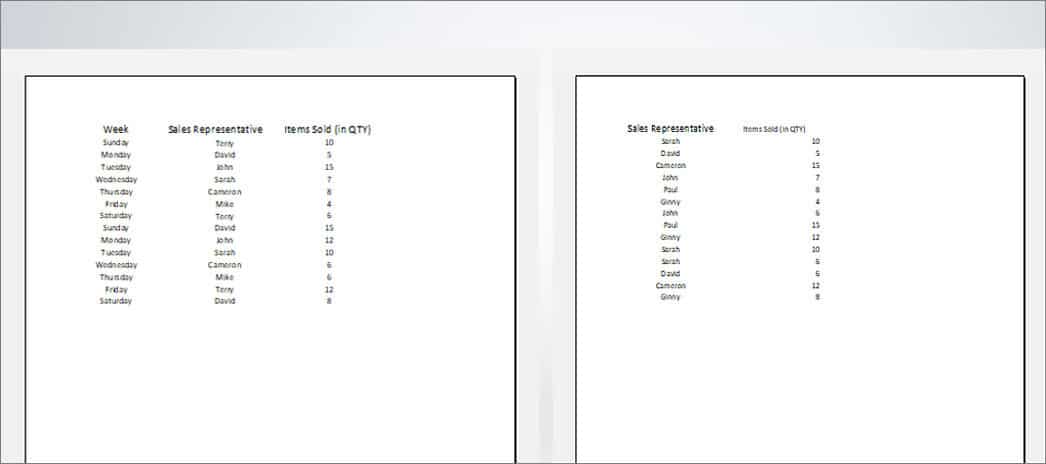
For this, simply hover over the Print Titles menu and click on Sheet Tab. To add the A1 column on page 2, click on Up Arrow Icon next to Columns to repeat at left and highlight the column.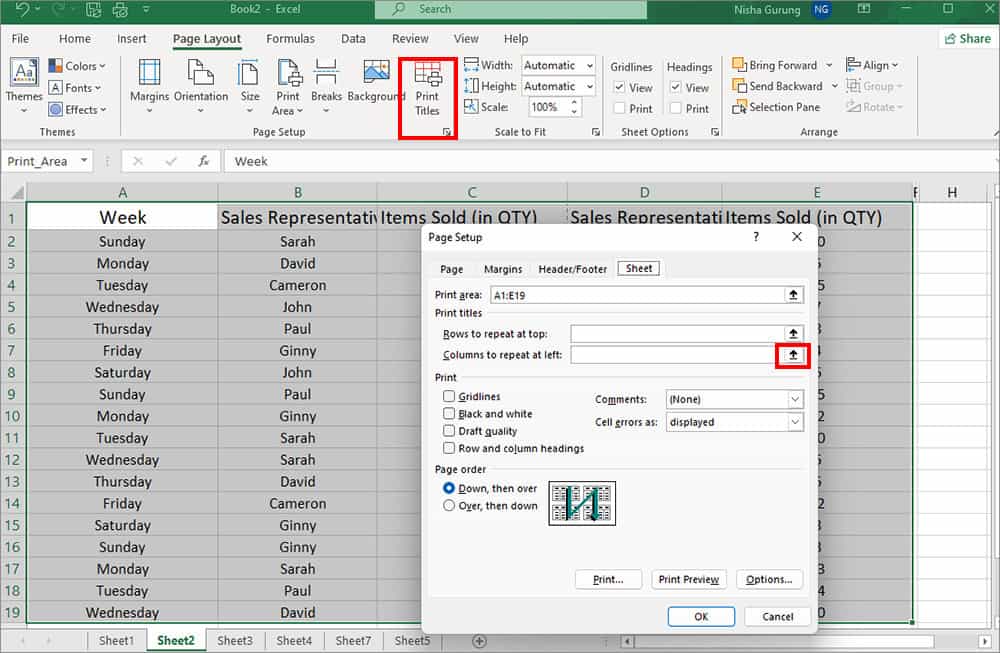
You can also take a look into the Print option to adjust your Draft Quality, colour, comments, headings, cell errors. Once you are done with editing, click OK button to apply changes.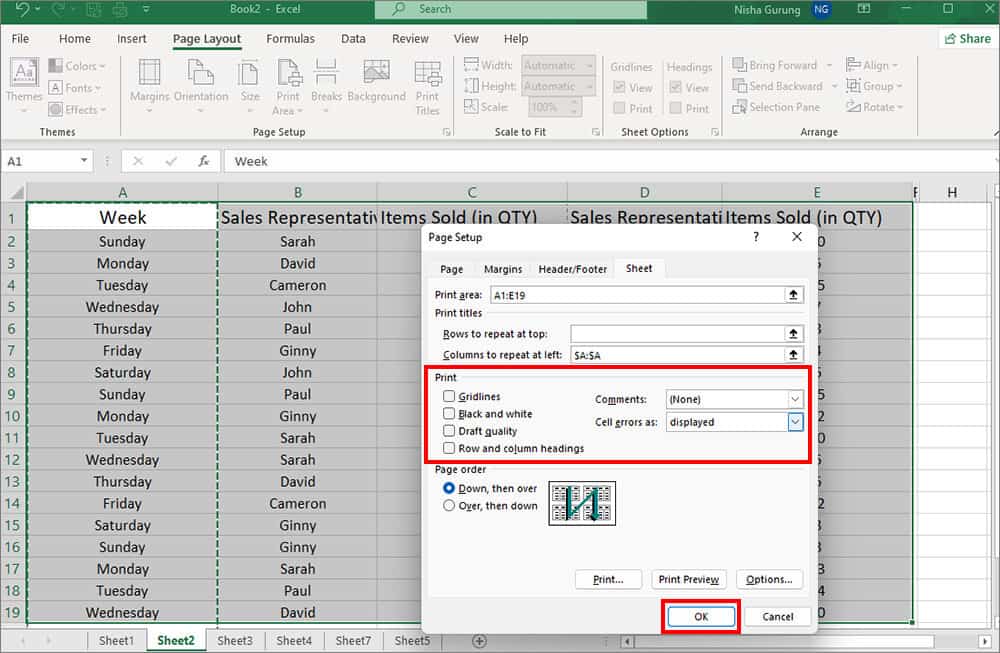
Method 3: Hide Rows or Column
While creating a Print Area, you highlight all cells within a part of the spreadsheet. But, what if you do not want some cell ranges within the area to be printed?
In such case, you can hide columns or rows within the Print Area. This way, you can skip some ranges to print without deleting the data.
We have provided an example to hide rows below. You can follow the same steps to hide your preferred cell and print them.
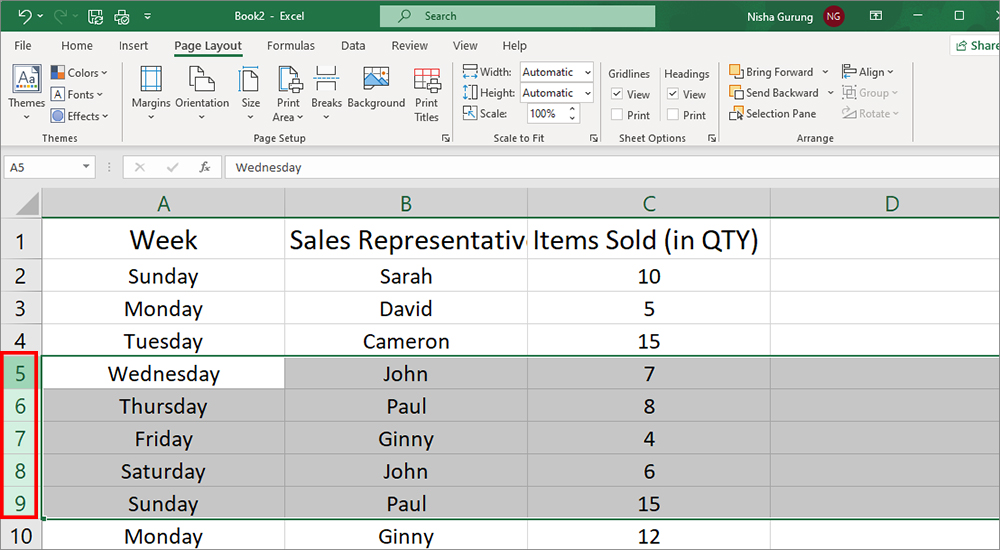
- Firstly, hover over the Rows number on the left panel.
- When you see a black arrow, use it to Select a row. Then, Drag down the arrow to highlight other rows.
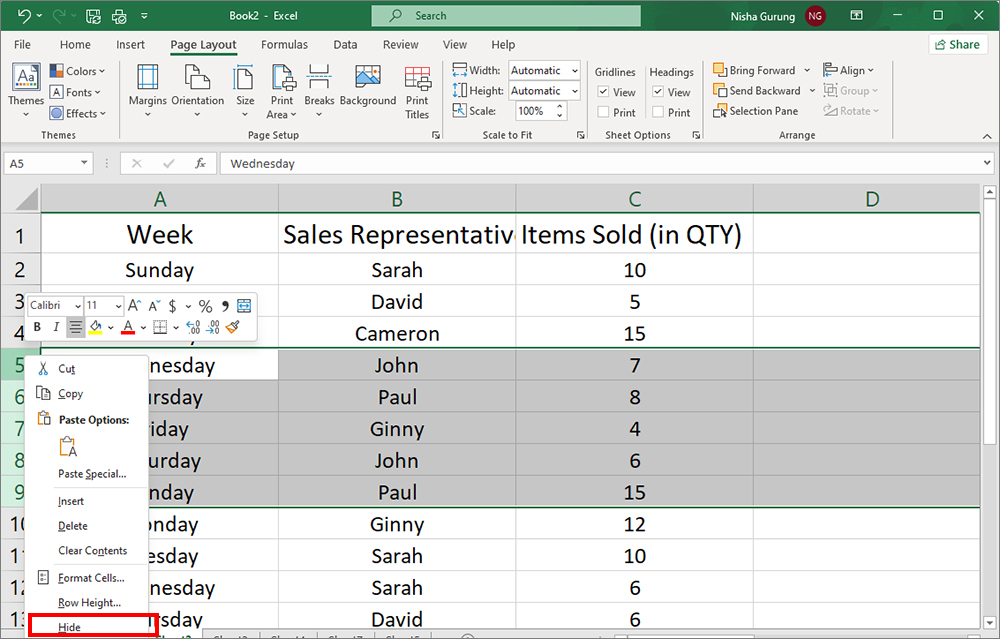
- Now, right-click on the Rows and choose Hide.
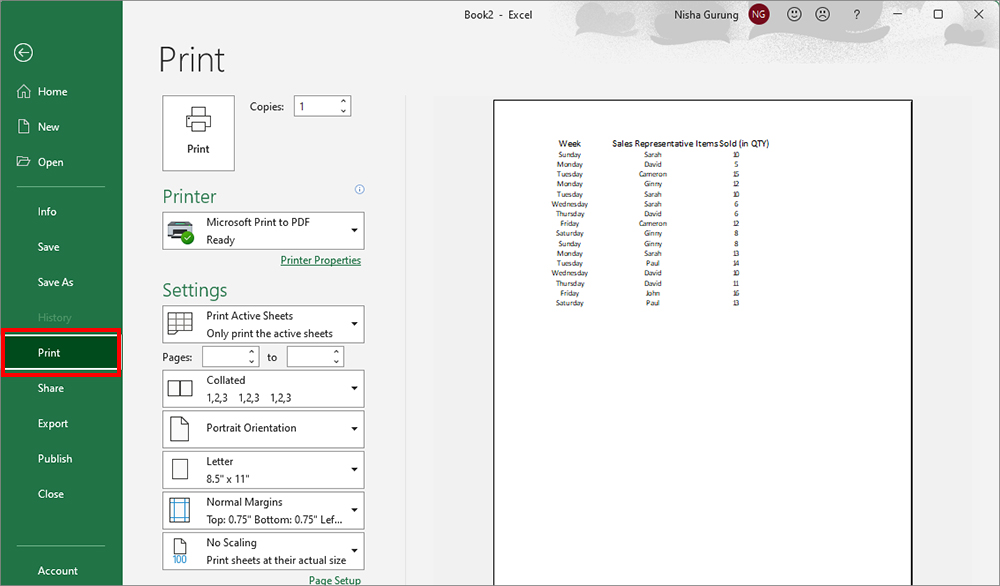
- Go to File > Print.
Method 4: Ignore Print Area
Each time you print a document, Excel will automatically designate the Print area. But, there can be times when you would want to print other areas of your worksheet.
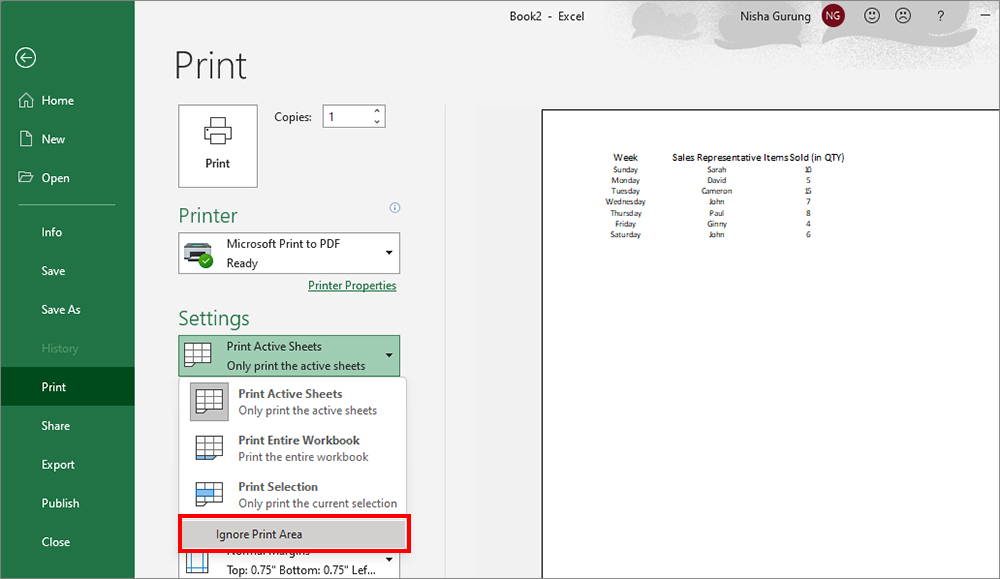
During such instance, you can choose to Ignore Print Area while printing. In this approach, we are just ignoring the Print Areas and not removing them. So, you can have your Print Area back again.
- On your Excel, open the workbook with Print Area.
- Navigate to File Tab > Print.
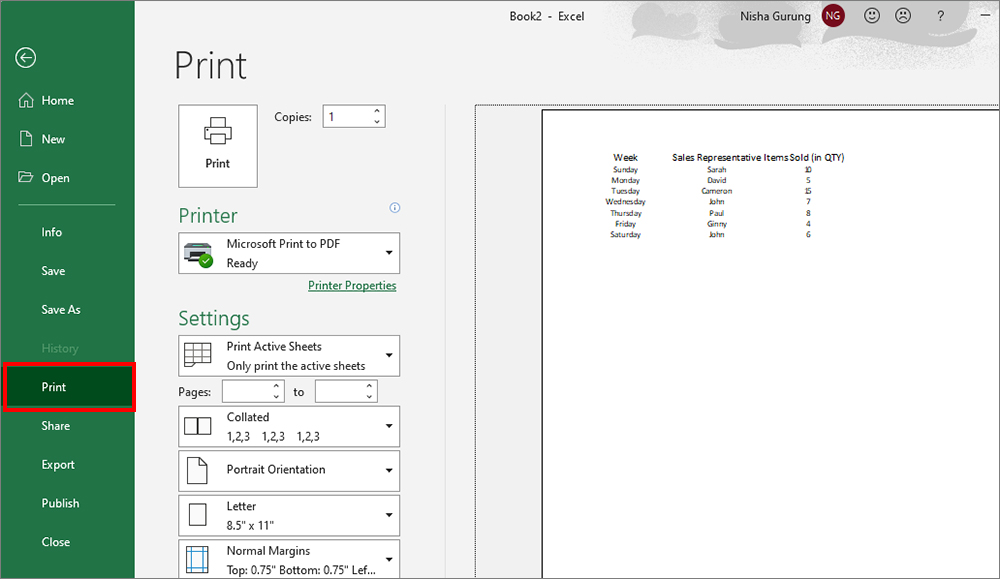
- Under Settings, pick Ignore Print Area.
How to Format Specific Print Area?
Extend Print Area
You can add additional cells to your existing Print Area in Excel. This will save you from creating a separate Print Area whenever you add data on your worksheet.
However, this method will work only if you add adjacent cells i.e. cells closer to your last print area. In case the cells are not adjacent, Excel will print them on a different page.
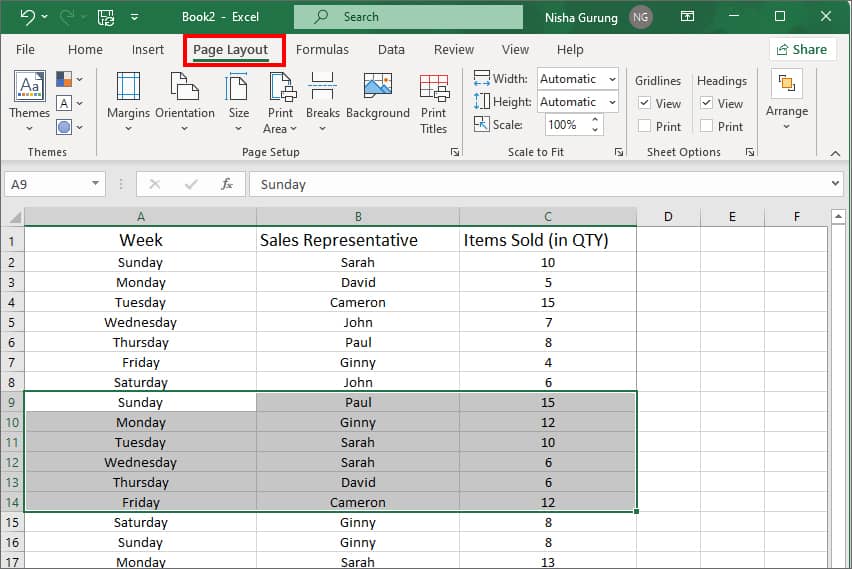
- On your worksheet, select a new set of Adjacent cells.
- Go to Page Layout Tab.
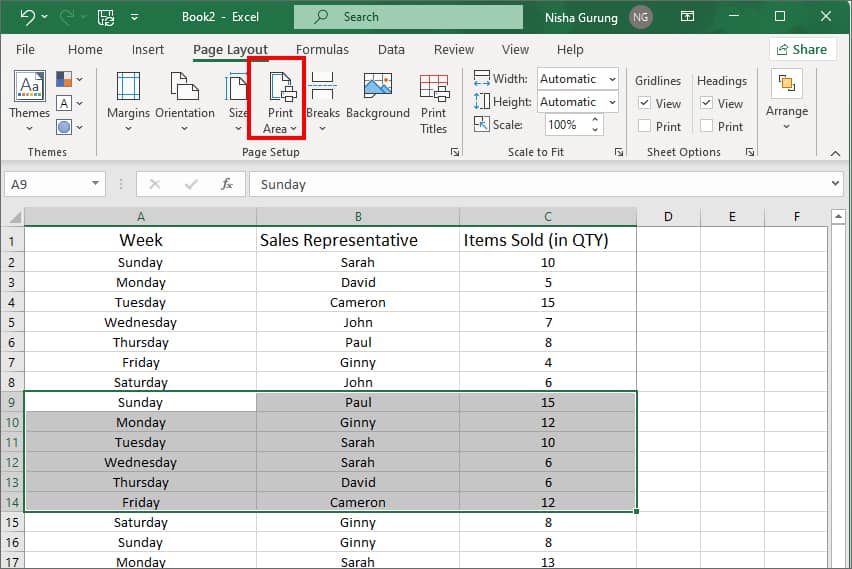
- Click on Print Area.
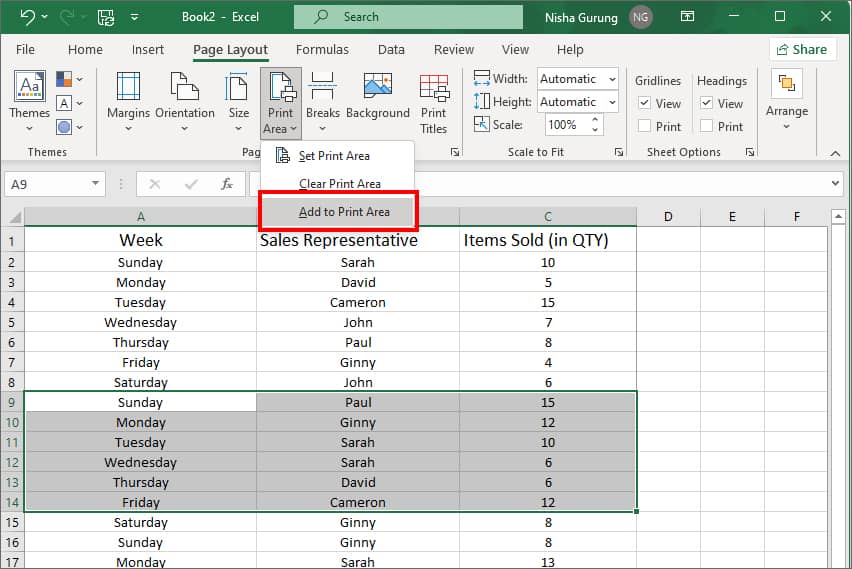
- Pick Add to Print Area.
Adjust Print Settings
For Print Area to work, the Print Settings should be on Print Active Sheets. If the option is set to another option, Excel will print a different sheet. To check this, you can navigate to File tab > Print. Then, adjust the settings if needed. You should see a Print Preview on the right side of the screen. 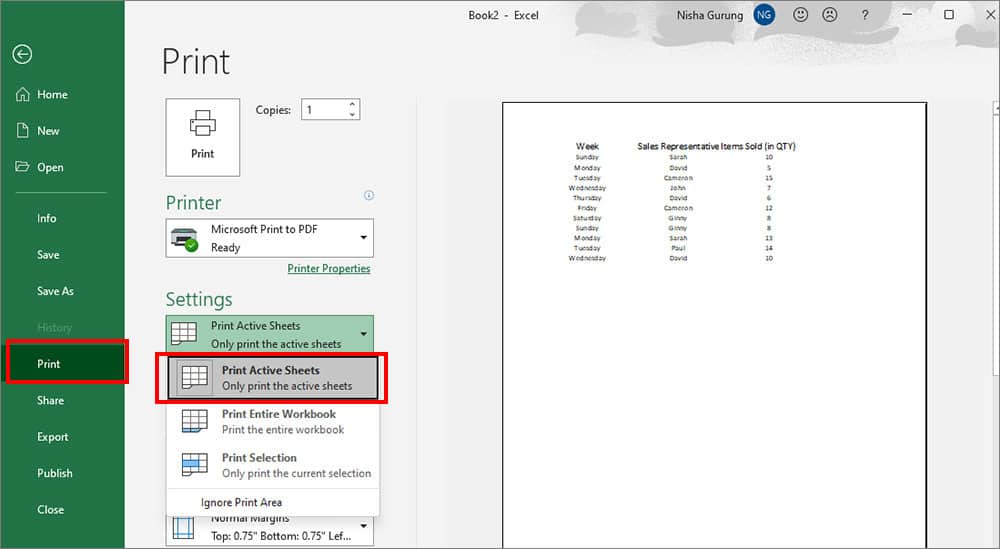
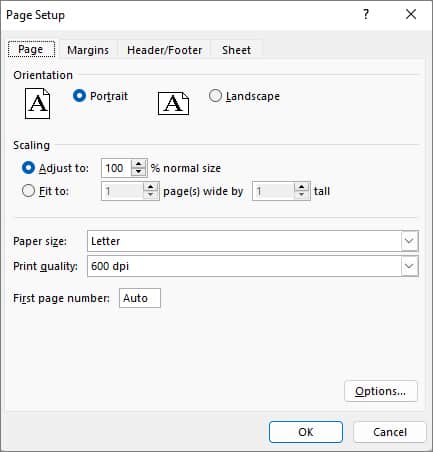
If you want to add more customization to your sheet, click on the Page Setup menu at the bottom of Print Settings. Then, on the Page Setup box, you can go through different tabs to apply formats.
- Page Tab: You can choose the Orientation of the sheet, adjust scaling, paper size, and print quality.
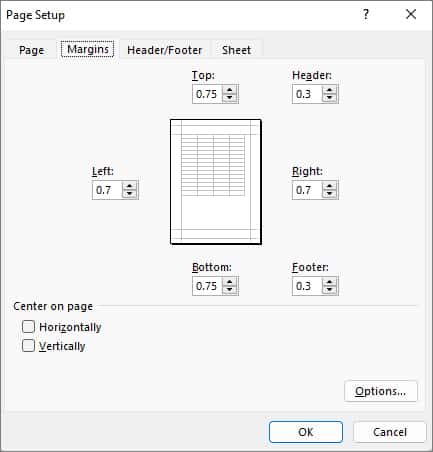
- Margins Tab: This tab allows you to adjust the top, left, right, and bottom margins of your sheet.
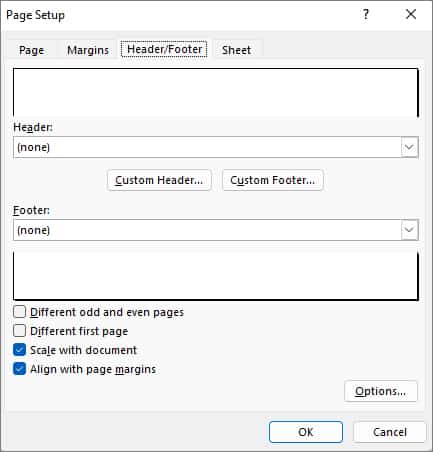
- Header/Footer Tab: Go to this tab if you want to add Header or Footer for your sheet.
- Sheet Tab: You can re-define your Print Area, Print Titles, Page order, etc.
Once you are done, click OK to confirm. Now, your worksheet is ready to print.
Clear Print Area
There’s also a Clear Print Area option if you want to remove the Print Areas of your worksheet. This option will delete all existing Print Areas from your worksheet.
- Launch Excel.
- On your worksheet, click on data Cells.
- Navigate to Page Layout.
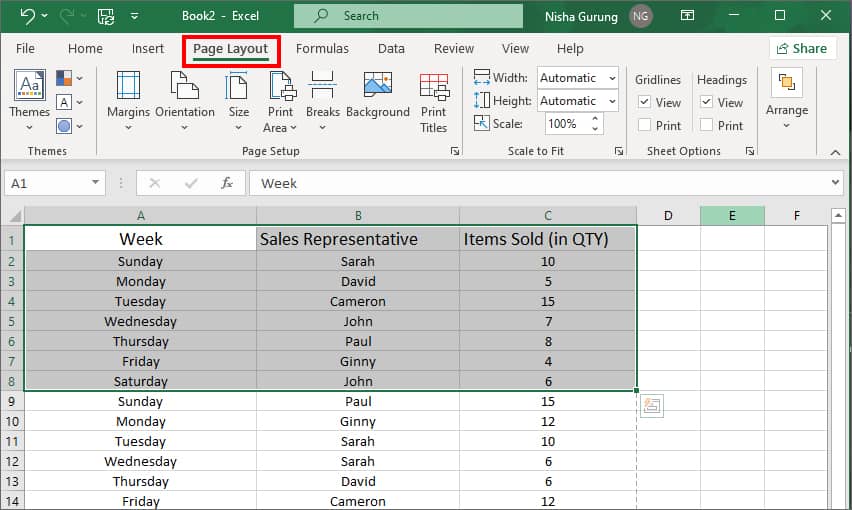
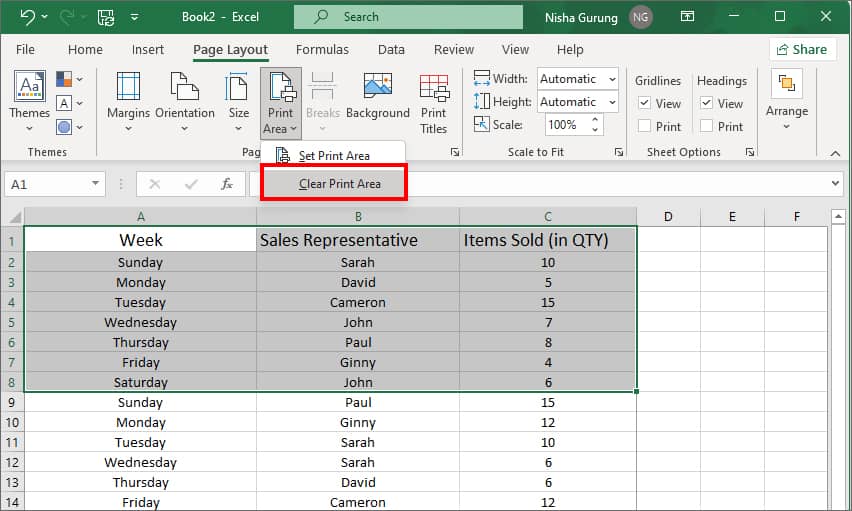
- On Page Setup, go to Print Area menu > Clear Print Area.
