While you can easily send an email to multiple recipients, you may sometimes specifically need to send them individually.
If you are trying to send mass emails to people without exposing recipients to each other, you can use the Bcc option.
In case, you want to send a personalized email to multiple recipients with a few changes like their name, email, address, etc, you can use the Mail Merge feature.
In this article, we go through step by step approach to both these methods for email clients like Gmail and Outlook.
Using BCC to Send Email Individually
As the Bcc field hides the identity of everyone mentioned in it, you can use it to easily send an email to multiple recipients at once. However, unlike the To and Cc fields, it will appear as if the mail was sent to each recipient individually.
So, even if you send the same email to multiple Bcc recipients, they won’t know about each other.
Outlook
- Open the Outlook app.
- Select the Inbox icon.
- Create a new message or open an existing draft email.
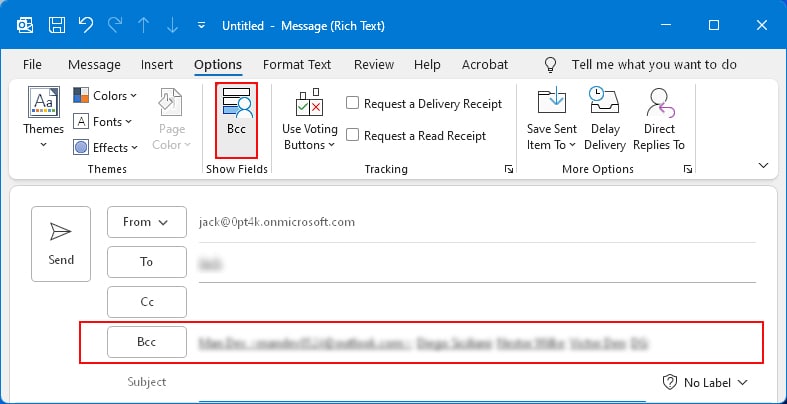
- Select the Options tab and click BCC.
- Enter the email of all the primary recipients in the To field and the remaining others in the Bcc field.
- Enter the desired message in the message body.
- When done, click Send.
Gmail
- Open a browser and log in to your Gmail account.
- Click Compose to send a new message.
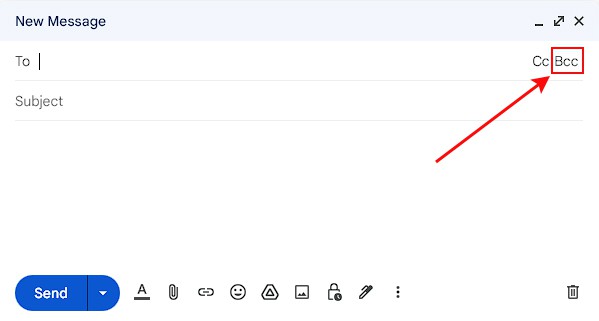
- Then, click Bcc. Look for it at the end of the To field.
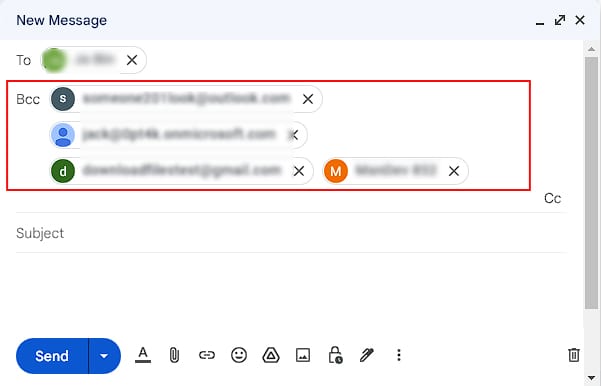
- Now, enter the email address of the primary recipients in the To field and rest in the Bcc field.
- Fill in other details like the Subject and message body.
- When done, click Send.
Please note that, one major downside of using Bcc is that whenever one of the Bcc recipients replies back to the email, the primary recipients in the To field and recipients in the Cc field will also come to know about them.
To avoid such an issue, you can create a contact and save it as “Undisclosed” or similar on Outlook. Then, add it in the To field along with your email and add all other primary recipients in the Bcc field.
On Gmail, you can directly add your own email as an alias such as “Undisclosed email.” To learn more in detail, you can refer to the article “How to Send Email to Undisclosed Recipients in Gmail.“
Send Personalized Emails Using Mail Merge
The Mail Merge feature uses the headers/fields that contain the dynamic values. So, you can send personalized emails to respective recipients.
While using this method, you have to remember two things.
- Headers/Fields are case-sensitive. Meaning, “First name” and “First Name” aren’t the same. So, you have to use their exact names while mentioning them in the email draft.
- Although these methods do not require you to install any third-party addons, you need to use Google Sheets (for Gmail) and Microsoft Word (for Outlook) for mail merge.
Gmail
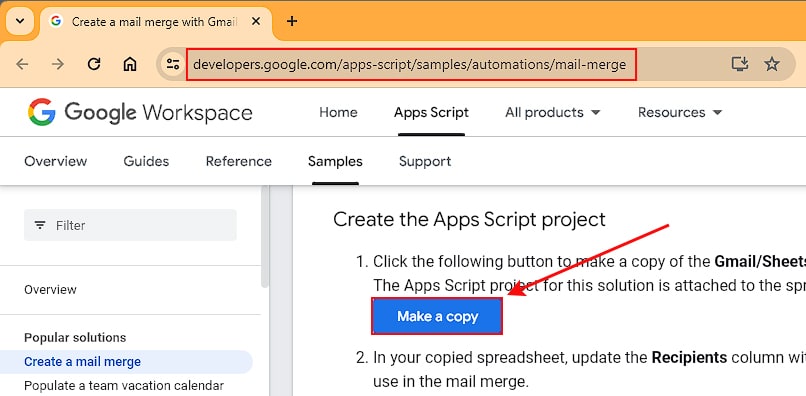
- Open the Google Developer official site for Gmail/Sheets mail merge spreadsheet (contains the script for mail merge).
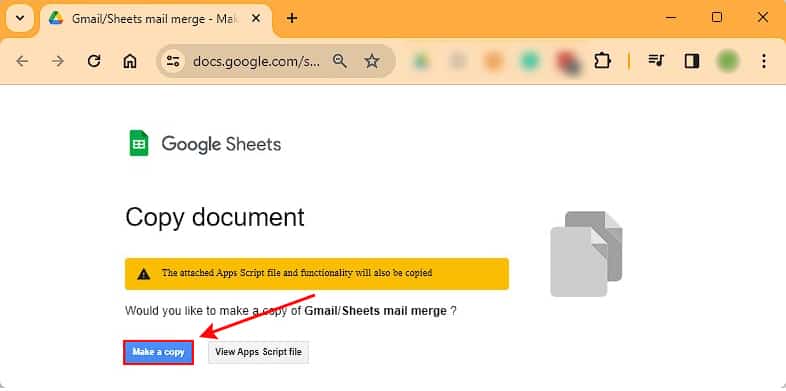
- Scroll down to the Set up the script section and click the Make a copy button.
- On the next window, click the Make a copy button again.
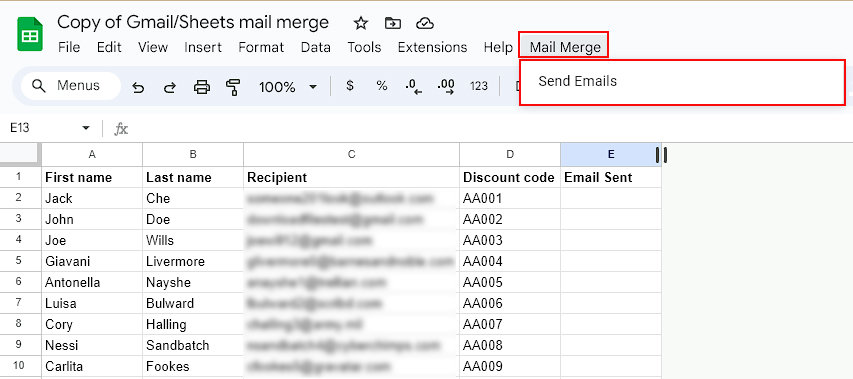
- Now, you can add or remove any column header according to your preferences except the Recipient and Email Sent. To change them, you can view and edit the Apps Script file.
- Compose a new email and save it as a draft on Gmail. Use the email headers which contain the list of dynamic values in the spreadsheet. Make sure you wrap them inside two curly brackets like
{{First name}},{{Last name}}and so on.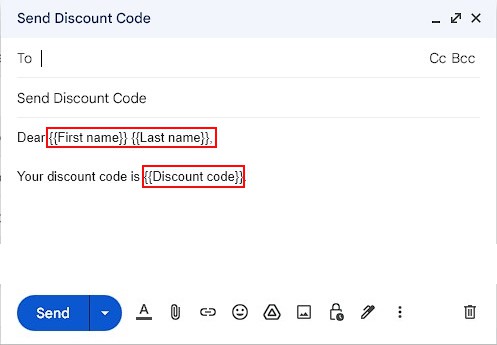
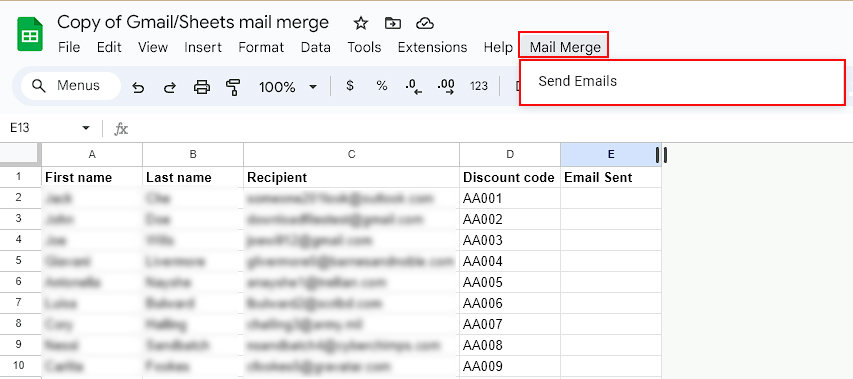
- Next, open the spreadsheet template you downloaded earlier. Click the Merge menu and select Send Emails.
- Follow the on-screen instructions and provide the necessary permissions.
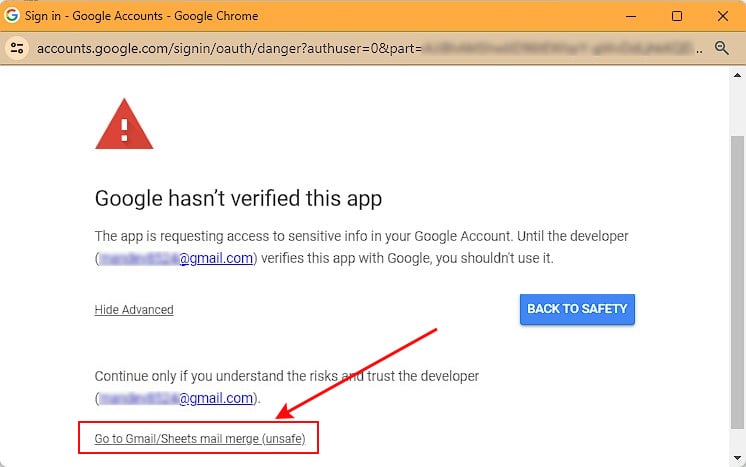
- When you reach the page that displays “Google hasn’t verified this app”, click Advanced below it and click Go to Gmail/Sheets mail merge.
- Open the spreadsheet template. Click the Mail merge menu and select Send Emails again.
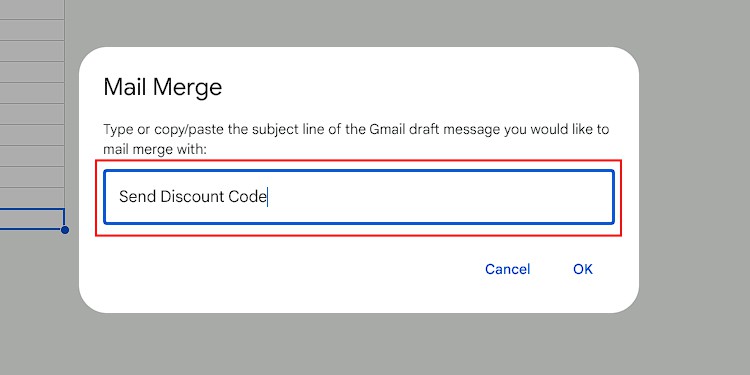
- When prompted, copy and paste the subject of the draft email that you want to send to multiple recipients individually.
Outlook
- Open the Word app.
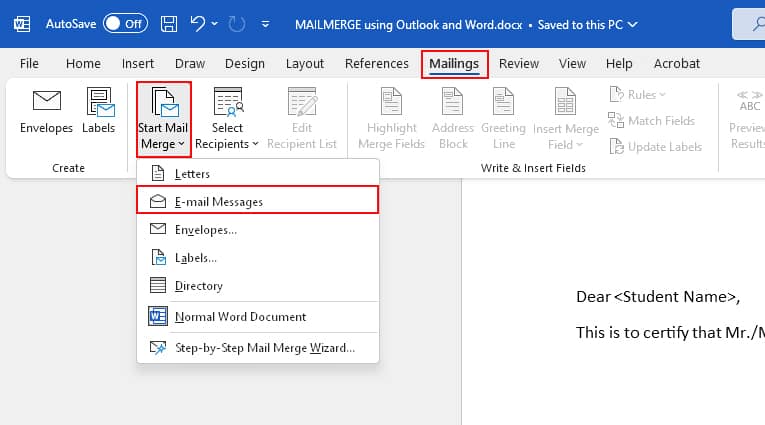
- Under the Mailings tab, select Start Mail Merge > E-mail Messages. Alternatively, you can also choose the Step-by-Step mail Merge Wizard if you want Microsoft Word to guide you through the entire mail merge process.
- Then, select Select Recipients and choose one of the options according to your preferences.
- Use an Existing List: Open an Excel file that already contains the required recipient’s details like Name, Email, Address, etc.
- Choose from Outlook Contacts: Choose this to use existing fields of your saved Outlook contacts.
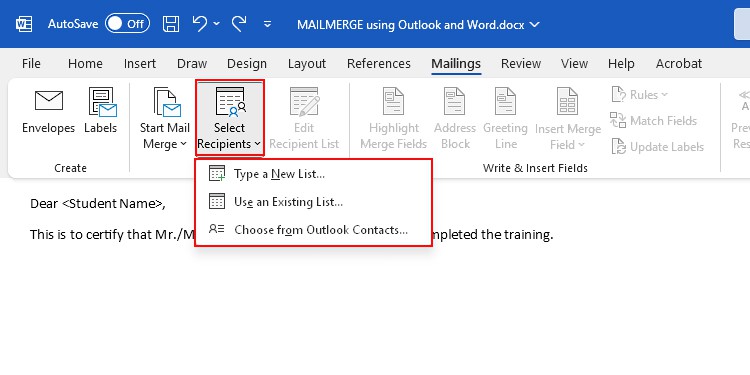
Here, we are proceeding with the first option.
- Open the Excel file containing the recipient details.
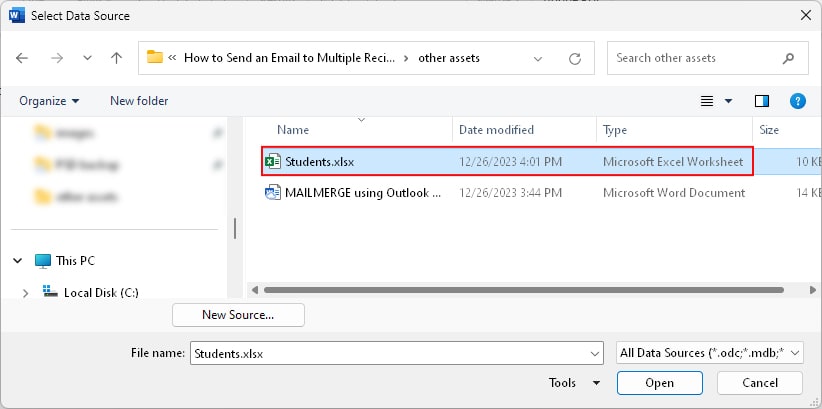
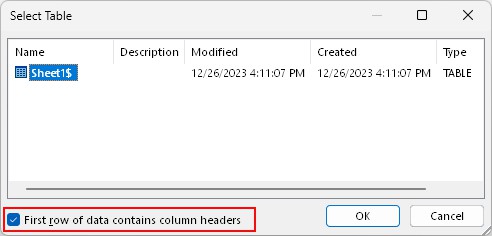
- On the next prompt, select the worksheets with recipient details and enable the First row of data contains column headers checkbox.
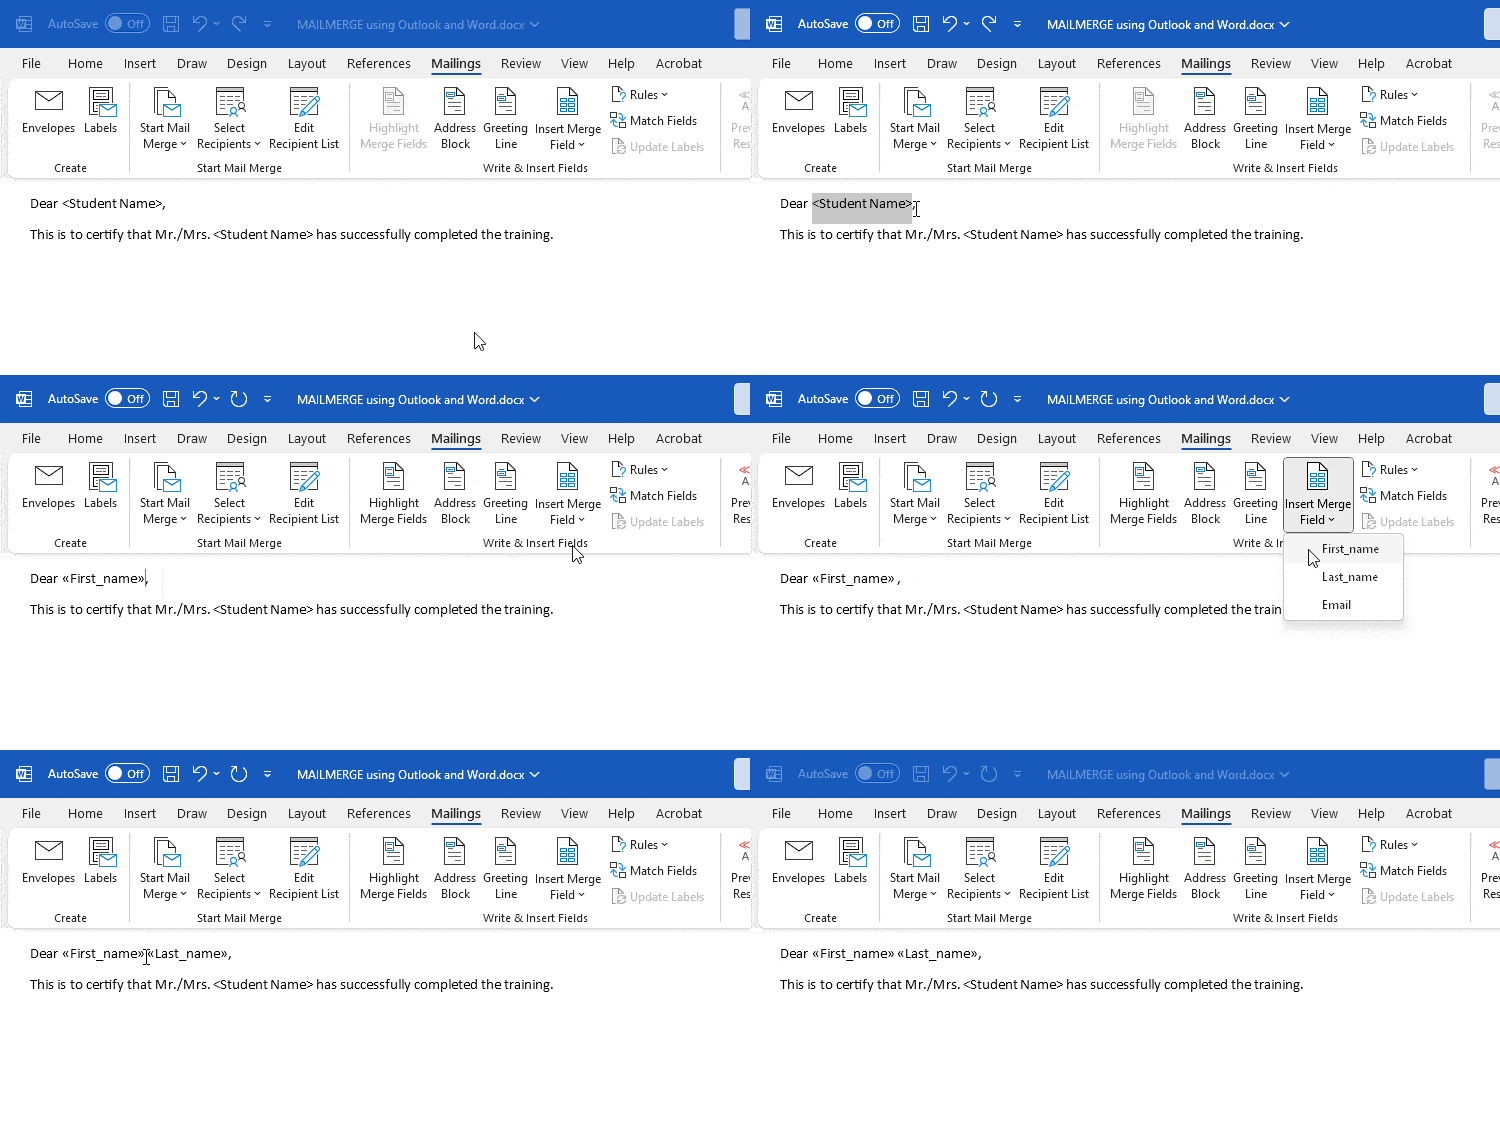
- Now, select the placeholder/field and replace it with the respective merge field by selecting Insert Merge Field.
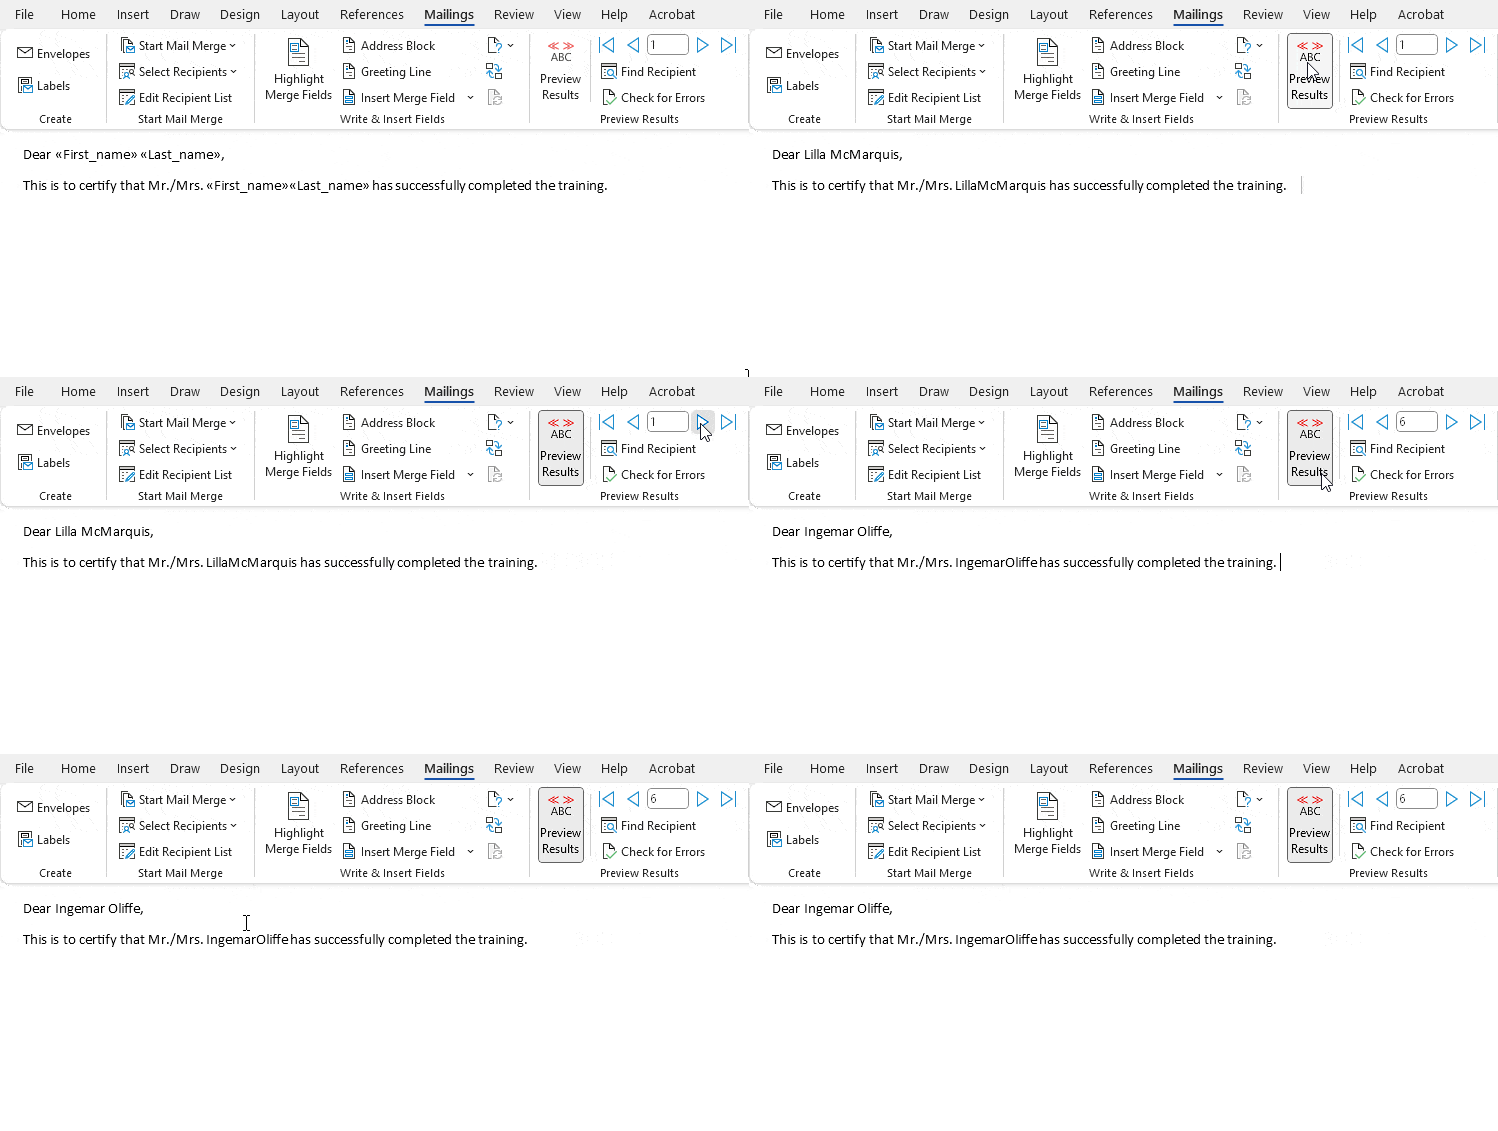
- To preview the email before sending it, click Preview Results. Click the arrow icon and check if you have the desired personalized email.
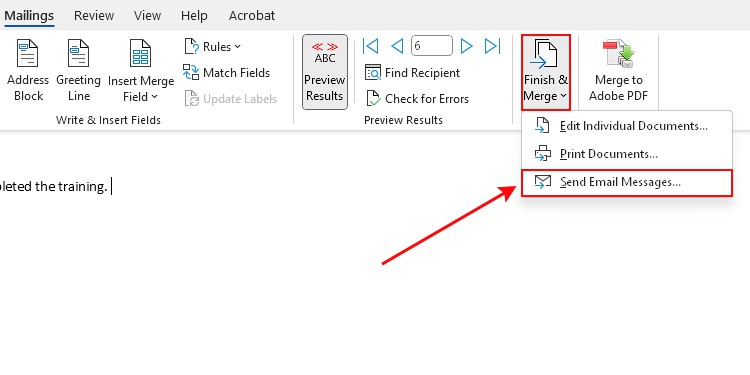
- When done, click Finish & Merge and select Send Email Messages.
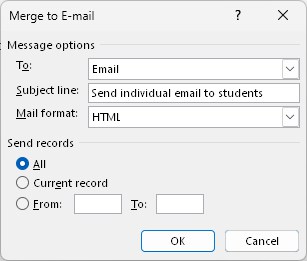
- Next, select Email next to the To field. Under Send records, choose the All option and click OK.
- Wait for Outlook to automatically generate and send each personalized email to respective recipients.
- Open the Sent Items folder to check if Outlook has finished sending emails.