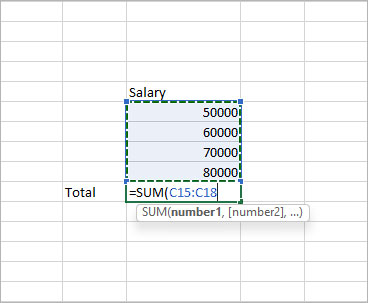
Dotted lines in Excel indicate one of two things; page breaks and cell borders.
If you see such lines recurring after a specific number of rows or columns, it’s likely due to page breaks.
But, if they are occurring at random and even individual cells have them, they are cell borders. Removing them is a piece of cake and doesn’t take much time.
Remove the Dotted Lines Due to the Page Break
More often than not, the dotted lines appear because of the page breaks.
Page breaks are initially hidden but once you insert a page break, Excel displays them to give you an idea of where each page break exists. They help you to figure out where each page break starts/ends to form a new page and what part of the worksheet will be visible while printing.
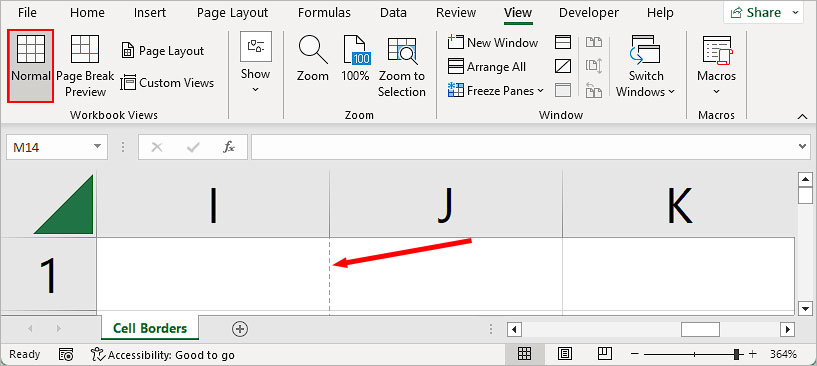
Excel inserts and displays dotted lines for automatic page breaks and solid lines to indicate a manual page break.
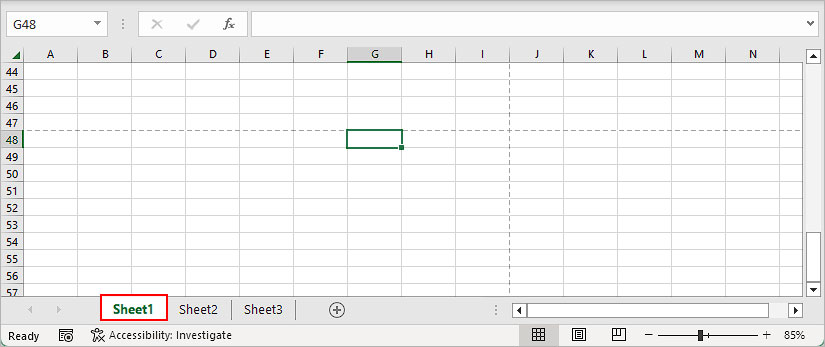
Both lines are grayish when on the Normal view like in the image below.
However, you will see a blue dotted line if you are previewing the page break.
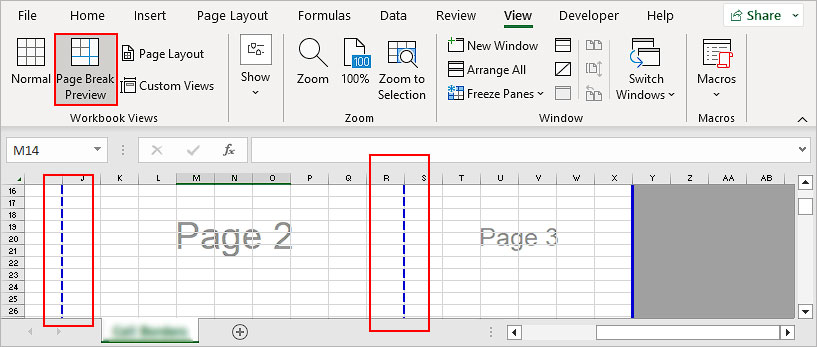
While the solid lines will disappear after you remove or reset page breaks, the dotted lines still remain on the worksheet. Although they won’t show up on the printed paper, you cannot remove or delete them on the worksheet.
Also, if you select any print-related options, like setting the print area, or try to print the worksheet, you can see the dotted lines indicating default/automatic page breaks in the worksheet.
Similarly, changing the workbook view to Page Layout or Page Break Preview also results in such lines even if you switch to Normal mode later.
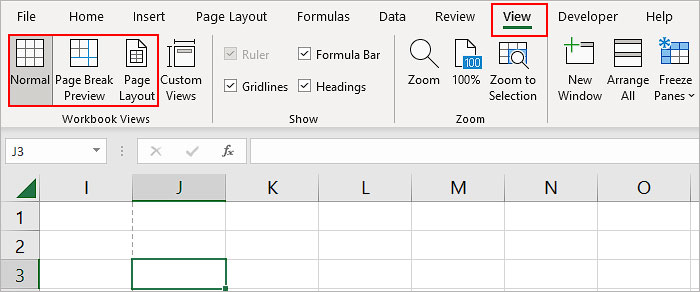
Luckily, you still have the option to hide such dotted lines in the Excel settings or you can use Visual Basic Analysis (VBA) to do so.
Using VBA
- Open the worksheet with page breaks and dotted lines. Here, it’s Sheet1.
- Press Alt + F11 to open the Microsoft Visual Basic for Applications window.
- Then, press Ctrl + G and paste the code below inside the Immediate window that appears at the bottom.
ActiveSheet.DisplayPageBreaks = False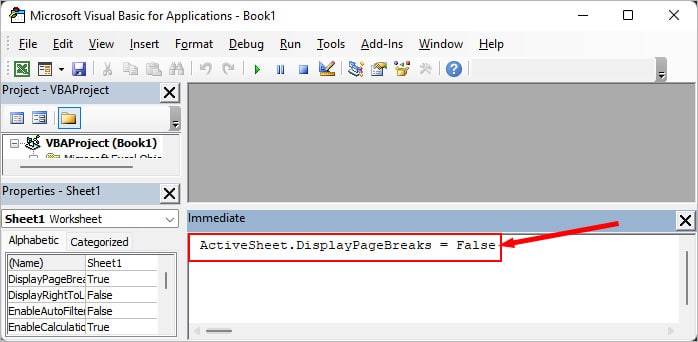
- Press Enter.
Note: This method removes both manual and automatic page breaks, which means, you won’t see any dotted or solid lines due to page breaks.Using Excel Settings
- Launch the Excel app.
- Open the worksheet containing the dotted lines.
- Navigate to File > Options. If your Excel window is minimized, select More > Options.
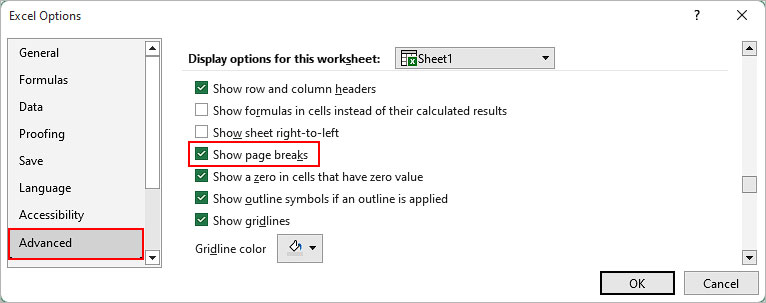
- Select the Advanced tab on the sidebar.
- On the right pane, scroll down to the Display options for this worksheet section. Then, uncheck the Show page breaks checkbox.
- Click OK.
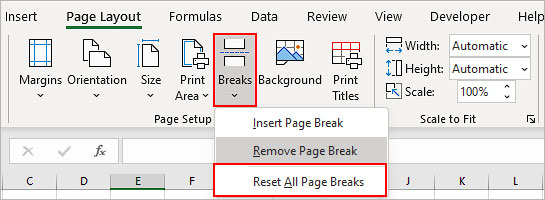
- Additionally, you can remove all the solid lines by selecting Breaks > Reset All Page Breaks.
Remove the Dotted in Cell Borders
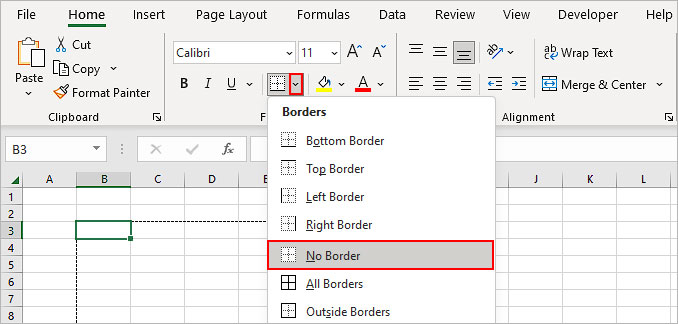
Another reason why dotted lines appear is when cell borders are applied with a dotted line style. You can easily remove such lines by choosing the No Border option for the cell border.
- To remove dotted lines for a specific cell range, select it.
- Alternatively, if you don’t want such lines to appear anywhere on your worksheet, select all cells (Ctrl + A).
- Click the Home tab.
- Click the down arrow next to the Border icon and select the No Border option. Or, choose other preferred border styles to replace the dotted lines.
You can use the Erase Border option to remove such dotted lines. To use it, just click and drag across the cells containing such lines.
Note: If you don’t mind removing the formatting of the cells (cell color, font color, heading styles, etc), you can also use the Clear Formats option to remove the dotted lines.Other Common Scenarios where Dotted Lines May Appear
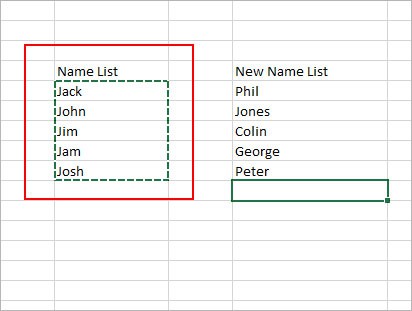
- Cut or Copy Cell values: Whenever you are copying a cell/cell range into another location, you can see moving dotted lines around the selected cells. And after a while, dotted lines stop moving. To solve this issue, paste the cells in the preferred cell location or use the Esc key to stop highlighting.
- While referencing a cell in a formula: While referencing a cell/cell range in a formula, Excel highlights them with dotted lines. Once you type the whole formula and press Enter, they go away.
