Often times when presenting an Excel report, you might want to display additional details like descriptions or images for a better explanation. But, since Excel isn’t well-suited for long texts, you might want to mention them in a Word document and insert that document in Excel.
While you could open the Word document separately, it’s quite a hassle to figure out the correct Word file associated file for the particular Excel file. This can happen especially when there are multiple documents all stored in one place.
Luckily, you can embed such Word documents into Excel as an object. Also, you can link them so that the Excel file is in sync with changes in the original Word document.
By Attaching the Word Document
Using this method, you can embed the whole Word document in the Excel worksheet/file. As a result, its file size can increase too.
Alternatively, you could also create a link to a Word document in Excel. But once the file moves to a different location, you will get an error such as “Cannot open the specified file”. So, it’s better to embed a file rather than use such links, especially, if you need to share the file with other people.
- Open the Excel worksheet and select the preferred cell to insert the Word document.
- Click the Insert tab.
- Then, select Text > Object.
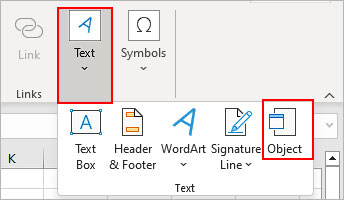
- On the next prompt, select the Create from File tab and click click Browse.
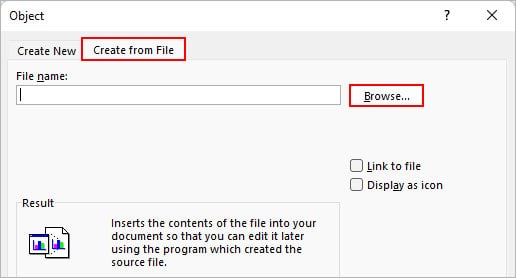
- Then, select the correct file and click Insert.
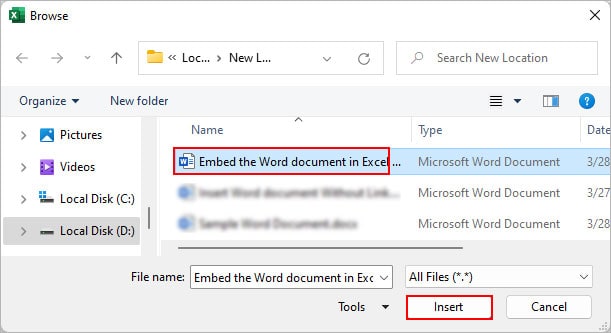
- Now, enable the Link to file checkbox if you want any update in the Word document to reflect in the attached file.
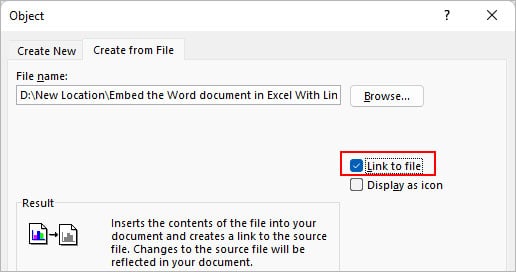
- Also, enable the Display as icon checkbox if you just want to view the Word file icon and open it only when double-clicking it. Otherwise, the whole word document will show up in the Excel app.
- Click OK.
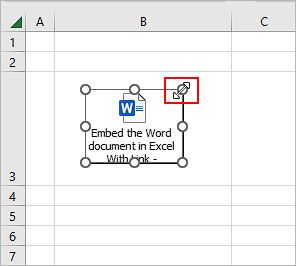
After you embed the document while displaying it as an icon, you might want it to stay in one cell. Otherwise, any time the row/columns shift the document will also shift and change its cell position.
For this,
- Select a cell and drag the icon to move it there.
- Adjust the cell height and width so that the icon fits in that cell. Or, select the icon and drag its size handle to adjust its size.
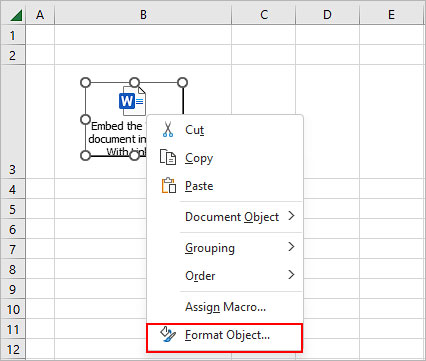
- Then, right-click and select Format Object.
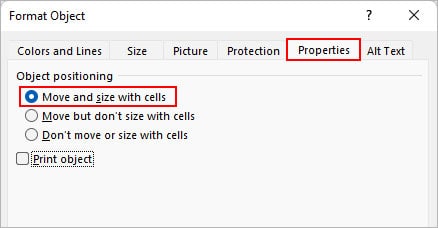
- On the next prompt, select Move and size with cells under the Properties tab.
By Pasting Word Data into Excel
If you have some tables in a Word document that you need in Excel, you can copy and paste them into Excel. Or, you can choose to copy only a specific table also.
However, any new update in the source Word document won’t reflect in the table data you just pasted.
- Open the Word document that contains the required table.
- Hover over the top left corner and click the four arrow icon when you see it. This will select the entire table at once.

- Press Ctrl + C to copy them.
- Now, open the Excel worksheet and select the cell where you want the table data.
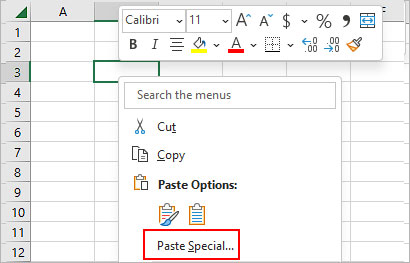
- Right-click and select Paste Special.
- On the next prompt, choose the Paste option and select Microsoft Word Document Object.
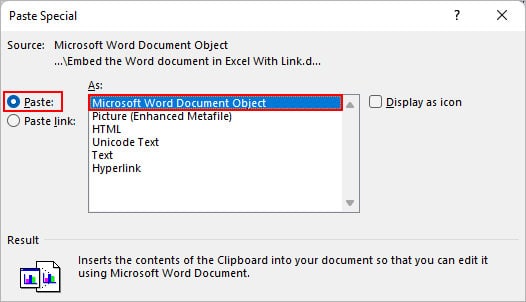
- Additionally, enable the Display as icon checkbox to only view the Word document icon instead of its contents.