If you love creating macros, you may have stored several macros in your workbook. While it is definitely convenient, the issue may arise when you run out of easy shortcuts you can use to call the macro.
Instead of overriding pre-existing shortcuts, you can create macro buttons in Excel that run your macros when you click on them. This can not only be a pretty handy and accessible tool for you to use personally but, also a cool feature to show off to your colleagues.
Inserting buttons can also make your sheet more user-friendly and is a great way to fool-proof tasks in Excel.
Creating Macro Buttons in Excel
Excel offers two button controls: Form and ActiveX. In Windows, you can use both ways to create Macro buttons. However, if you’re a Mac user, you’re limited to just Form Controls. Similarly, you can also assign macros to shapes.
Make sure you’ve already created your macro before setting up the button. You can either record your macro or modify an existing macro using VBA from the developer tab.
Assign Macro to a Shape
A simple, yet effective way to create a macro button is to assign macros to a shape. You can insert any shapes, including circles, rectangles, diamonds, and many more then assign them a macro. When you click on these shapes, Excel will run the assigned macro.
- Go to the Insert tab.
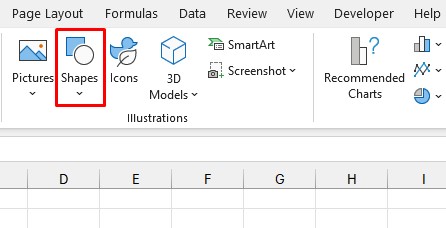
- From the illustrations section, select Shapes.
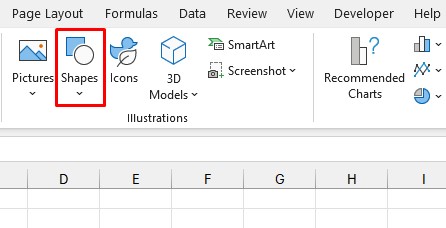
- Click on the shape you wish to place on your sheet.
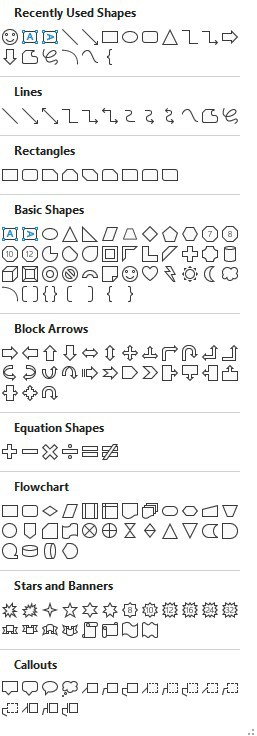
- Hold and drag the cursor to create your shape.
- Right-click on your shape and select Assign Macro.
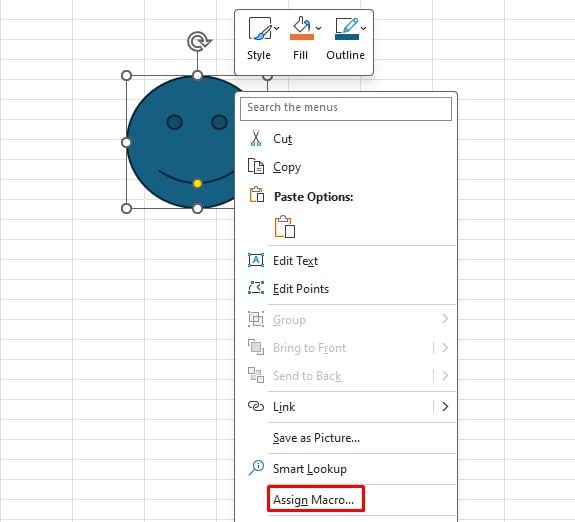
- Choose your macro and click OK.
Use Form Controls
Form controls are built into Excel, therefore you don’t have to manually add the sheet to your Trust Center Settings. In short, you don’t have to enable macros when you open the sheet as Excel trusts the macros created using the Form Controls.
- Go to the Developer tab.
- From the Controls section, select Insert.
- Under the Form Controls section, choose the first icon.
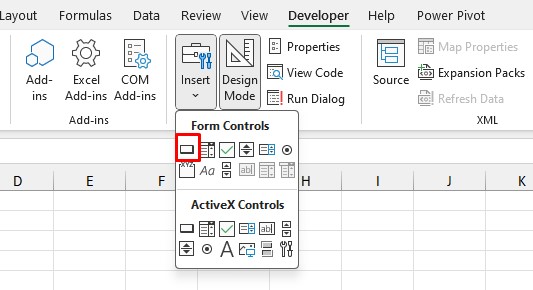
- Your cursor will change into a plus (+). Click and drag to create your button.
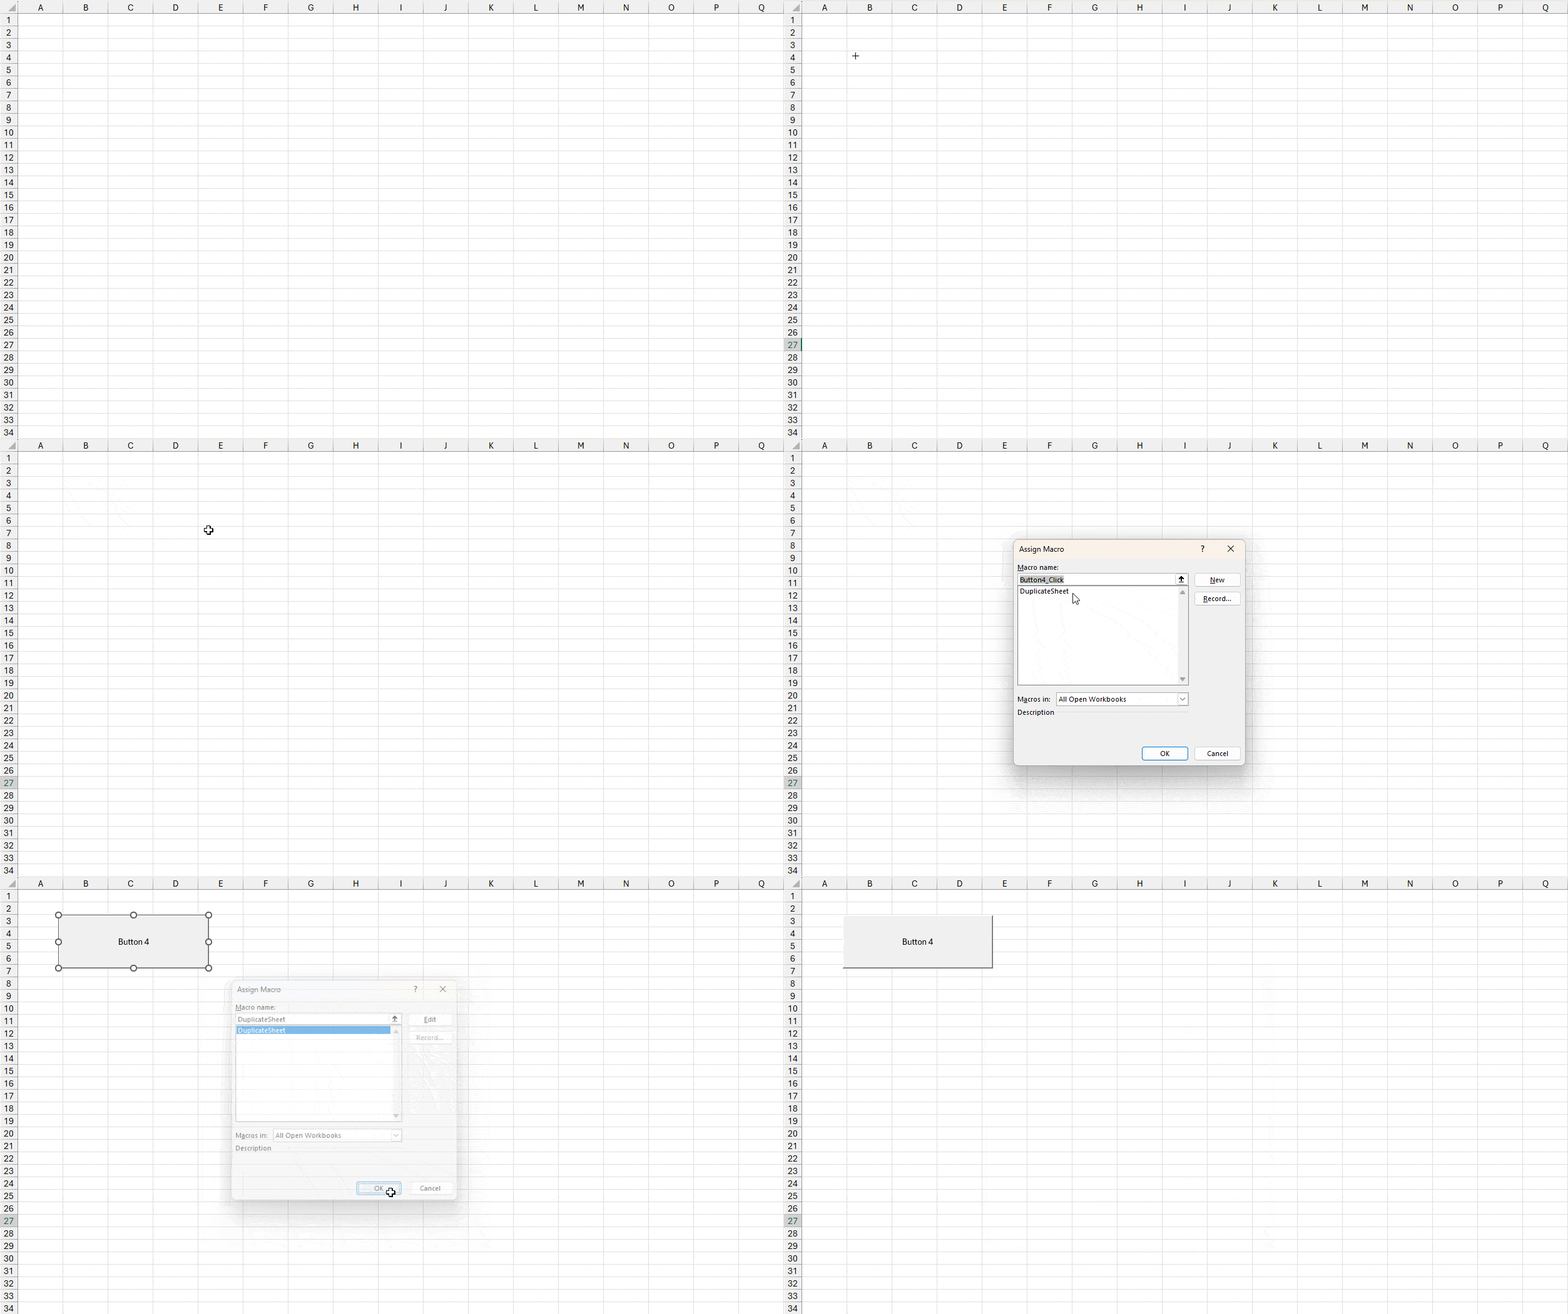
- Select your macro from the Assign Macro window.
- Click OK.
Use ActiveX Controls
While ActiveX is quite more customizable than Form Controls, you will have to manually place it in your Trust Center Settings. Additionally, ActiveX controls aren’t currently available for you if you’re a Mac user.
- Head on to the Developer tab.
- Click Insert from the Controls section.
- Select the first icon from the ActiveX section.
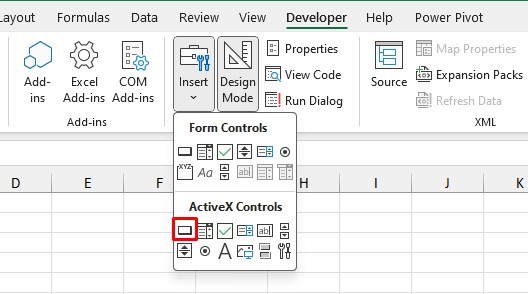
- Hold, then drag the plus cursor to create your button.
- Once the button is placed, double-click on the command button.
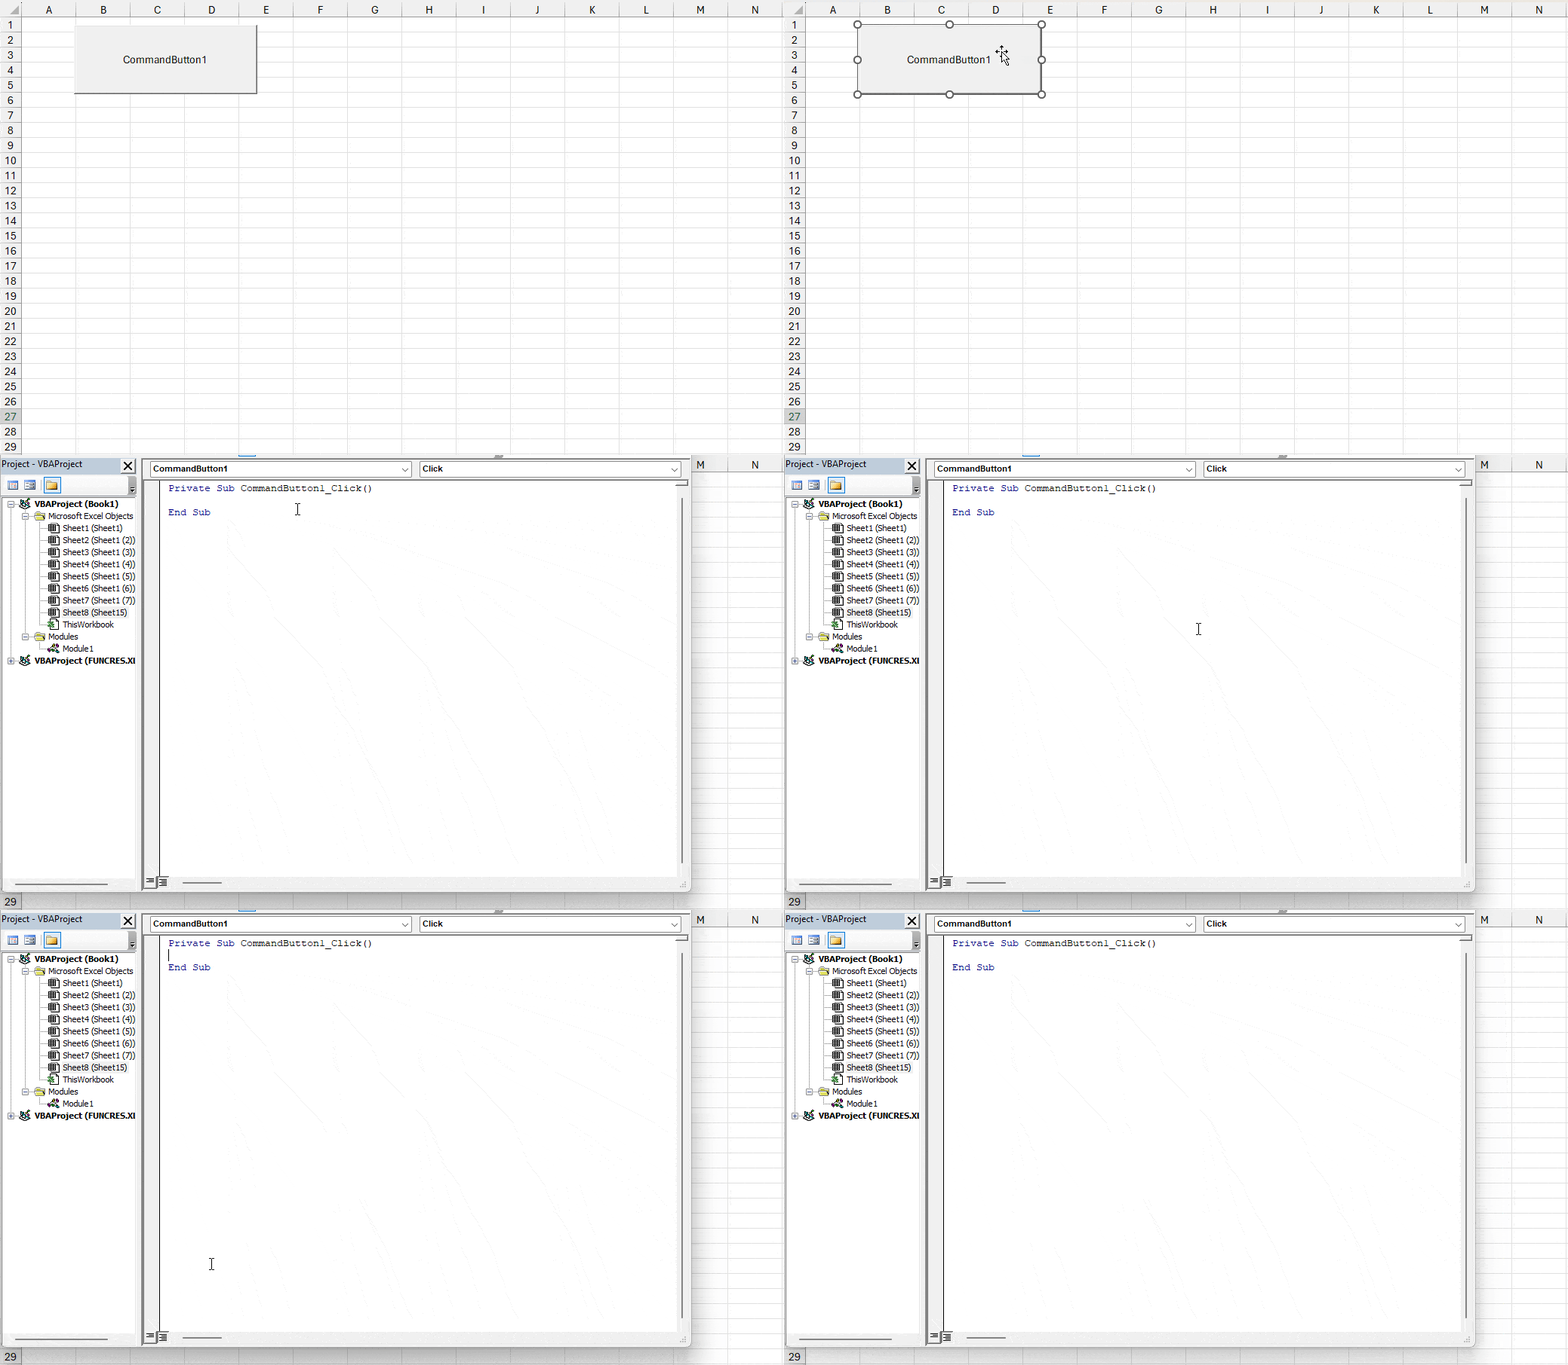
- In the VBA editor, enter the name(s) of your macro inside the command.
- Close the VBA editor.
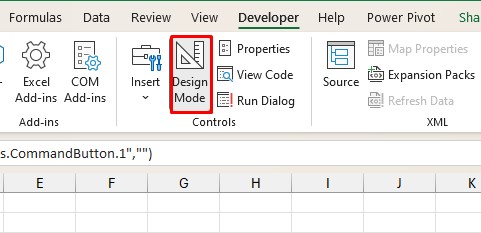
- From the Controls section, exit Design Mode.
Change the Appearance of Macro Buttons
The default formatting of the control buttons isn’t the best to look at. It’s just a plain grey button with black text. If your sheet is following a theme, you may want to change the formatting of your buttons.
Format Shapes with Assigned Macro
- Select your shape.
- Go to the Shape Format tab from the menubar.
- Format the shape using the tools in the Shape Styles section.
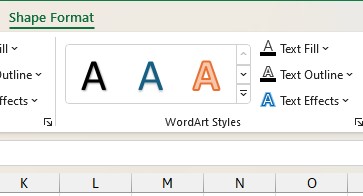
- To edit the text, use the tools in the WordArt Styles section.
- Change the height and width of your shape from the Size section.
Format ActiveX Control Buttons
- Go to the Developer tab.
- Click on Design Mode to enable it from the Controls section.
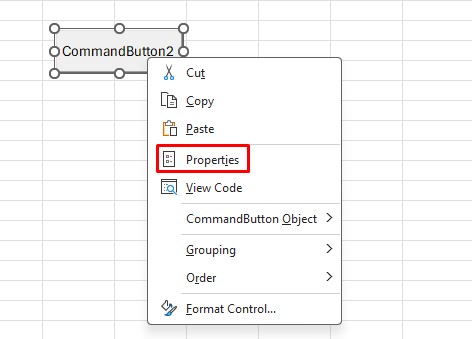
- Choose Properties.
- Select the fly-out next to BackColor to choose a different fill color for the button.
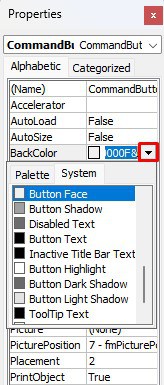
- To change the font color, select the fly-out next to ForeColor.
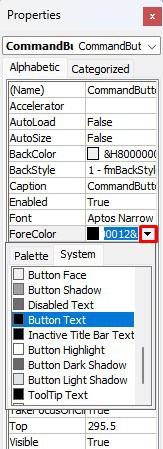
- Close the Properties window.
- Exit Design Mode.
Format Form Control Buttons
- Right-click on your control button and choose Format Control.
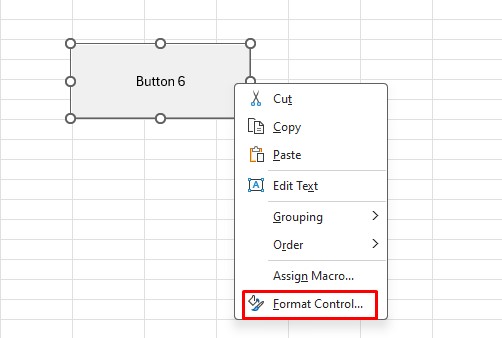
- From the Format Control window, switch between the tabs to format the appearance of your button.
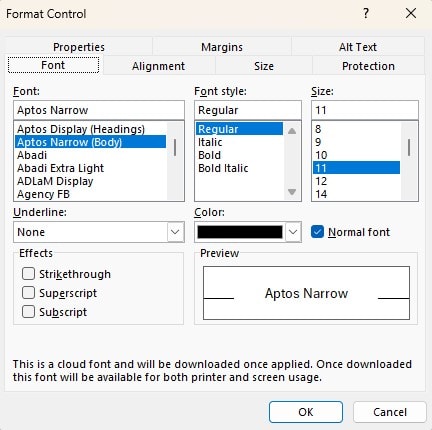
- Click OK to confirm the changes.