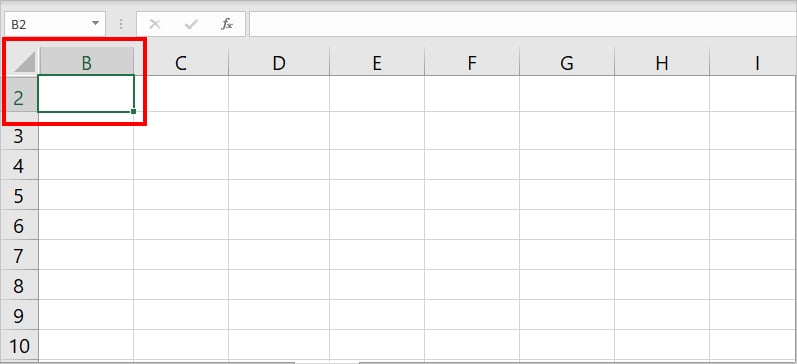
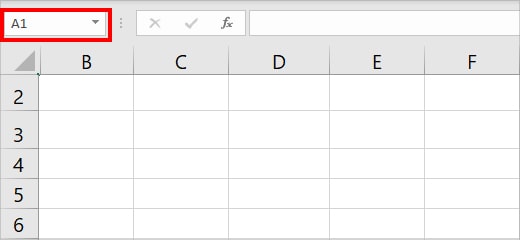
Typically, cell A1 is always the first cell reference in a worksheet. But, if your cell reference begins with B2 (as shown in the given picture), it implies that the first row and column are hidden.
Whether you are freezing the first columns or referring to cell A1 in a formula, it is best to unhide them first. This way, Excel will identify and use the correct cell reference for the given command.
To do so, you could select all, right-click on them, and pick Unhide option. But, this would bring up all the hidden ranges of your worksheet. To specifically unhide only the first rows and columns, there are three better approaches that we have mentioned in this article.
Using Resize cursor
Excel’s Resize cursor is mainly used to readjust the column and row sizes. However, you can use this same cursor to hide and unhide the cells on your worksheet. Dragging resize cursor is by far the quickest method to show up hidden rows and columns.
Unhide Rows
- On your worksheet, hover your Cursor above the 2nd Row.
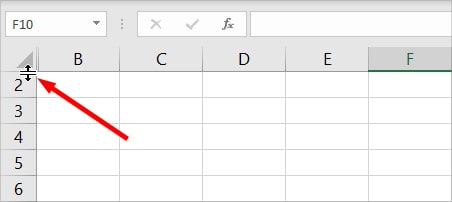
- When you see the Resize Cursor, drag it Down to unhide the first row.

Unhide Columns
- Hover your Cursor near Column B.
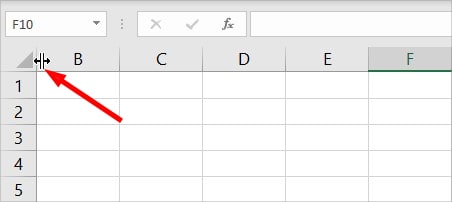
- When the Black Arrow appears, Left-click on it and drag it toward the Right.
From Format Menu
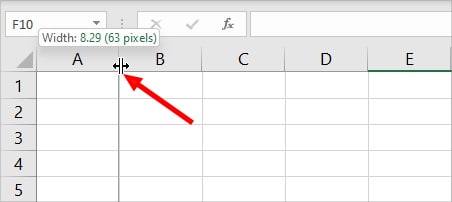
Using the resize cursor to unhide columns and rows will most likely change the cell boundary and result in the #### cell. To avoid this, you can unhide ranges from the format menu instead.
In this method, we will select the hidden ranges using the Name box. Then, pick the default Unhide Rows and Unhide Columns from the Excel ribbon.
To do so,
- Go to Name box and type in A1. Press Enter.
- Navigate to Home Tab > Format.

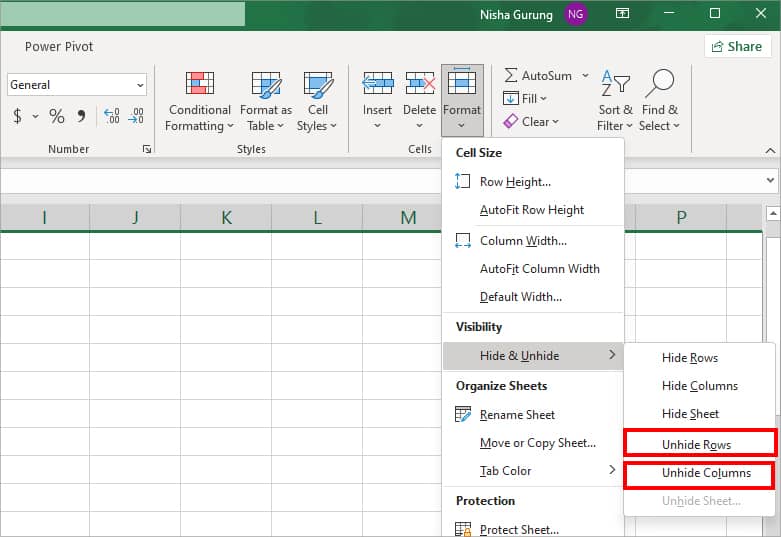
- Under Visibility, select Hide & Unhide menu.
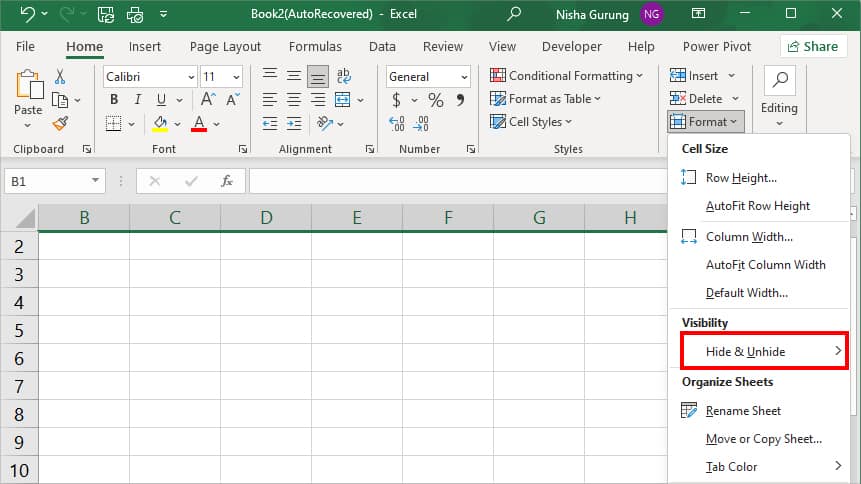
- Pick Unhide Rows or Unhide Columns.
Quick Tip: By default, Row height is 15 and Column Width is 8.3 in Excelspreadsheet. Using Visual Basic Editor
Another way to unhide the first hidden ranges in Excel is with the Visual Basic Editor. If you are a beginner, using VBA tool may sound a bit intimidating. But, you can relax as I have mentioned a very simple code here.
Just run the given code into your VBA tool and there it is, you’ll have the first rows and columns visible. For this, you need to go to Developer Tab. If you cannot find it in the Excel ribbon, follow step 1 to enable them.
Step 1: Activate Developer Tab
- Head to File Tab on your worksheet.
- Click on Options.
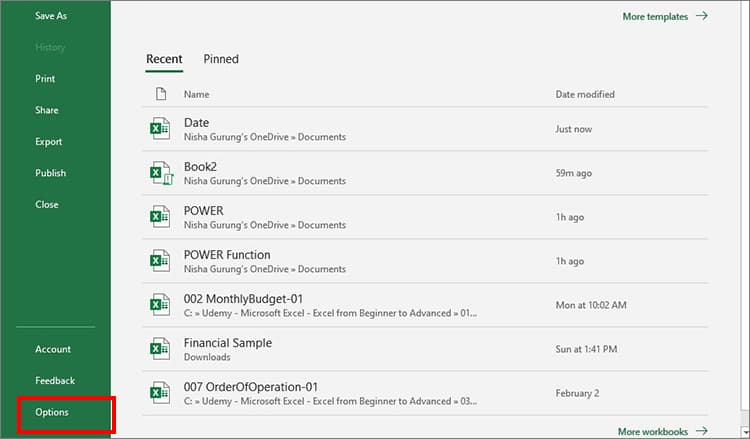
- Select Customize Ribbon. Then, click on Developer.
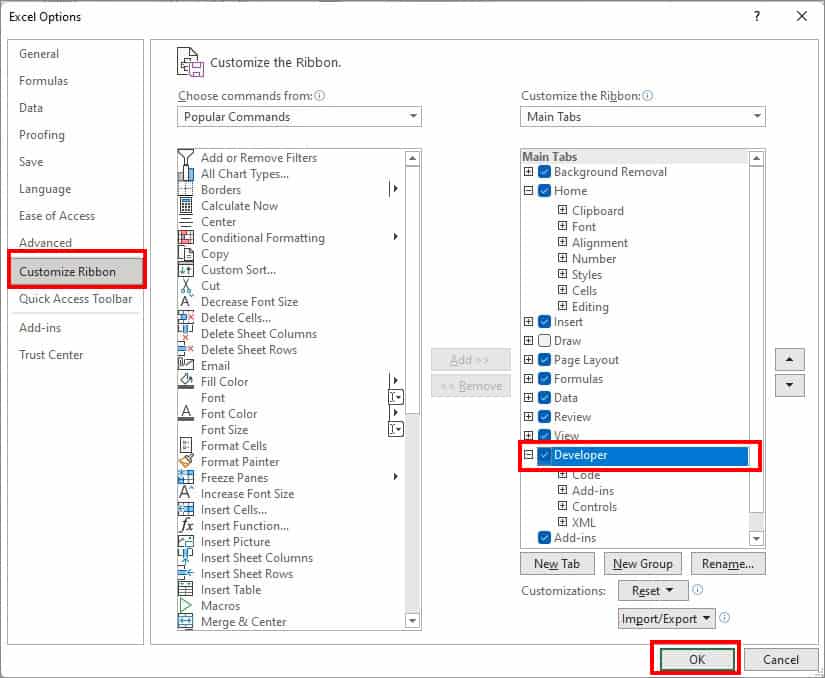
- Hit OK.
Step 2: Run Code
- Go to Developer Tab > Visual Basic.

- Click on Insert > Module.
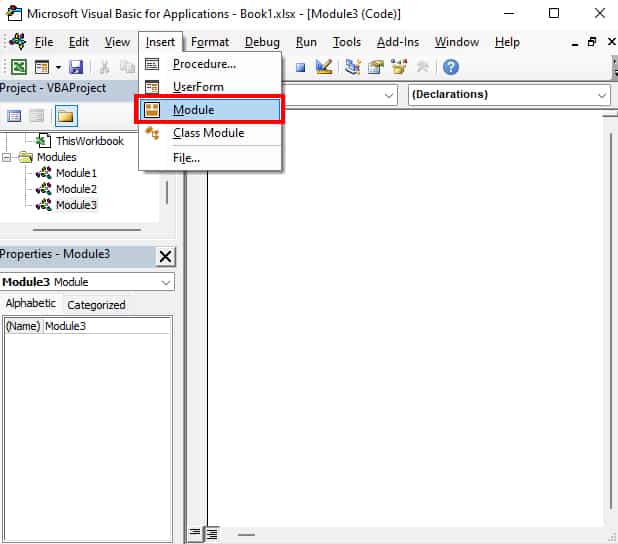
- Paste the following code in the field.
Sub UnhideRow1Column1()
Range(“A1”).EntireRow.Hidden = False
Range(“A1”).EntireColumn.Hidden = False
End Sub- Ensure you’ve entered the code on the right Sheet from Microsoft Excel Objects.
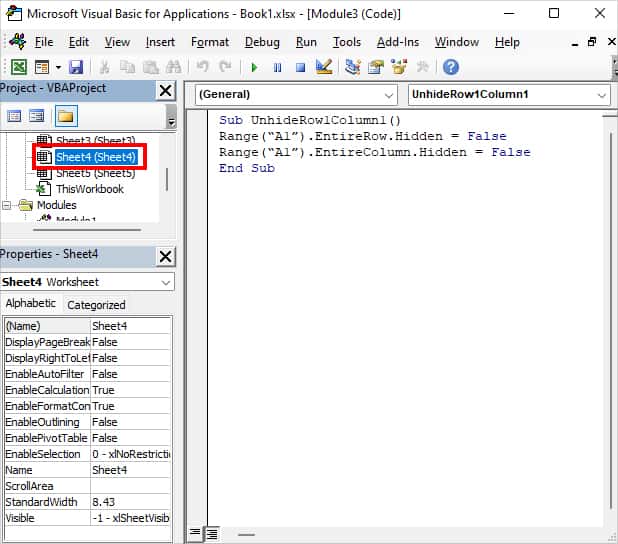
- Enter F5 to run code.
- Close Window.