Need to merge data from multiple sheets to create a Master Sheet?
You can easily consolidate data using Excel’s Functions and tools to achieve that. For example, prepare an aggregate report of different Invoices, summary sheets of monthly sales, and so on.
Depending on your need, use any one from Consolidate Tool, SUM Function, SUMIF function, or Power Query.
Using the Consolidate Tool
Excel has a dedicated Consolidate tool in the Data Tab to summarize the cell ranges. The best part about consolidating data with this method is that you can choose to link the values to the original source. In short, it is dynamic.
Using the steps given below, you could consolidate multiple rows and columns from different sheets into one.
- On your sheet, select Data.
- On the Data Tab, click Consolidate.

- In the Consolidate Window, perform these steps.
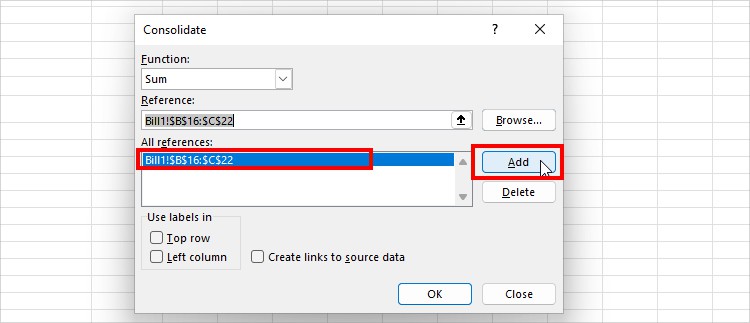
- Different Sheets in the Same Workbook: Head to the Reference menu and select Worksheet Data using the Collapse icon. Next to the All References menu, hit the Add button.
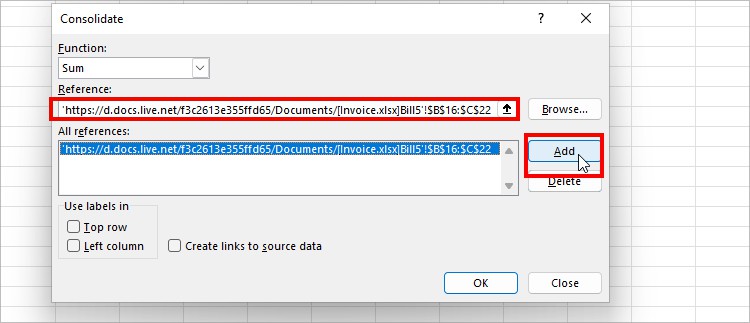
- Multiple Sheets in Different Workbooks: Keep all workbooks open. On Reference, click the Collapse icon. Go to Another workbook and select cell ranges from Sheet. Then, hit the Add button.
- Different Sheets in the Same Workbook: Head to the Reference menu and select Worksheet Data using the Collapse icon. Next to the All References menu, hit the Add button.
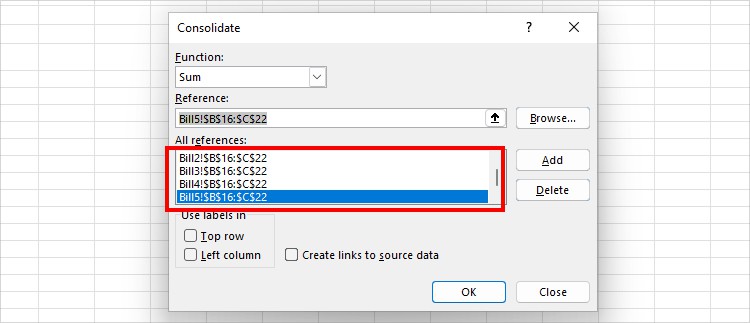
- Again, follow the same Step 3 to add extra Sheet References.
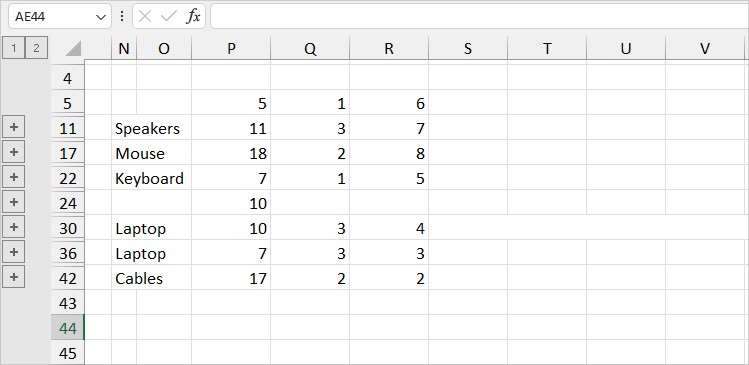
- Under Use labels in, tick the boxes for Top row and Left Column. Make sure to check the box for Create links to source data. Then, hit OK.
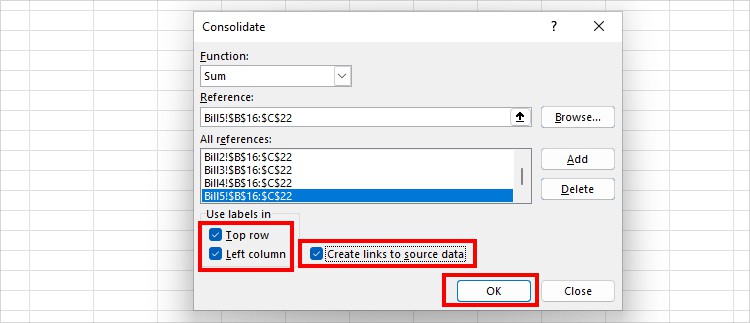
- You’ll have the consolidated values in the new sheet.
Using the SUM Function
Excel’s SUM Function is not just restricted to adding values within the same sheet. It also works best to sum across multiple sheets by creating a 3D Referencing.
If you’ve been using the SUM function regularly in Excel, consolidating data from different sheets won’t be much of a big deal.
=SUM(number1, [number2]...)Example:
Suppose I have data in 5 different Sheets named Bill1, Bill2, Bill3, Bill4, and Bill5. Let’s add the data and extract the total in the Summary Sheet.
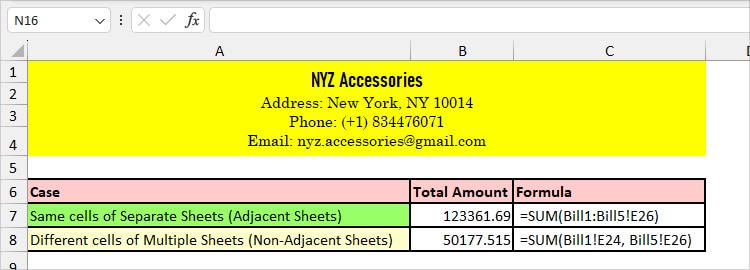
In the given table, I have compiled two different examples of consolidating data.
| Case | Formula | Description |
| Consolidate data from the Same cells of Separate Sheets (Adjacent Sheets) | =SUM(Bill1:Bill5!E26) | The SUM function adds the cell value in E26 from Bill 1 to Bill 5. We got 123361.69 as output. |
| Consolidate data from the different cells of Multiple Sheets (Non-Adjacent Sheets) | =SUM(Bill1!E24, Bill5!E26) | In the formula, the SUM function returns the added value from E24 in Bill 1 and E26 in Bill 5. It returned 50177.515. |
- To use the SUM function, type =SUM(.
- Go to Another Sheet and select the Cell Ranges.
- Add a Comma. Again, head to Another sheet and select Cell Ranges.
- Close the Bracket and hit Enter.
Using SUMIF Function
Just like the SUM function, you could also use the SUMIF function to add the values. Opt for this function when you need to merge data from multiple sheets based on a given condition. But, here, you have to use the (+) operator.
Syntax:

=SUMIF(range, criteria, [sum_range]) + SUMIF(range, criteria, [sum_range]) + SUMIF(range, criteria, [sum_range]), ….
Example:
Suppose I want to consolidate the values from cell D16:D22 (Unit Price) range where the quantity is “greater than 3 in Bill1,” “less than 2 in Bill2,” and “greater than 4 in Bill 5.” For that, I used the formula mentioned in the box.
=SUMIF(Bill1!C16:C22, ">3", Bill1!D16:D22) + SUMIF(Bill2!C16:C22, "<2", Bill2!D16:D22) + SUMIF(Bill5!C16:C22, ">4", Bill5!D16:D22)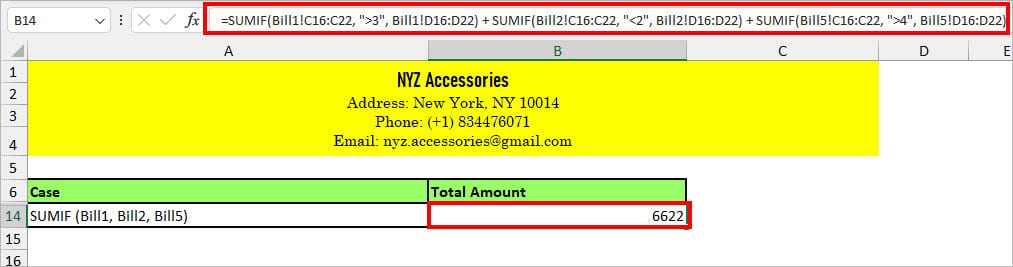
The formula returned 6622 as an output.
Use Power Query
Next, if you want to consolidate data from different workbooks, Power Query is the best tool for it. There are two ways you can merge data using this method.
Firstly, save Excel Files on your PC and gather all Workbooks in a single Folder. Then, follow these steps.
- Launch Excel and open a new Worksheet.
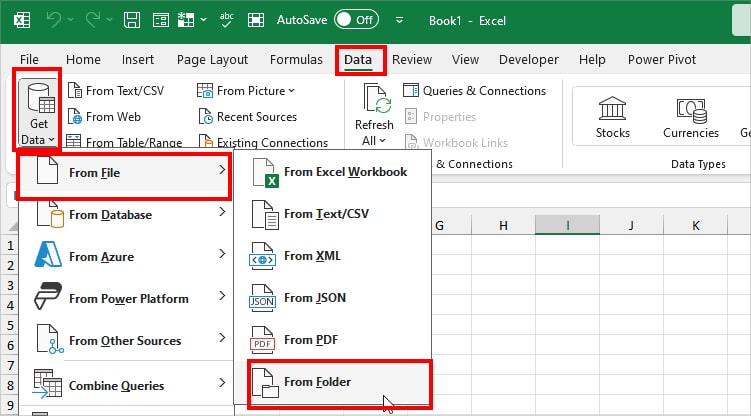
- From the Data Tab, click on Get Data > From File > From Folder.
- On the Browse window, choose your Folder. Hit Open.

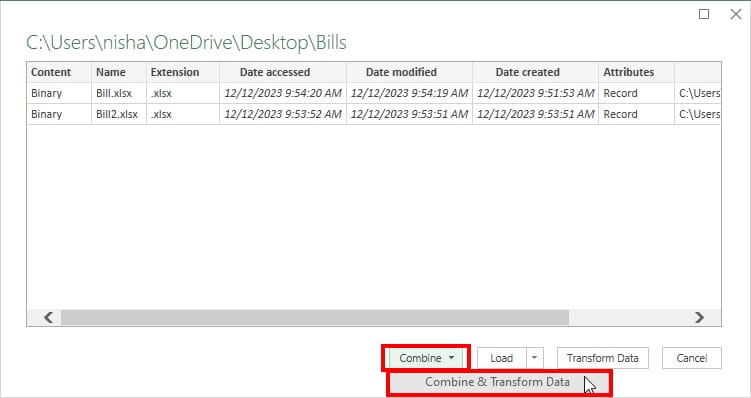
- In the Power Query window, expand Combine > Combine & Transform Data.
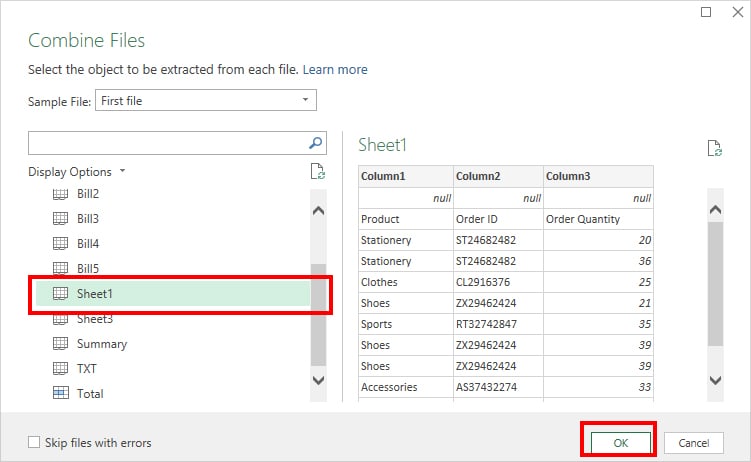
- If prompted, choose a Sheet and click OK.
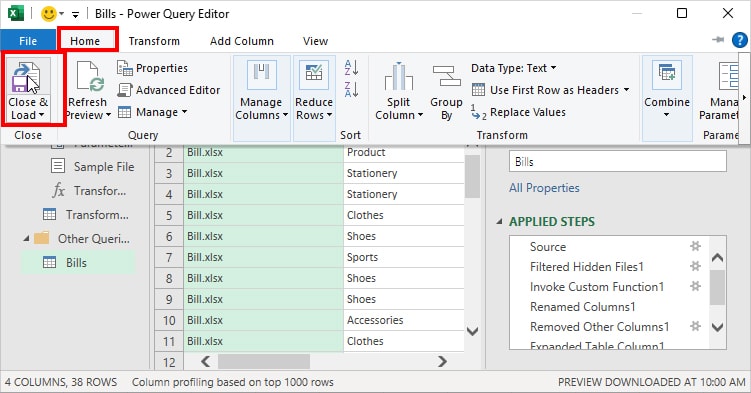
- If needed edit data in the Power Query Editor. For example, Delete duplicates, Truncate texts, Delete columns/rows, etc. Once you are done, hit Close & Load in the Home tab.
If you want to merge tables from different sheets using Power Query, check out our article guide on “How to Merge or Combine Tables in Excel.”