Zoom has made connecting to online meetings much easier with its cloud-based platform. However, issues such as an unstable internet connection can cause interference such as buffering, stuttering, or even random disconnections from Zoom meetings. If this error prevents you from attending an important meeting or online class, using Zoom may backfire.
Generally, you could resolve this issue by restarting your router or moving your system closer to the router. If you’ve already tried these fixes to no avail, follow this guide. Here, we’ve listed all the viable methods you can try to resolve the unstable Zoom internet connection.
What Causes Unstable Zoom Internet Connection?
Before we move on to the fixes, you should know what causes this problem. Different factors, such as your internet connection, insufficient resources, and improper application installation, create an unstable Zoom connection. Apart from that, the following reasons could cause an unstable Zoom internet connection error:
- Unnecessary Zoom features.
- VPN services.
- Faulty DNS servers.
- Misconfigured network.
- Connection block by Windows Firewall.
- Faulty installation of the application.
How to Fix Unstable Zoom Internet Connection?
After considering all the possible reasons that could cause this error, we can move on to the fixes. Here, we will cover simple ways to troubleshoot your internet connection and configuration, faulty Zoom application, and DNS server, along with some methods to conserve your bandwidth for a reliable connection.
Test Your Connection
As Zoom relies on a stable internet connection, you should start by checking your internet. Often, the connection might be faulty from the ISP end, so you can test your connection from Speed test. If you see something wrong with your internet speed, contact your ISP to resolve the problem.
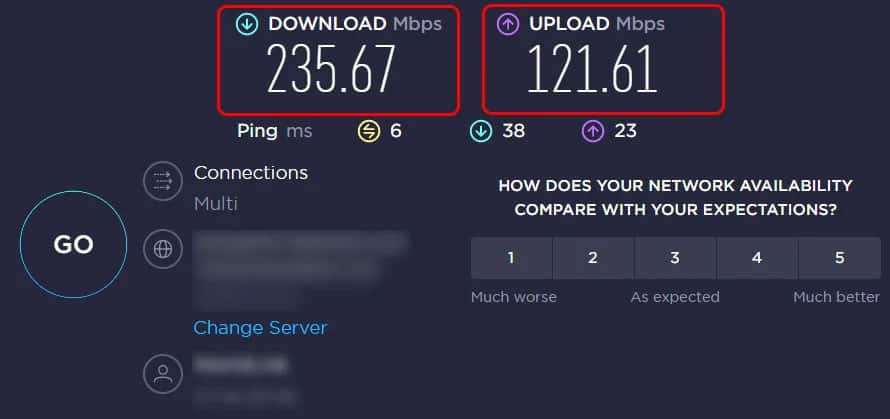
You can also restart your router to fix common connectivity issues. Proceed to unplug your router, then wait for 30 seconds before plugging it back in.

Although Wi-Fi is more convenient than ethernet cable, you should still consider hardwiring your system. Wireless transmission suffers from distortions and can suffer from interference. Instead, wired connections provide faster data transmission and stability, leading to better Zoom connection stability.
Close Unnecessary Applications
Zoom requires sufficient bandwidth and memory to work properly. It cannot function properly if multiple resource-hogging applications run in the background. You can resolve this by closing the resource-intensive applications. Additionally, ensure that tasks using high bandwidth are not active such as downloading or uploading large files. Pause any updates that could be active in Windows while using Zoom.
You can close applications that use the most resources via the task manager.
- Press the Ctrl + Shift + Esc to open the task manager.
- Click on Memory or Network to sort all applications based on resource consumption.
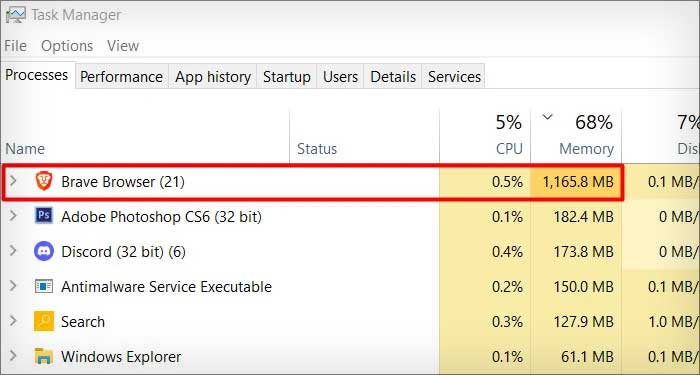
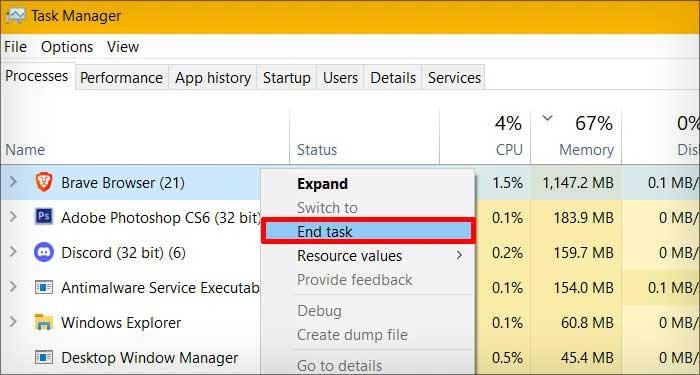
- Right-click on the application consuming the highest amount of resources and click on End task.
Reinstall Zoom
Often, the Zoom application you’ve installed can contain an error or a bug rather than a faulty internet connection. In such cases, you should remove it from your system and install the latest application version.
Run Troubleshooter
You can use the inbuilt troubleshooter in Windows to automatically detect and fix any network problem in the system. To run the troubleshooter, follow the given steps:
- Press the shortcut keys Windows + I. It will open settings.
- Select Update & Security.
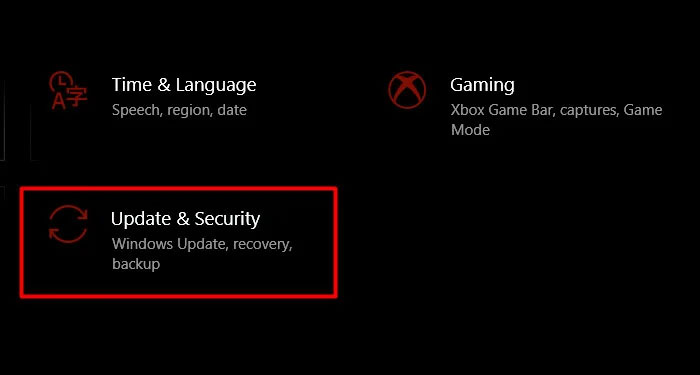
- Select Troubleshoot tab.
- Click on Additional troubleshooters.
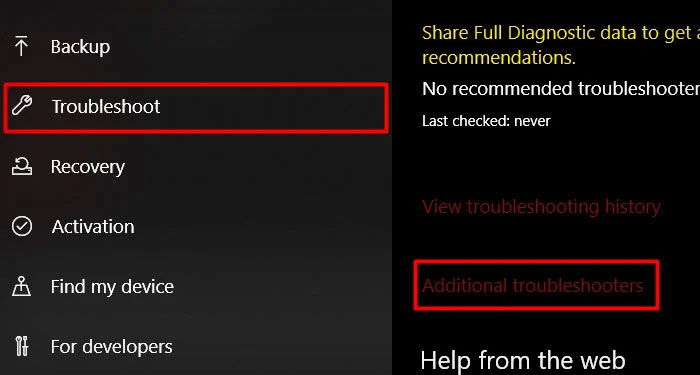
- Run the following troubleshooter:
- Incoming Connections.
- Network Adapter.
- Internet Connections.
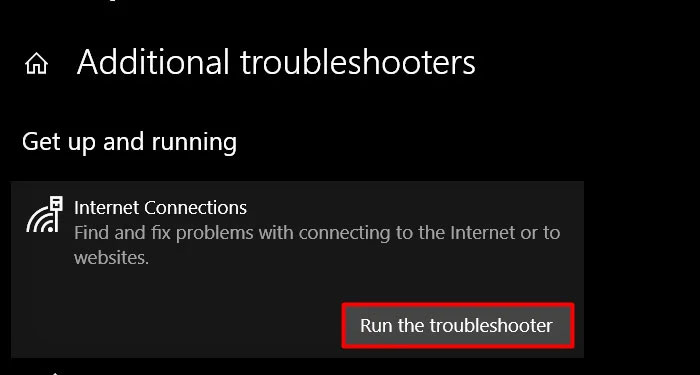
- Restart your system after running the three mentioned troubleshooters.
Turn Off Additional Features
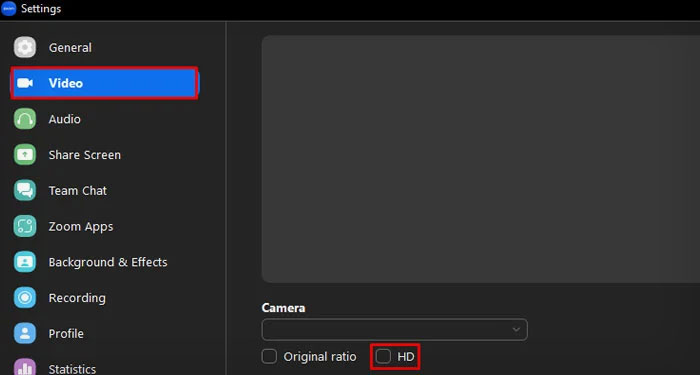
Zoom provides multiple features that use resources and bandwidth to enhance user experience. However, if you are facing connection problems, you can turn off additional features such as Screen Sharing or turn your webcam off in the meeting to create a steady connection. Similarly, disabling High-Definition Videos in Settings can reduce bandwidth consumption for better connection stability. To disable HD videos, follow the steps:
- Open Zoom and log in with your account.
- Click the Settings icon at the top right corner of the application.
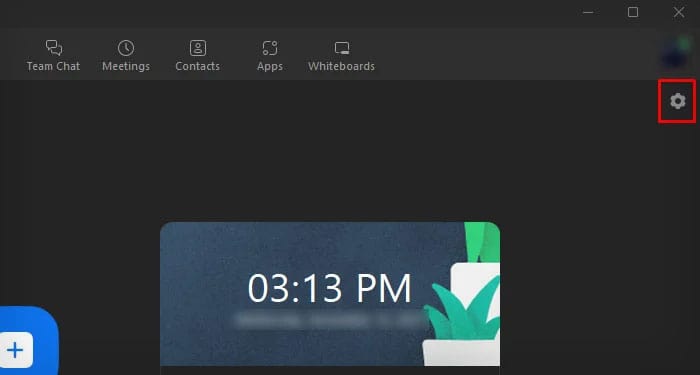
- Switch to the Video tab and uncheck the HD option.
Disable VPN Services
Although you can mask your IP address for private browsing, VPN can significantly decrease your internet connection speed. You can either temporarily disable your VPN, select a server location closer to your region, or use alternate VPN services to boost your internet connection.
Switch DNS Servers
Due to technical errors in the DNS server, your PC may not establish a stable Internet connection for Zoom. You can manually configure an alternate DNS server for your PC in such cases. You can use DNS servers like Google, Cloudflare, etc. Follow the given steps to configure the Google DNS server:
- Open the Run command by pressing the Windows + R keys.
- Type in
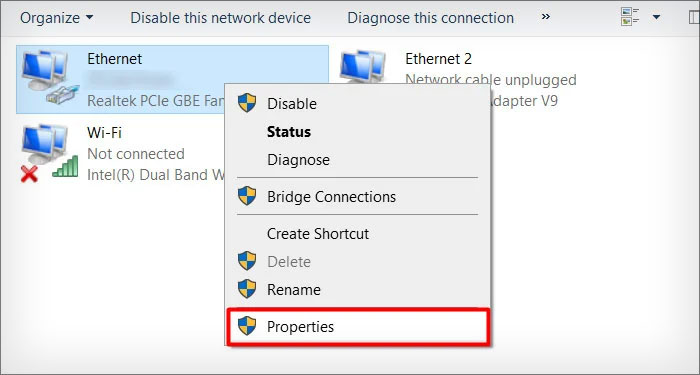
ncpa.cpland hit Enter. - Right-click on your current connection, i.e., ethernet or wireless network.
- Select Properties.
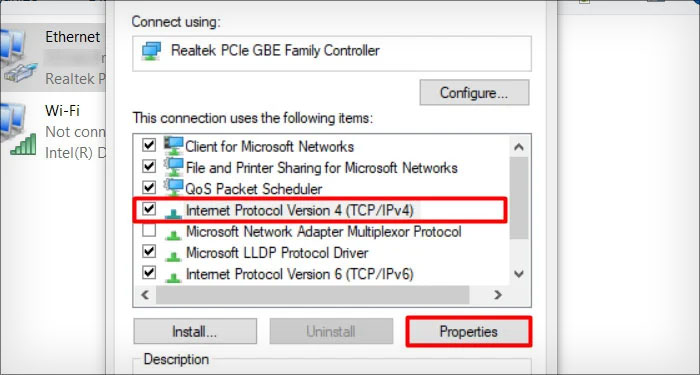
- Click on Internet Protocol Version 4 (TCP/IPv4) and select Properties.
- Click on the Use the following DNS server address radio button.
- Enter
8.8.8.8on the preferred DNS server field and8.8.4.4on the alternate DNS server field.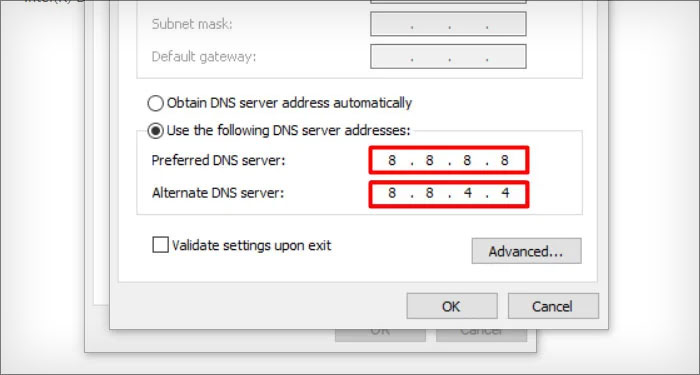
- Click on Ok.
Reset Network Configuration
When your internet connections are incorrectly configured, you can face connectivity issues on Zoom. In such cases, you can reset your network to assign new addresses and configurations to your system. You can reset your network by the following steps:
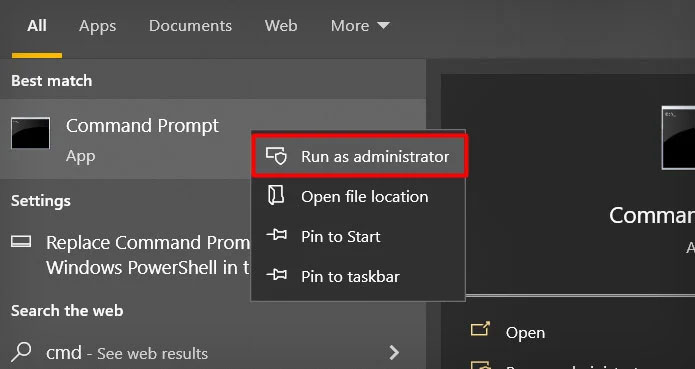
- Type CMD on the start menu and press Enter.
- Right-click on the Command Prompt and click Run as administrator.
- Click on Yes in the prompt.
- Press Enter after typing each of the following commands
ipconfig /releaseipconfig /flushdnsipconfig /renew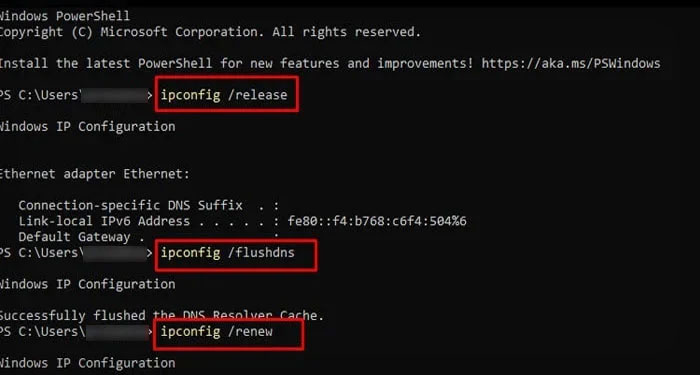
netsh winsock reset
- Close the command prompt and restart your computer.
Check Windows Firewall
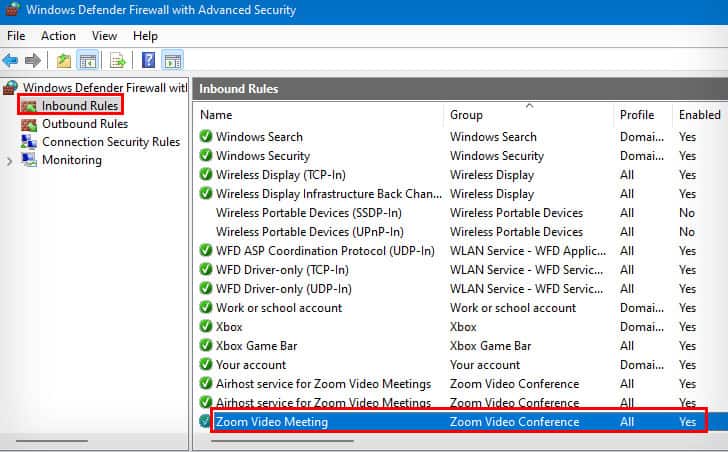
Windows Defender Firewall blocks connections that it determines to be harmful or malicious. In rare cases, it can falsely block Zoom as well, thus causing connectivity issues. You can check whether the firewall has blocked Zoom through the following steps:
- Press Windows + R keys to open the Run command.
- Type in
wf.mscand press Enter. - Switch to the Inbound Rules connection tab and ensure that Zoom Video Meeting is enabled.
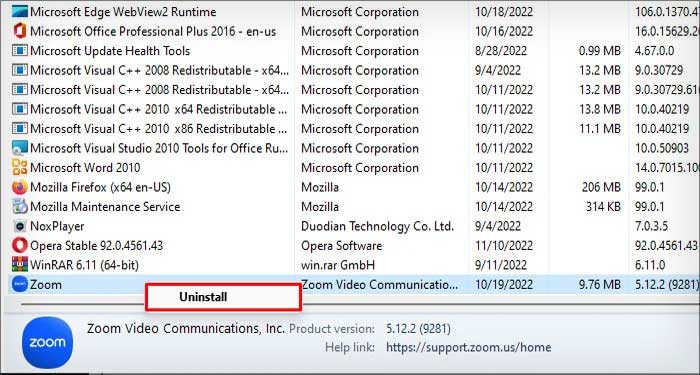
Here’re the steps to uninstall Zoom.
- Open the Run command by pressing the Windows + R keys.
- Type in
appwiz.cpland press Enter. - Right-click on Zoom and select Uninstall. Follow the onscreen instruction to remove Zoom.
Here’re the steps to re-install Zoom.
- Visit Zoom’s official site on your web browser. Zoom will download automatically. If it doesn’t, click on restart the download.
- Open the application to install Zoom.