Compressing files is a straightforward method to share a large number of files among users. You can zip a large amount of files into zip archive and send it as an attachment in Gmail.
However, when attempting to attach a Zip file containing certain file formats, such as.exe, .iso, .apk, and various others, you will get an error message “Blocked For Security Reasons!”
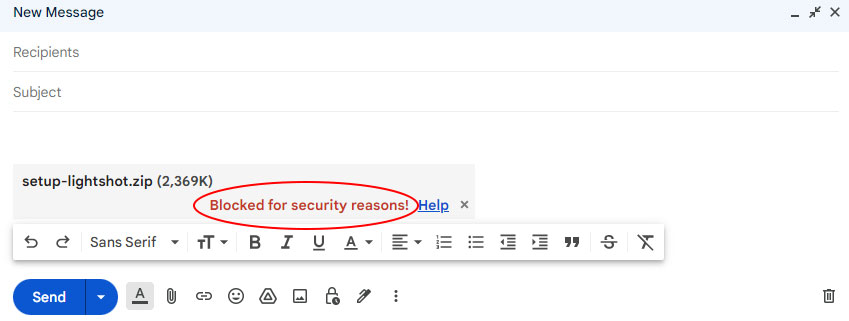
This warning is displayed as a precaution to protect your account from potential viruses and harmful software, and it will restrict users from attaching such files.
In such a case, you will need to upload the attachment to your Google Drive and then share the Google Drive link in the email.
Step 1: Create a Zip File
You can either create a Zip file from the built-in feature on your Windows operating system, or you can use a third-party software.
But before that, please note that Gmail does not allow you to attach certain file types to your email attachment.
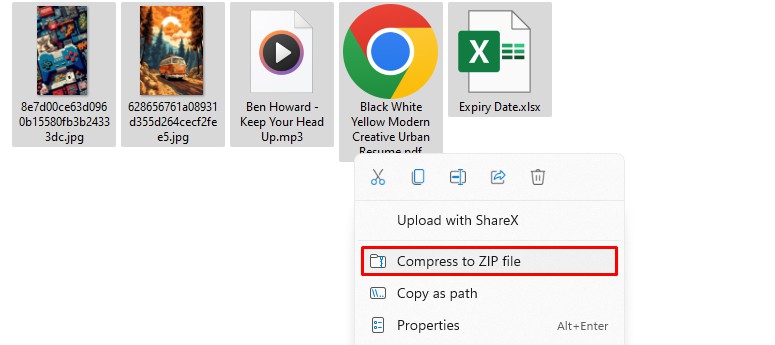
- Open the folder containing the files you want to Zip.
- Select the items you want to Zip and right-click on it.
- On Windows 11, click on Compress to Zip File.
- On Windows 10, Click on Send To and select Compressed Folder.
- On Windows 11, click on Compress to Zip File.
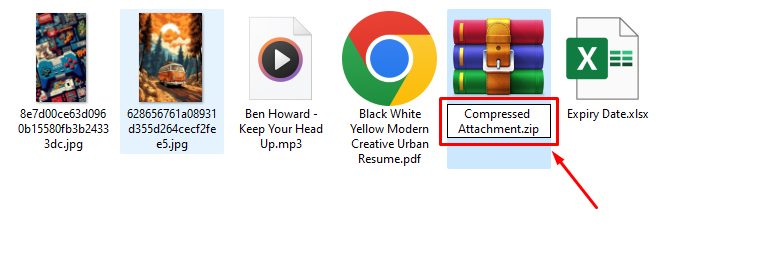
- Lastly, name your Zip file.
Step 2: Send a Zip File
Sending a Zip File from your Gmail is similar to sending any other attachments in Gmail. You will simply need to attach the Zip file to your Email and send it to the recipient.
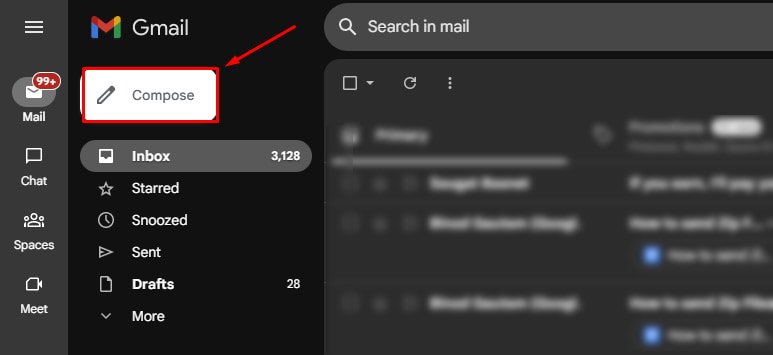
- Open your browser and log in to your Gmail.
- Click on Compose.
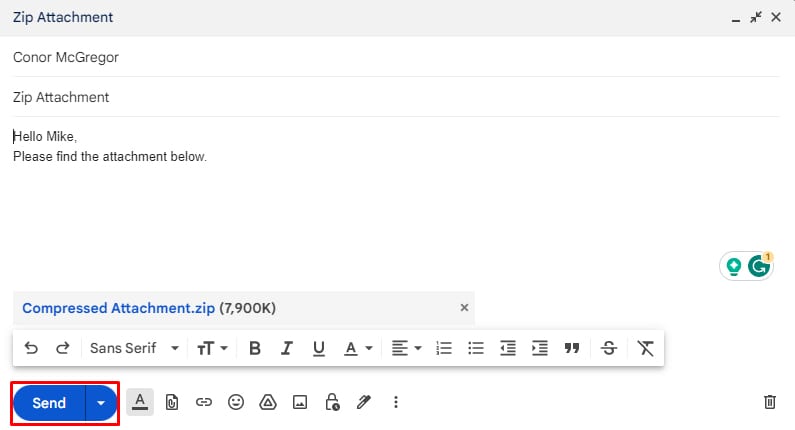
- Compose your email, then add a subject and recipient.
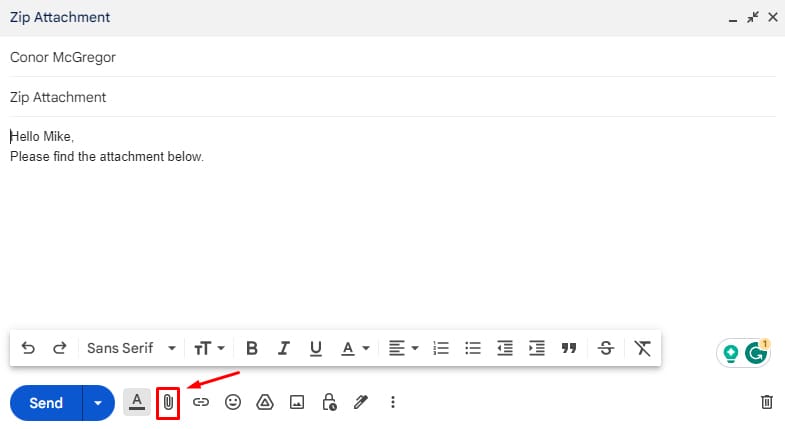
- Click on the Paperclip icon.

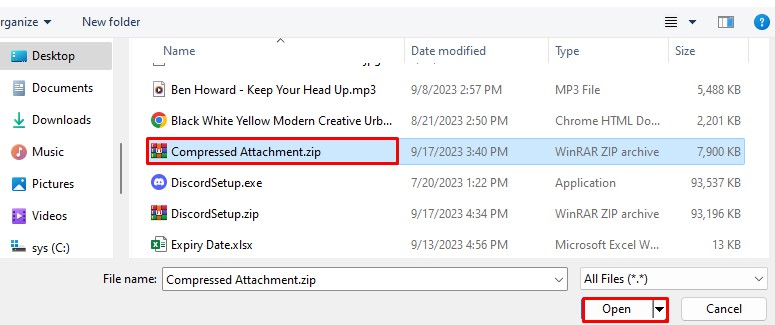
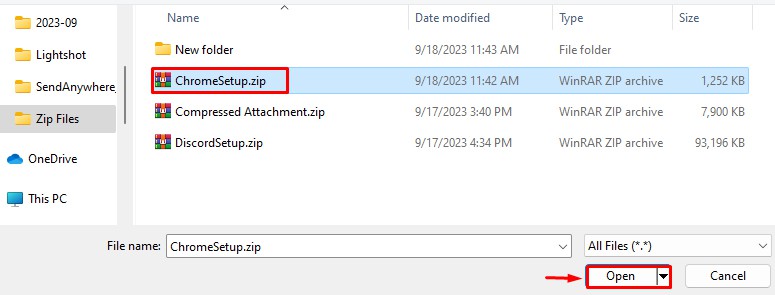
- Select the Zip file and click Open.
- Click on Send to send the email with the Zip file as attachments.
How to Send Large Zip Files via Google Drive?
Sending small-sized Zip files is a straightforward process. However, if you try to attach a file that is larger than 25 MB, Gmail automatically creates a Google Drive link for the file and includes the link in the body of the email.
Additionally, you can also manually carry out this process by uploading the files to your Google Drive, and when composing the email, sharing the link to the Drive.
Automatically Attaching Google Drive Link
- Open Gmail and go to Compose.
- Compose your email and add recipients.
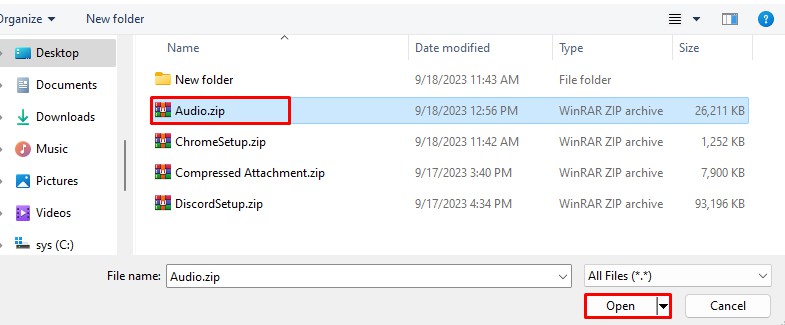
- Click on the paperclip icon and select your file.
- Select the Zip file and click Open.
- Now, Gmail will automatically create a Google Drive link to your file.
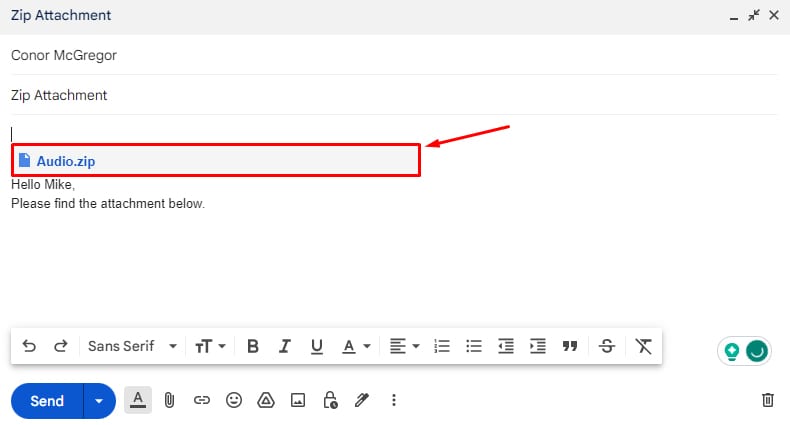
- Click on Send.
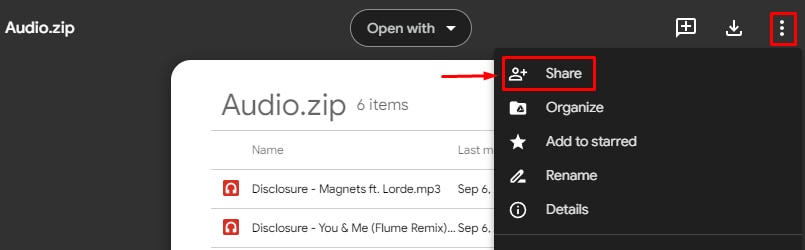
Also, note that you may need to provide file access permission to the recipient. To change it, click on the file link from your email and follow these steps.
- Click on the three Dot icon at the top right and select Share.
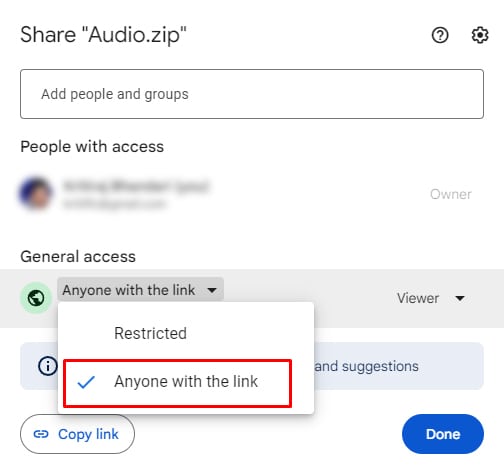
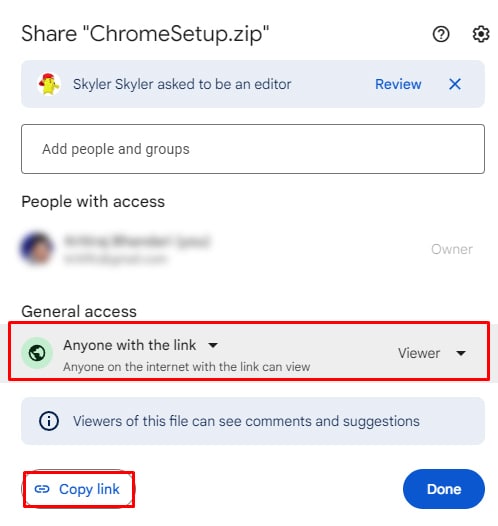
- In the General Access section, click on the drop-down and select Anyone with the link. Then, update the necessary permissions you want to grant. Finally, click on Copy Link.
Manually Sharing Link on Gmail
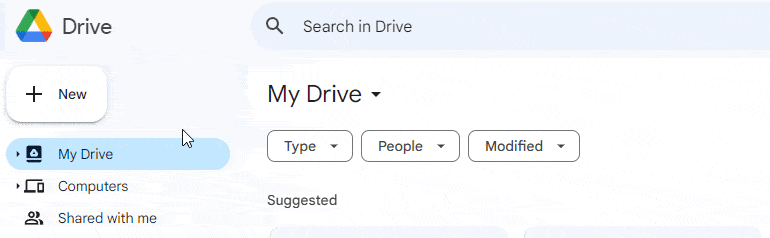
- On the Google homepage, click on the 9-dots icon in the top right corner and select Drive.

- Go to New > File Upload.
- Select your Zip File and click Open.
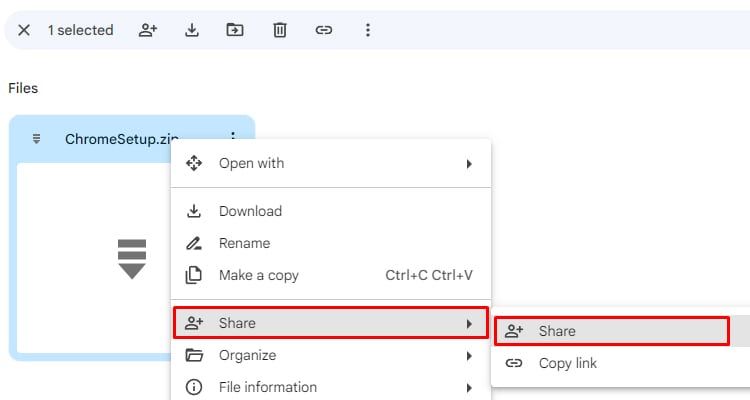
- Right-click on the file from your drive and go to Share > Share.
- In the General Access section, click on the drop-down and select Anyone with the link. Then, update the necessary permissions you want to grant. Finally, click on Copy Link.
- Go to your Gmail.
- While composing the email, simply paste the link into the message body.
- Add the subjects and recipients, then click on Send.