Data entry in Excel is done in alignments of rows and columns. Every once in a while, you might find the need to insert rows in between your data set. However, this process is sometimes interrupted by the “Microsoft Excel can’t insert new cells because it would push non-empty cells off the end of the worksheet…” error.
This is a fairly common error, mostly caused when there is a non-empty cell at the bottom of your sheet. Excel has a limited number of rows of 1,048,576. When you insert a new row, Excel pushes down the non-empty cells. Excel will fail to push down the existing row if any form of data exists at the end of the worksheet.
How to Fix Rows Not Inserting in Excel?
While you will mostly encounter this error because there is data at the bottom of your sheet, there are a few external factors that may fail Excel to insert new rows. These factors include faulty Add-ins, Corrupt or Outdated Microsoft 365 suite.
Inspect and Clear the Bottom Row
On your keyboard, use the navigation shortcut, and hit Ctrl + Down Arrow until you move to the end of the worksheet. See if there are any values at the end row. These values can be anything including static values, formatting, or formulas. Even if you don’t see any value, check for hidden values in the row.
To be on the safe side, if you do not need any of the data in the last row, you can clear everything at the bottom row.
- Use
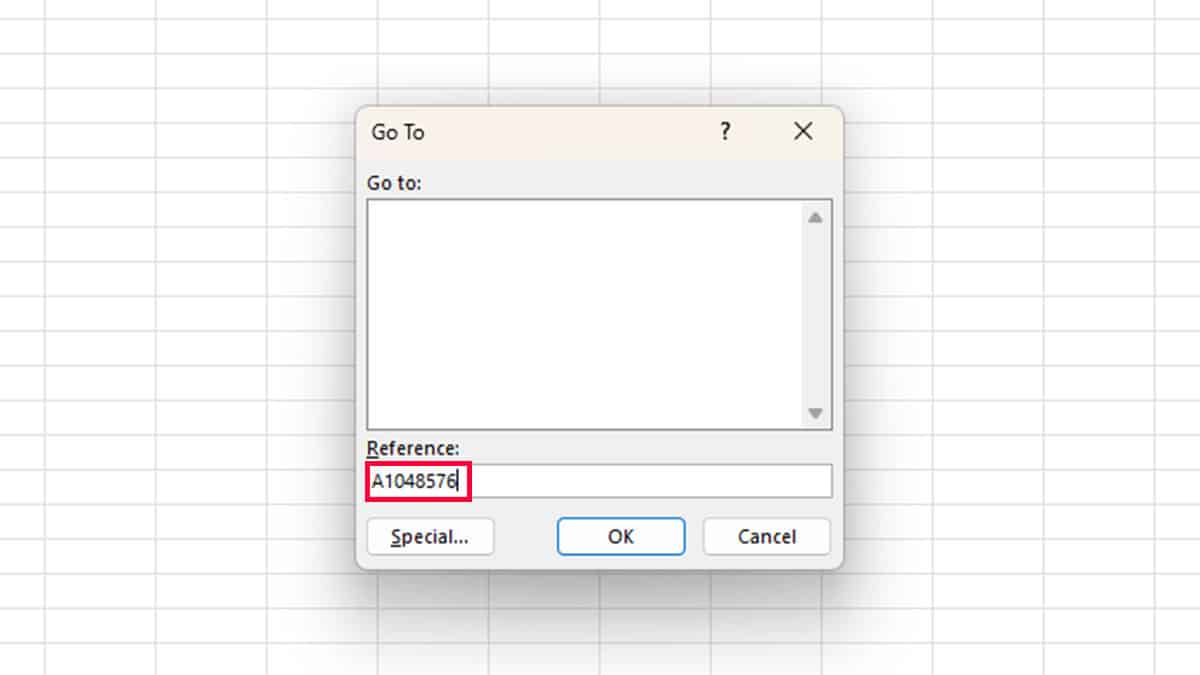
Ctrl + Gto open the Go To window. - Enter A1048576 in the reference and click OK.
- On your keyboard, hit the
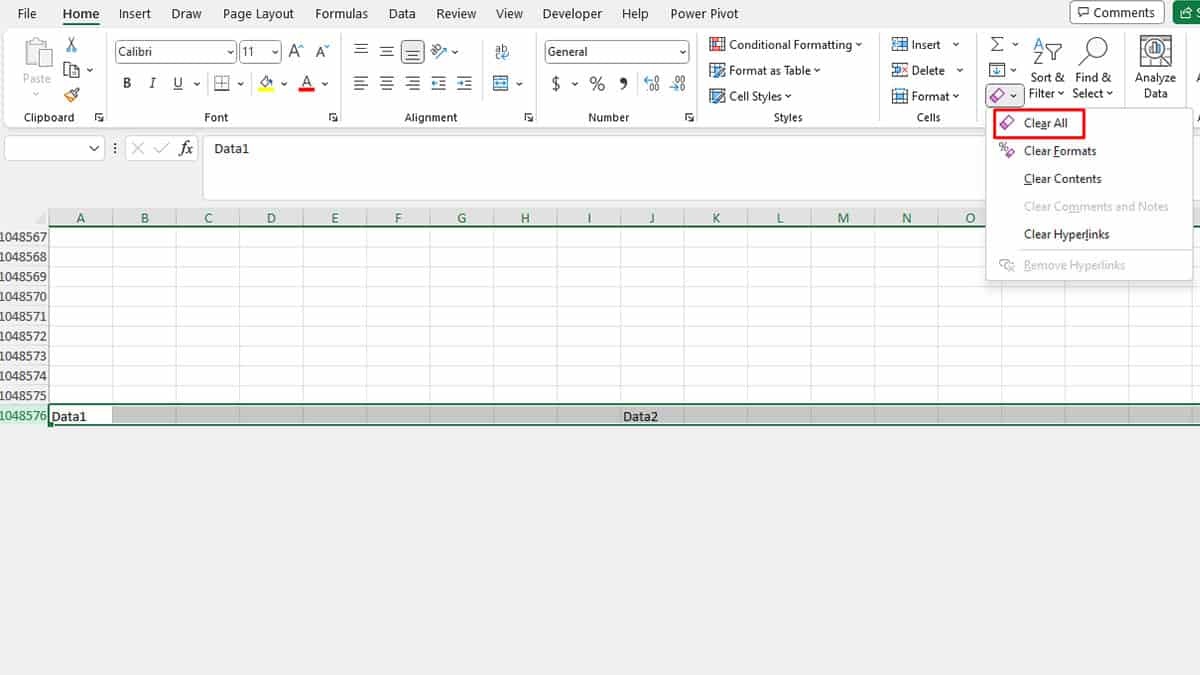
Ctrl + Shift + Right Arrowshortcut. - Head to the Home tab.
- Select Clear > Clear All.
Unmerge Cells
If you have merged an entire column in your spreadsheet, Excel will not allow you to insert a new row. This is because you have already merged the existing 1,048,576 cells in the column, and cannot add any more rows in the sheet.
If you merged the cells by accident, you can simply revert the move. If you merged the cells to fit texts into the cells, you can create line breaks inside a cell.
- Select the column with the merged cells.
- Go to Home.
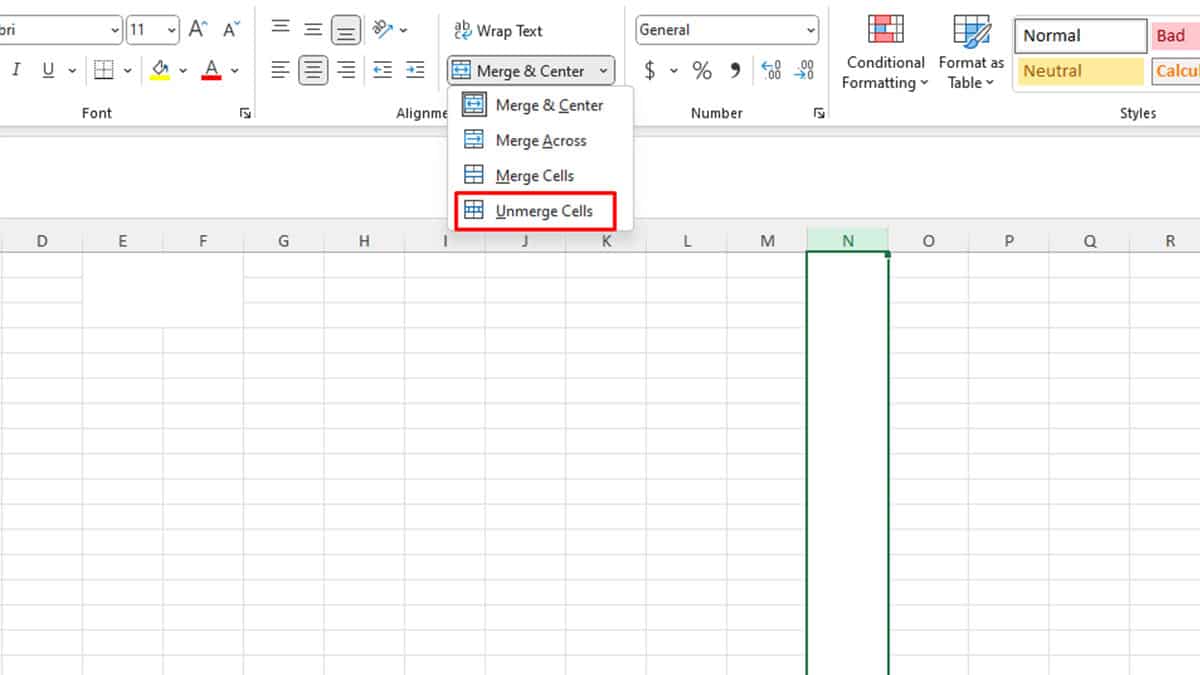
- Select Merge & Center from the Alignment section.
- Choose Unmerge Cells.
Copy-Paste Data to a New Sheet
If you don’t have time to inspect the worksheet at the moment, you can copy-paste the data on a new worksheet on a new workbook. You can select the data range and use the Ctrl + C shortcut to copy the data. Once you create a new worksheet, click on a cell and paste the data using the Ctrl + V shortcut.
Change Referencing
When referencing values in Excel, you have the option to reference an entire column. If you’ve used 3D referencing to reference a column from another worksheet, all data including the non-empty cells are referenced to the destination sheet. This means, there will be data at the bottom row, which will cause issues in inserting new rows.
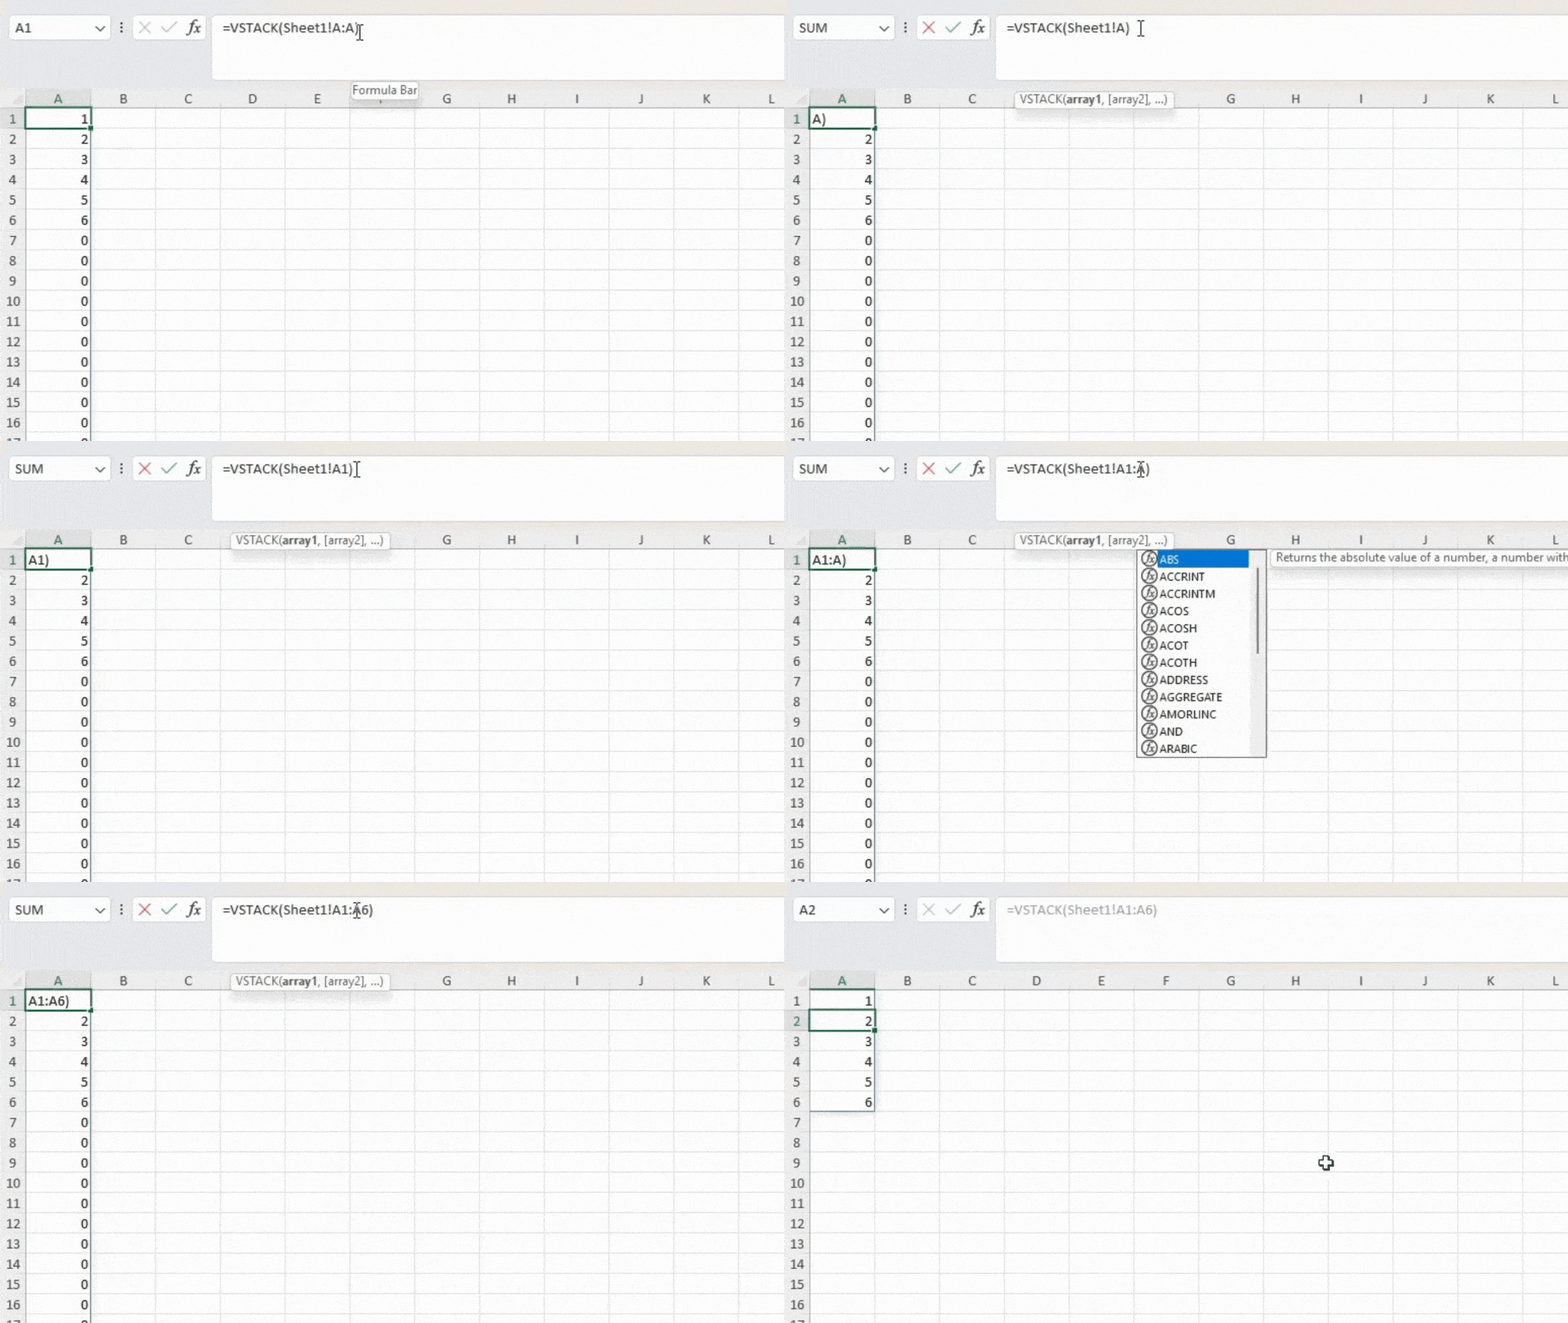
In most cases, you do not need to reference the entire column. Therefore, change the referencing in your formula to reference only the active data range.
Check and Reset Used Range
Even when you remove data at the bottom of your sheet, Excel might still be selecting the range as a used range. You can inspect this by using the Ctrl + Shift + End shortcut. If your selection extends to the end of the worksheet, you will have to reset the used range.
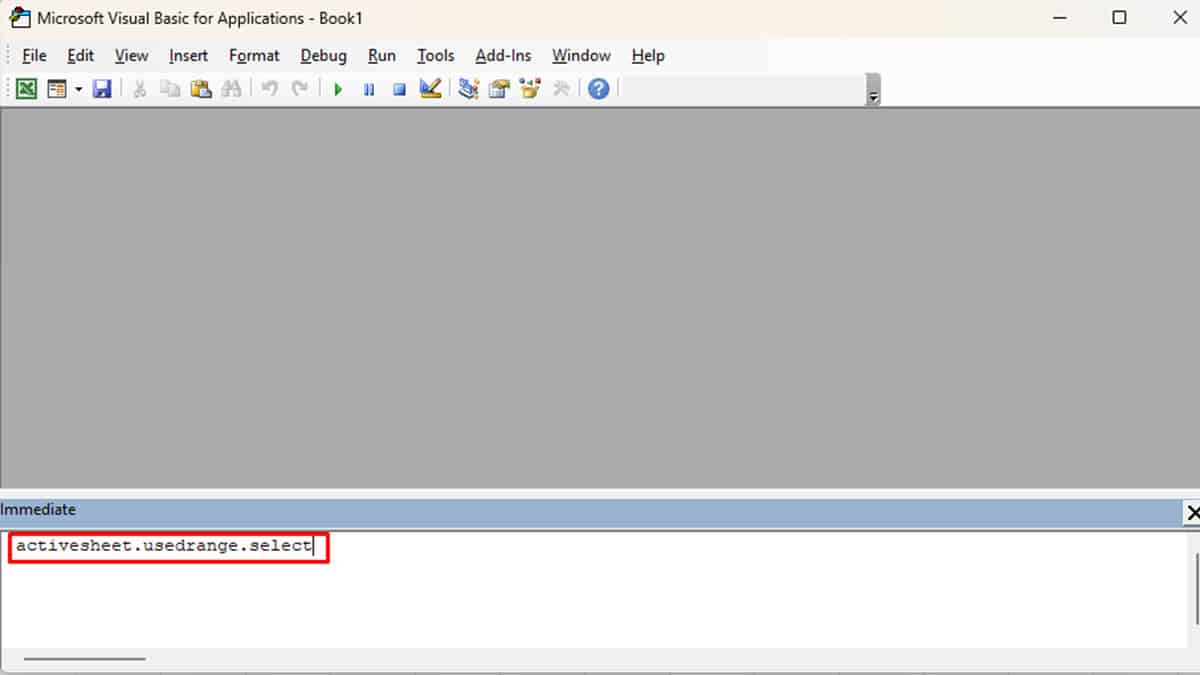
To reset the used range in Excel, you need to enter a code in the Immediate section of the VBA editor window. You can access the VBA editor from the Developer tab in Excel, which is hidden by default. If you haven’t already, enable the Developer tab and follow these steps to reset the used range:
- Use
Alt + F11to open the VBA editor. - Open the Immediate window (
Ctrl + G). - Enter the following code:
activesheet.usedrange.select- Hit Enter.
- Use
Ctrl + Shift + Endto see if only your data is being selected.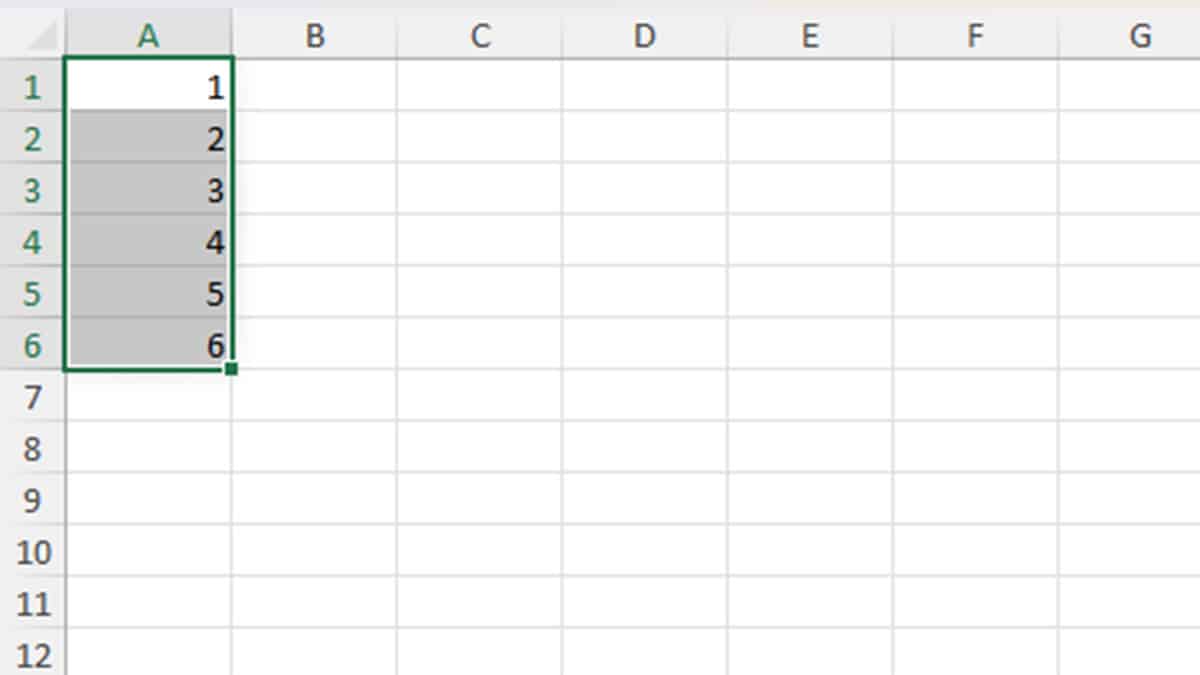
Unprotect Worksheet
If your worksheet has been protected, your access may be limited. This could be why you cannot insert a row in Excel. Similarly, you will also be restricted from inserting rows if another person has locked the range you wish to insert a new row.
If there is any, make sure you have the password of the protected sheet and follow these steps to unprotect your sheet:
- Head to the Review tab on Excel.
- From the Protect section, click on Unprotect Sheet.
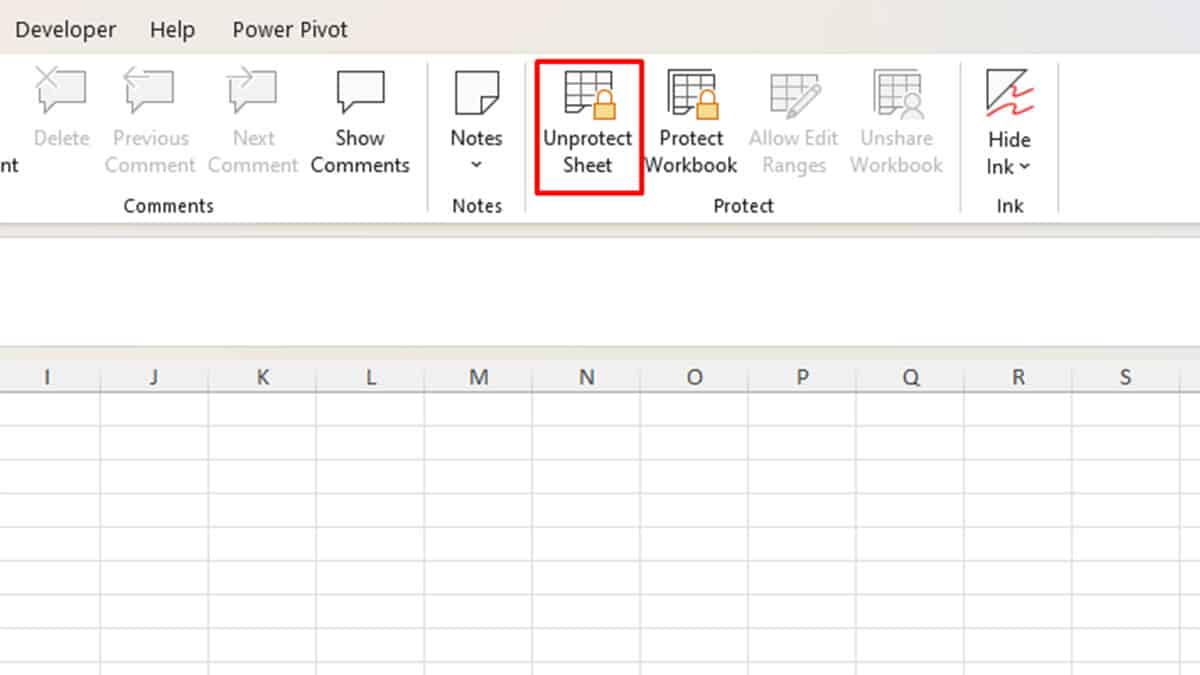
- Enter your password > OK.
Disable Macros
If your worksheet is currently running a macro that formats your cells in some type of way, it is most probably the reason why you can’t insert new rows. If you’re not actively in need of using any macros on your sheet, you can disable them and see if it solves this issue.
- Head to File > Options.
- Go to Trust Center > Trust Center Settings.
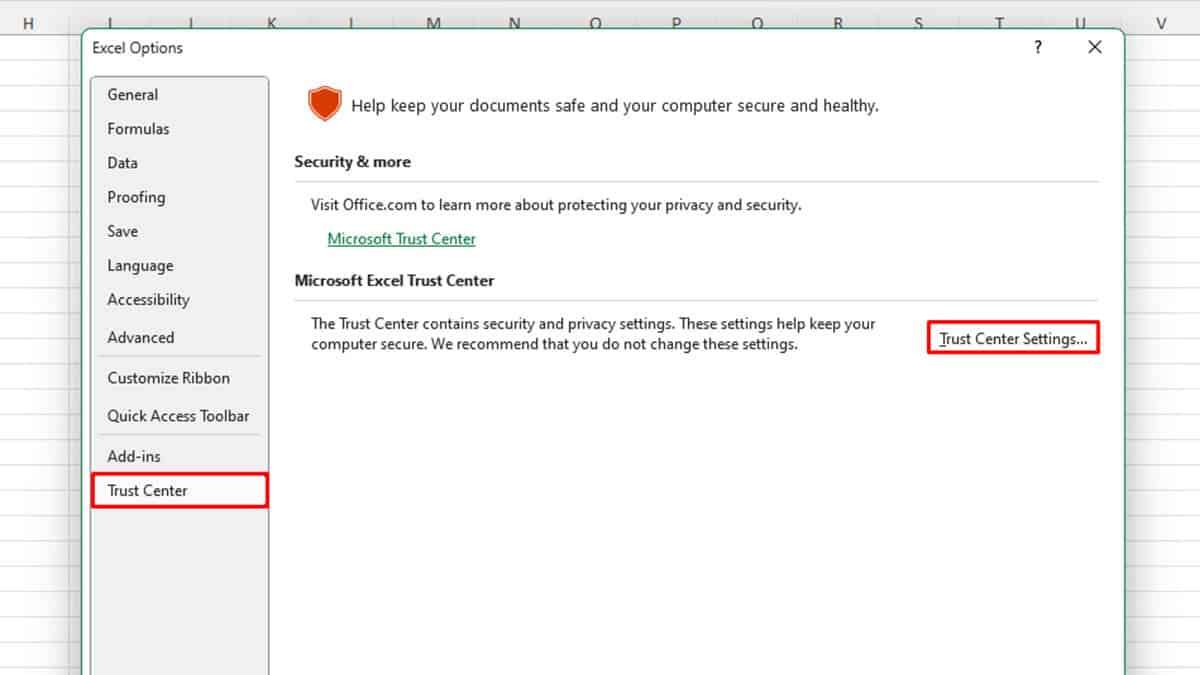
- Select Macro Settings from the sidebar.
- Under Macro Settings, choose Disable VBA macros with notification.
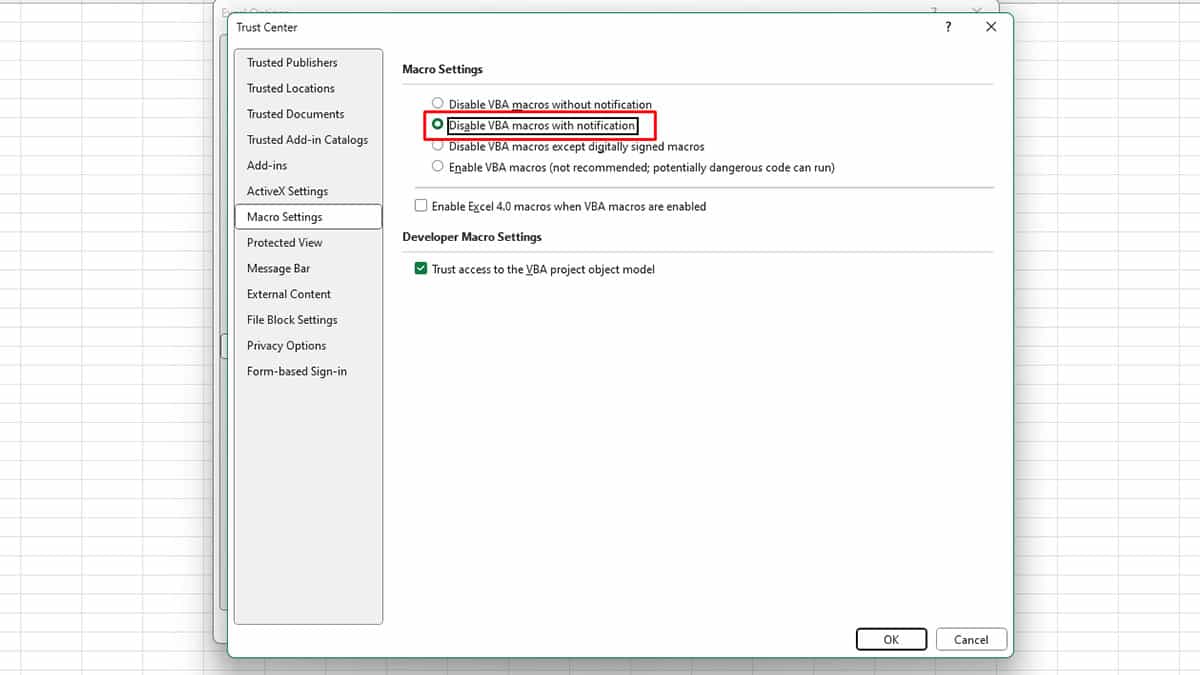
- Click OK > OK.
Disable Add-ins
There could be a faulty extension interfering with the normal functioning of the Excel program. You can test this by operating Excel in safe mode. If you can insert rows in safe mode, there is most probably an add-in causing this issue.
You can identify this add-in by disabling each add-in one by one and trying to insert rows again. Once you locate the add-in, you can delete it from your program.
- Go to File > Options.

- Select Add-ins.
- Next to Manage, choose COM Add-ins > Go.
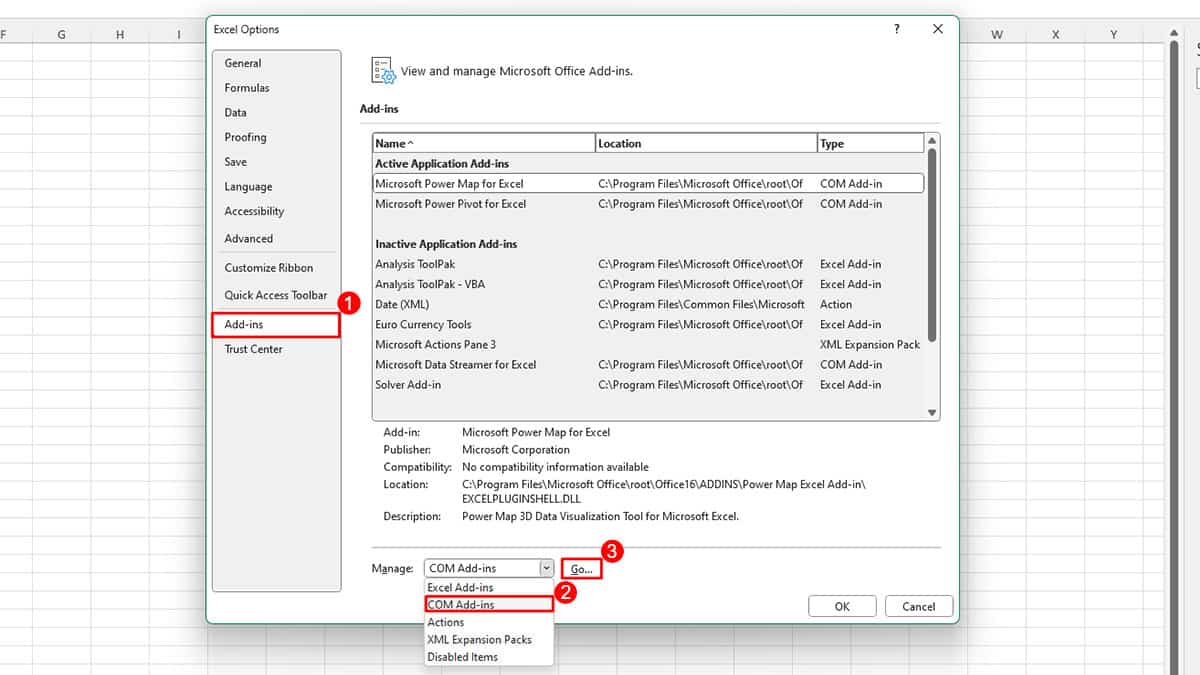
- Uncheck the box next to one add-in and click OK. Try to insert a row on your sheet.
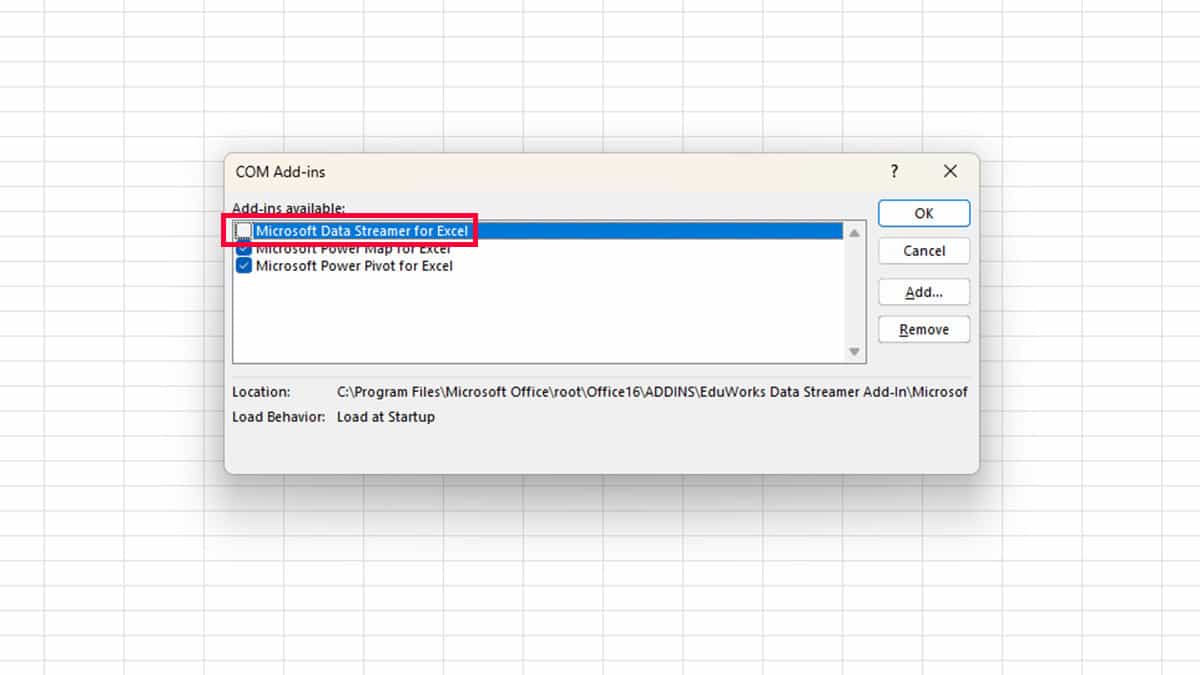
- If the issue persists, repeat this until you locate the faulty add-in.
- Once you identify the problematic add-in, select it and click Remove.
- Click OK > OK.
Update Microsoft 365
If you haven’t updated your 365 suite, it could be the reason why features like adding rows are not working in Excel. You can check for updates and install if any. Then, restart Excel to see if the problem is solved.
- Head to File > Account.
- Click Update Options > Update Now.
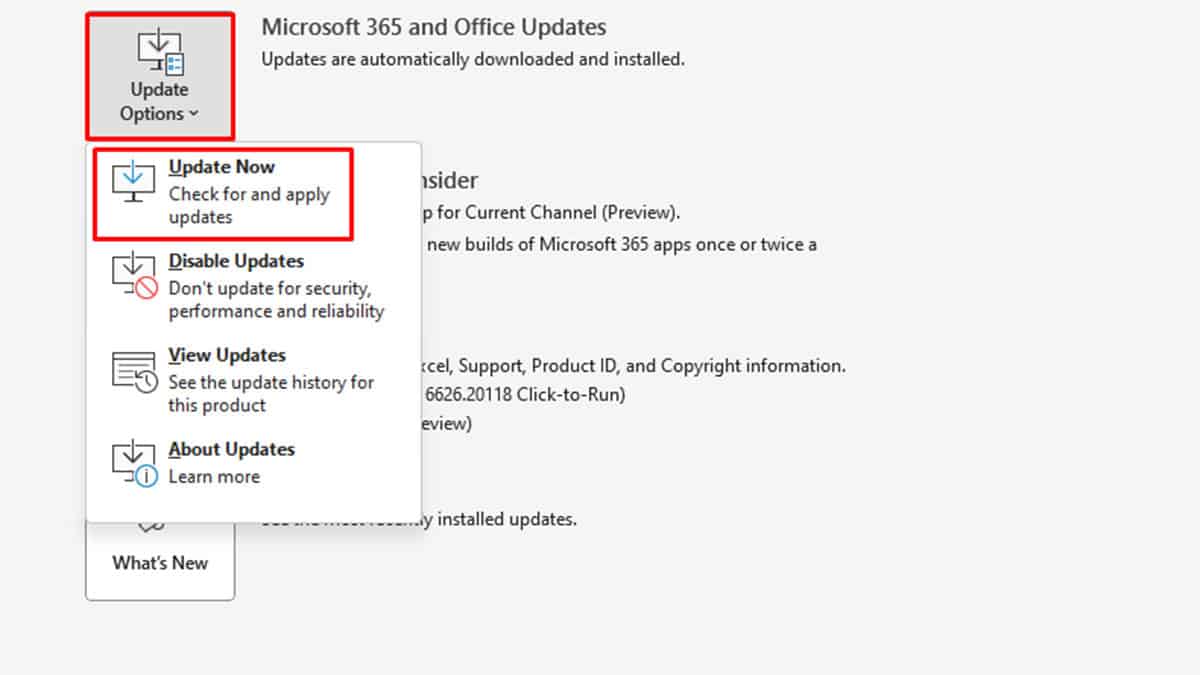
- Microsft 365 will run a check and offer you an update, if any.
- Restart Excel.
Repair Microsoft 365
There could be an issue with the Microsft 365 suite’s program files. When program files go missing or corrupt, an application will not have enough information to carry out certain commands. You can try repairing Microsoft 365 and see if it solves your problem.
- Go to Settings (
Windows key + I). - Head to Apps > Installed Apps.
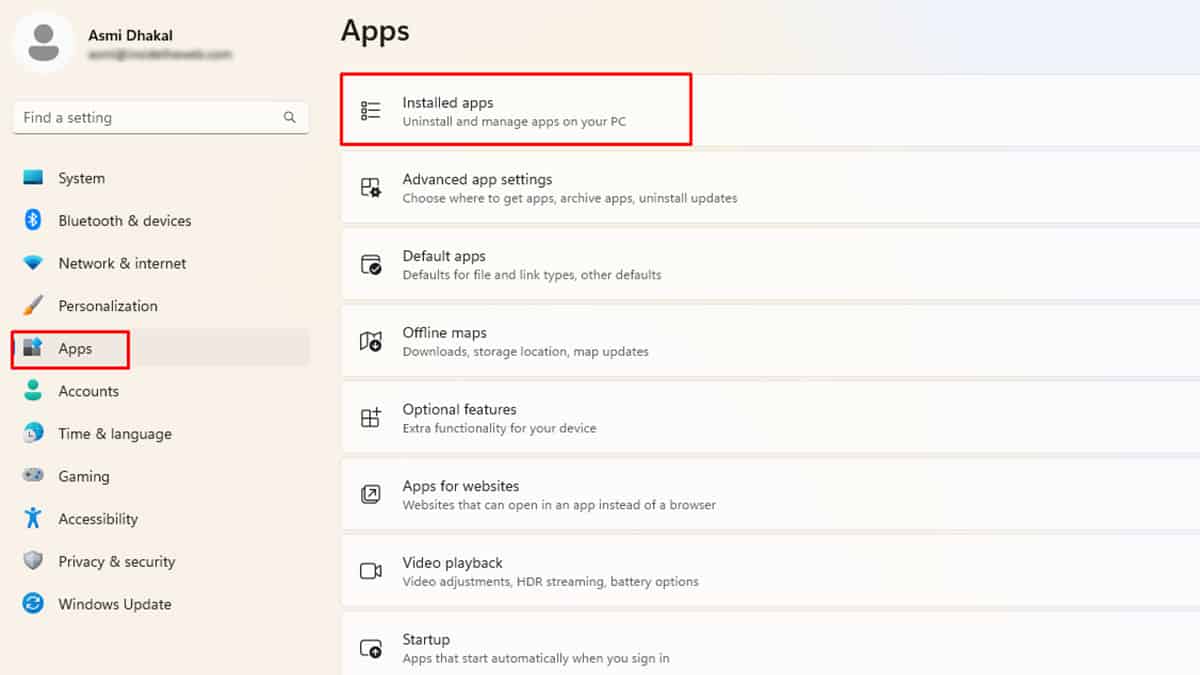
- Scroll down to locate Microsoft 365.
- Click on the horizontal three-dot menu > Modify.
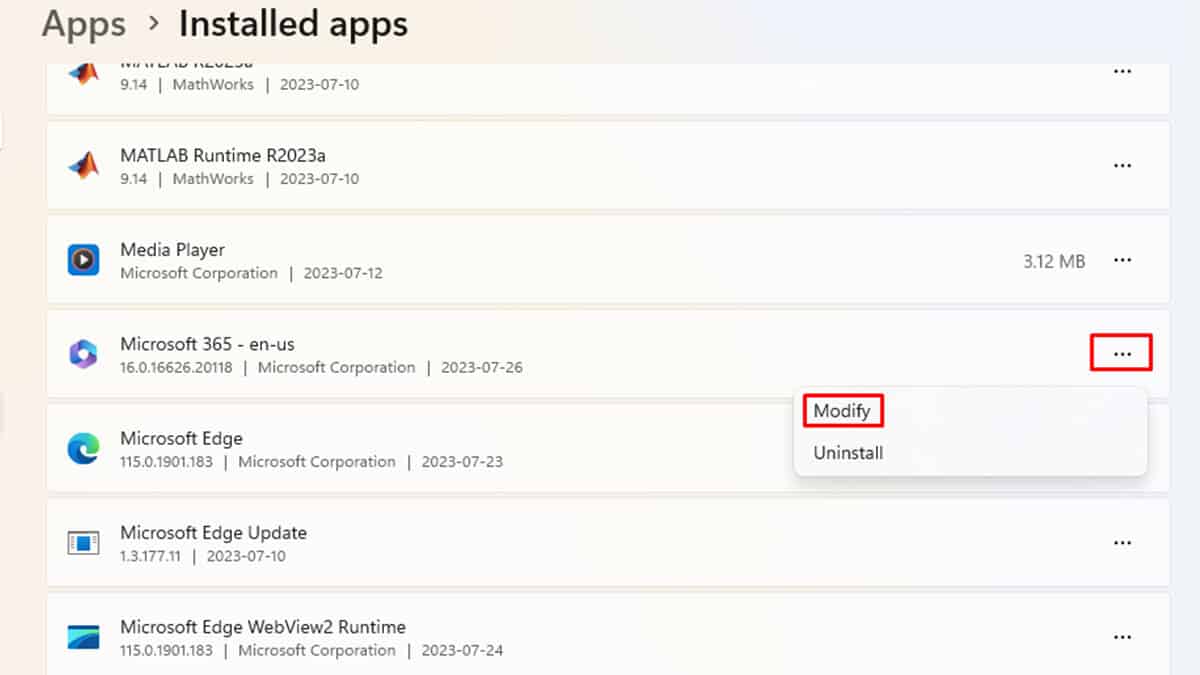
- Select Yes on the User Account Control window.
- Choose Online Repair > Repair > Repair.