As managing multiple tasks in Outlook starts to get difficult, creating a to-do or task list becomes essential to organize them.
Depending on your Outlook version, you can use the built-in Tasks section or the later integrated task planner called “Microsoft To Do” to create tasks and to-do lists on Outlook.
Once you create a task, you can add a due date and make it recurring if necessary. You can even assign tasks, keep track of their progress, and get notified whenever it’s completed.
Using Outlook Tasks
Every Outlook app comes with a dedicated Tasks section. Here, you can create multiple tasks and view them along with flagged emails. You can usually find it in the top left corner or the bottom left corner.
When selecting the Tasks icon, you will find two sections — the To-Do List section and the Tasks section.
The Tasks section only contains the list of tasks. Whereas, the To-Do List section contains both the tasks and flagged emails.
To create a task,
- Open the Outlook app.
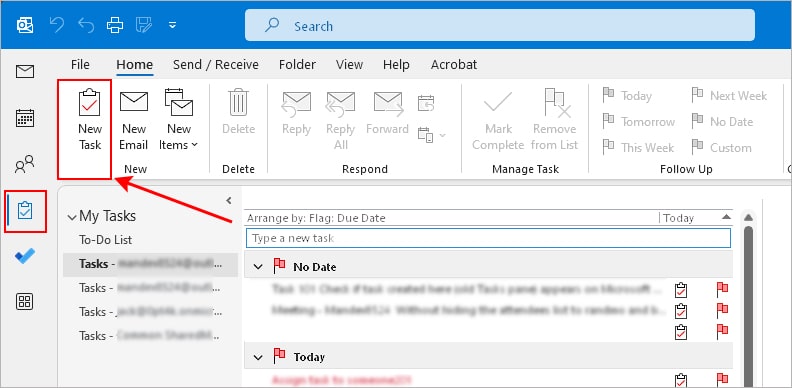
- Select the Tasks icon in the sidebar.
- Under the Home tab, click New Task.
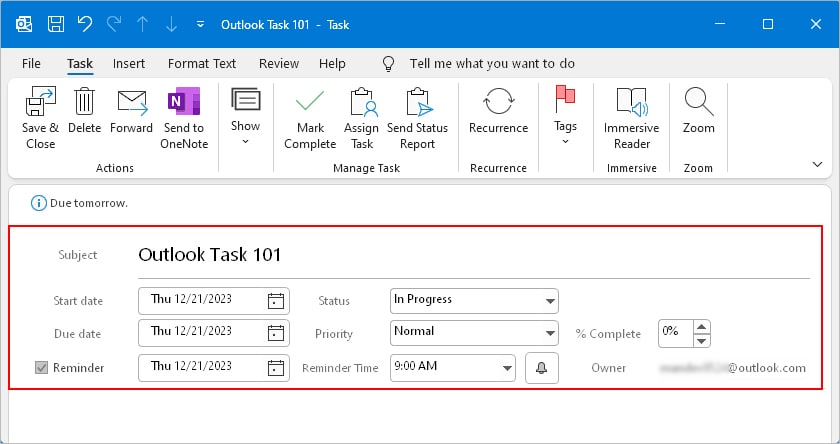
- On the next window prompt, enter necessary details like Start/Due date, Status, Priority, and Reminder according to your preferences.
- Add a note relating to the task on the message body.
- When done, click Save & Close in the top left corner.
To create a recurring task,
- Click New Task or open an existing task.
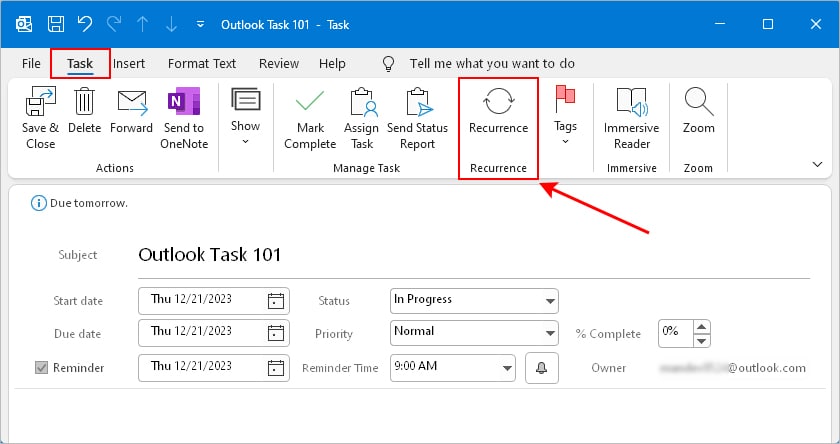
- Under the Task tab, click Recurrence.
- On the next prompt, select the preferred frequency of the recurring task such as daily, monthly, or yearly basis. Or, choose a specific start and end date under the Range of recurrence section.
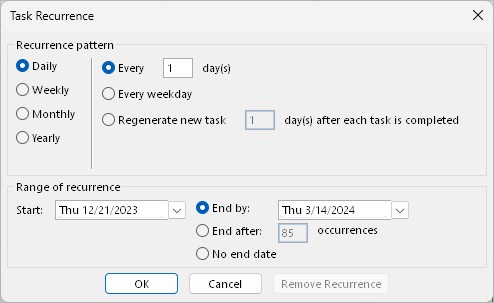
- When done, click OK.
- Click Save & Close in the top left corner.
Using Microsoft To Do
The newer Outlook Desktop and the web version already come with an integrated task planner called “Microsoft To Do.”
If you are using Outlook on a Mac system, you need to separately download it from the App Store or sign in with the Microsoft account on a browser to access the Outlook tasks on it.
However, the good thing is you can access any tasks/to-do lists from outside of Outlook using the Microsoft To Do app.
- My Day: Tasks for the particular day (automatically updated for each day)
- Important: Tasks marked as important (High Priority)
- Planned: Tasks with a due date or a reminder
- Assigned to me: Tasks created by someone else and shared with you
- Flagged email: List of all Flagged emails
- Tasks: List of all tasks (including assigned or shared by others)
To create a task inside Microsoft To Do,
- Select the Microsoft To Do icon. (blue tick icon)
- Select Tasks (one with a list icon next to it) from the sidebar.
- In the right pane, click Add a task.
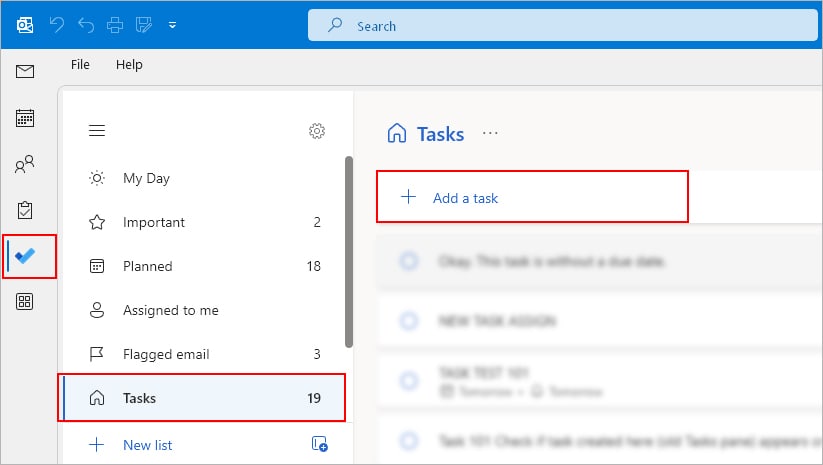
- Enter task details.
- Click the calendar icon to specify the due date of the task starting from the current date.
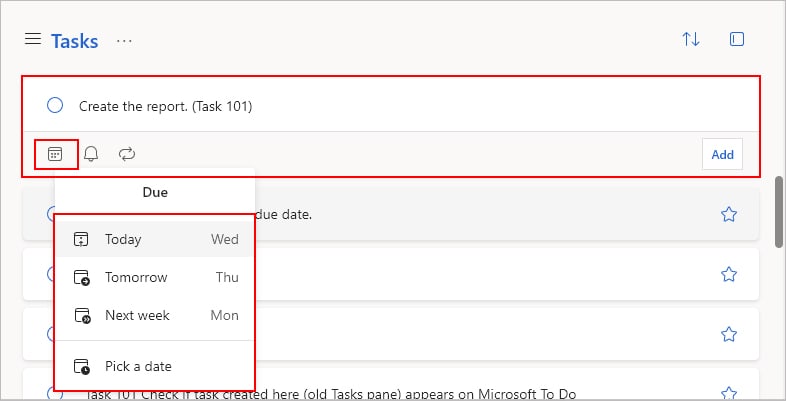
- Click the bell icon to add a reminder.
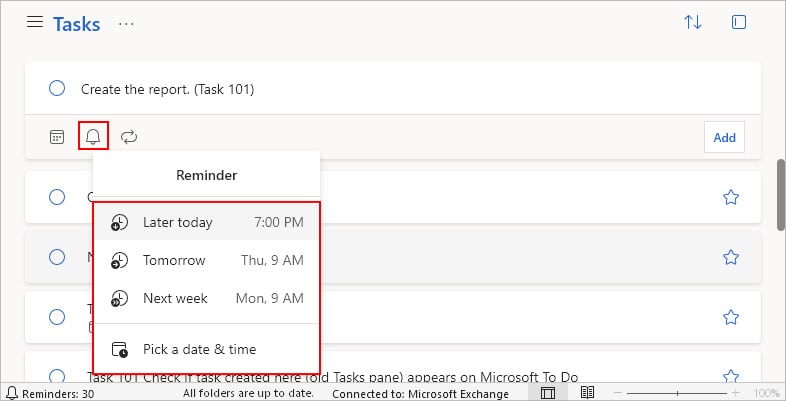
- Additionally, click the repeat icon to create a recurring task.
- When done, click Add.
Outlook Tasks Vs Microsoft To Do: Which One Should You Use?
Well, it depends. Personally, I use the Microsoft To Do app to manage my personal to-do list for the day.
And, since it already has separate sections for different kinds of tasks (flagged, high priority, assigned), it’s much easier to have a quick look at my tasks.
However, if I need to assign/delegate a task to someone else, I prefer using the classic Outlook tasks.
That’s because it helps me keep track of the task and I automatically get a notification along with a status report when it’s complete.
How to View Tasks in Outlook Calendar?
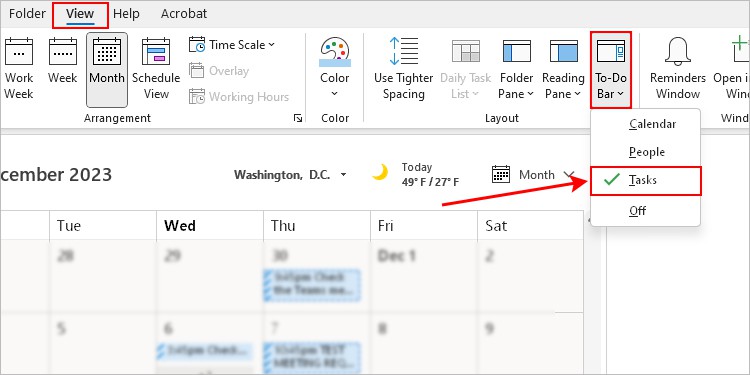
While viewing the calendar, you can also add your due tasks list and flagged emails on the sidebar.
For this, select the View menu. Then, click To-Do Bar and select Tasks. Make sure it has a little tick icon next to it.
