The SUM function is one of the most used functions in Excel. With just one formula, you can get the total sum of entire cell ranges. But, as convenient as using this function is, it can also leave your head scratching when the function does not work.
In most cases, you may get errors like #REF!, #FIELD! when using the SUM function. Or, you might just get 0 as an output and not the actual result.
Usually, such an error arises, when there is a typo or the number is in text format. So, a little change in your formula should fix this.
Types of Errors When Sum Function is Not Working
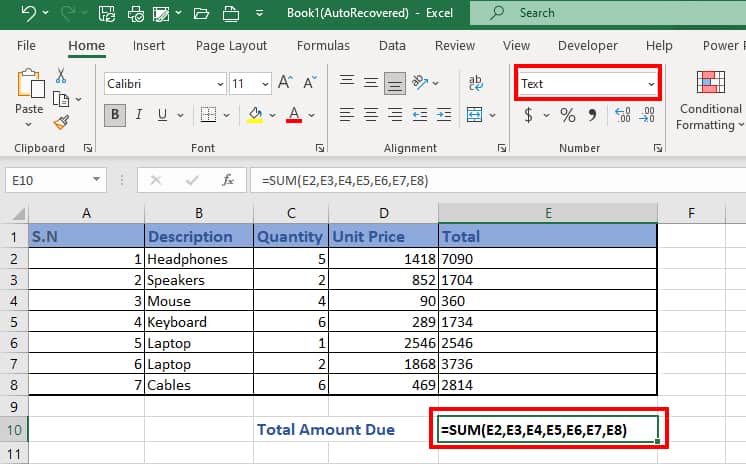
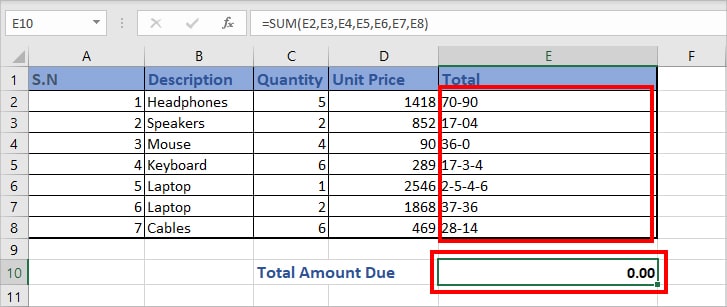
- =SUM(number1, number2,…) Error: If the numbers are in text format while using the SUM function, you’ll not get the output. Instead of this, the formula will stay in the cell. For Instance, =SUM(E2,E3,E4,E5,E6,E7,E8) like in the given image.
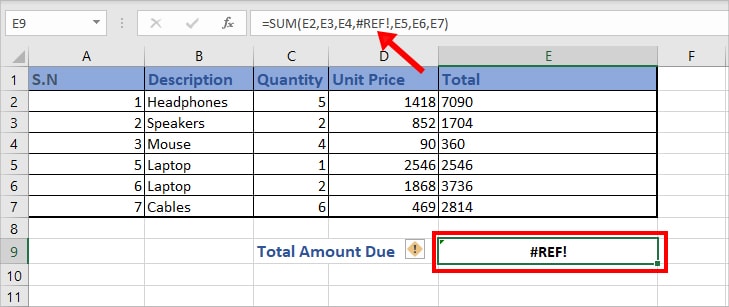
- #REF! Error: Usually, Excel automatically updates the cell references in a formula when you delete a value. But, the SUM function fails to update the deleted column/row. Hence, the SUM function will result in #REF! Error if you have deleted the entire column or row you’ve passed down in the formula.
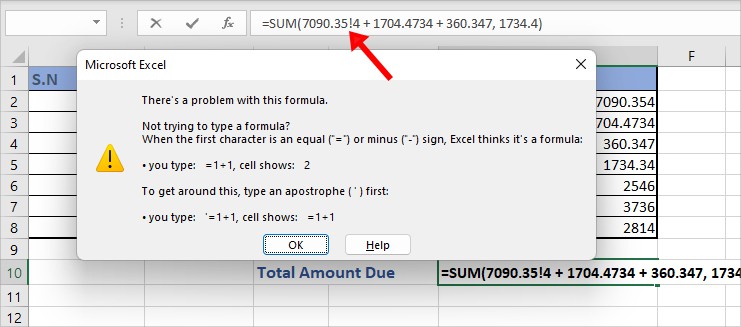
- There’s a problem with this formula: One of the most common mistakes users make is a typo when they manually enter the values inside the SUM function. Comparatively, large numbers with decimals such as the given image are more prone to error. For Instance, when you do not type the number from the keyboard Numpad, you could accidentally enter special characters.
- 0 as an output: The SUM function will return 0 as an output when there are unsupported symbols or delimiters in the numbers. This is because Excel identifies them as texts and not values. For Instance, it could be a dash in between the numbers.
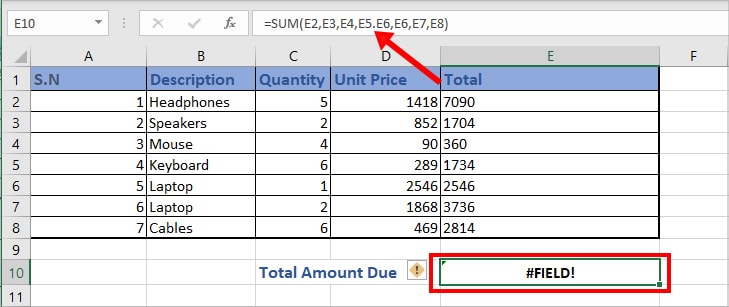
- #FIELD! Error: When using the SUM function, you’ll get #FIELD! Error if you accidentally mistype the formula. For Instance, on the keyboard (.) and (,) are together. So, you may write the formula as =SUM(E2,E3,E4,E5.E6,E6,E7,E8) instead of =SUM(E2,E3,E4,E5,E6,E6,E7,E8). See, even a small typo can lead to an error.
Fixes of SUM Function Not Working
Check for Typo
Usually, if there is a minor typo in your formula, Excel will detect it and prompt you to correct them. For instance, if you’ve mistakenly typed in an apostrophe. You can pick Yes to resolve the error.
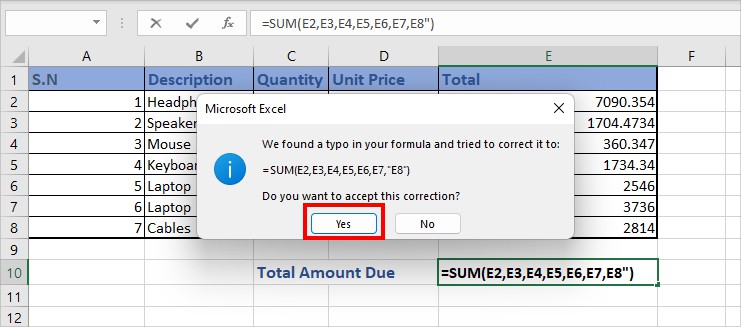
However, this is not always the case. It could be a wrong value in the formula instead, giving you a different result than expected. For this, manually check values in the formula bar and correct them.
Also, we recommend you input the number value in each cell and use these cell references in the SUM function formula instead. It prevents typo errors of number values. But, again, when using cell references, you must be equally careful while you enter the formula to avoid the #FIELD error.
Convert Value to a Number
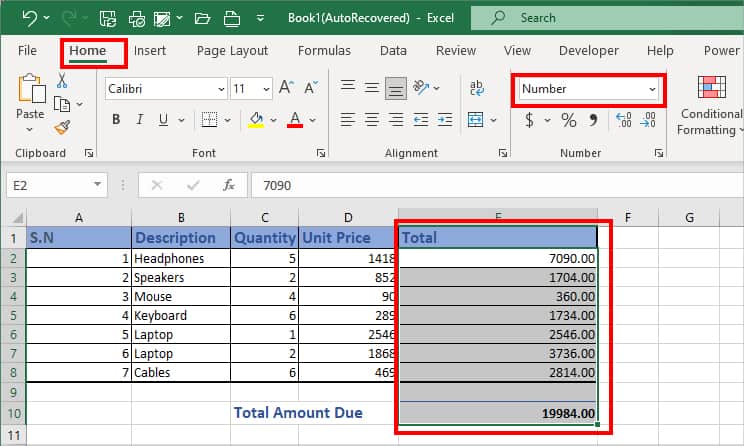
One of the most common reasons the SUM function does not work in Excel is when the numbers are in text format. To fix this, you can change the formatting to the Number. For this, select all numbers. Then, on Home Tab, pick the Number format from the drop-down menu.
Make sure you also convert the format of the output cell. Users often miss out on this and still encounter the error.
Replace Delimiters
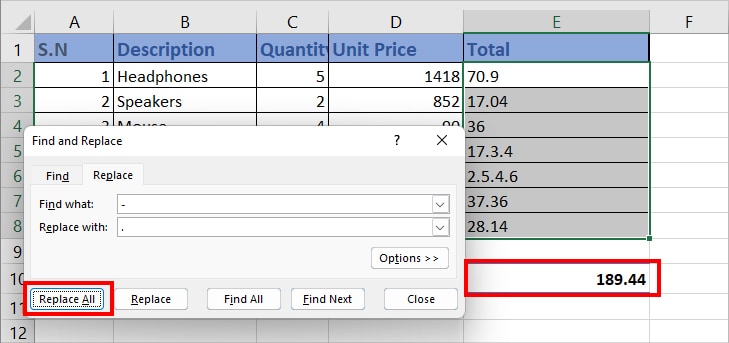
Does your number have dashes or any other symbols? If you have, you need to either remove them or replace them with the appropriate delimiter for the SUM function to work. Excel supports only (.) decimal symbols in the number during calculations.
To quickly replace them, we will be using the Find and Replace tool. It is the quickest way to locate all the unsupported symbols and substitute them with (.).
In the given steps, we have provided the steps to replace dashes as a reference. Make sure you input the symbol you have in the Find what menu.
- Firstly, select the number ranges on your spreadsheet.
- Pres Ctrl + H keys to bring up the Find and Replace window.
- On Find what, enter – and . on Replace with field.
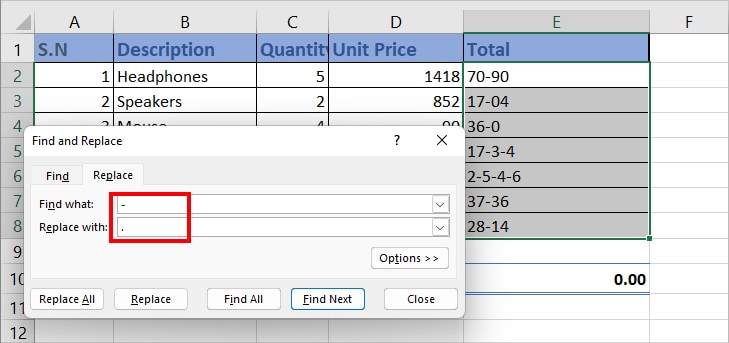
- Click on Replace All.
Quick Repair Office Applications
If the SUM function is not working on your Excel spreadsheet without any error, perform a quick office repair. When you do this, Microsoft will look for the existing app bugs and fix them.
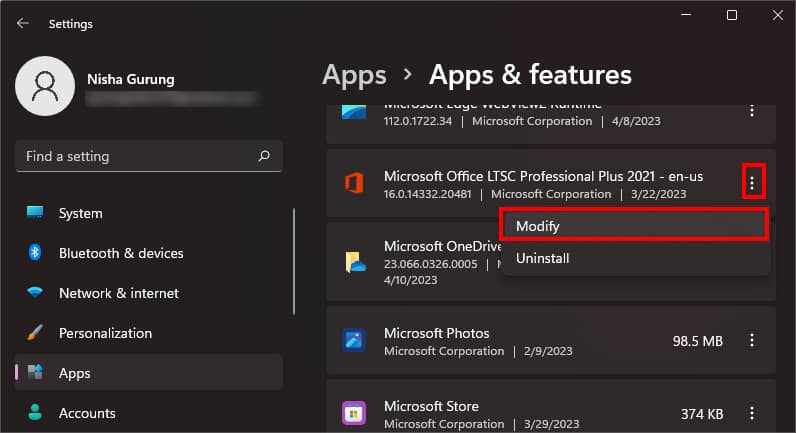
- For Windows PC, right-click on the Start button > Apps and Features.
- Scroll to find Microsoft Office Application. Next to the app, expand More icon and pick Modify.
- When prompted, click Yes.
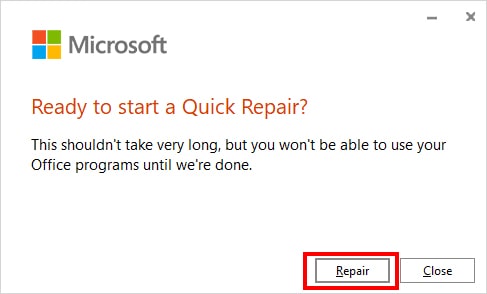
- On the Microsoft Repair Window, select Quick Repair. Click Repair to confirm.
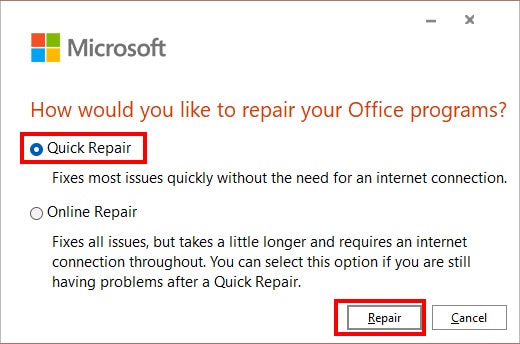
- Again, choose Repair.
