Power BI (business intelligence) is commonly used for data visualization. Nowadays, most companies seem to have integrated this program into their Microsoft 365 package. This is probably because of the convenience it provides to non-technical companies in data analysis.
One thing one might notice when they view the Power BI interface is that it is quite similar to Excel. However, it is a completely different program. In order to view the data from Power BI on an Excel spreadsheet, you will have to export it to Excel.
There are two versions of Power BI; Power BI Desktop and Power BI Service (PowerBI.com). The process of exporting elements slightly varies depending on these versions. In this article, we have covered exporting data from Power BI to Excel on both of these versions, so keep reading!
Export from Power BI Desktop
If you have the Power BI application installed on your computer system, you’re using the Power BI Desktop version. Exporting data from this version is pretty straightforward. You will get to export the data as a .csv file, which is supported in MS Excel. If you wish to convert it to a different file type, you can do it from the Excel program itself.
- Launch Power BI and open your file.
- Select the element you wish to export.
- Click on the three-dot menu.
- Choose Export data.
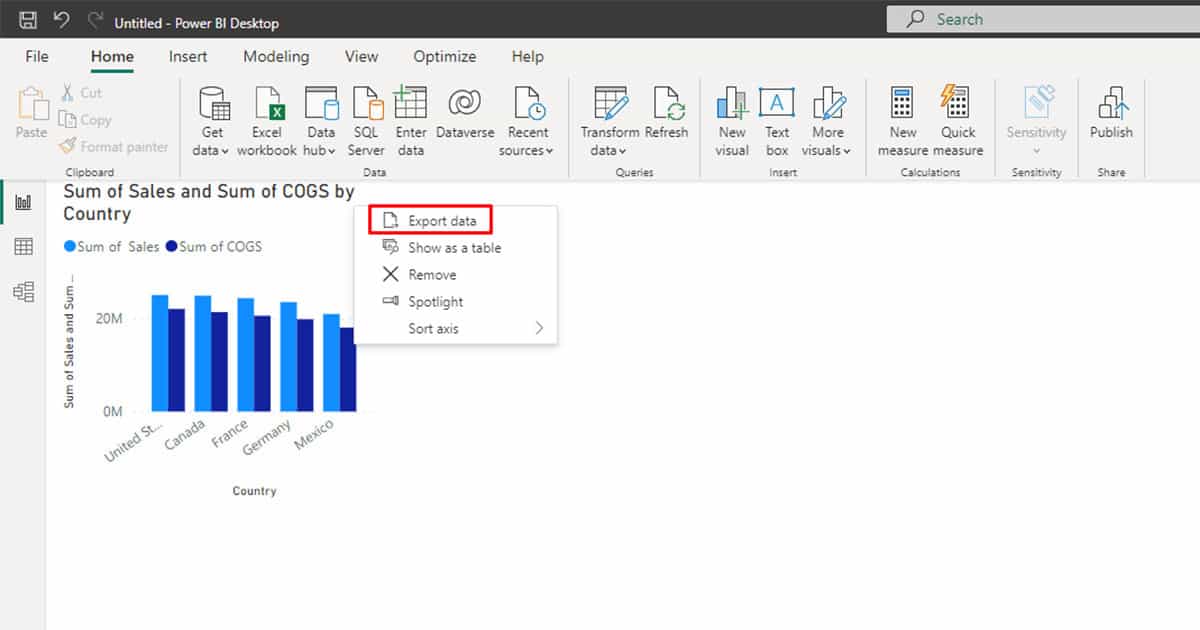
- Navigate to the location you wish to save your file > Save.

Export from Power BI Service (PowerBI.com)
Exporting data from the Power BI web is a bit different than exporting from Power BI desktop. In some ways, I find that exporting from Power BI to Excel is better in Power BI Service.
While exporting is limited to .csv files in Power BI Desktop, you have the option to choose between exporting your data as a .csv or, an .xlsx file in Power BI Service. Additionally, you get to choose whether you want to export a summarized version or include all underlying values from your element to Excel.
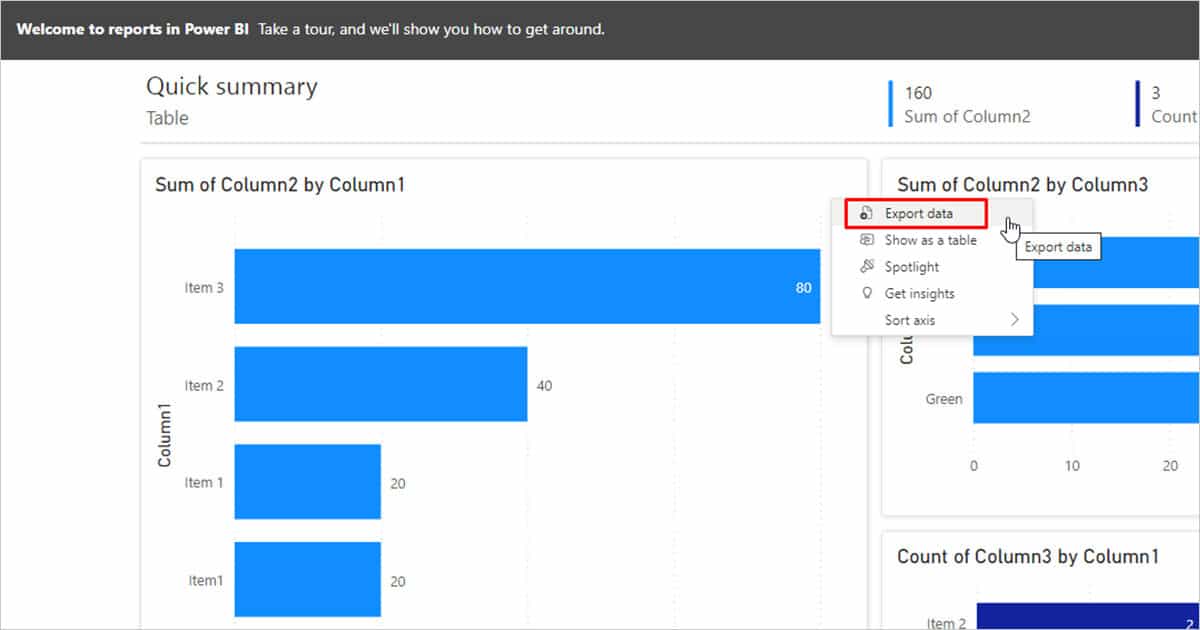
- Open Power BI Service on your browser and open your file.
- Click on your element and click on the three-dot menu.
- Choose Export data.
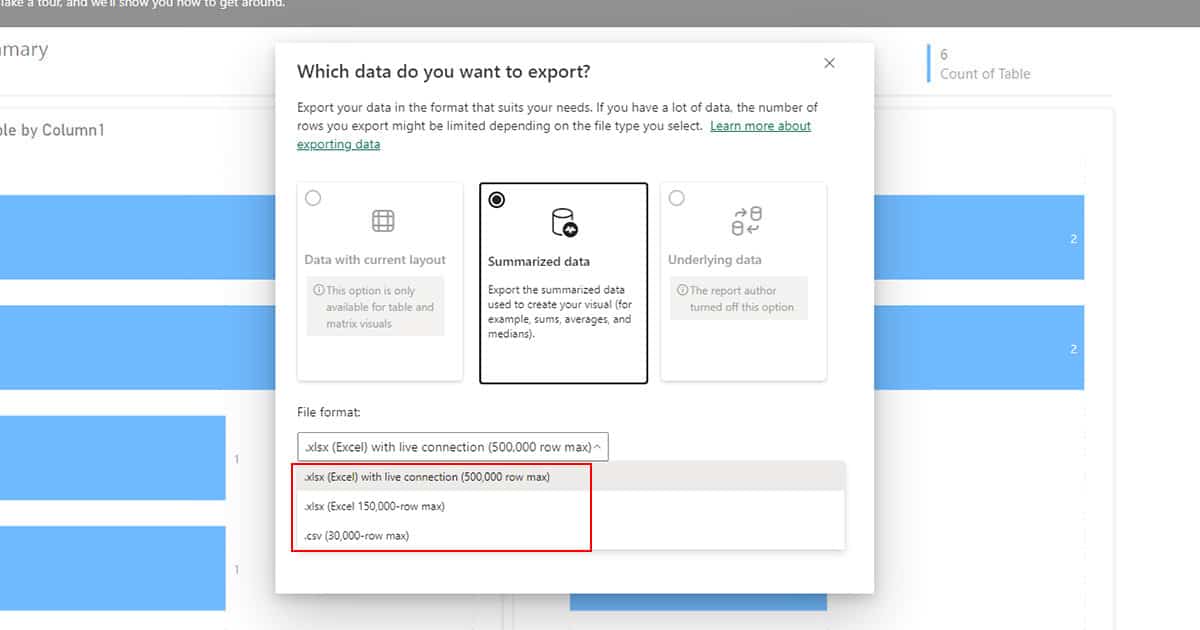
- In the Export Data window, select one of these under “Which data would you like to export?”
- Summarized data: The Power BI program will only export the rows and columns used to create the visualization. This will therefore summarize your data from the original table.
- Underlying data: This will export all data, including the values used and not used to create the illustration. In a nutshell, it will export all data from the data table used to create your visualization.
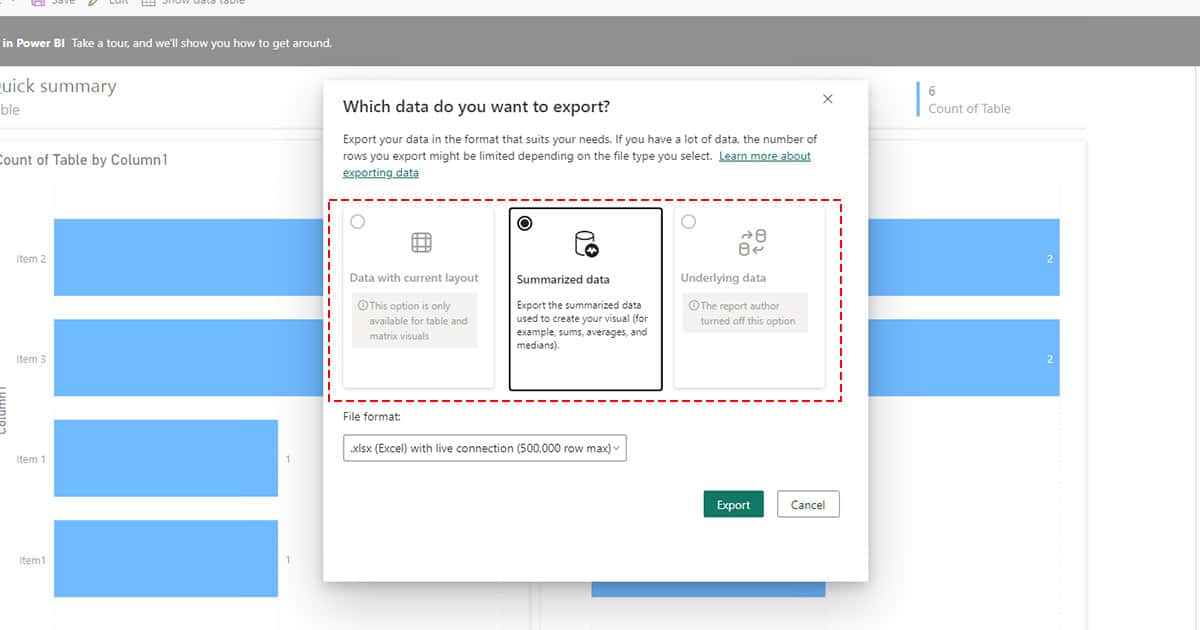
- Choose either .xlsx (Excel) or .csv under File Format.
- Click Export.
Can’t Export Power BI to Excel?
If you’re not the designer of the Power BI file, you may not be able to export the file to Excel. This is because designers are supposed to configure the export settings in Power BI to allow other users to export Power BI files.
As a designer, you have the option to let other users export only the summarized version of an element in Power BI, export both summarized and underlying data or exempt users from exporting anything from the file. If you are the designer, then follow these steps to configure the expert setting to allow users to export Power BI to Excel:
- Launch Power BI.
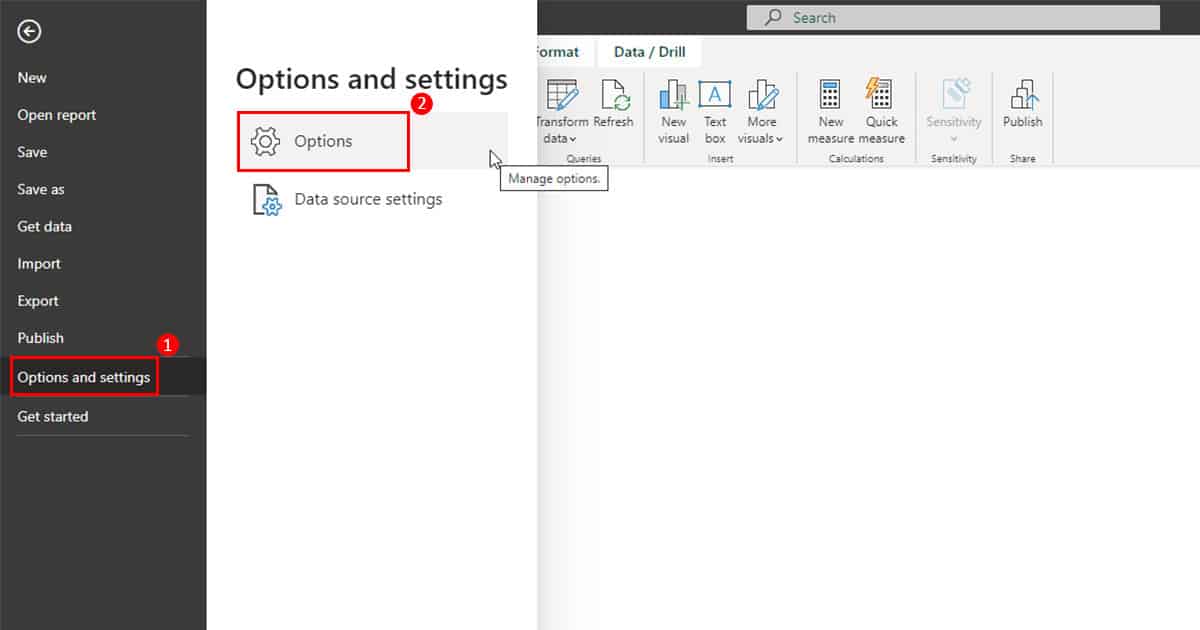
- Select File from the menu bar.
- Head to Options and Settings > Options.
- Select Report Settings in the CURRENT FILE section.
- Locate Export data and choose one of the following:
- Allow end users to export summarized data from the Power BI service or Power BI Report Server.
- Allow end users to export both summarized and underlying data from the service or Report Server.
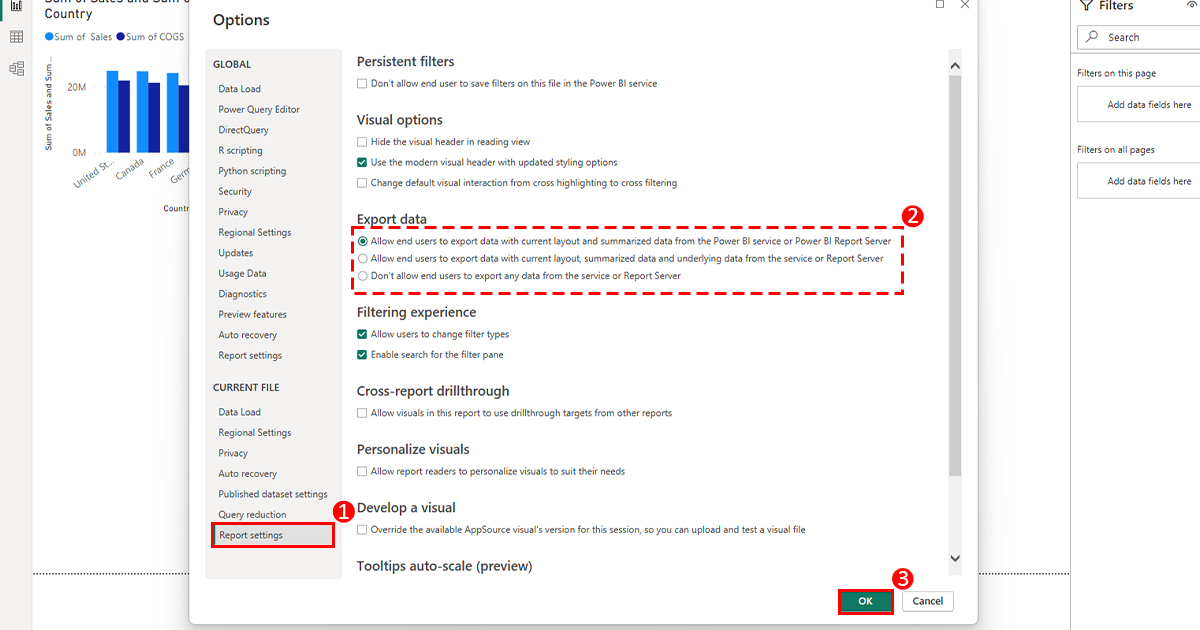
6. Click OK.