Conditional Formatting is a lifesaver when it comes to quick analysis of data. While you must be familiar with using conditional formatting in Excel, some of you may be surprised to know that this functionality also exists in Outlook.
You can enter a value sent by a specific user and enter a rule to format these values accordingly. You can also change the format of pre-existing Conditional Formatting rules such as an Unread Message, Expired Mail, and so on.
How to Use Conditional Formatting in Outlook?
Now that you know that conditional formatting does exist in Outlook, let’s get into how you can actually use it. Unfortunately, using conditional formatting isn’t as straightforward as it is in Excel, but you can still get used to it with a bit of practice.
Step 1: Locate the Conditional Formatting Option
- Open Outlook and head to View from the menubar.
- Select View Settings from the Current View section.

- From the window, click Conditional Formatting.
Step 2: Set Conditional Formatting Rules
- Under the Rules for this view, select the item you wish to enter the rule for.
- If you want to insert the rule for a custom value, click Add.
- Select the Font button to set the formatting.
- Choose a Font, Font style, and Size.

- If you wish to apply effects, click the box next to the effects you want to apply.

- Choose a color.
- Select a Script.

- After previewing the value in the Sample section, click OK.
- Select OK > OK to confirm the changes.
Use Conditional Formatting to Format Unread Messages
Outlook already has a formatting it uses for messages that you have not read. However, you can change this formatting and apply your custom format to view unread messages. This is just an example of how you can use Conditional Formatting in Outlook. You can use these steps to conditionally format other values.
- Head to the View tab in Outlook.
- In the Current View section, select View Settings.
- Choose the Conditional Formatting option in the Advanced View Settings window.

- Select Unread messages from the Rules for this view section.
- Under Properties of selected rule, select Font.

- We applied the Tahoma Font in an Oblique style and left the Size as Normal.
- Under Effects, we choose to apply Underline.
- We selected Purple as our Font color and left the Script as Western.
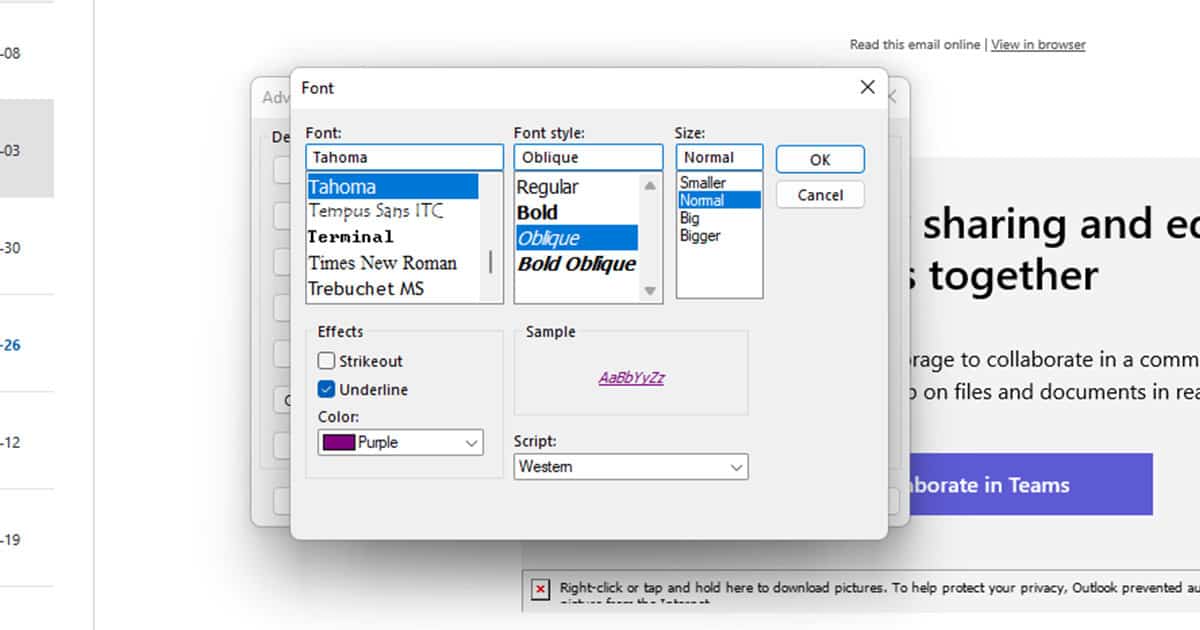
- Click OK.
- Click OK twice and now the formatting is applied to all unread messages.
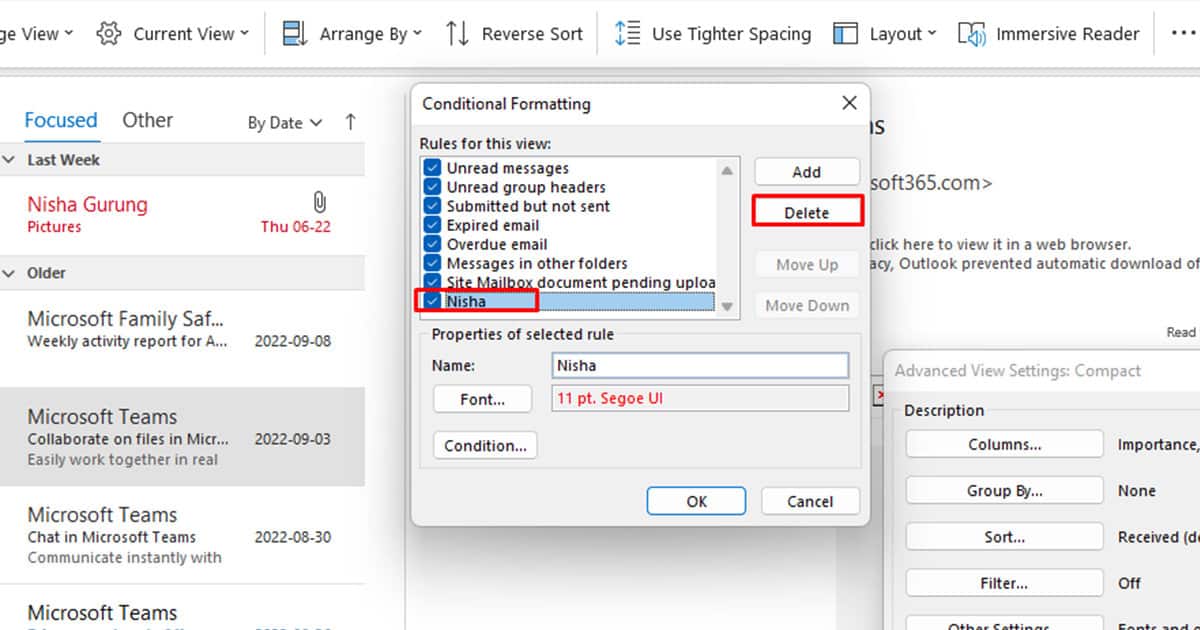
How to Delete Conditional Formatting in Outlook
You can only delete the conditional formatting you applied to custom values. For example, you cannot delete the default conditional formatting applied to Unread messages. This is because Outlook has to separate read messages from the unread messages in the inbox.
However, if you’ve created a new rule to format custom, you can easily delete it from Outlook.
- From the View ribbon, select View Settings.
- Select the Conditional Formatting button.
- Under Rules for the view, click on the value you wish to remove formatting for.
- On the right, click on the Delete button.