If you have different Gmail accounts for personal and work stuff, switching between them can be a hassle while you check or send emails.
You can solve this problem by merging the Gmail accounts together. In addition to saving time and increasing productivity, linking emails also provides you with extra free space.
However, there’s a catch—Gmail does not have a direct account linking feature. Depending on what you want, you need to find a workaround to add another email address to your primary Gmail account.
Allow Gmail to Send Email From Other Addresses
If you work in bigger and private organizations, disclosing your primary email address can look unprofessional.
In that case, you can set up an alternative email address to send emails and link it with your primary Gmail account.
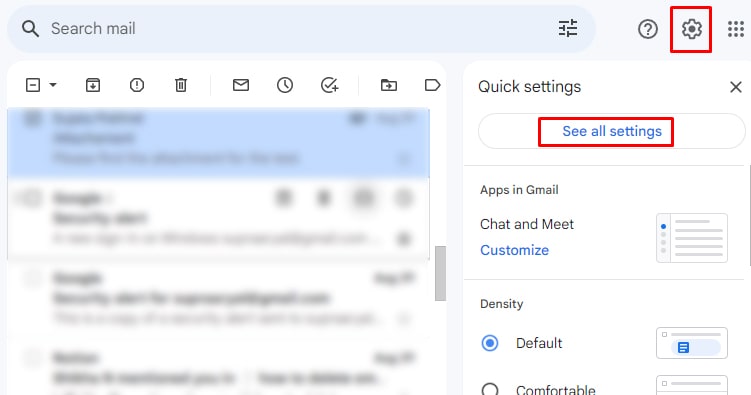
- Click on the Settings icon and select See All Settings.
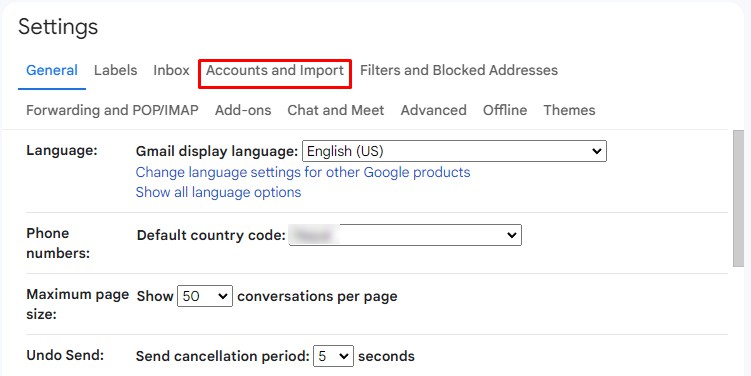
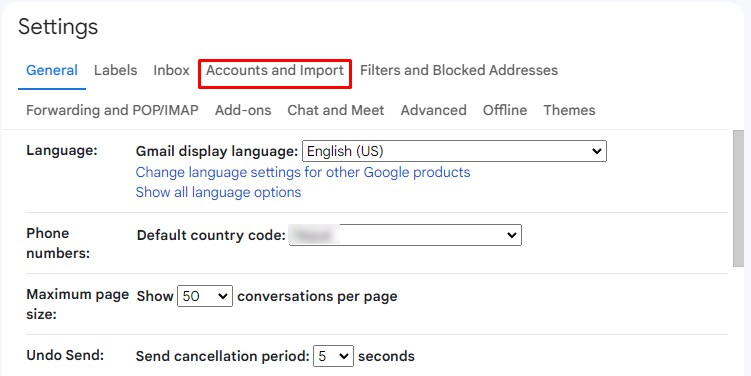
- Tap on the Accounts and Import.
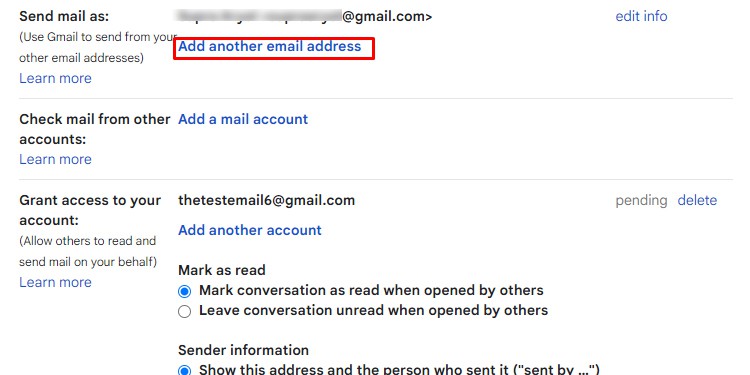
- Go to Send mail as section, select Add another email address.
- On a new dialog, enter the Name and Email address of another Gmail account. Tick on Treat as an alias.
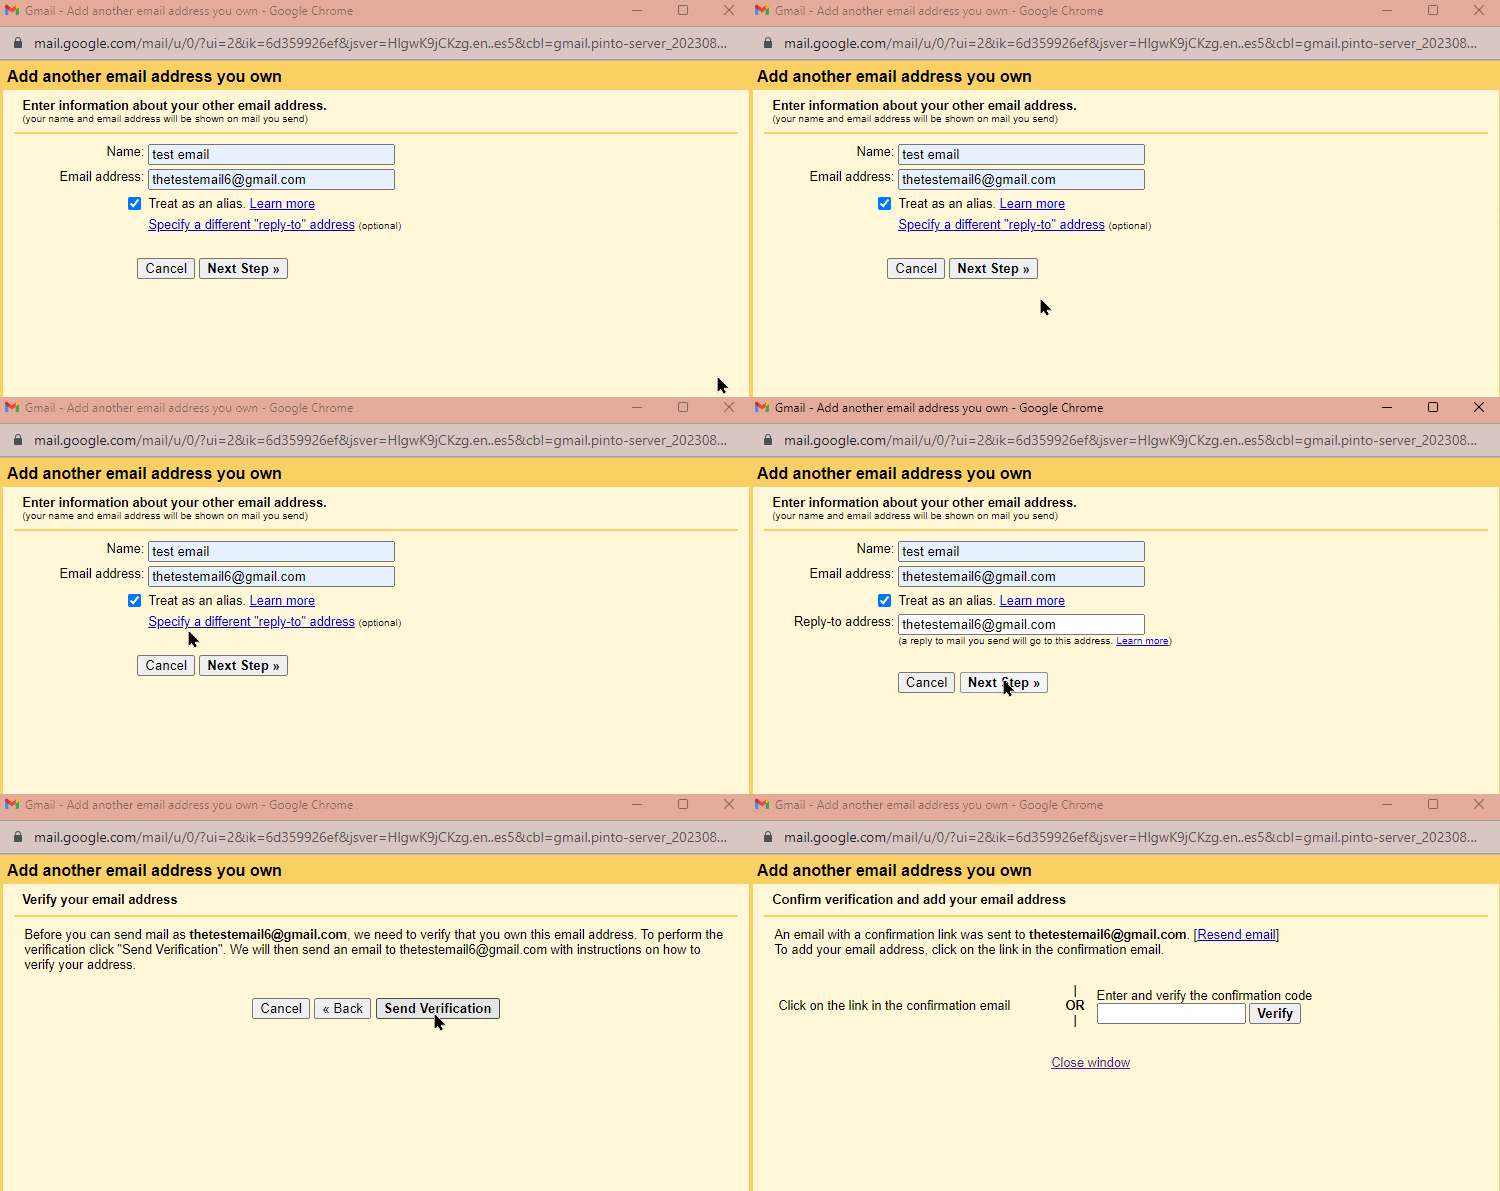
- If you want to add a separate email for replies, click on Specify a different “reply-to” address and type the email address. Tap on Next Step.
- Verify your email address by clicking on Send Verification.
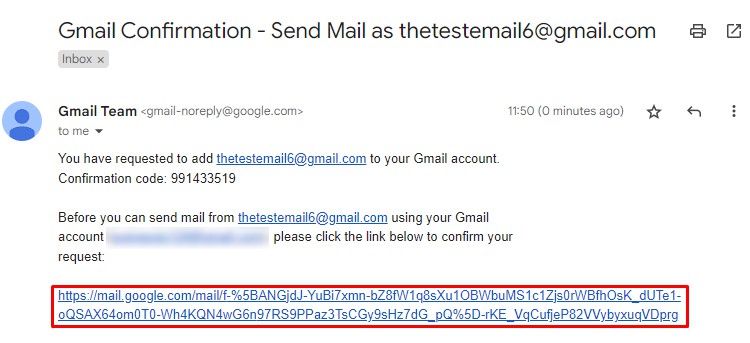
- Open another Gmail account and click on the verification link. Click Confirm on the confirmation page.
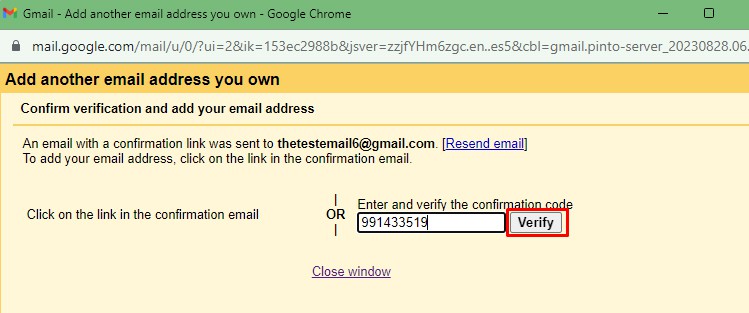
- Or else you can enter the verification code and tap Verify.
Allow Others to Send and Read Emails
If you have multiple Gmail accounts, you can add another Gmail to your primary account.
By doing so, you can use other addresses to send and read emails on your behalf.
- Open the Settings icon on your Gmail and choose See All Settings.

- Click on the Accounts and Import section.
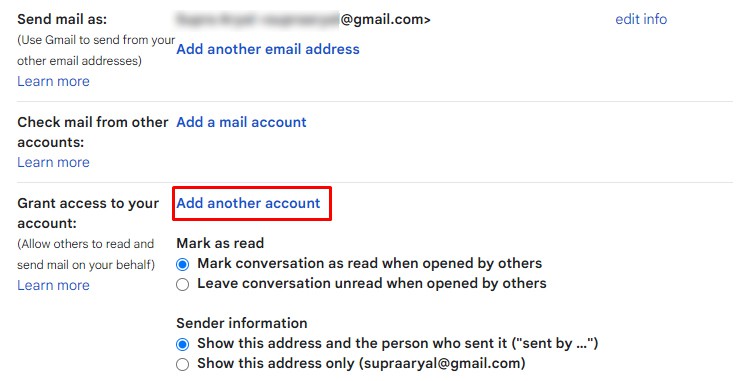
- Go to Grant access to your account and select Add another account.
- On a new window, type you another Gmail and select Next Step.
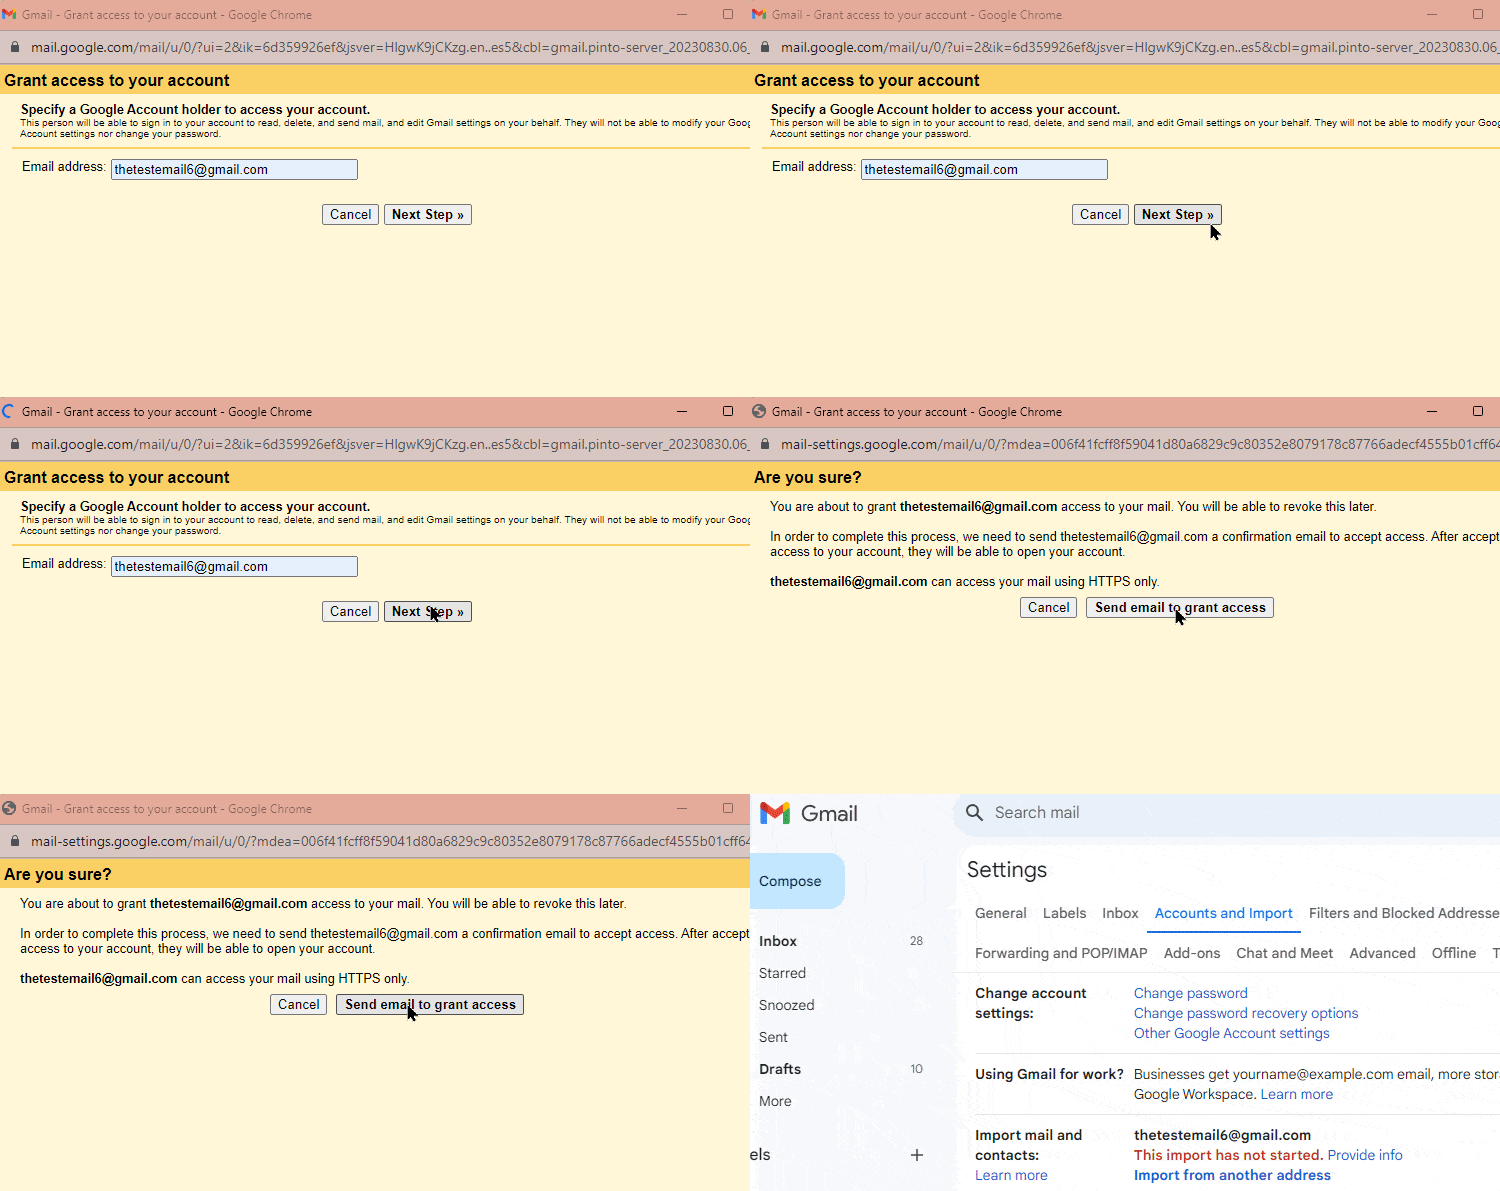
- Select Send email to grant access.
- Log in to your other Gmail account and click on the accept link sent to you.
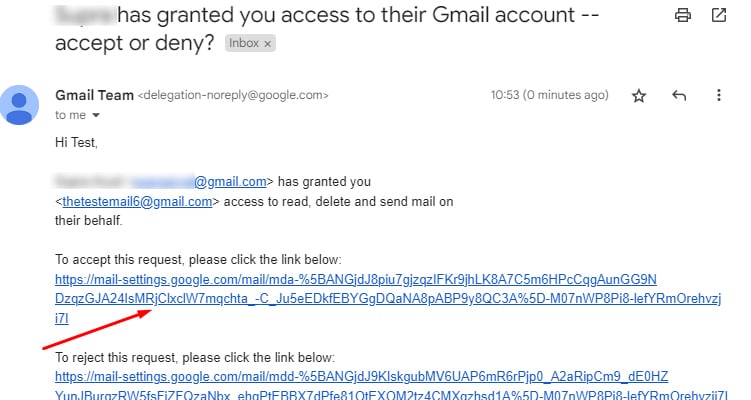
- Once the confirmation succeeds, the accounts will be linked.
- Repeat the same steps for multiple accounts.
Set Up Email Forwarding
You can also set up a forwarding address so that all emails you receive in your primary email address appear in your other Gmail address.
Here’s how you can set up email forwarding.
- Expand the Settings icon on the primary Gmail. Open See All Settings.

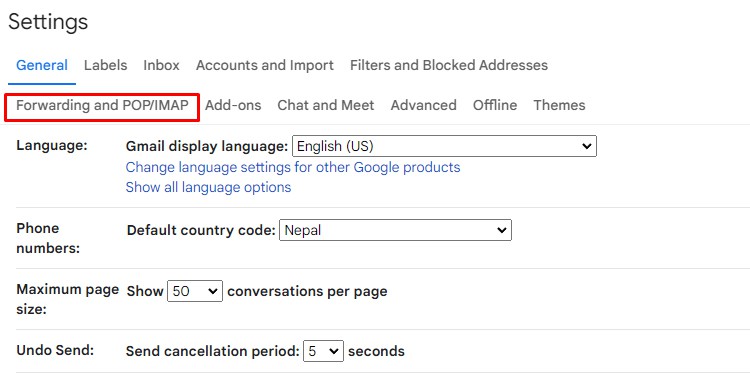
- Click on Forwarding and POP/IMAP section.
- Select Add a forwarding address.
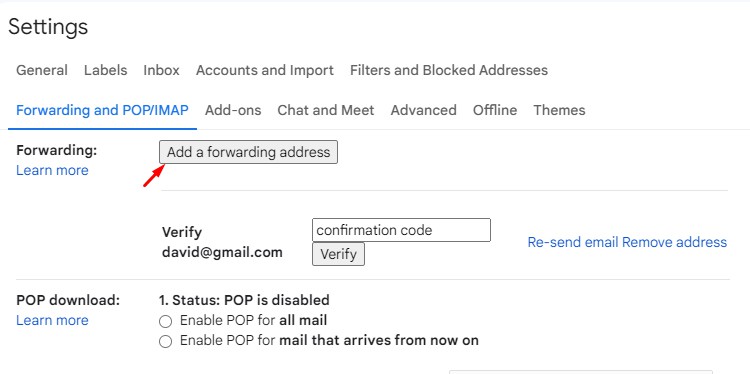
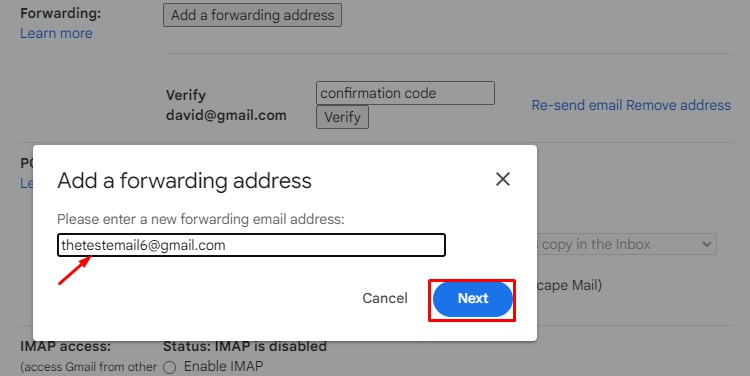
- Enter the recipient’s email and click Next.
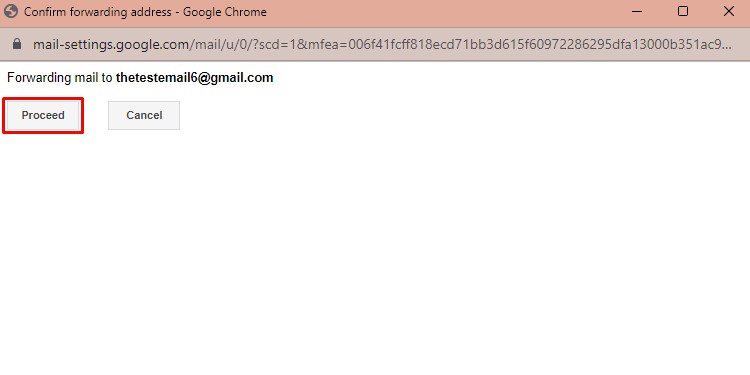
- Select Proceed to confirm the forwarding address.
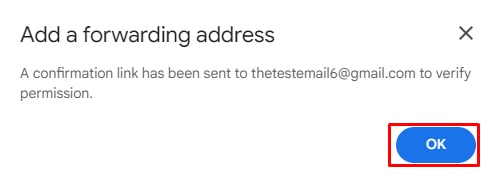
- A message will display saying a confirmation link has been sent. Click on OK.
- Go to the forwarding email’s inbox and click on the link.
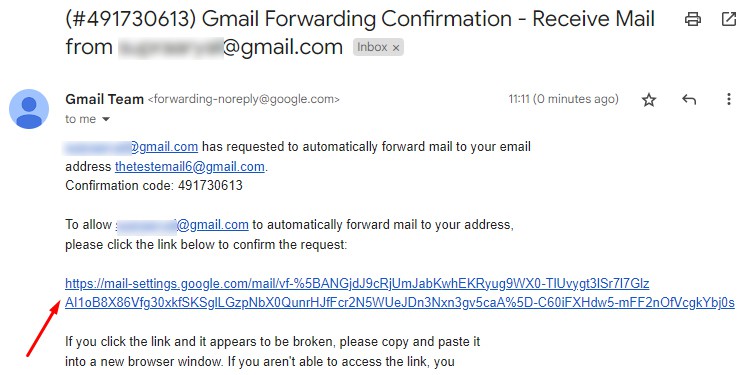
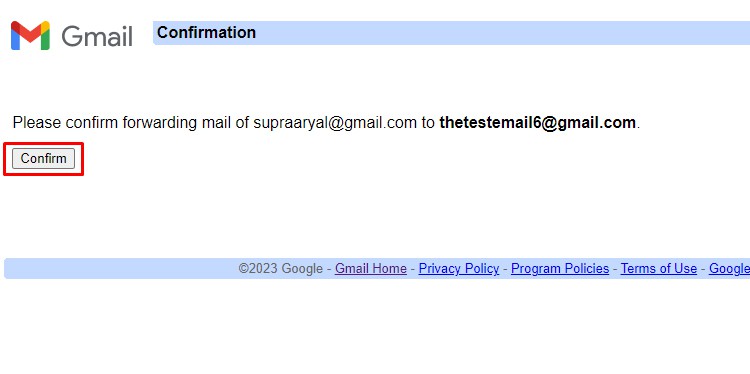
- Tap on Confirm.
In case you want to forward only a type of email to the linked email address, then you can create a filter using a typical keyword, subject, or sender email.
Gmailify Accounts
Although this method is meant for linking your non-Gmail address to your existing Gmail account, you can also use it to link two Gmail accounts. You will be able to check all emails in the primary accounts from your linked account after you link and verify.
To link non-Gmail or Gmail email addresses for checking emails, follow these steps.
- Go to the Settings icon on your Gmail and select See All Settings.

- Click on the Accounts and Import tab.

- On Check mail from other accounts, select Add a mail account.

- A new dialog opens. Type another Gmail address and select Next.
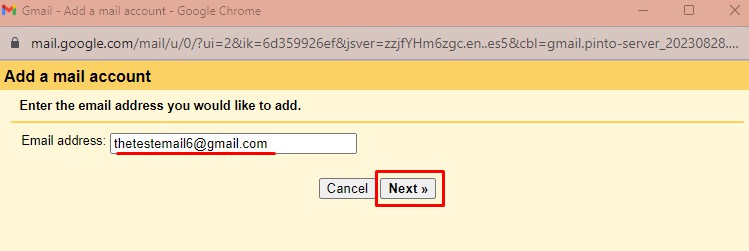
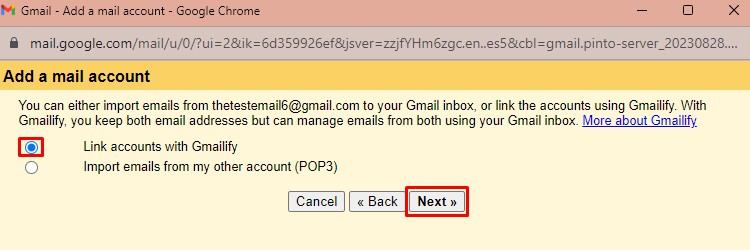
- Select Link accounts with Gmailify and click Next.
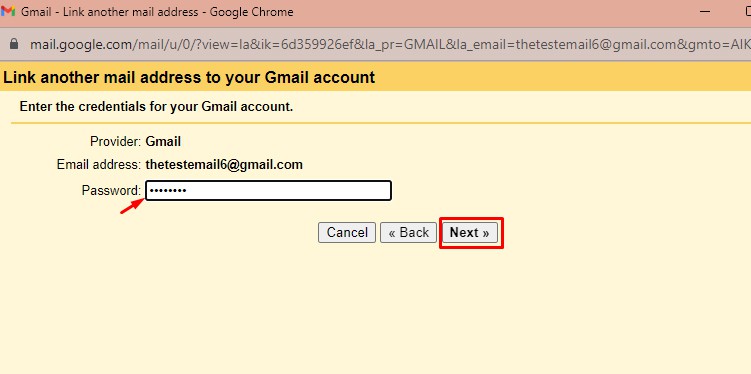
- Enter the password and click Next.
Sync Mail and Contacts
If you have created a new email account and want to transfer emails and contacts from the older one, you can import the emails and contacts.
However, you can only import messages, not files and folders, from your old Gmail.
- Select the Settings icon on Gmail and click See All Settings.

- Go to Accounts and Import.

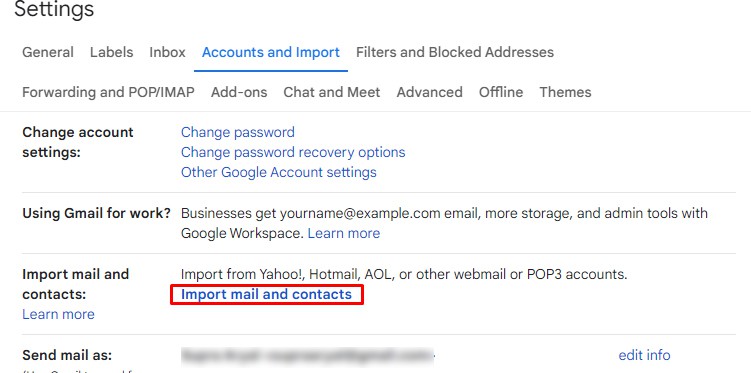
- Tap on Import mail and contacts and follow the steps as displayed.
- Sign in using your other email account:
- Type your old Gmail address and select Continue.
- After Google checks, select Continue to log in to that account.
- If you have a popup blocker on your PC, a dialog appears. Select OK to disable it.
- Another dialog box will appear, asking you to choose an account to continue to Gmail ShuttleCloud Migration. Click the email.
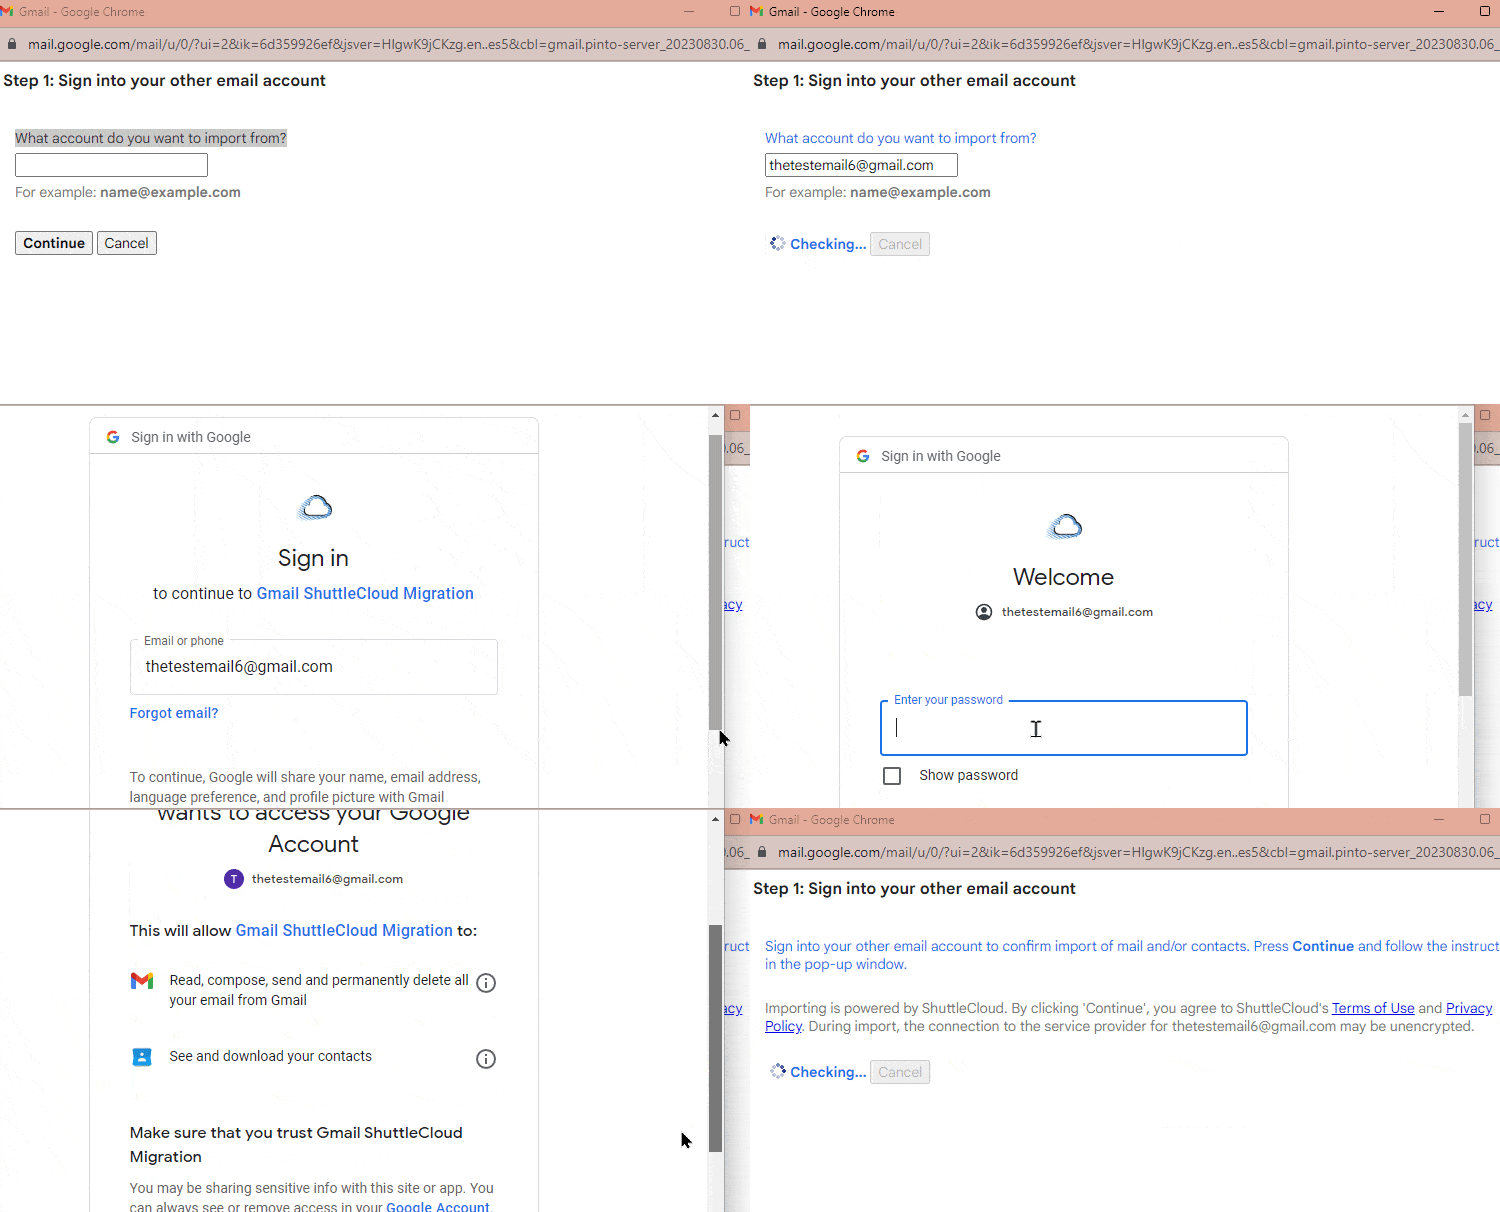
- Read the instructions and select Allow to initiate migration.
- Close the window to continue.
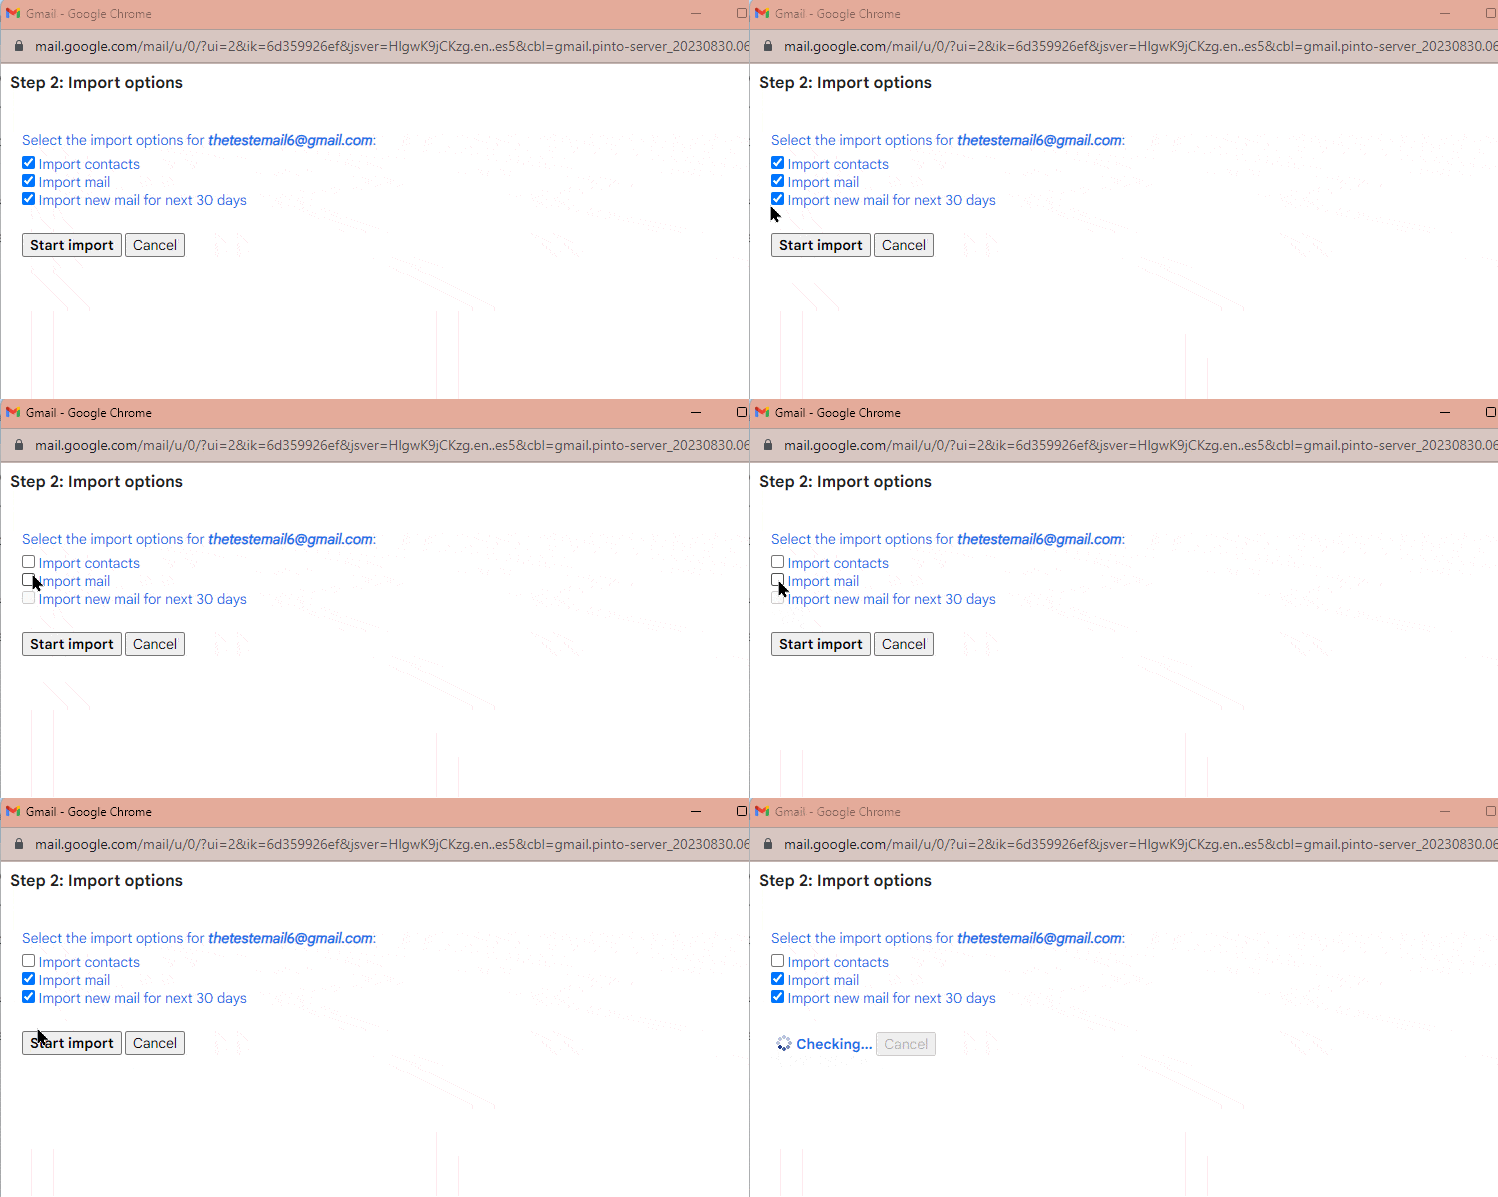
- Tick on the box before Import mail. If required, click on the box before Import new mail for the next 30 days and Import contacts. Tap on Start Import.
- Select OK to finish.
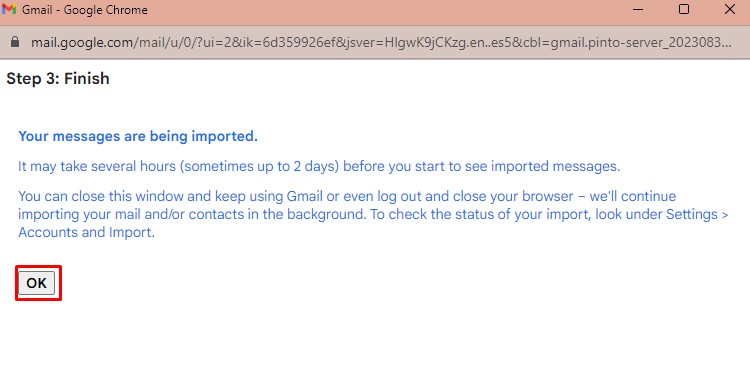
- Close the dialog box and wait until your import is complete. You will receive an email in your new Gmail after it is done.
How to Link Gmail Accounts on the Gmail App?
Unlike PC, you cannot link your Gmail accounts together. But, if you have signed in to the Gmail app with multiple accounts, you can view emails from all inboxes together. You need to turn on Auto-sync to see all inboxes together.
Here’s how you can add a new Gmail account.
- Launch Gmail on your mobile device.
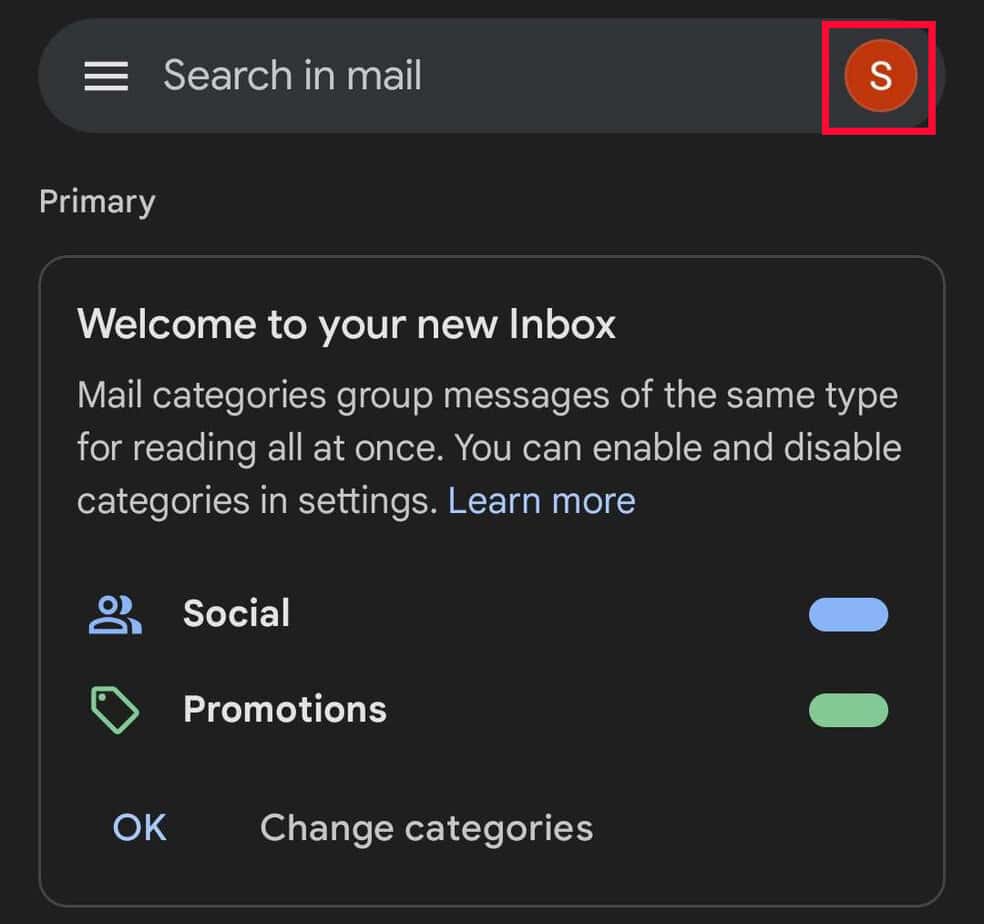
- Click on the Profile icon.
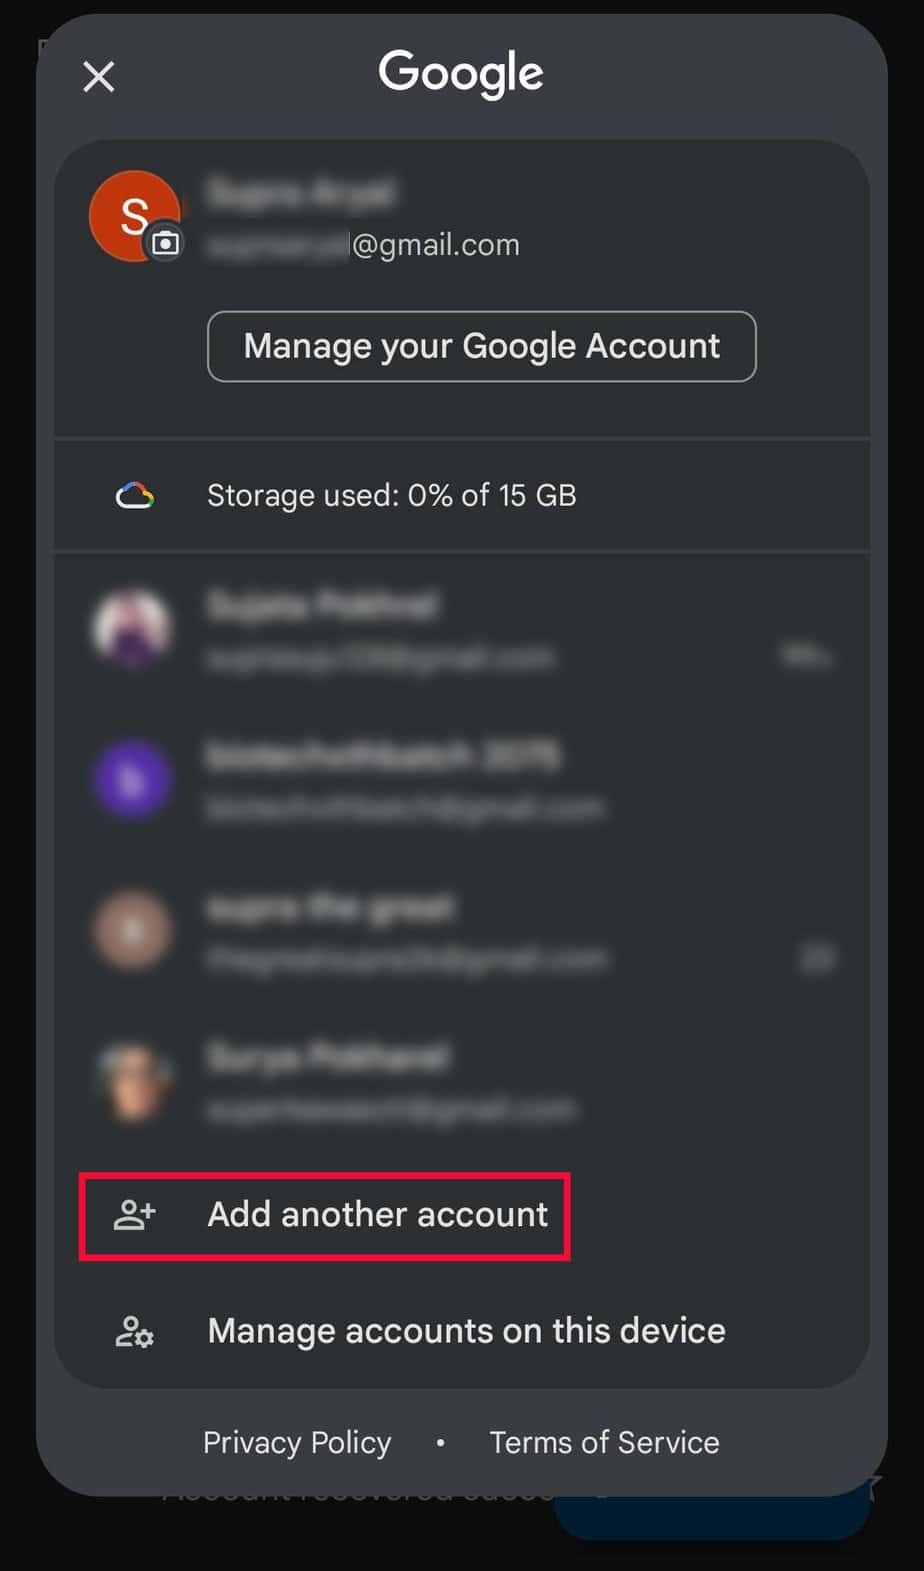
- Select Add another account.
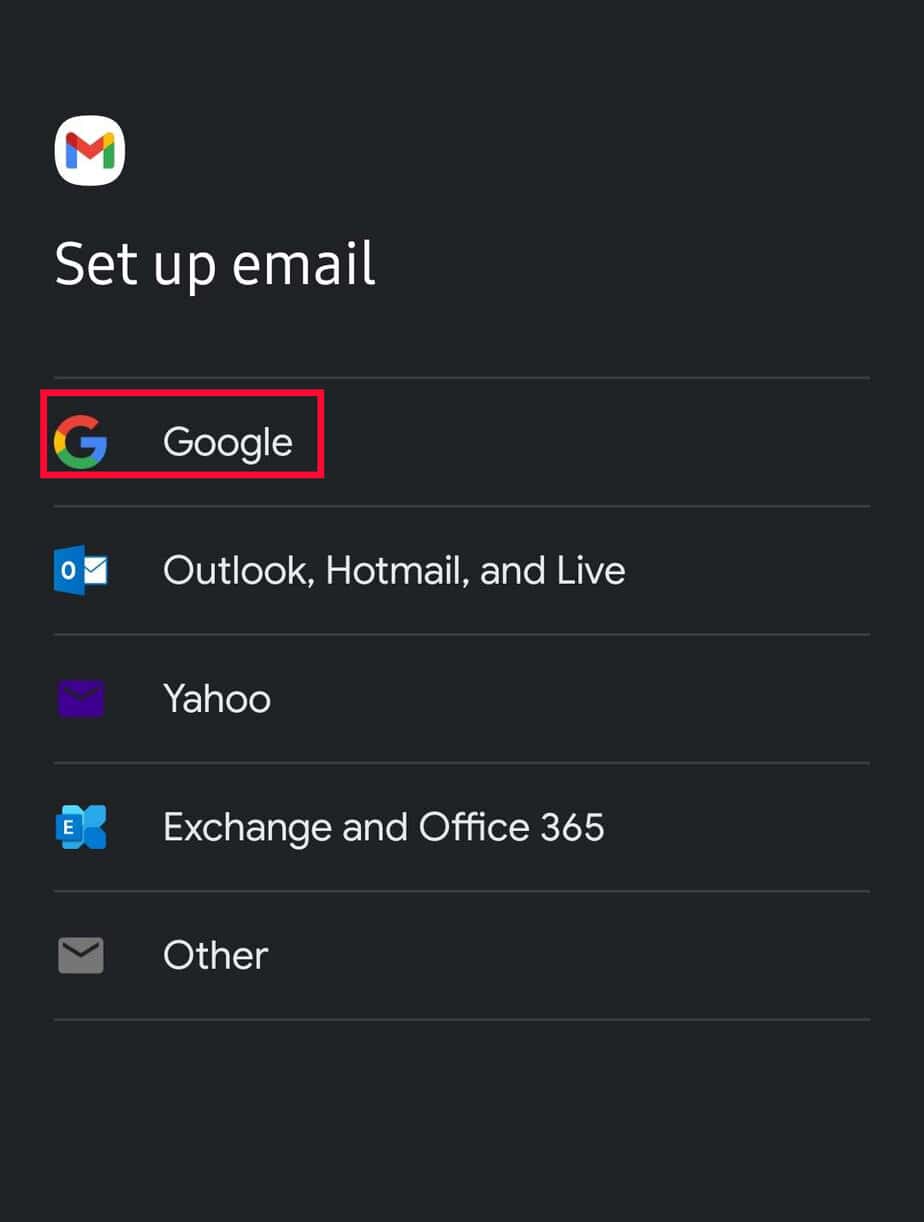
- Choose Google on the Set up email page.
- Verify your identity using the phone security pass.
- Type your Email address and tap Next. Then, enter the Password and select Next.
- Click I agree on Google Terms of Service.
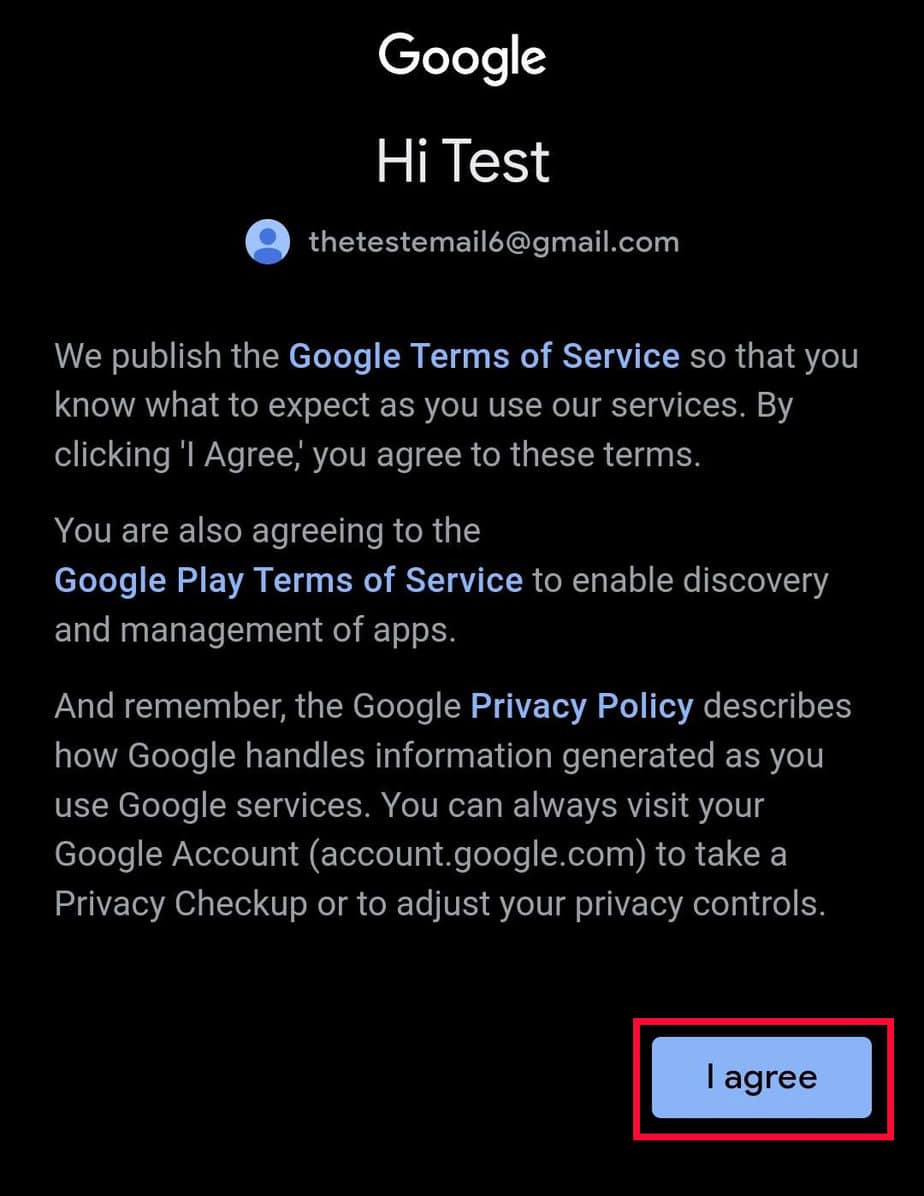
- Your other Gmail account will be signed into your device.
After adding the Gmail account, you can also sync the data.
- Open the Gmail app on your device.
- Click on the Profile icon on the top right.

- Select Manage accounts on this device.
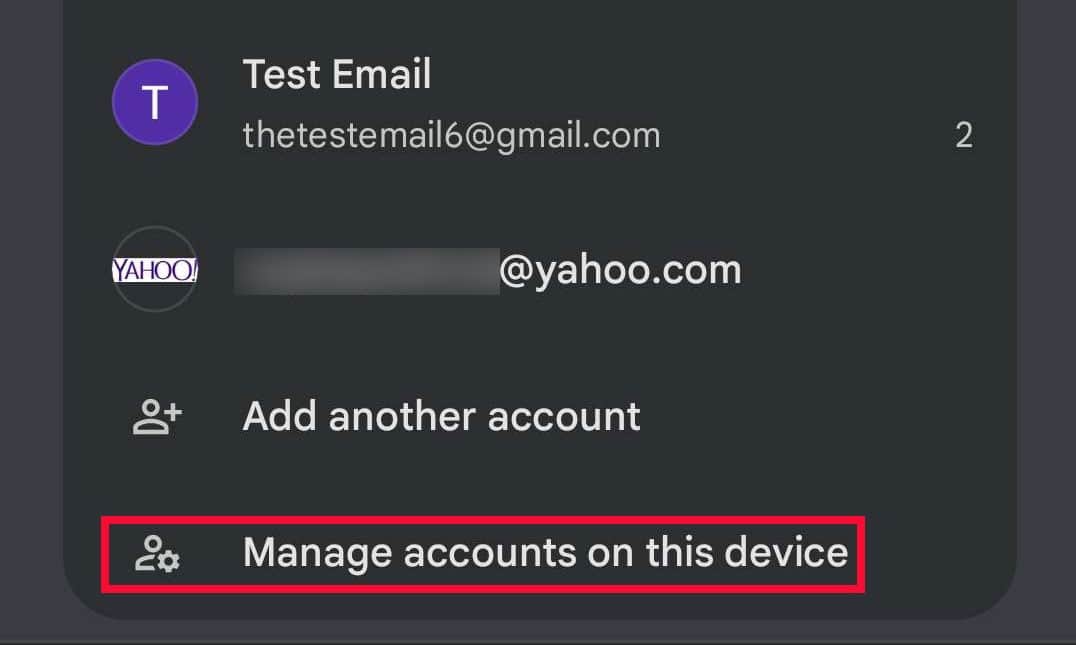
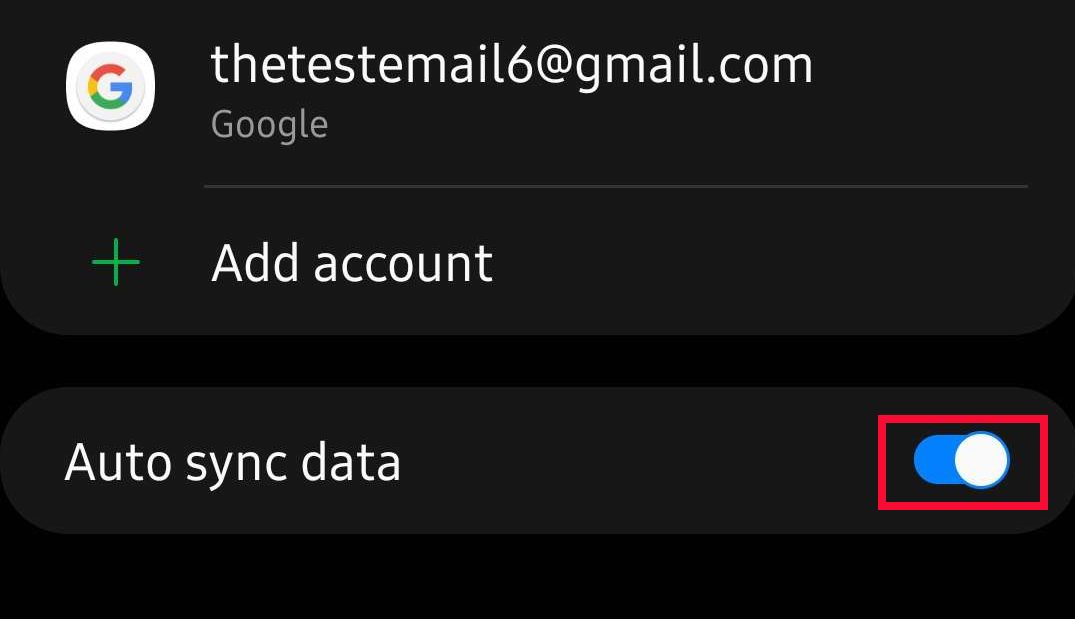
- For Android, go to the Auto sync data option and slide the toggle button to the right.
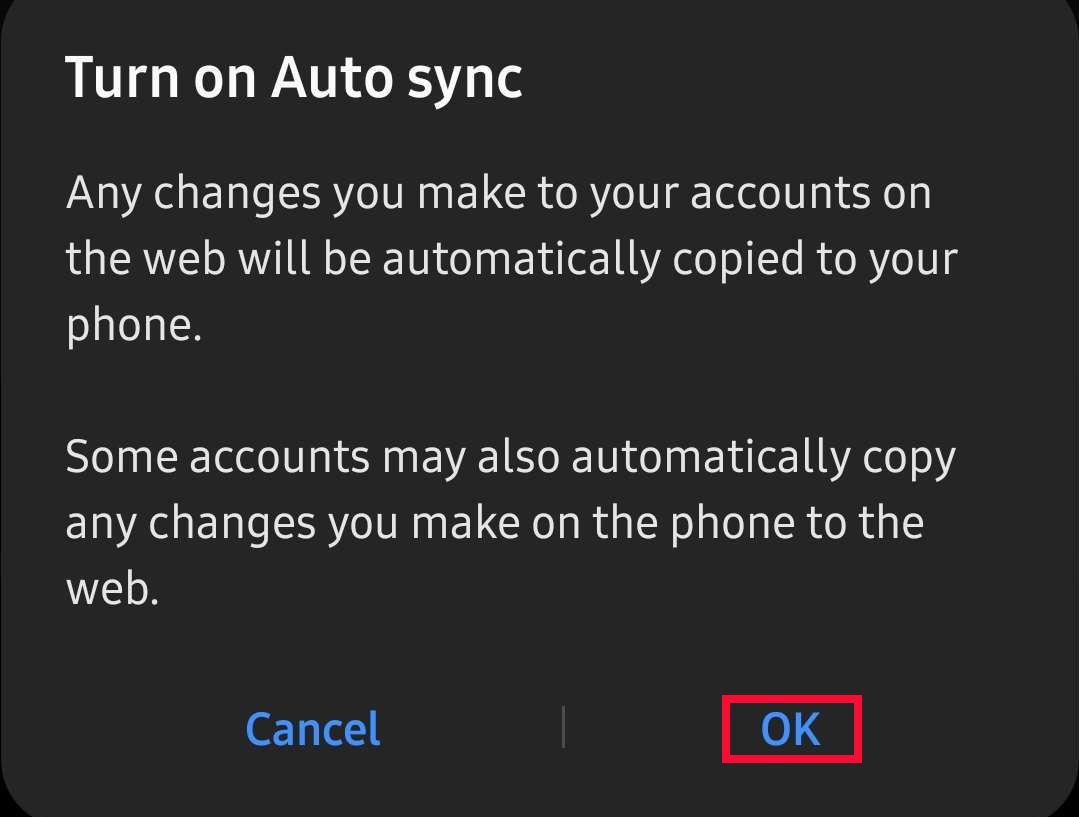
- Select OK for confirmation.
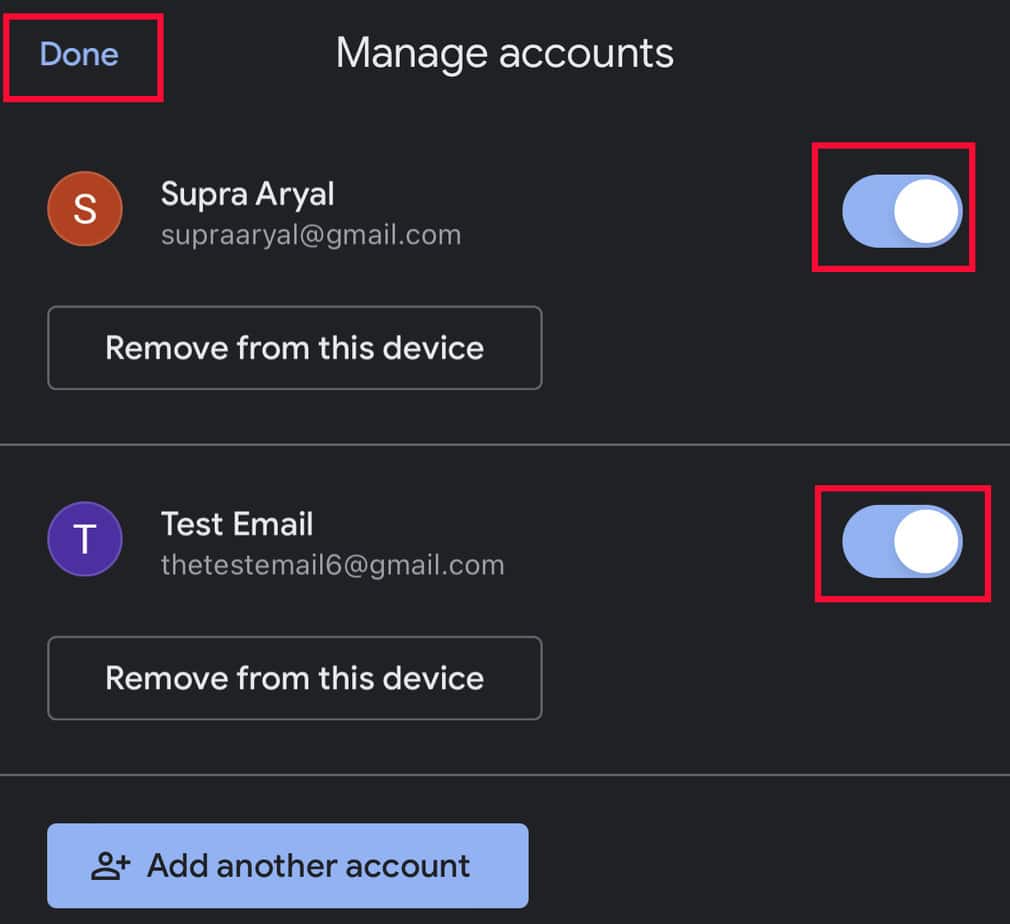
- For iOS, go to the email address that you want to sync and slide the toggle button to the right. Select Done.
