If you are attempting to import a .TXT or .CSV files on your worksheet, there are three simple methods to do so.
Depending on the data format you prefer for your spreadsheet, you could use Open command, Power Query, or Power Pivot Table to import TXT files. For copying the contents as it is in the original format, use Open Command. However, if you wish to modify the data before importing them, using the Power Pivot table or Power Query would be most effective.
Using Open Command
If you have local TXT files on your PC, use the Open command to locate and quickly import them into your workbook. In this approach, Excel will import the file contents in the original format, including the file extension name. So, I mostly use this method to only view the contents of Text Files in an organized form.
Here, if you have .CSV file, Excel will immediately open them on your worksheet after importing. However, for .TXT files, you will be prompted to configure a few steps in the Text Import Wizard first.
To open TXT Files,
- Open Excel Workbook.
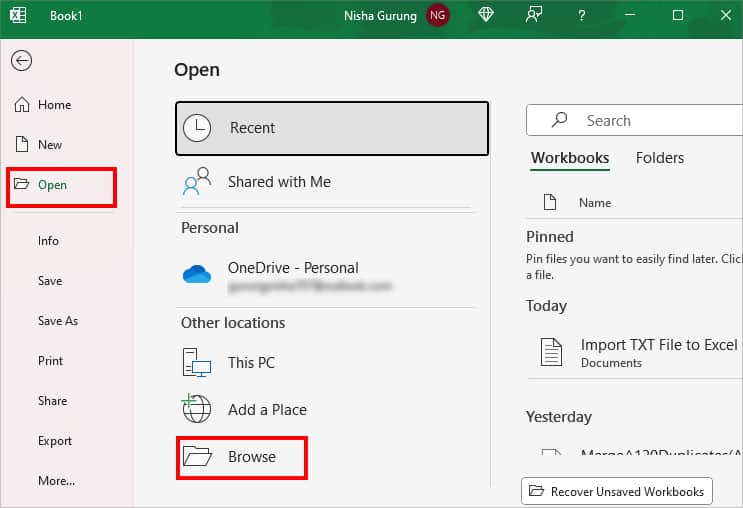
- Click on File tab.
- Choose Open menu from the left panel and select Browse.
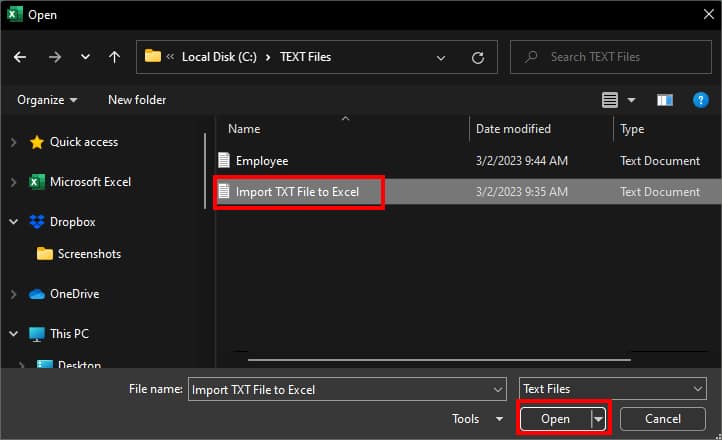
- Once you find a Text File, select the File and click Open.
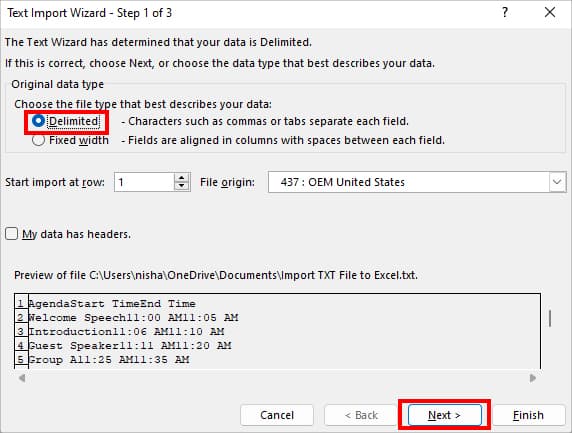
- If you have .TXT files, Text Import Wizard window will appear. Pick Delimited option and hit Next.
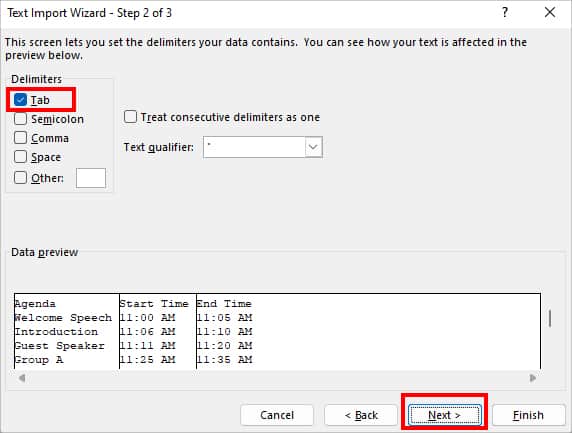
- On Step 2, check the box for Tab and click Next.
- Finally, hit the Finish button.
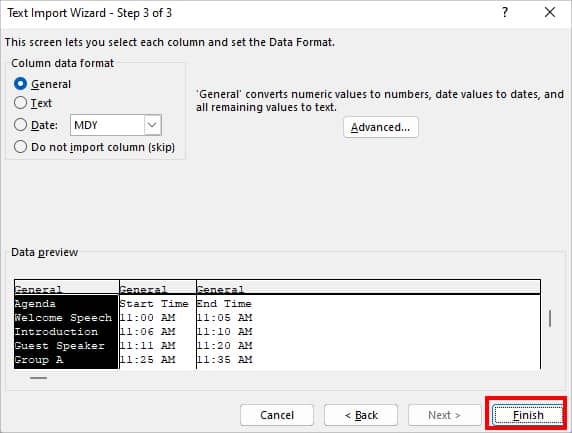
Quick Tip: You can convert .CSV files to .TXT files before importing. This will allow you to customize the contents of .CSV files using the Text Import Wizard window. Using Power Query
Excel’s Data tab has the default option to import data from Text/CSV. If you do not want the same plain format of Text files on your worksheet, use this method. When you import the TXT files using Power Query, it imports the data in Table with Columns. It also allows you to adjust Columns and Rows with the Transform Data.
This method is especially effective for users who wish to import multiple text files as Power Query can combine two or more TXT files.
Import Single Text File
- On your worksheet, select a Cell to import the contents of Text Files.
- Then, navigate to Data Tab.
- On Get & Transform Data section, click From Text/CSV.

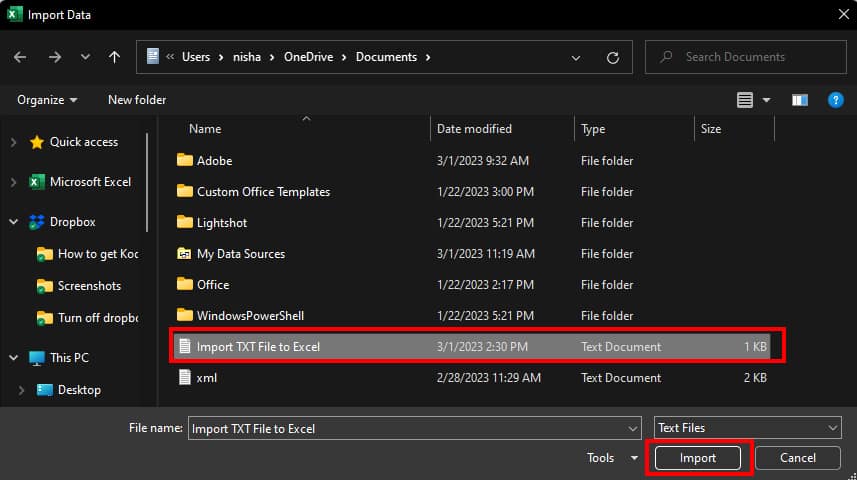
- Select TXT file and choose Import.
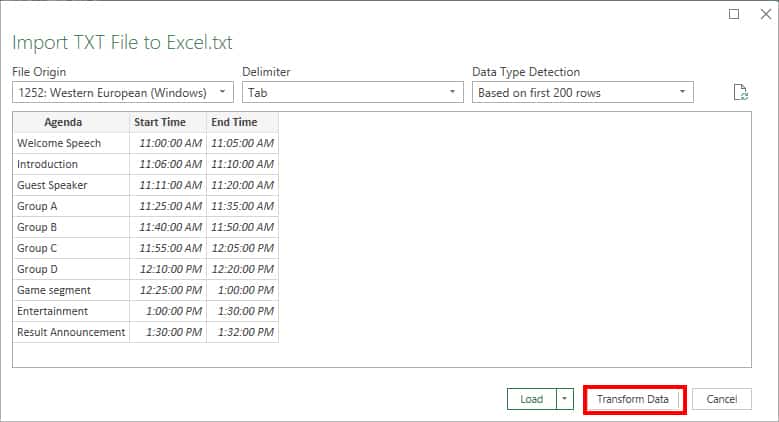
- Import TXT File to Excel.txt dialogue box will appear on the screen. Choose Transform Data if you want to modify Columns and Rows of the data with the Power Query Editor. (This is Optional)
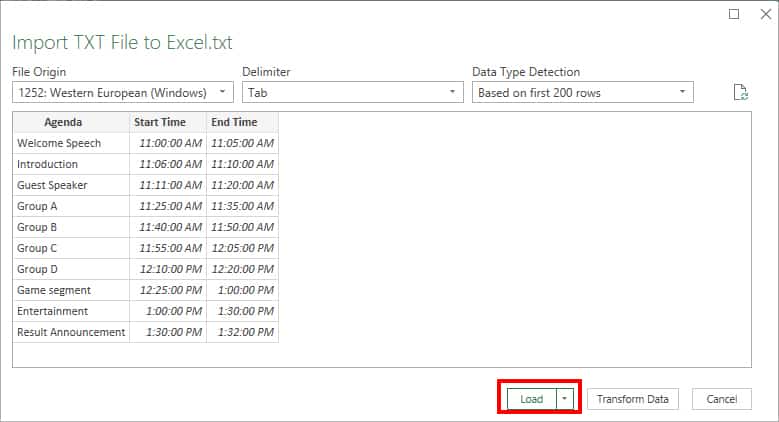
- To open TXT files, click Load option. All Text File contents will appear on your worksheet.
Import Multiple Text Files
- Hover over Data tab on your Worksheet.
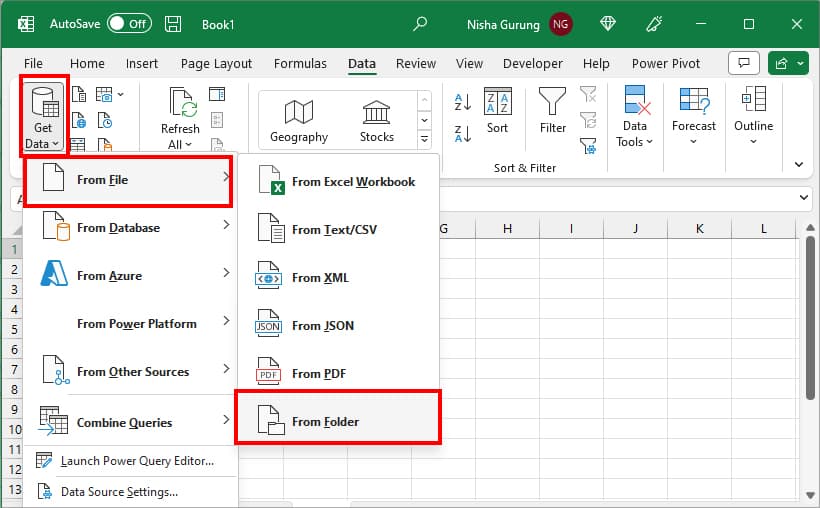
- From Get & Transform Data, click on Get Data > From File > From Folder.
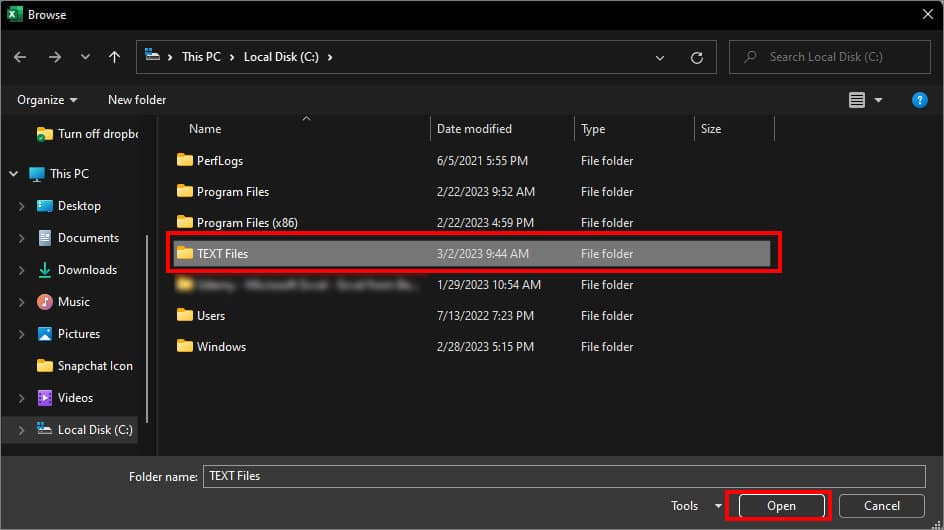
- Locate and select the Folder with Text Files. Click Open.
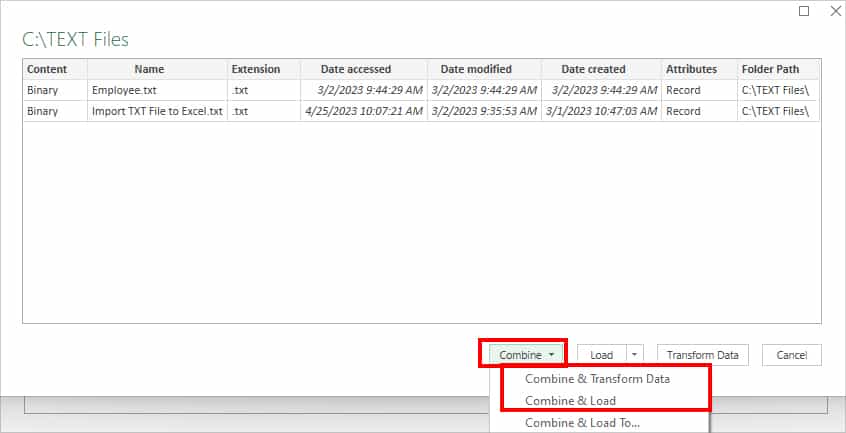
- Click on Combine. Pick Combine & Transform Data to edit contents using Power Query Editor. Or, choose Combine & Load to directly open the data.
Using Power Pivot Table
While you can quickly import TXT files using the above-mentioned methods, both approaches restrict your ability to modify data. But, with the Power Pivot Table, you can access several customization features while importing TXT files. For Instance, change the name of tables or import only the required subset from data.
We have divided the steps to import a TXT file using Power Pivot Table into three parts. By default, Power Pivot Table tab is hidden on your worksheet. So, you must enable it from the Options menu first. However, if you already have the tab, you can directly jump into Step 2.
Step 1: Enable Power Pivot Table
- Navigate to File tab on your worksheet.
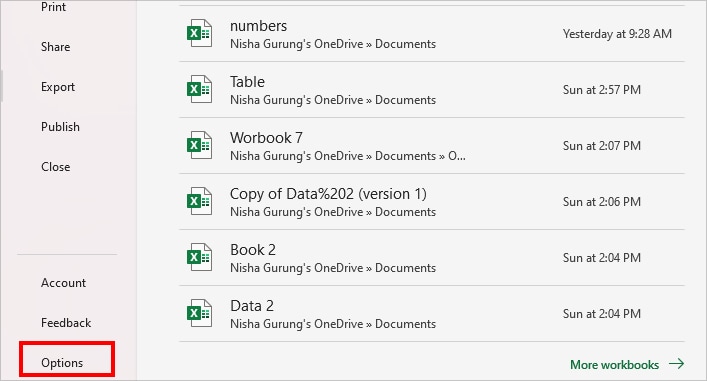
- Click Options menu.
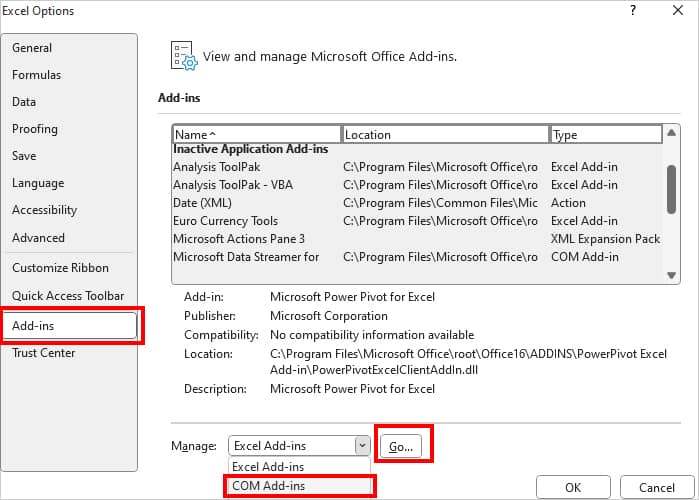
- On Excel Options dialogue box, choose Add-ins in the left panel. Locate Manage menu and pick COM Add-ins from the drop-down list. Then, click Go.
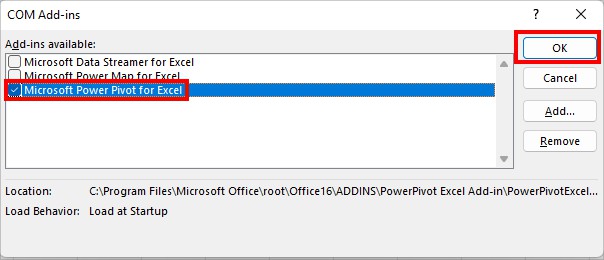
- Under Add-ins available, select Microsoft Power Pivot for Excel and hit OK. Power Pivot tab will show up on your Excel Worksheet.
Step 2: Import Txt File to Pivot Table
- Hover over Power Pivot Tab. On Data Model section, click Manage.

- From the Home Tab of Power Pivot Window, pick From Other Sources.

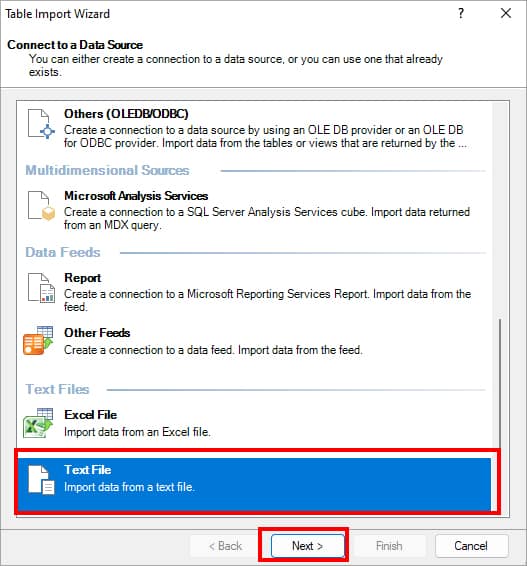
- Scroll to the bottom and choose Text File. Hit Next to continue.
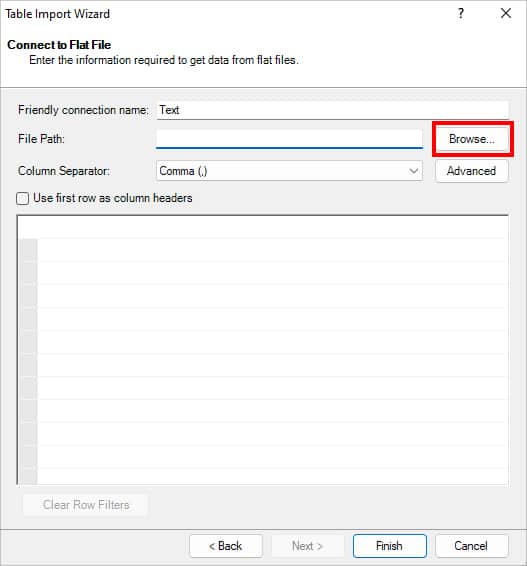
- Next to File Path, click Browse to import TXT file.
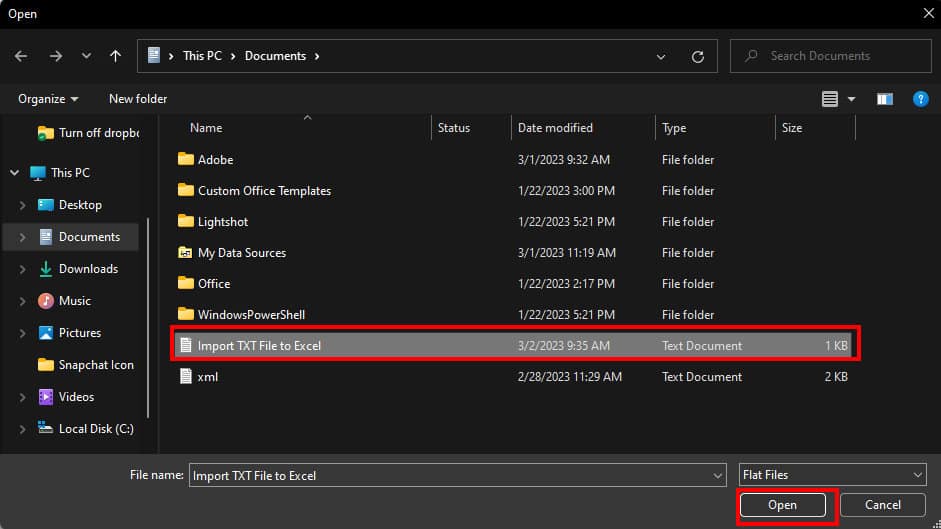
- Pick a TXT File and click Open.
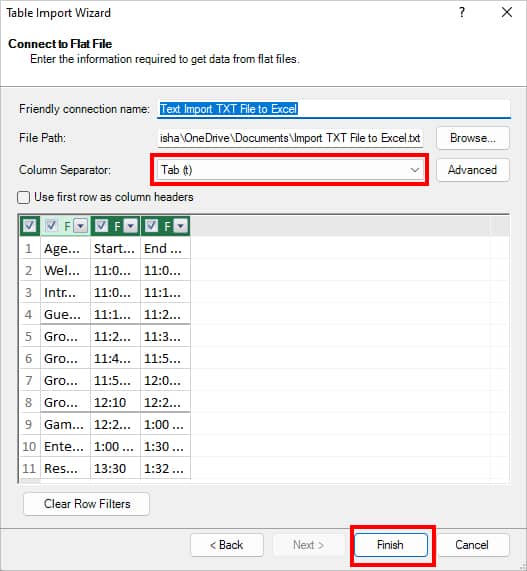
- Set the Column Separator as Tab(t) and hit Finish.
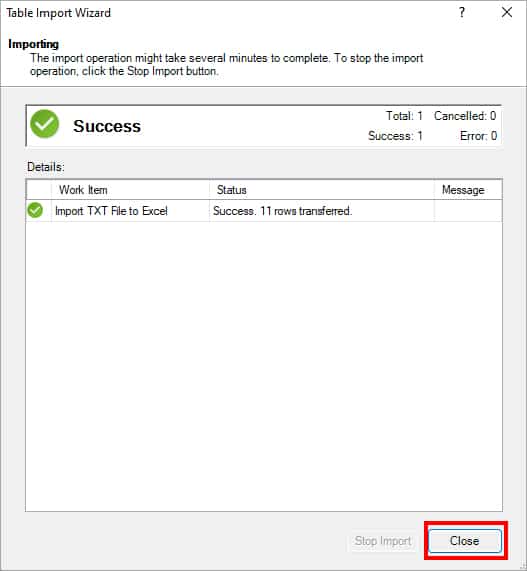
- After the importing process completes, close the Window.
Step 3: Import Data to Your Worksheet
- On your worksheet, hover over Data Tab.
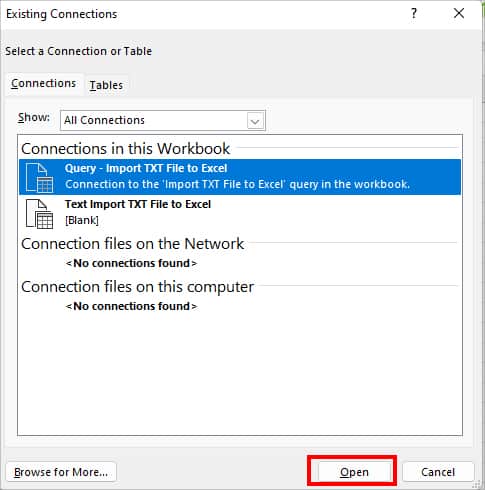
- Click Existing Connections.

- Hit Open button on the Existing Connections Window.
- On Import Data box, highlight the Cells to add data and click OK.
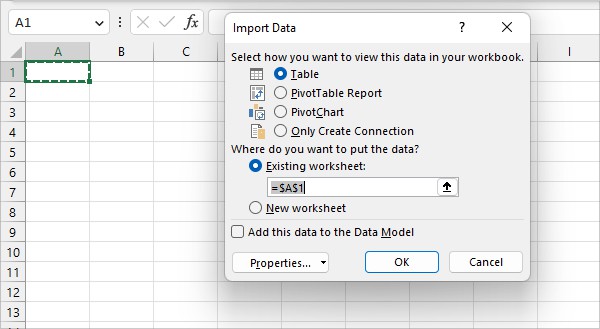
- You should see Text Files data on your worksheet.

Related Questions
How to Export as Text Files in Excel?
Exporting Text Files is as simple as importing them. While saving files, all you need to do is save them in .txt file extension format. For this, navigate to the File tab on your spreadsheet and choose Save As menu. Then, on Save As type, pick Text or CSV file name.