Do you have an Excel sheet with hundreds of contact data? If you are wondering how to import them to your Gmail account, the process is actually quite straightforward.
I usually import contacts before sending emails in batch, as it helps me to send emails to multiple recipients with just a few clicks. Importing contacts from Excel to Gmail also saves the hassle of manually adding contacts one at a time and keeps you organised.
In this article, I will provide a step-by-step guide to importing contacts from Excel to Gmail.
Keep in mind that the maximum file size for a single contact is 129 KB. If it exceeds this limit, the Notes field on contact may be compromised.
Also, you can only upload up to 3000 contacts at a time. If you have more contacts than the limit, you will have to create multiple CSV files.
Step 1: Preparing Contacts
The key element in importing contact data to Google is to have the contact file in a CSV (Comma Separated Values) format. This will allow Google contacts to interpret the information from the Excel sheet and upload it as contact information.
There are two ways of preparing contact—one is by using your Excel sheet with custom headings, and the other is by using the Google Contact template itself.
Option 1: Saving Excel Sheet in CSV Format
First and foremost, you must be aware that Gmail can only import files to contacts in a CSV format. Thus, saving your Excel Sheets containing contact details in a CSV format is mandatory.
After getting your contacts data ready, here’s how you can save your Excel Sheet in CSV format:
- Open the Excel Sheet containing contact data.
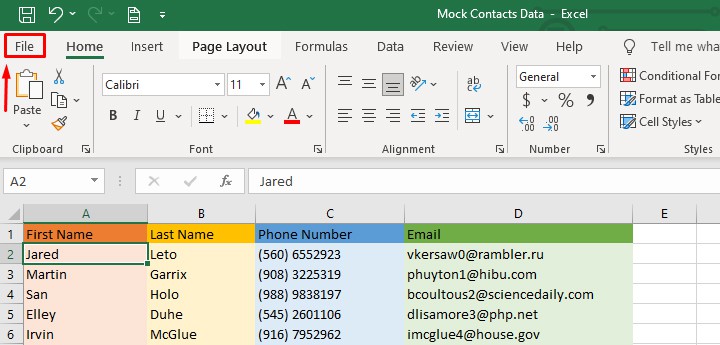
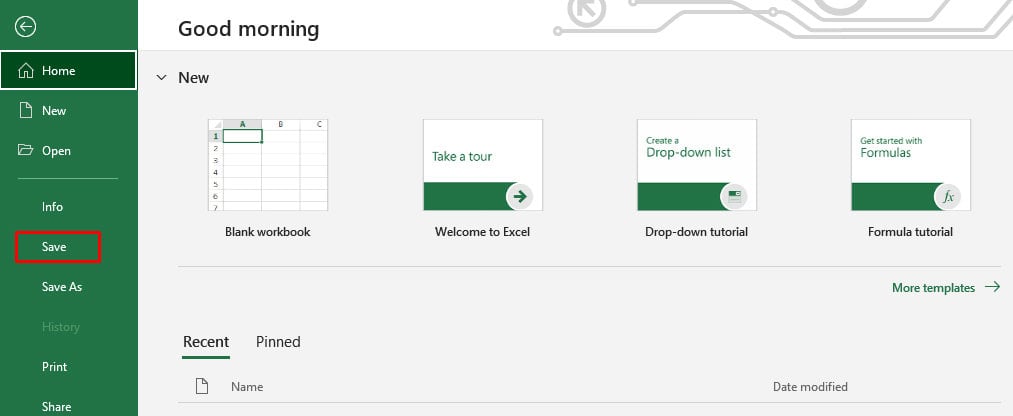
- Click on the File ribbon.
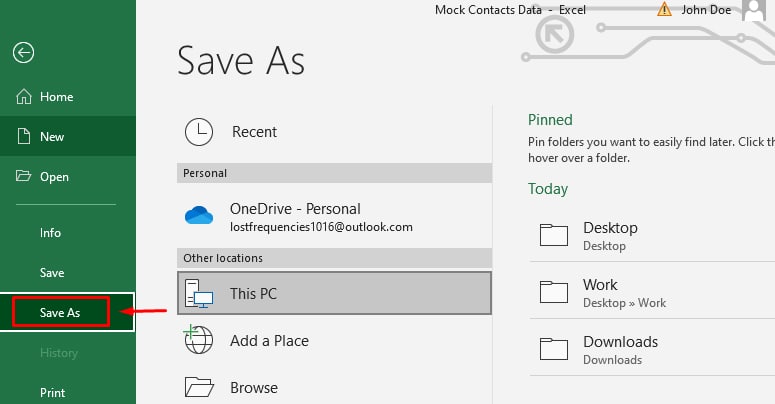
- Click on Save As.
- Select your desired location to save the file.
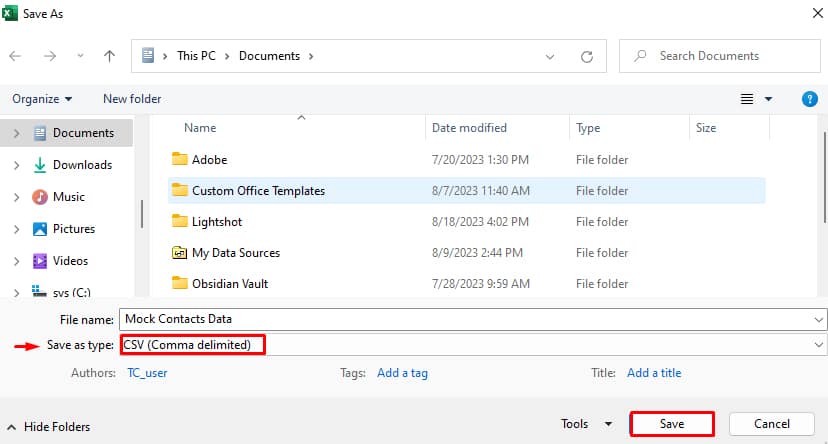
- In Save as type, select CSV (Comma delimited) and click on Save.
Note: In some cases, some specific data of the contacts is saved in the Notes section rather than the heading section—if you’re not using the default Google template.
Option 2: Exporting Gmail Contact as a CSV File
If you face any issues in exporting contacts through the method mentioned above, you will need to reimport the contacts using the Google template.
This method requires you to export your contact data from Google as a CSV file which includes all the default column headings provided by Gmail. Later, we will import our Excel data into that sheet and re-import it to Gmail.
- Open Google Contacts on your web browser.
- Go to Create Contact and select Create a Contact.
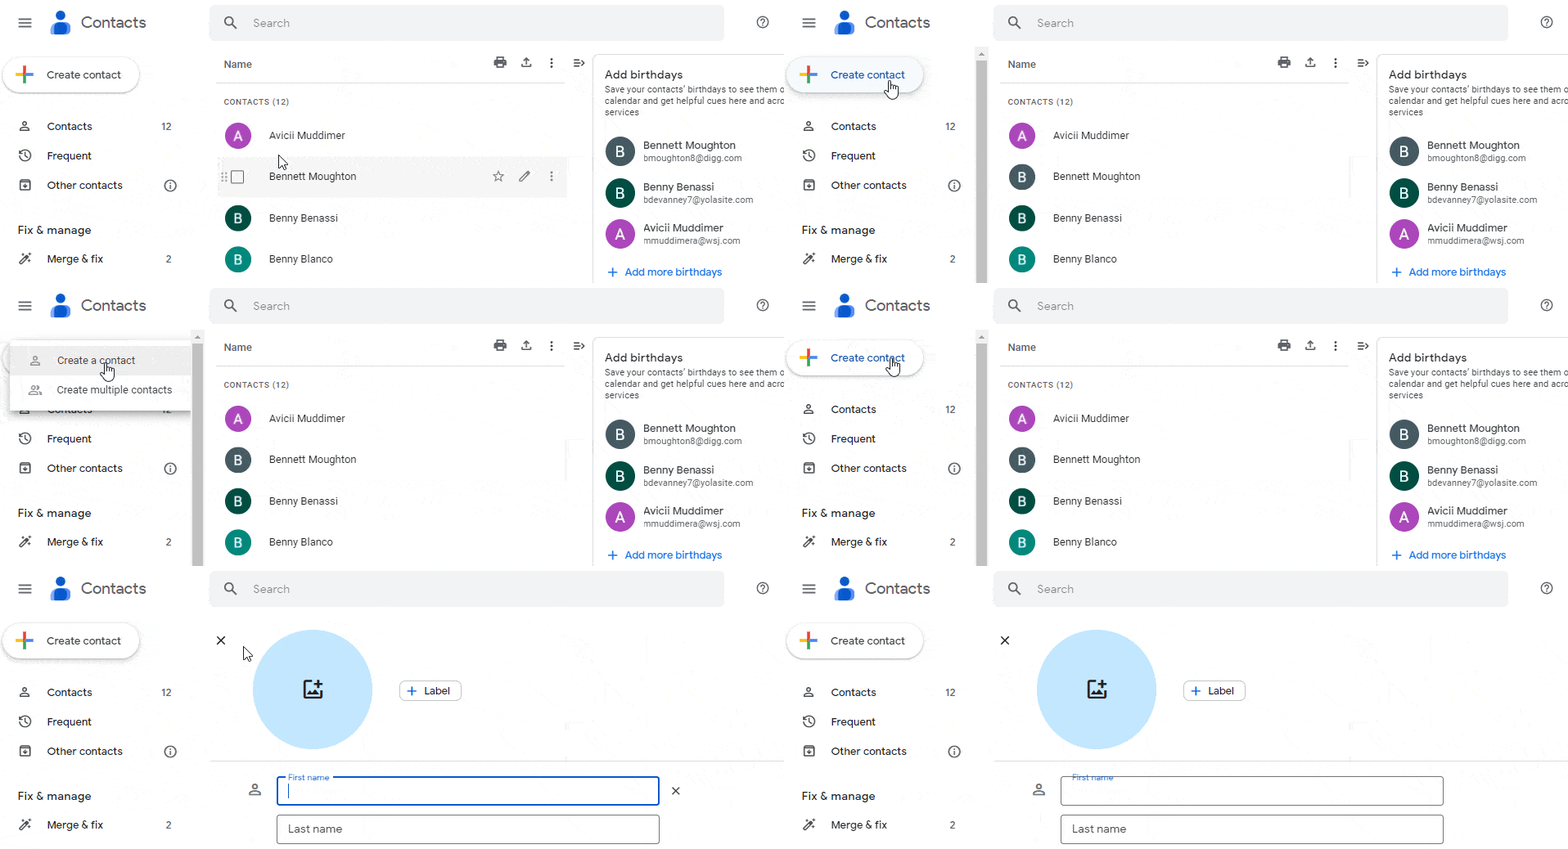
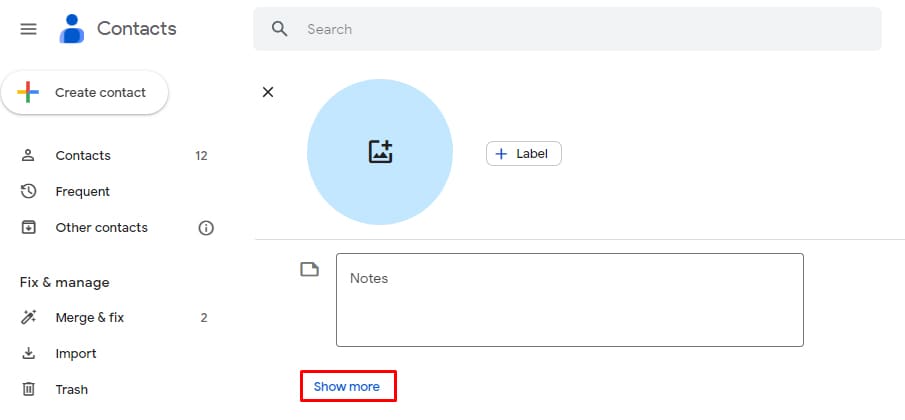
- Click Show More and fill out all the necessary headings.
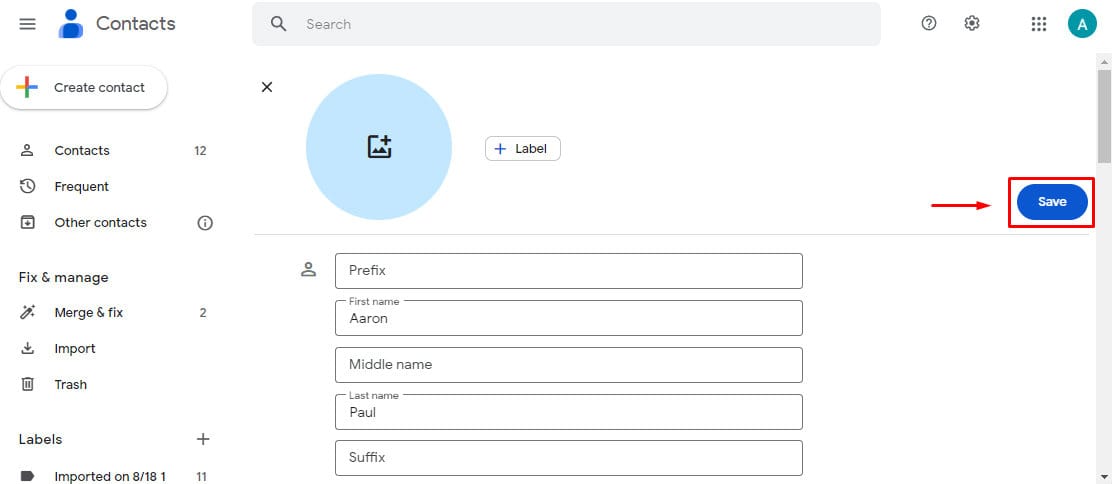
- Now click on Save, which will open the contact information page.
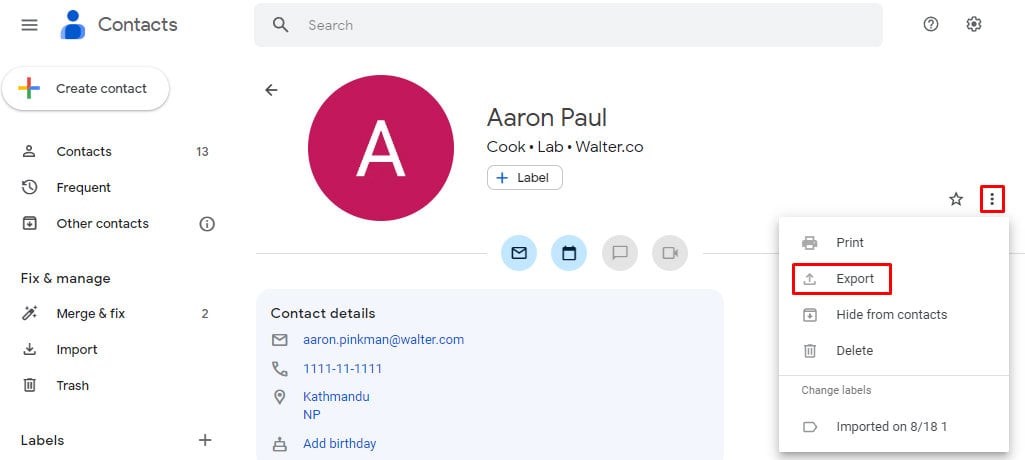
- Click on three vertical dots and select Export.
- Select Google CSV and click on Export.
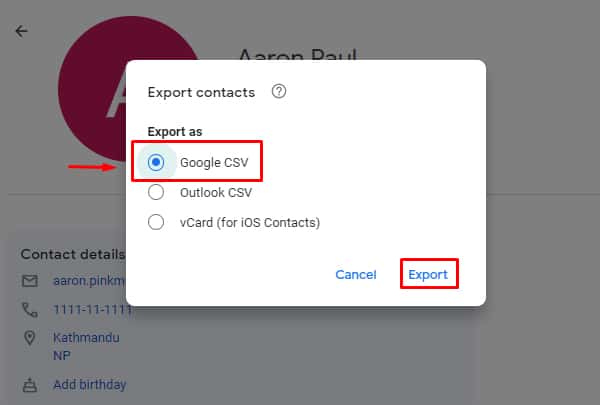
Exporting the contact data through the method shown above will include all the default column headings. Now, if you fill out the data in this format, all your data will be in proper correspondence to Google headings.
- Go to Excel and open the recently saved Google CSV file.
- Match column headings and copy-paste your data to Google CSV.

- Save the file.
Step 3: Import CSV File to Gmail
Once your sheet is now saved in CSV format, you will need to transfer the CSV files into Google Contacts. This way, you can easily import Excel Sheet data into your contacts.
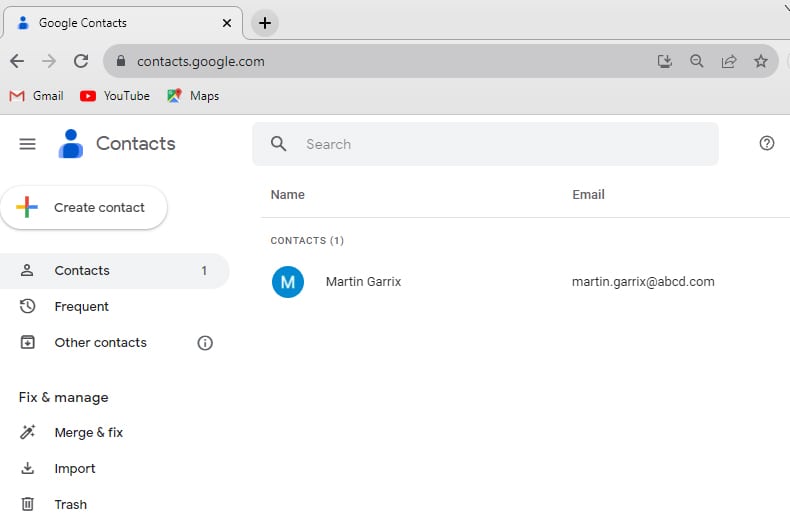
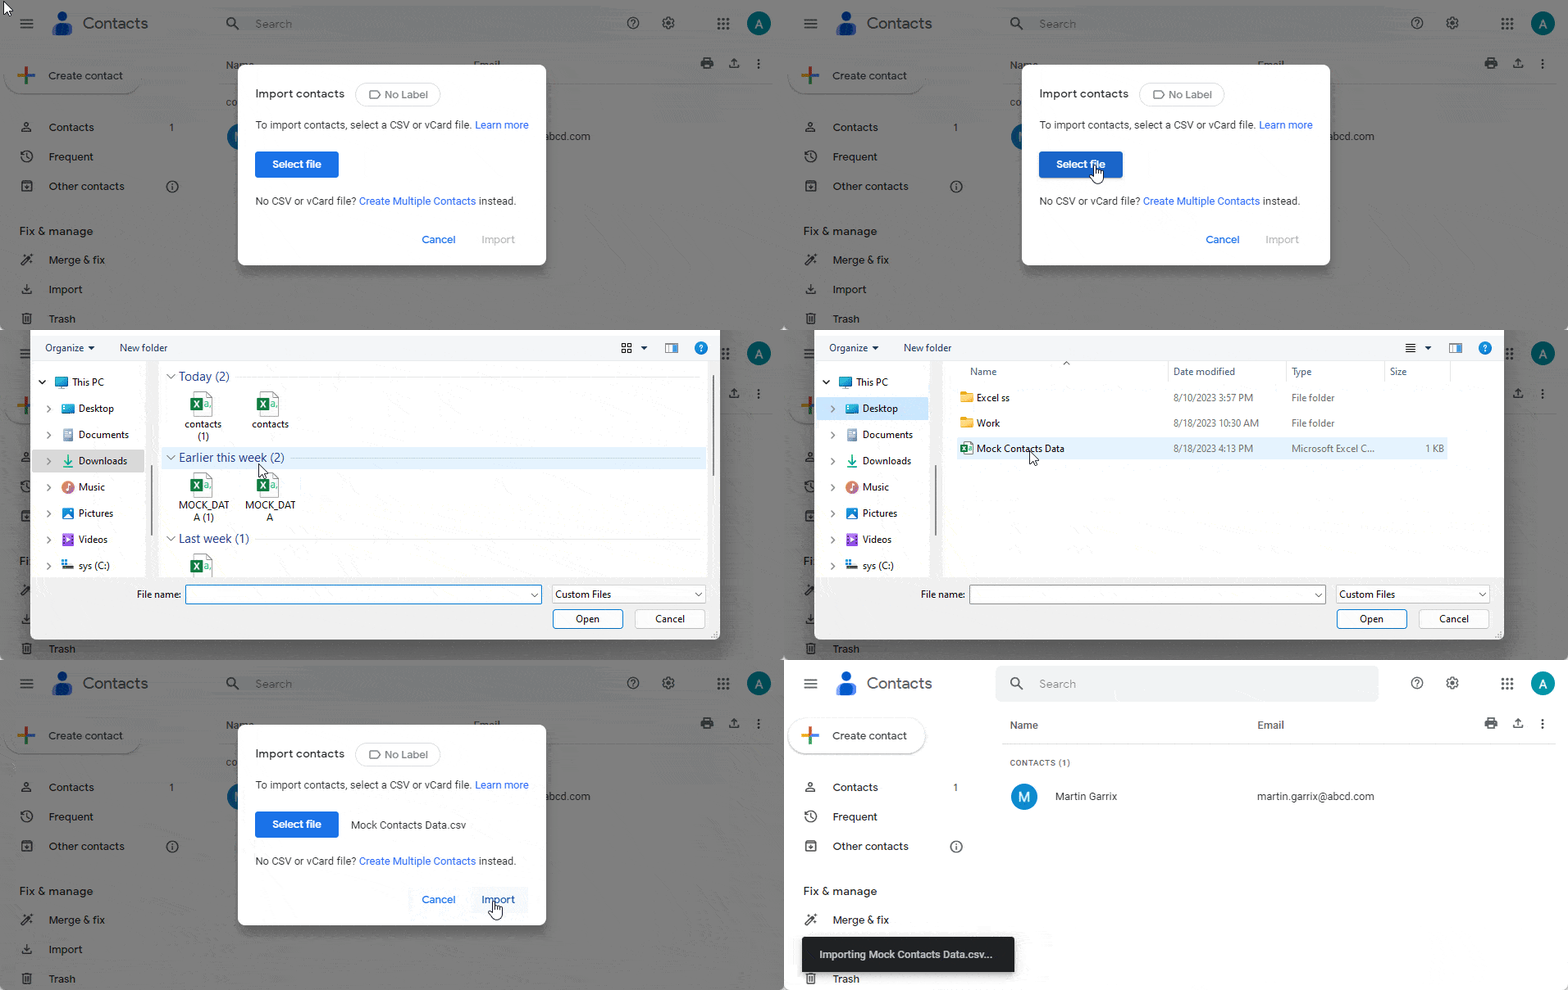
- Open Google Contacts on your web browser.
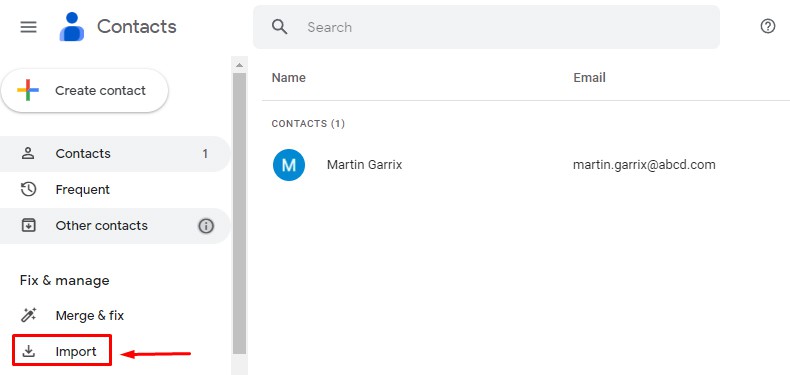
- Click on Import located on the left side panel.
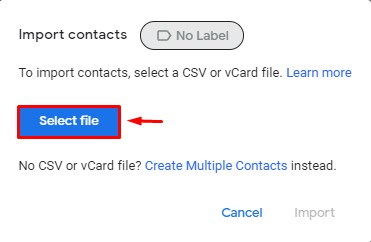
- Click on Select File on the popup.
- Browse the CSV file you just saved and click Import.
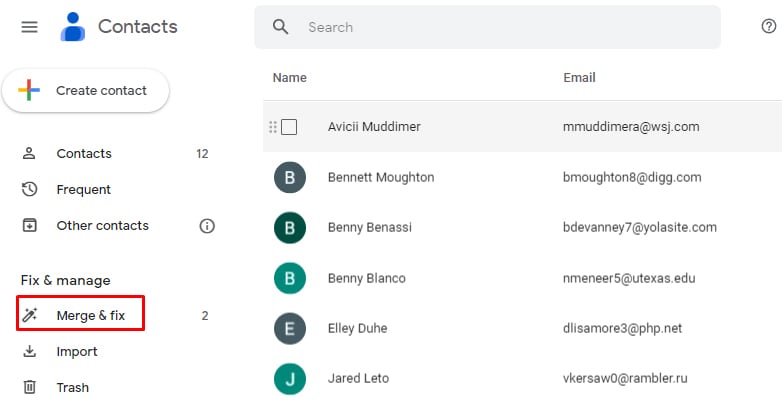
- If the file contains duplicate contacts, you can merge them or dismiss them if it’s different.
- Click on Merge & Fix.
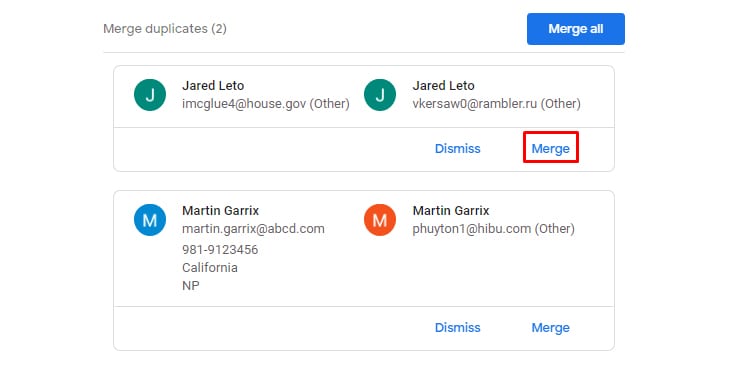
- Click Merge if the contact is the same person, or click Dismiss if the contact is different.
- Click on Merge & Fix.
Once your contacts are imported to Google, you can send emails to them through Gmail using the contact name.