Whenever you input large texts in Sheets, it spills to adjacent cells if the next columns are empty. However, if it isn’t, you can only see the contents that fit the cell while the rest is hidden. It happens because the characters do not fit in the default cell size.
To overcome this, you can use the Sheet’s Wrap Text menu. This tool will auto-fit even the longest paragraphs into the Column Width such that everything inside the cell is visible. In short, you can tidy up cluttered texts and have a professional sheet.
Using Shortcut Key
If you are an avid Sheets user, keyboard shortcuts can be your best friend. With just a few combination keys, you can complete any task quickly. I personally use shortcuts to perform almost every task in Sheets.
We have a shortcut key to Wrap Texts in Sheets. Basically, it is the easiest way to fit your texts into cells. Select cell ranges and press down the following keys together.
Shortcut Key: Alt + H + W
OR, Alt + O + W + WUsing Text Wrapping Icon
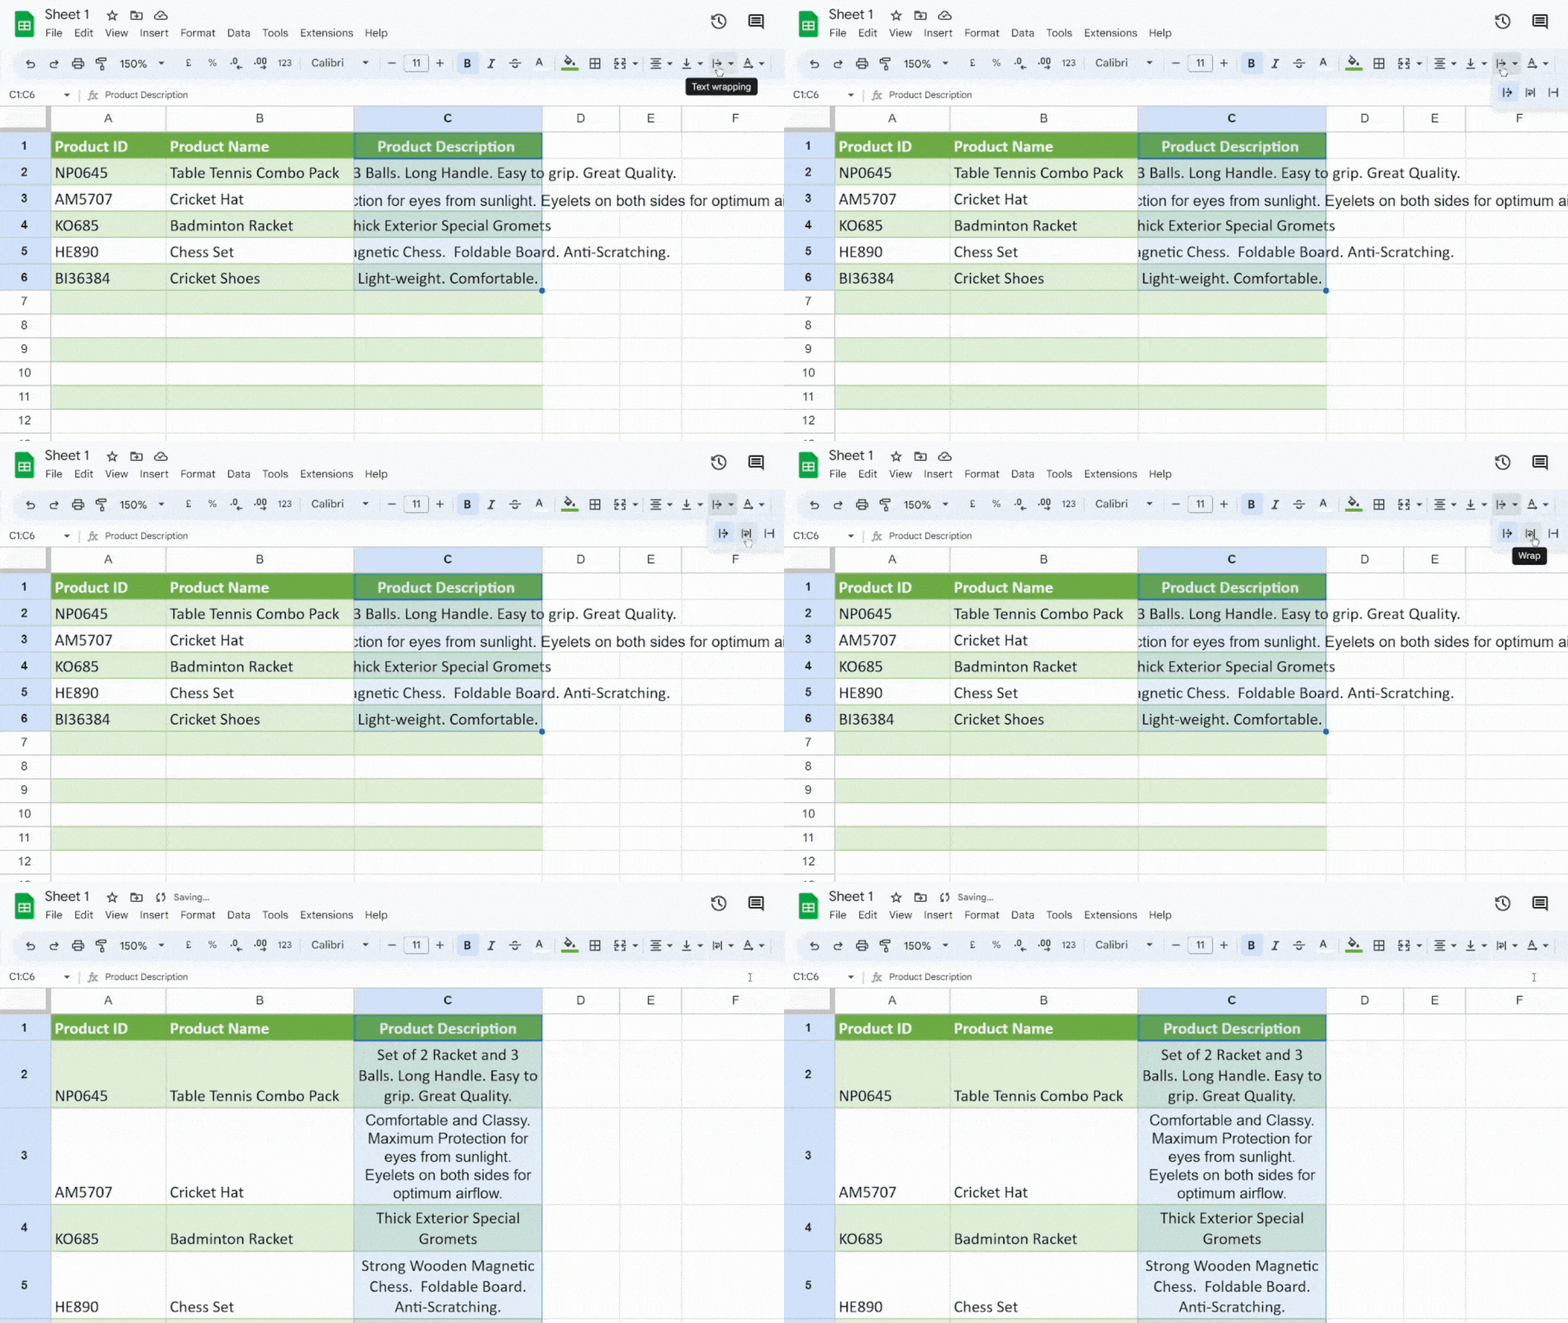
I know the keyboard shortcuts to Wrap Texts are pretty long. If you’re having a hard time getting hang of them, you can directly Wrap Texts from the Sheet’s toolbar instead. When you click on the Wrapping icon, all sentences will auto-fit the cell size.
For this, select the cell ranges with the texts. Then, from the toolbar, click on the Text Wrapping Icon > Wrap.

From Format Tab
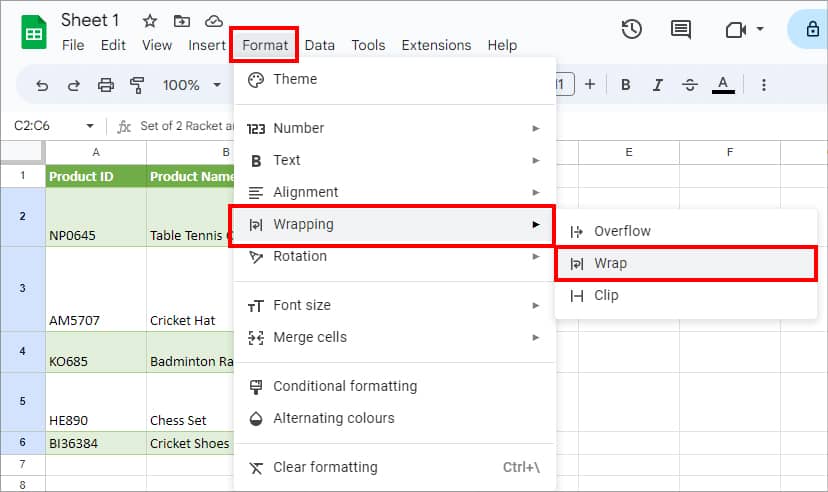
This method is especially for starters who may get a little confused with the Wrapping Icon in the Toolbar. On the Format Tab, you can find the default Wrapping menu to Wrap Texts.
Here’s how you do it.
- Select data ranges. Navigate to the Format tab.
- Click Wrapping > Wrap.

How to Wrap Text on Sheets on Mobile?
If you use the Sheets Mobile app, we’ve also got you covered with the steps to wrap text. These are the steps for both Android and iOS users.
- Launch Sheets and open a workbook.
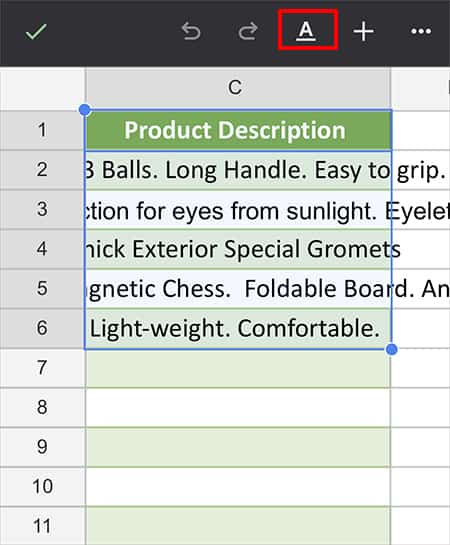
- Select cell ranges and tap on the Text Formatting (A) Icon on the top.

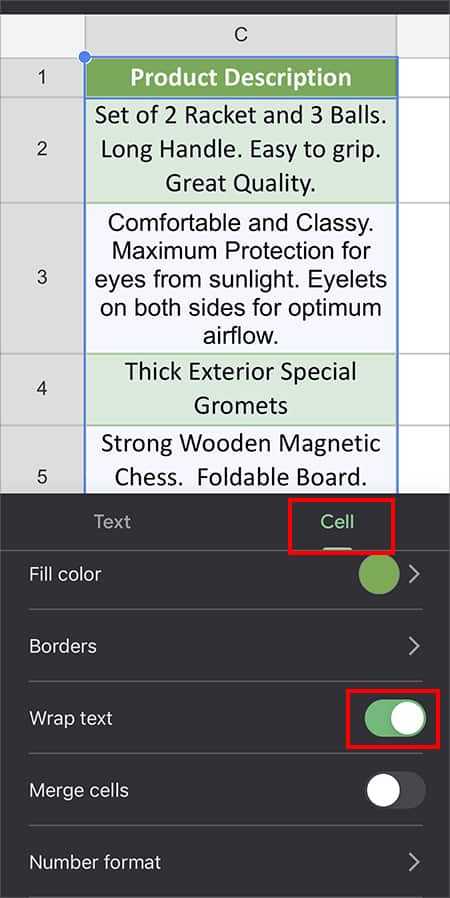
- Go to the Cell Tab. Then, Toggle On the option for Wrap text.
