What I love about Excel is that it is not only an excellent program for data entry, but also for data analysis. The program offers several tools to filter your data, among which Slicers are probably the most visually appealing.
I like to use Slicers as interactive filter elements when I’m presenting my data. Not only does it filter my data range in one click, but also never fails to impress my seniors.
In this article, I will be showing you how you can insert and use Slicers to sort through your data in Excel. As a bonus, we will also be going over the formatting options to make your slicers more visually appealing!
What are Slicers?
To simply put it, Slicers are tools that help you in filtering your data. You must be familiar with the Filter tool in Excel. Well, Slicers give you a similar result with a different interface, which I personally prefer more.
You can only create slicers on an Excel table or a Pivot Table. So, make sure to convert your data range to one of these before you begin creating slicers. You will have to choose one or multiple column headers to create a slicer for each of the selected columns.
To filter the table, you can then select the data you wish to see, and Excel will push the remaining data below your selected data.
How to Insert Slicers?
As we’ve already mentioned, you have to convert your range to a table or a Pivot Table to insert slicers. After you’ve done that, refer to one of these methods depending on if your data is in an Excel table, or a Pivot Table.
Insert Slicers on an Excel Table
- Select your table and head to the Table Design tab.
- From the Tools section, click Insert Slicer.
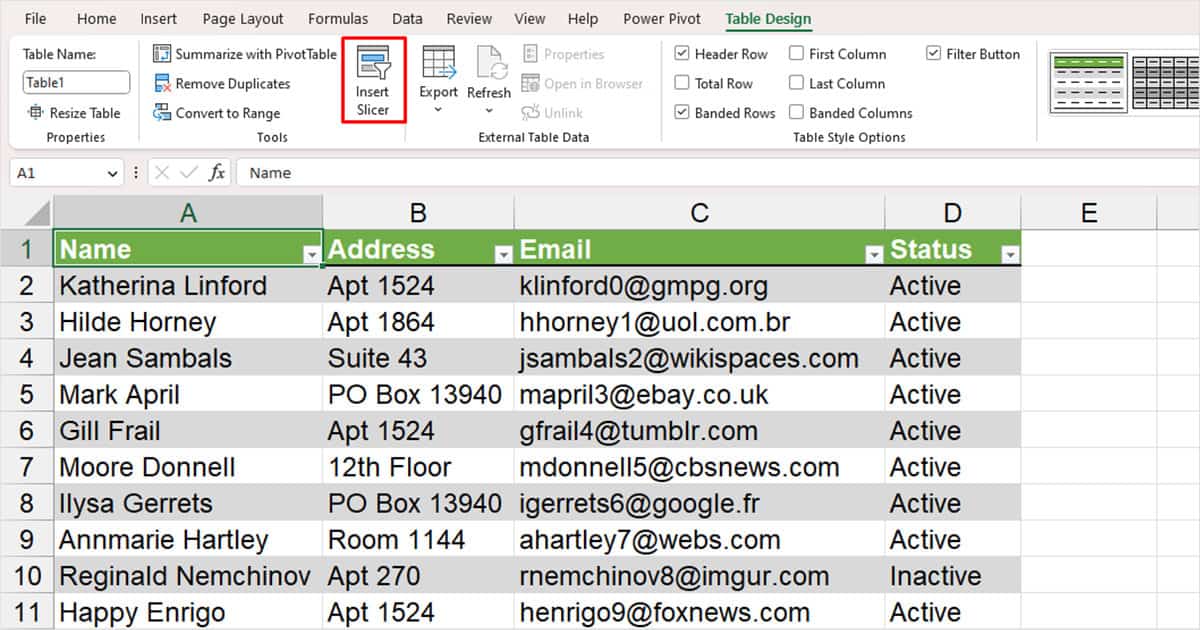
- Select the box next to the column header that you wish to create a slicer for. You can also select multiple options.
- Click OK.
Insert Slicers on Pivot Table
- Click on any cell from the pivot table and go to PivotTable Analyze from the menubar.
- From the Filter section, select Insert Slicer.
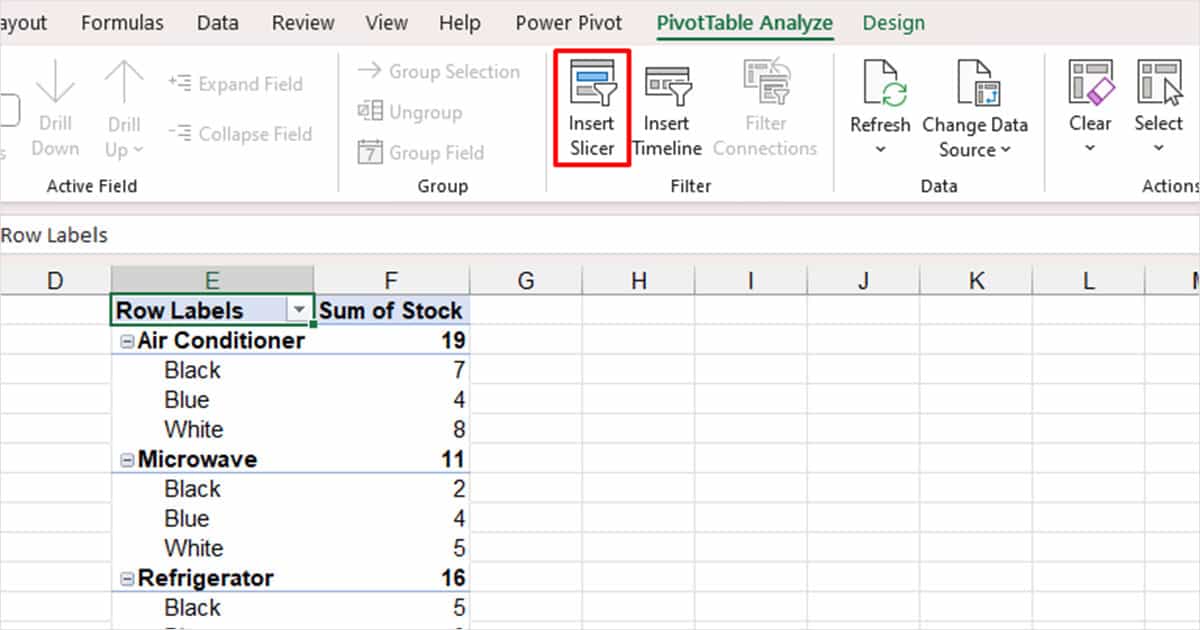
- Choose one, multiple, or all options from the Insert Slicers window.
- Select OK.
How to Use Slicers to Filter Data?
To show you how slicers work, I have two examples. In each example, we will be learning how to use slicers to filter data by one, or multiple criteria in Excel.
Filter Data by One Criterion
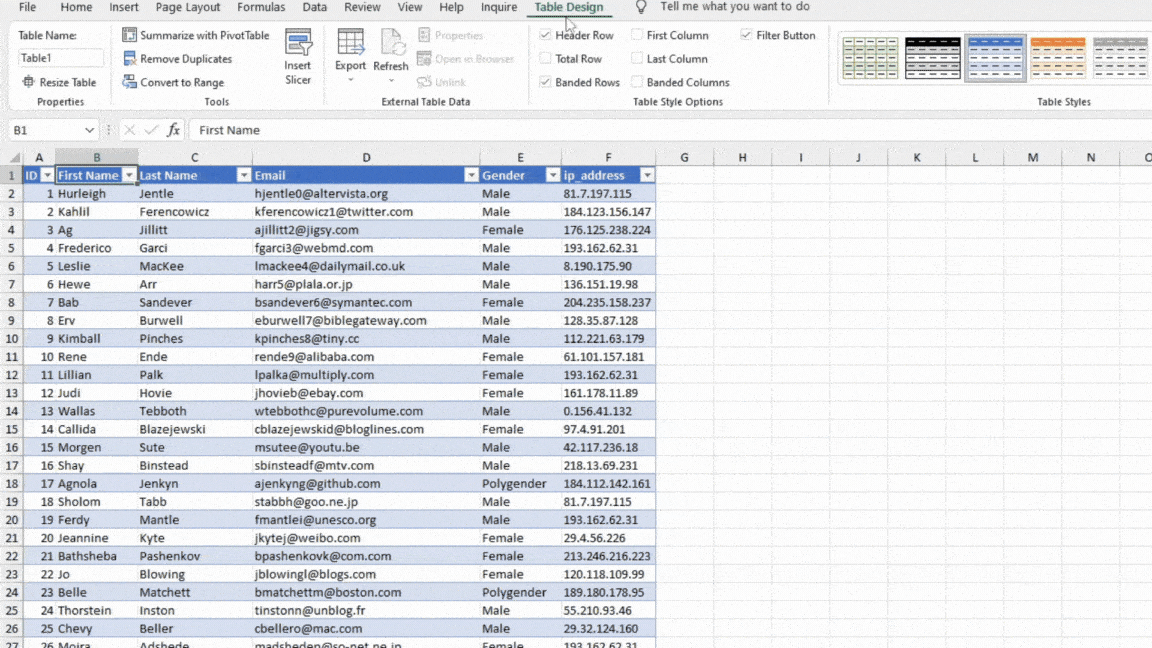
Take a look at this data table. This table has six columns, ID, First Name, Last Name, Email, Gender, and ip_address. As this is a normal Excel table, I will be using the steps I’ve mentioned above.
Let’s filter our data table by each user’s Gender.
After we select the Insert Slicer tool, Excel will present you with a window. We will now select the checkbox next to Gender > OK.
You will now see a pop-up on your screen with all values under the Gender column. Click on one of the buttons from the slicer. All rows that contain the selected option in column E, Gender will be pushed above the remaining rows.
Filter Data by Multiple Criteria in One Column
In the first example, we filtered data using one criterion. For example, if we selected Female, only the rows with Female were pushed on top of the table. However, Slicers also allows you to select multiple options to pass as criteria to filter the data table.
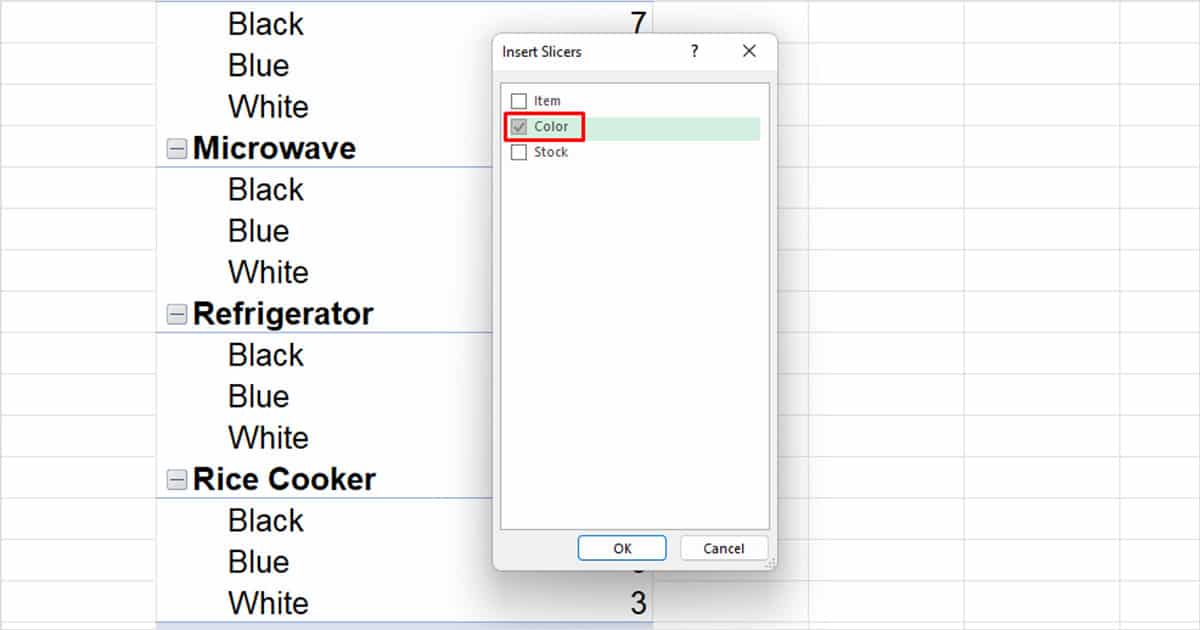
In this example, we will be inserting slicers for a Pivot Table. This Pivot Table has four items, their colors, and the number of items in stock. Let’s use slicers to filter items that aren’t black and blue.
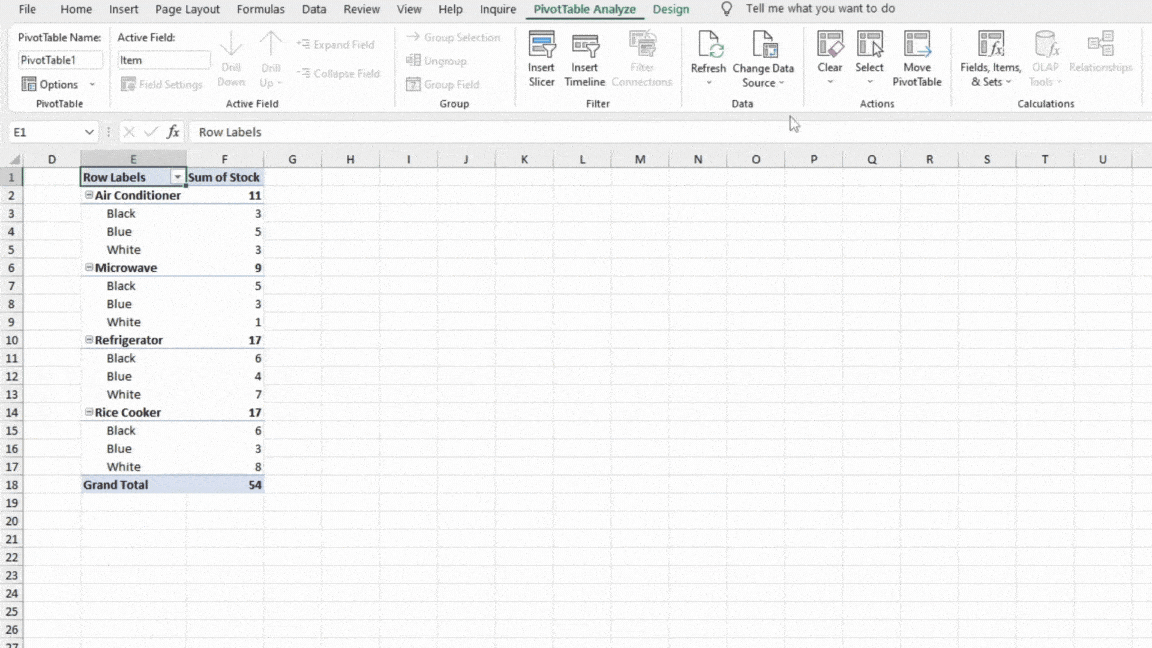
In the Insert Slicers window, we chose Color > OK. In the Slicer window, we first selected Black, then on the top-right, we selected the Multi-select (Alt + S) option. Then, we clicked on the next option, Blue.
This way, our Pivot table is filtered using multiple criteria.
Filter Data by Multiple Criteria in Multiple Columns
You can also select multiple columns to create a slicer for. This way, you can filter your data according to multiple data in multiple columns.
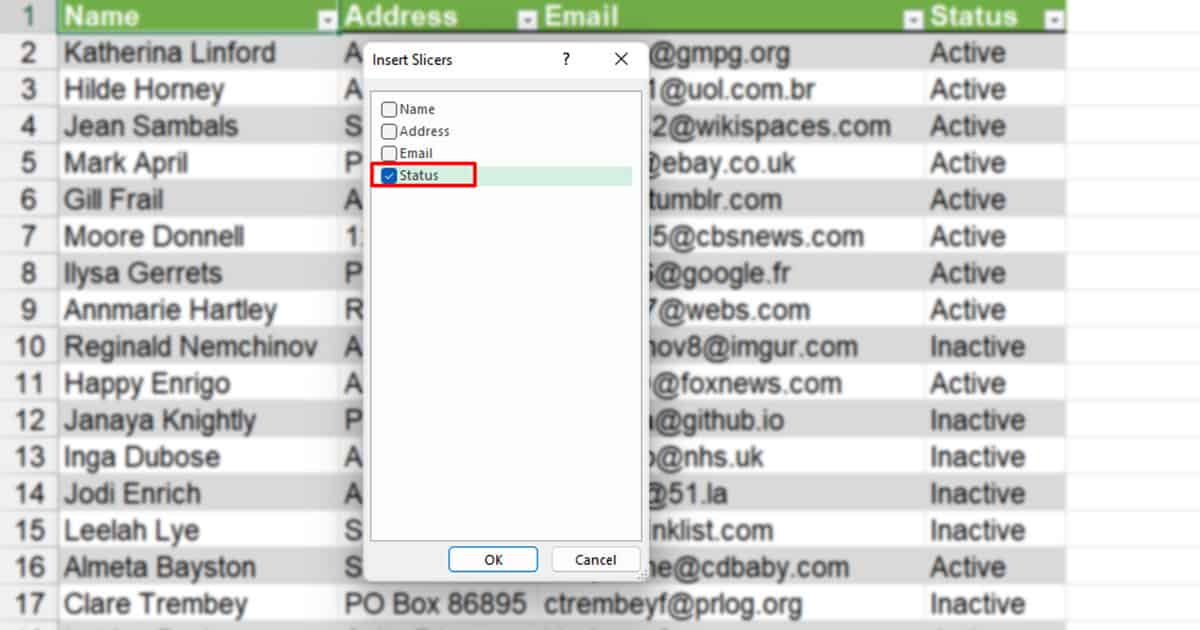
In this spreadsheet, we have four columns: Name, Address, Email, and Status. We will be using Slicers to filter data according to the Address and Status of each individual.
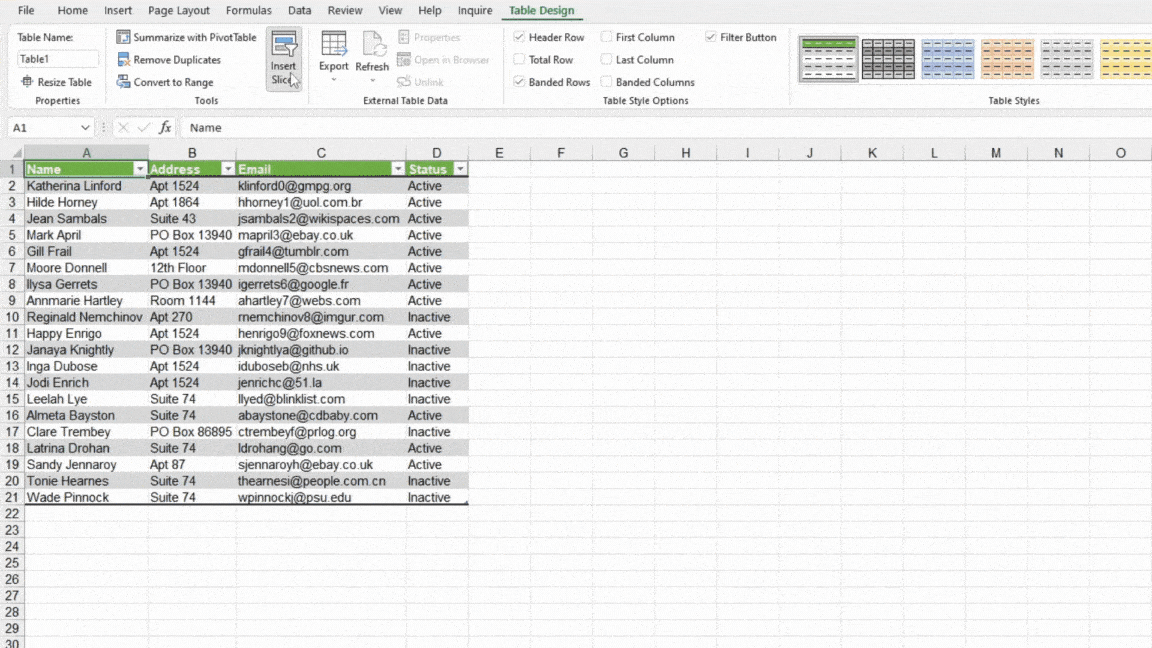
After we select the Insert Slicer tool, instead of choosing a single column as we did before, we’re selecting two boxes, Address and Status > OK.
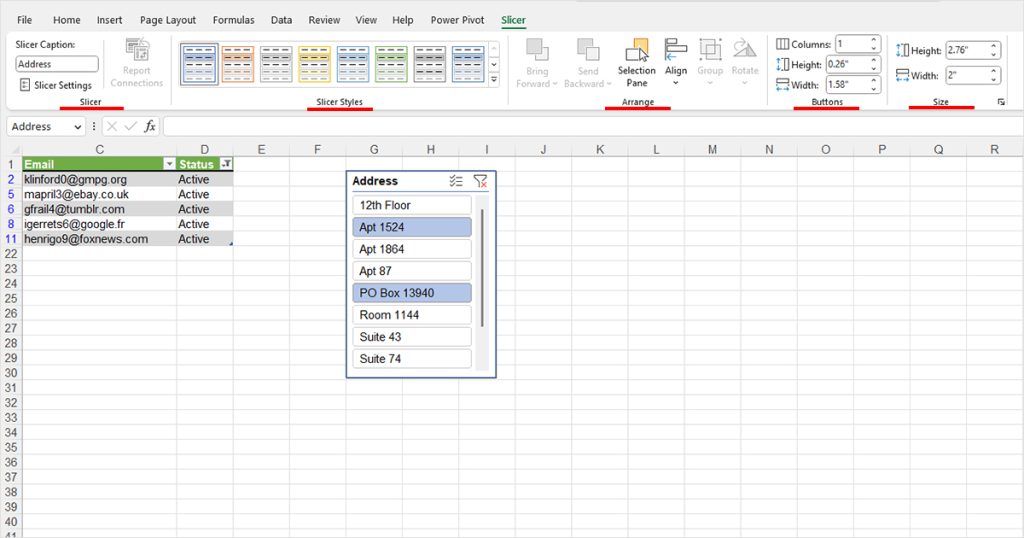
We will first filter the table by the Address and then, by the Status. Excel will filter your data table by combining both of these criteria. We can also use the Multi-select tool to select multiple buttons from the Address column as we did in the method before.
Remove Filter
Once you’re done analyzing the data, you can remove the filter. This does not delete the slicer but only reverts the placement of your data table. On your slicer, select the Clear Filter option in the top right corner. You can also use the shortcut, Alt + C to remove the filter from your table.

If you want to remove the interface as a whole, you can select the slicer and use Backspace on your keyboard. You can also right-click on the slicer and choose, Remove “(name)”.
Format your Slicer
Once you’ve inserted the slicer into your spreadsheet, you can also use many of Excel styles, and arrangements to personalize the tool. Similarly, you can also customize the size of the slicer, and the buttons as well.
Select your slicer and header to the Slicer tab from the menu bar. Navigate through the Slicer ribbon for the following formatting features:
- Slicer: You can caption for your slicer under Slicer Caption.
- Slicer Styles: Choose a design for your Slicer.
- Arrange: Pick how you want to place your Slicer.
- Buttons: Customize the dimensions of your buttons inside the slicer.
- Size: Change the measurements of your Slicer.