Like it or not, the Gmail app archives your emails as soon as you swipe to its left/right side. Therefore, accidental archiving is much more common on mobile devices than on desktops. Still, you can use the Undo option that appears at the bottom to unarchive the email again.
However, such an option only stays for a brief moment like 10 seconds. In case you missed it, you’ll manually need to find and unarchive such emails in the All mails section. To make matters worse, you won’t find any separate label like “Archive” that contains only the archived mails.
No worries, we’ve got you covered. With special search operators, you can find all your archived emails in one place and unarchive them in a much more efficient manner. Plus, we’ll show how you can change the default setting to prevent Gmail from archiving as you swipe an email on mobile devices.
On Desktop (Browser)
- Open a browser and log in to your Gmail account.
- Type
-in:inboxin the search bar and press Enter. This will display only the archived emails.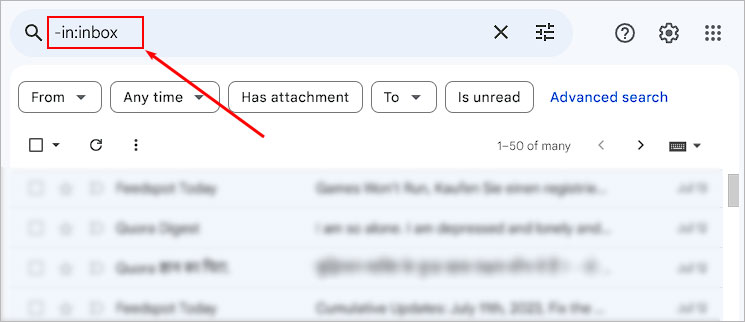
- If you archived a recent mail, it will appear on the same page of the search result and you should be able to find it easily. If you don’t find it, continue to the next step.
- To narrow down search results and only display specific archived mails, combine one or more of the following search operators along with the
-in:inboxoperator.has:nouserlabels: find archived mails with no labels. Use it to search for ones that don’t have any custom label (s).label:<label-name>: find mails with a specific label. (Eg. label:AccountingDept)from:<sender name or email-address>: search mails from a specific email or user (Eg. from:[email protected] or from:Jack)“<word or phrase>”: search for mails containing an exact word or phrase (For eg. “sales”)older_than:<number of days, months or year><d/m/y>: find mails older before a specific time period. (Eg. older_than:3m will search and display all mails before 3 months from the current time)newer_than: similar to the above but finds mails within specific day (s), month (s), or year (s).
has:attachment: find archived mails with attachments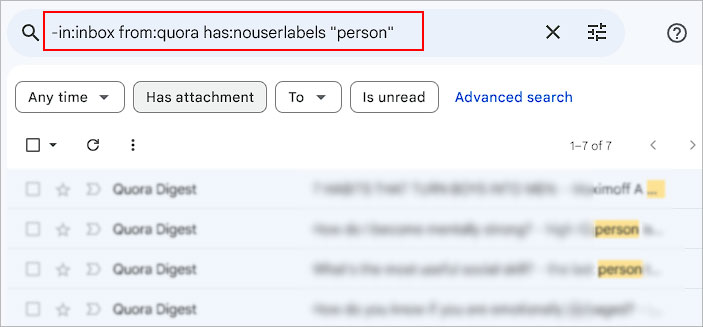
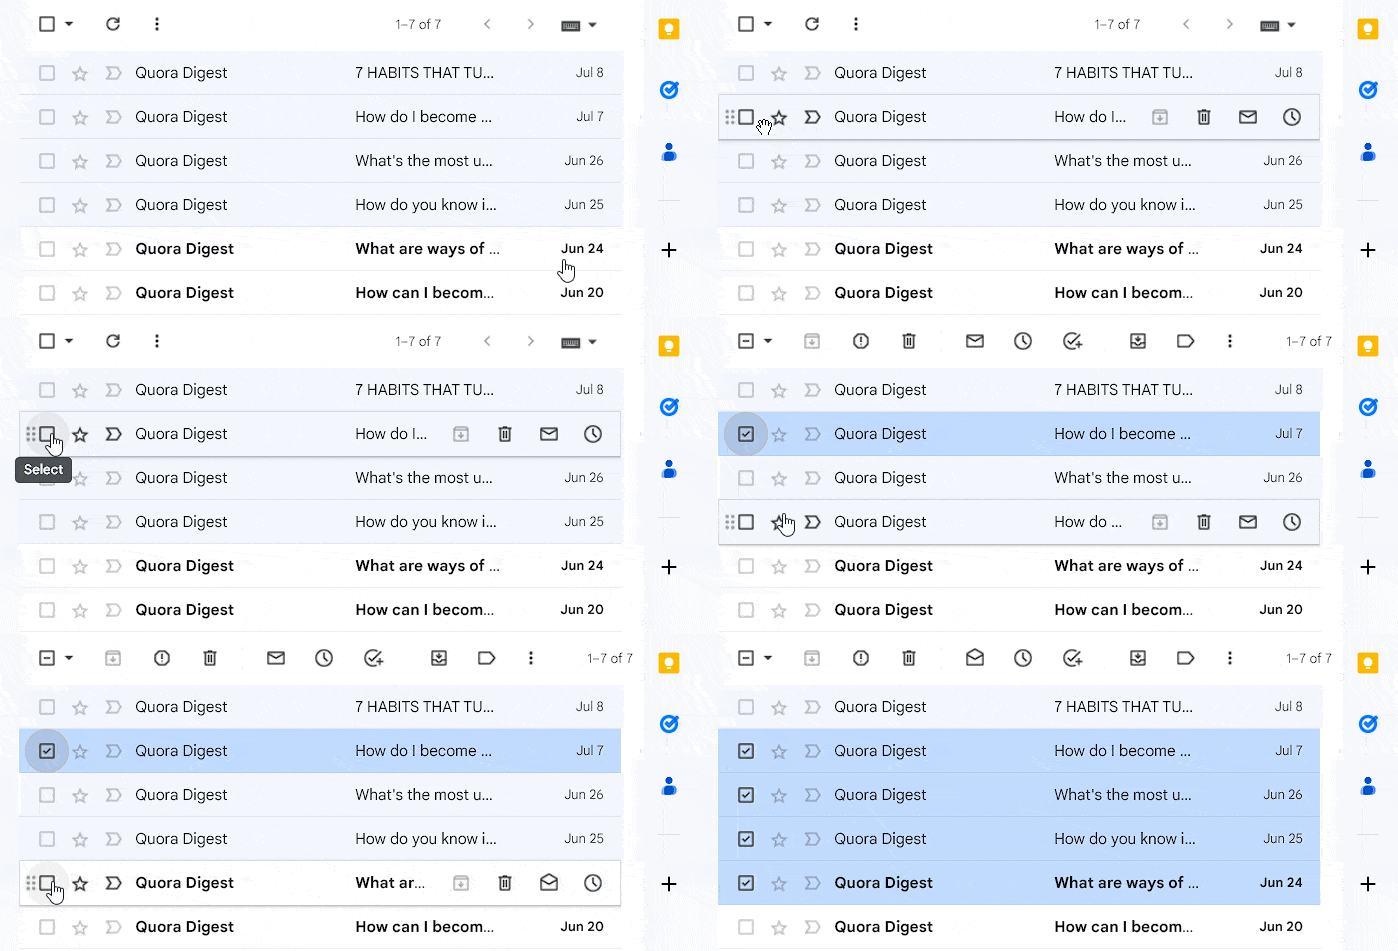
- Once you see a list of archived emails, select the ones you want to unarchive.
- To select multiple adjacent items/emails, select the first item by enabling its checkbox. Then, go to the last item you wish to select and click its checkbox while pressing the Shift key.
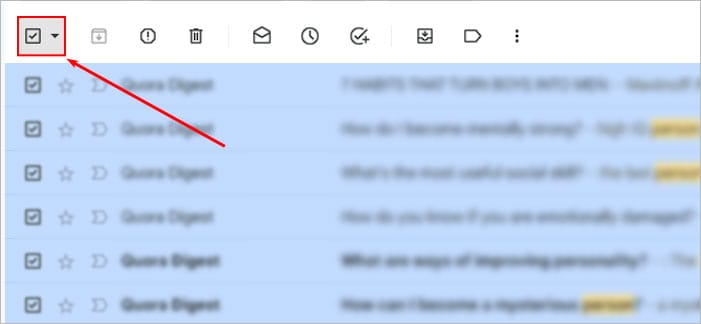
- To select all the emails on a single page, click the checkbox above all of them in the top left corner.
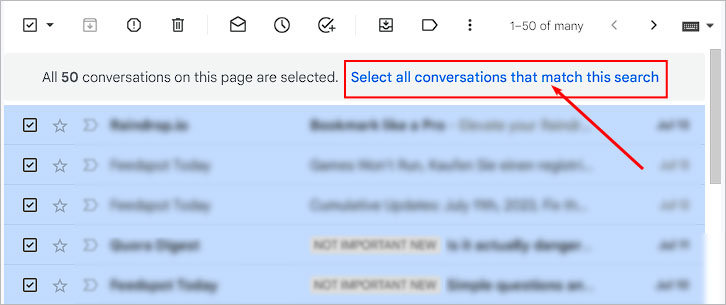
- If you have more than 50 archived emails after the search result, click the Select all conversations that match this search option. This will select mails on all pages and not only a single page that, by default, contains 50 mails.
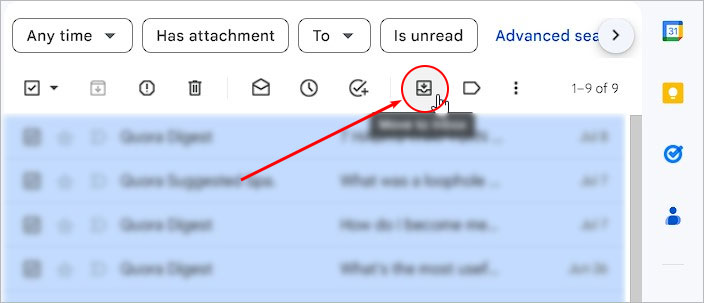
- Now, simply click the Move to Inbox icon below the search bar.
On the Mobile App
- Open the Gmail app.
- Type
-in:inboxand press Enter. The most recently archived emails should appear at the top. In case you don’t find the desired archived mail, continue to the next step. - To further narrow down search results, combine several search operators such as
from:<sender name or email>according to your preferences. Check out Step 4 of the above Desktop method section to find the list of such operators.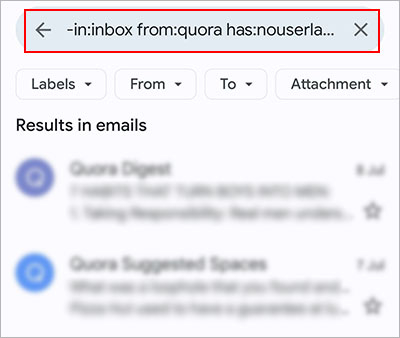
- Once you find the archived mail (s), select each email by tapping the icon next to it.
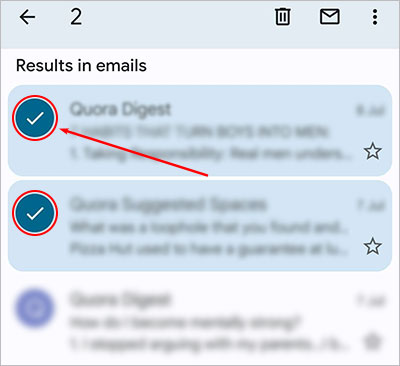
- Then, tap the three vertical dots in the top-right corner.
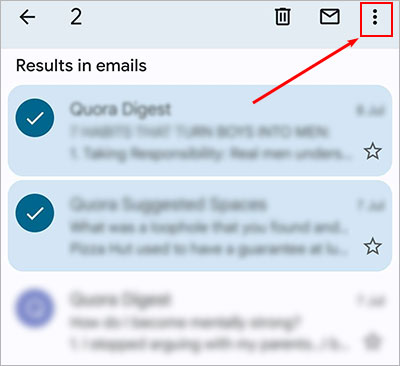
- Now, select the Move to Inbox option to unarchive the selected emails.
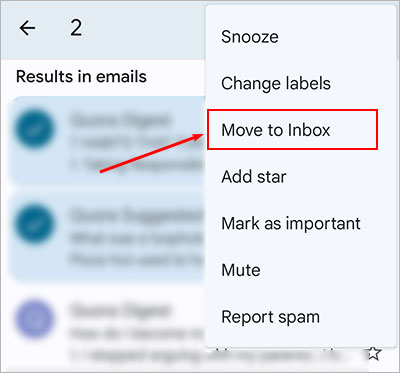
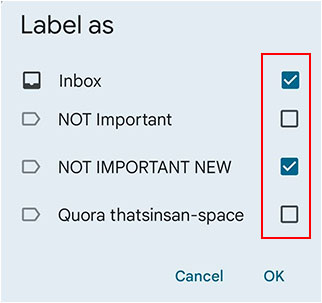
- Alternatively, select the Change labels option and enable the respective checkbox of the label (s) where you want to restore them.
On Mobile (Using Desktop Site Option)
- Open a browser app. Here we are using Google Chrome for demonstration purposes.
- Type
gmail.comin the URL address bar.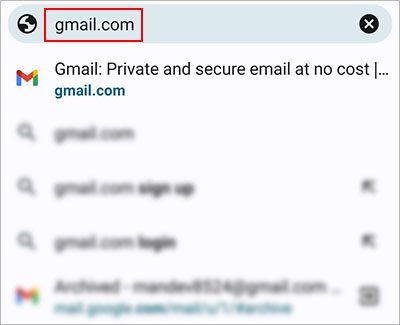
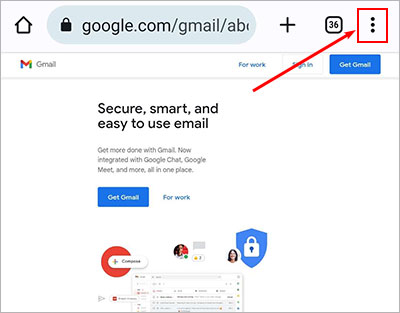
- Then, tap the three vertical dots in the top right corner. If you are using a different browser, look for a similar icon in another location.
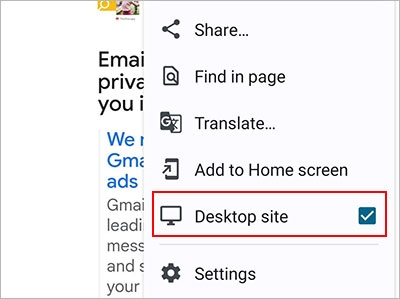
- Enable the Desktop site checkbox.
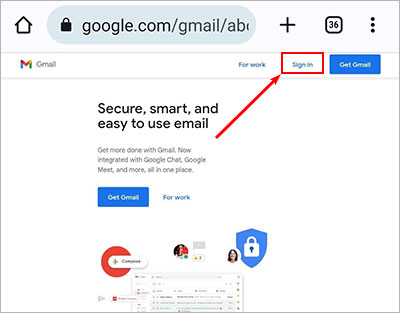
- Next, tap Sign in and enter your Gmail login details when prompted.
- Now, you should see an interface similar to the Gmail desktop version.
- Type
-in:inboxand use several search operators to find/restore archived mail (s) similar to the Desktop method as mentioned in the above section.
How to Prevent Gmail from Archiving My Emails while Swiping?
Initially, Gmail archives a mail whenever you swipe it to the left or right side. However, you can configure Gmail settings to prevent the default swipe action as follows.
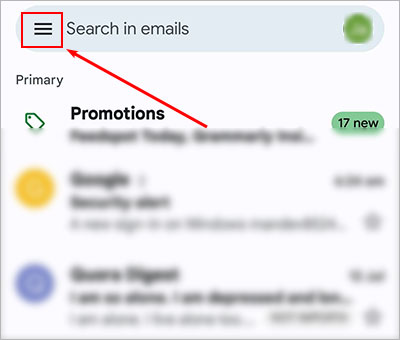
- Tap the hamburger menu in the top left corner.
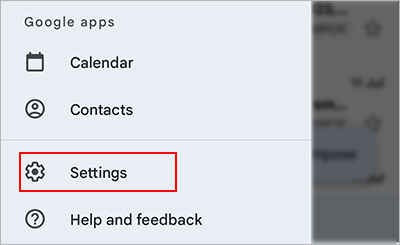
- Then, scroll down and select the Settings option.
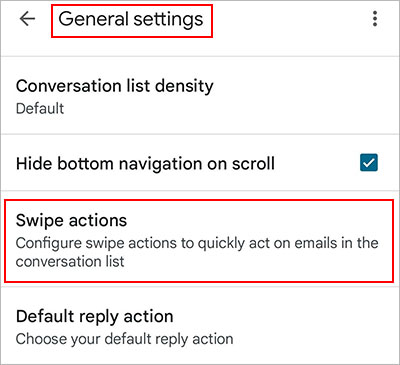
- Then, tap General settings > Swipe actions.
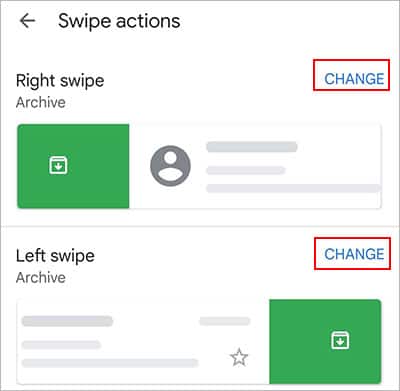
- Tap Change to use a different swipe action.
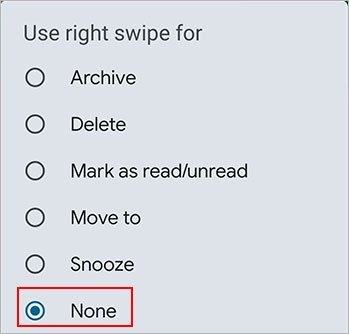
- Choose None to disable any action while swiping the mail. Alternatively, choose other options like Delete, Mark as read/unread, Move to, and Snooze according to your preferences.
How Archiving Works in Gmail?
By default, Gmail assigns the label “Inbox” to every incoming mail. And, when you archive a mail, Gmail just removes the Inbox label from those messages and nothing else.
They will still continue to show up inside the All mails label and you can find them along with other unarchived mails.
Now, if you archive emails that already have a custom label (label you created and assigned), they will no longer have the Inbox label. But you can find them inside that particular label whether you archive the mail or not.
In a nutshell, archiving an email simply means removing the Inbox label so that it doesn’t show up on your primary inbox view. Similarly, unarchiving means restoring such archived emails to the primary inbox.
Also, archiving won’t delete any of your emails and thus, it doesn’t actually save any storage space.
Related Questions
I Couldn’t Find the Archived Emails. How to Find and Restore Them?
Unless you have permanently deleted an archived mail, you can find them in the All mail label. However, if your account was inactive for a long time or the storage space is almost full, Gmail could send them to Trash. So, you could check such emails there.
Why Are Some of My Emails Disappearing and Archiving Automatically?
This could happen if you have a Gmail rule/filter that’s skipping certain incoming mails like from a particular email address and archiving them automatically. You can check if such a rule exists on Gmail and delete it as follows.
- Login to your Gmail account on a browser.
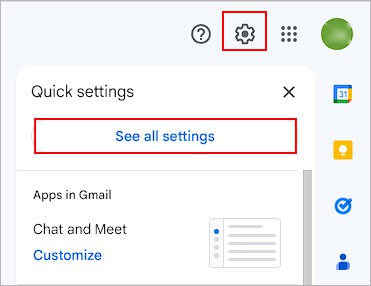
- Click the gear icon in the top right corner and select See all settings.
- Under the Filters and Blocked Address section, look for a filter that mentions Skip Inbox.
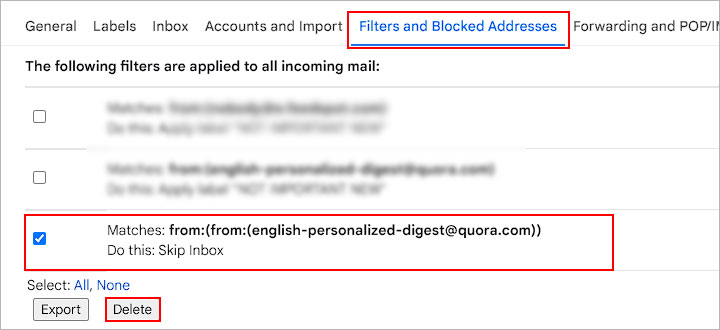
- Click Delete to remove the rule.
- Alternatively, click Edit on the right side of the rule to change the filter according to your preferences.