Whenever you want to schedule an upcoming meeting in Outlook, you need to send a calendar invite to other people. For this, you can use an existing meeting event on your Outlook calendar or create a new meeting.
Plus, if your Outlook app has integrated Microsoft Teams, you can send the Outlook invite which contains the Teams meeting link. Alternatively, you can provide links to other platforms like Zoom, Skype, or others as well.
In this article, we will guide you through a step-by-step approach to sending an Outlook meeting invite, both as an event organizer and on behalf of someone else.
How to Send an Outlook Invite as an Event Organizer?
If you are the event organizer, follow these essential steps to create and send the meeting invite to other people.
Step 1: Create an Event
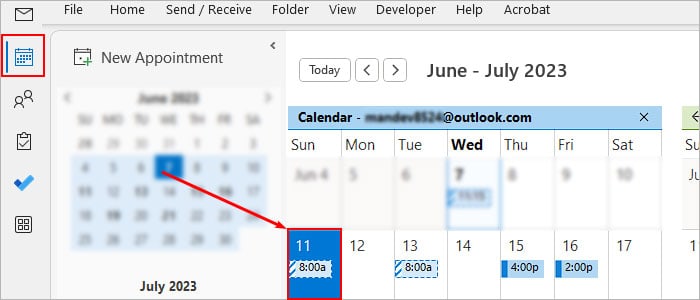
Click the calendar icon. You can find it in the bottom left corner or the sidebar depending on the Outlook app you are using.
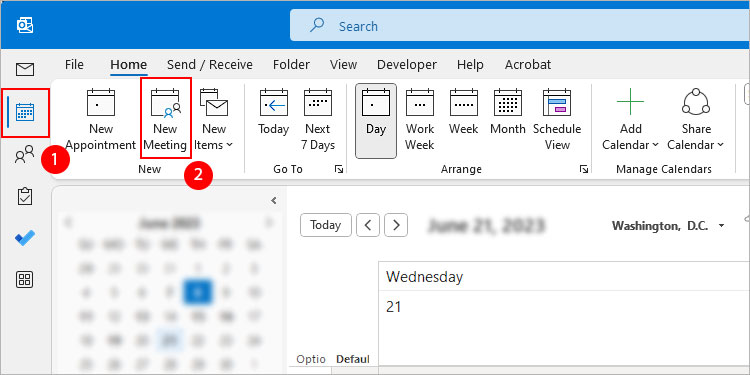
Click New Meeting to create a new event. Alternatively, open an existing meeting/appointment on your calendar to re-send the meeting invite with the latest update (s).
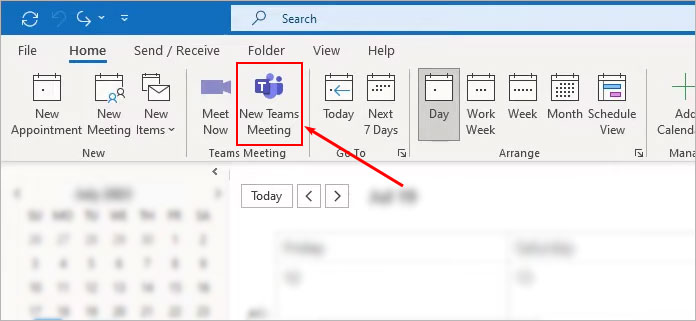
To create events using a meeting platform like Microsoft Teams (if available), click the New Teams meeting instead. Don’t worry, Outlook will automatically generate the equivalent link/code that opens in Microsoft Teams.
Step 2: Fill in the Necessary Details
Enter an appropriate meeting title.
Type the name or email of the person you want to invite next to the Required field. Similarly, you can also add optional attendees inside the Optional field. If you need to send the invite to multiple recipients at once, enter the contact group name (previously known as the distribution list).
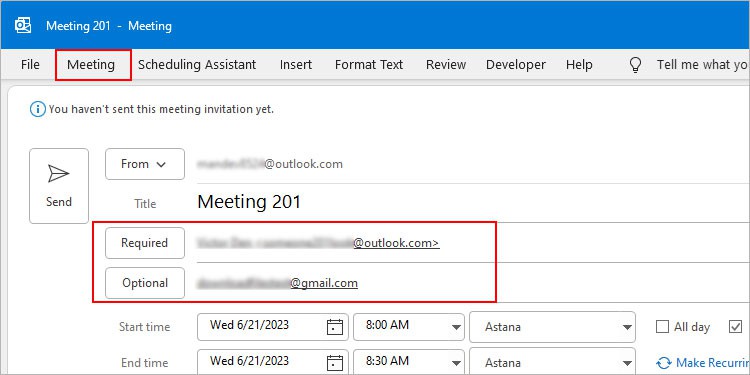
Choose an appropriate date/time for the meeting and add multiple time zones if you need to invite people attending from remote locations. If available, use the Scheduling Assistant to check for scheduling conflicts and adjust an appropriate time for all attendees.
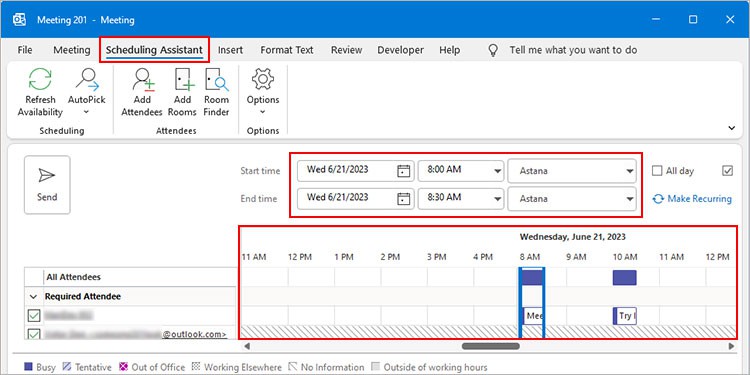
Additionally, click the Make Recurring button to send the meeting invite that occurs over multiple dates for a specific period (daily, weekly, monthly, or yearly).
Step 3: Request a Response
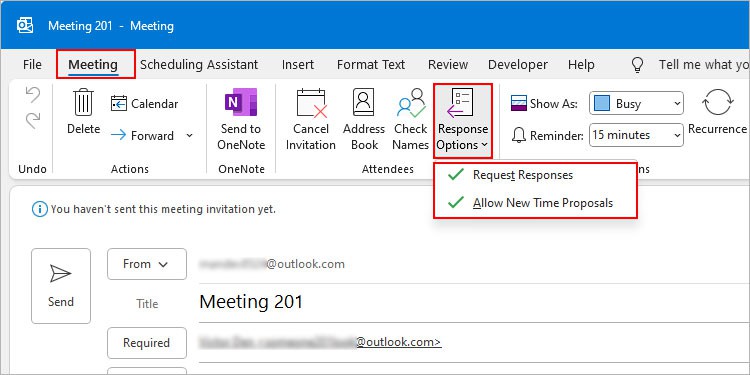
After entering the necessary details, enable the Request response to know whether an invitee is attending the meeting or not.
Step 4: Add a Reminder (Optional)
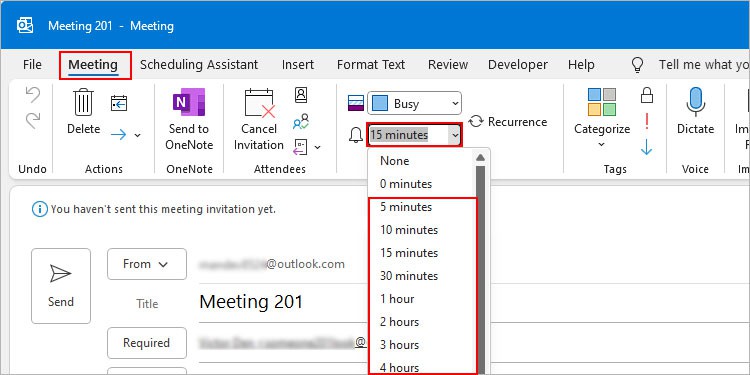
While this is an extra step, we highly suggest you add a reminder. This way you’ll have ample time to prepare before the meeting starts.
Step 5: Click Send
Once you have followed the above steps, review the details if necessary. Or, simply click Send.
How to Send an Outlook Invite as an Attendee?
If you are an attendee, you can send a copy of the meeting invite to other people on behalf of the event organizer.
For this, you can either forward the message containing meeting details or attach the calendar invite and forward it to the desired email address.
Here’s how to do it.
- Open the meeting invite you want to forward.
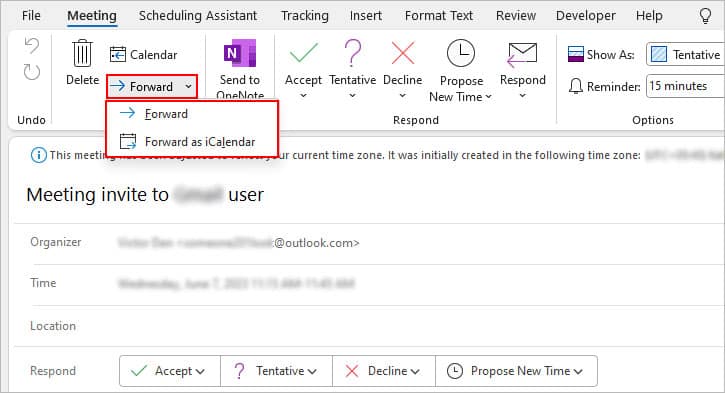
- Then, under the Meeting tab, click the down arrow icon next to Forward and choose one of the following options.
- Forward: Forward the meeting invite on behalf of the meeting organizer
- Forward as iCalendar: Attach the calendar with meeting details and email it to other people
- Click Send when done.
Related Questions
How to Send an Outlook Invite without Revealing All the Recipients’ Details?
By default, whenever you send a meeting invite, each recipient can view the email addresses of other invited attendees. However, if you later add or remove an attendee, you can choose to inform only such attendees, given that you are the event organizer and none of the other details have changed.
How to Undo a Sent Meeting Invite?
For some reason, if you later decide to update the meeting details or even cancel the meeting, you can reschedule a future meeting. Just select the specific meeting on your Outlook calendar and make the necessary changes.