When it comes to making an impression, timing is everything. Sending your email at the optimal time when your client is most likely to engage with, can make or break your business deal.
In April 2019, Gmail introduced the feature to schedule emails on desktops and mobile devices. You can use this feature to specify a date and time, and Gmail will send your email to the recipient at the specified timestamp.
Gmail lets you schedule up to 100 emails and set a time limit for scheduling emails for up to 49 years!
Scheduling Emails on PC
You can easily schedule an email through Gmail on your PC’s web browser. Here’re the steps to start scheduling your emails.
- Open the browser and log in to your Gmail account.
- On the top left corner, click on Compose.
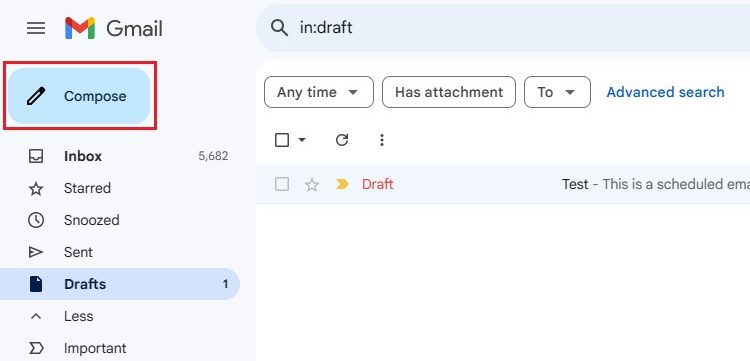
- Click on the Dropdown arrow next to the Send Button. On the new window, click on Schedule Send.

- Click on Pick date & Time.
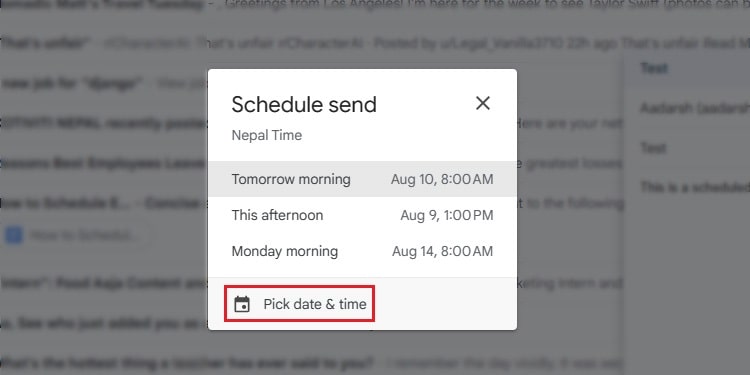
- Enter the date and time to send the email and click Schedule Send.
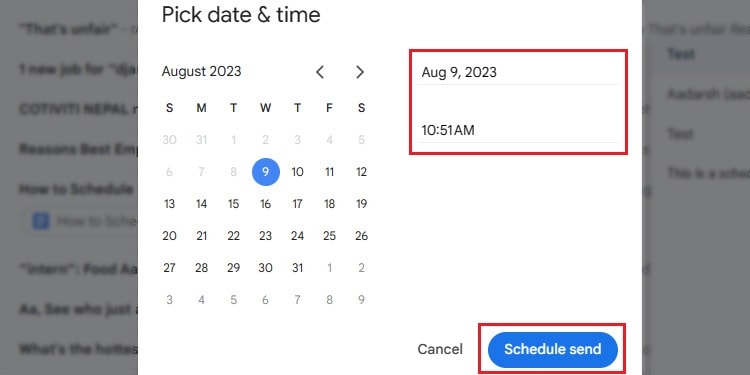
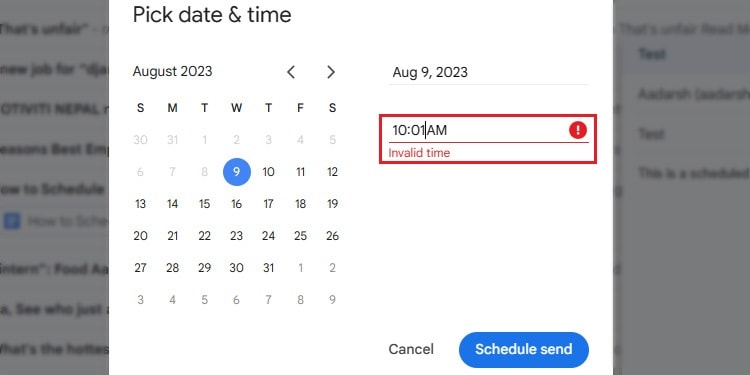
Remember that your scheduled time on your emails must be two minutes ahead of the current time. Otherwise, Gmail will display an error saying “Invalid Time.”
Scheduling Emails on Mobile
Scheduling emails on your mobile devices is similar to sending scheduled emails on your PC. Here’re the steps you need to follow.
- Open Gmail App and Compose an Email.
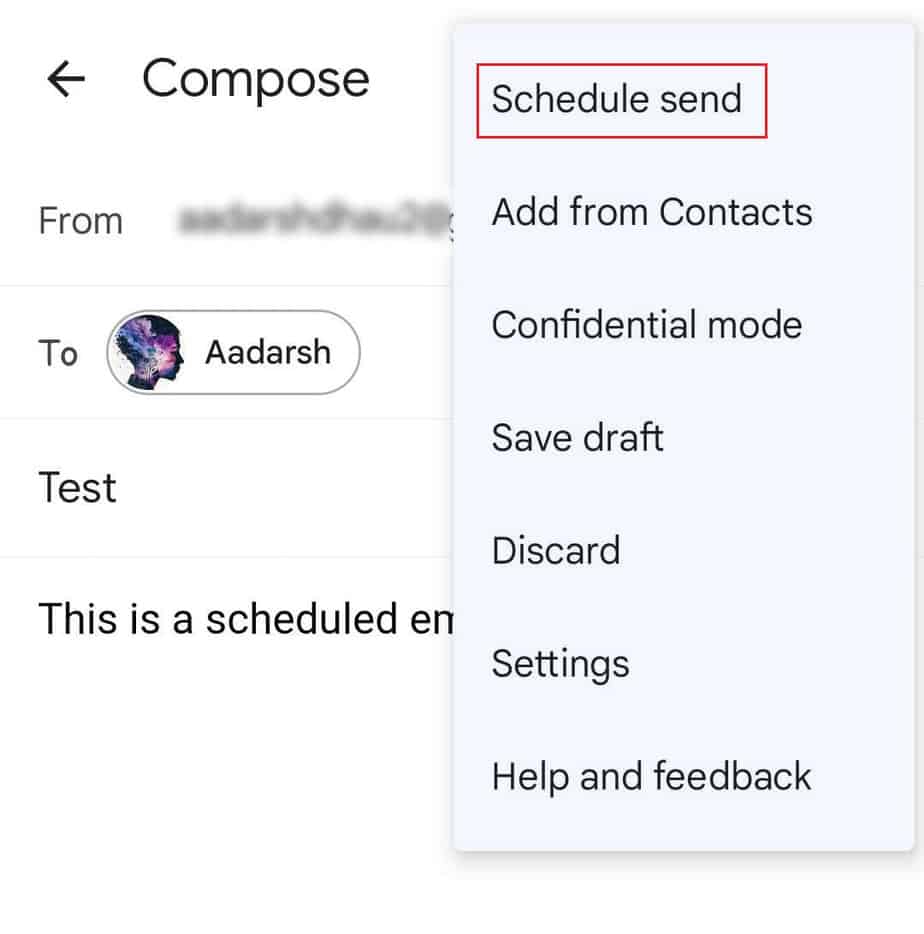
- Tap on the Hamburger icon next to Send icon and tap Schedule Send.
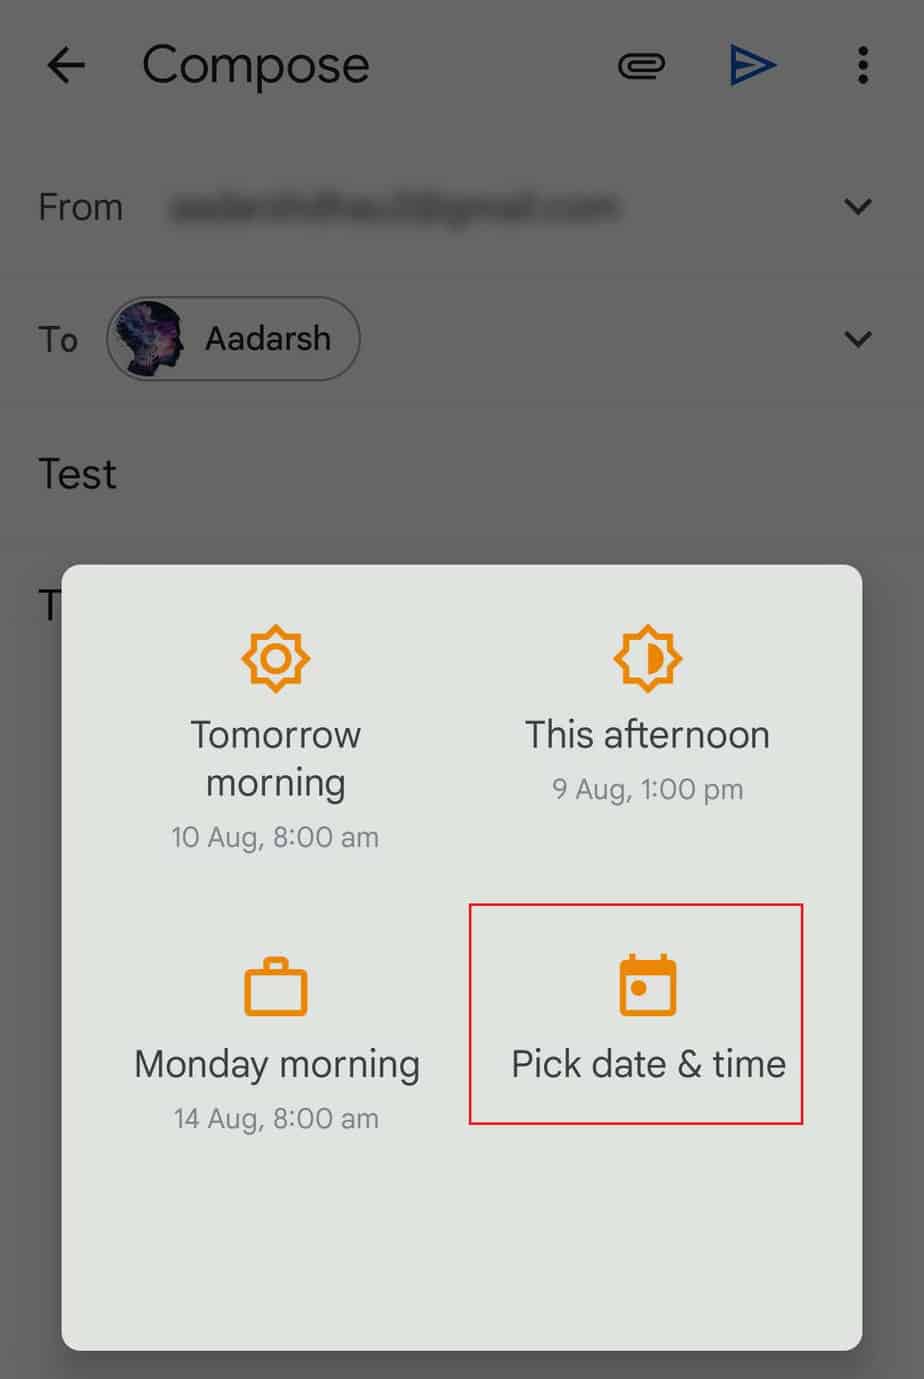
- Tap on Pick date & time.
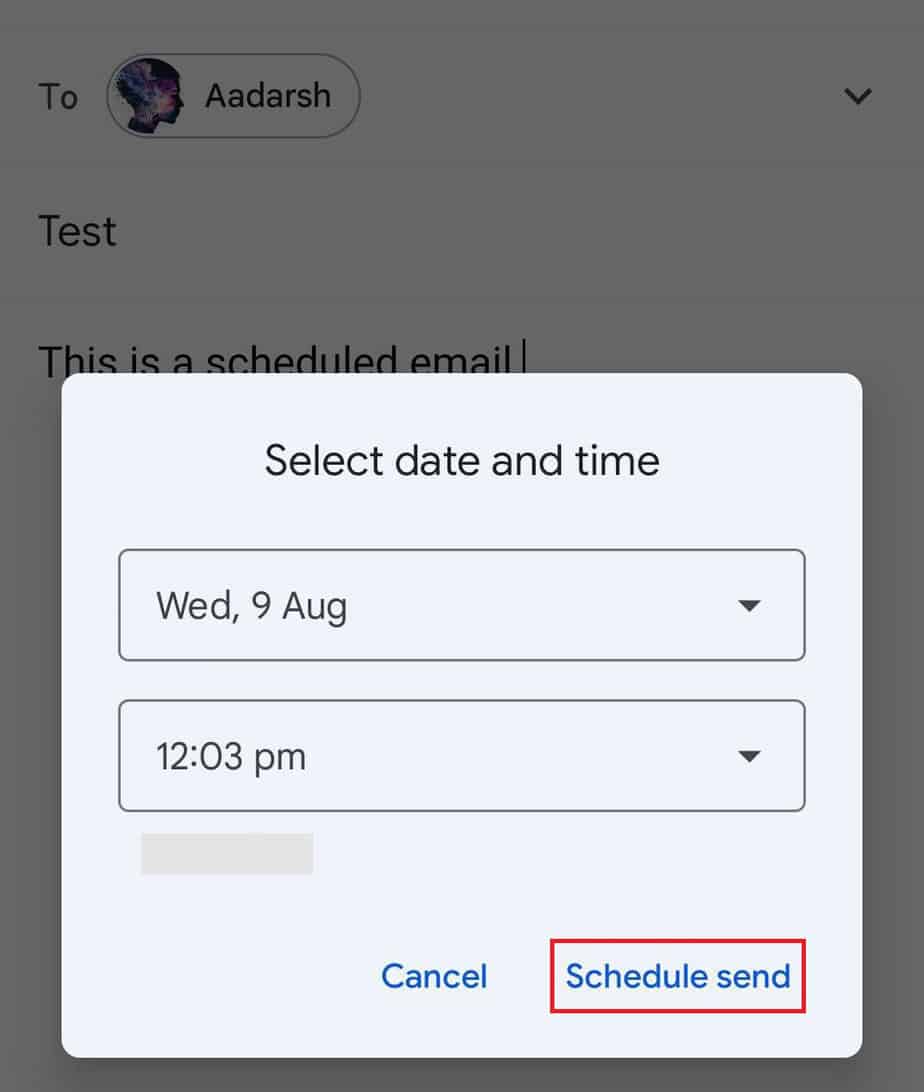
- Select the date and time and tap Schedule Send to send the email.
How to Edit Scheduled Emails in Gmail?
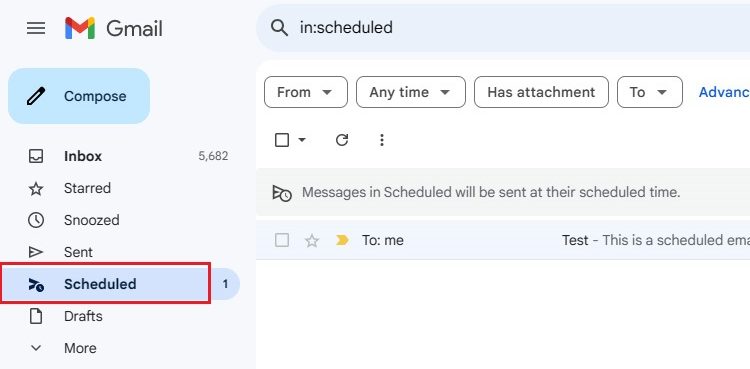
You can view the scheduled emails in the Scheduled label on the left panel on your PC and mobile devices. However, you can only edit the contents of the email after canceling them.
You can cancel them quickly by opening the scheduled folder and clicking the Cancel Send button. The email will open and be saved in the Drafts section.
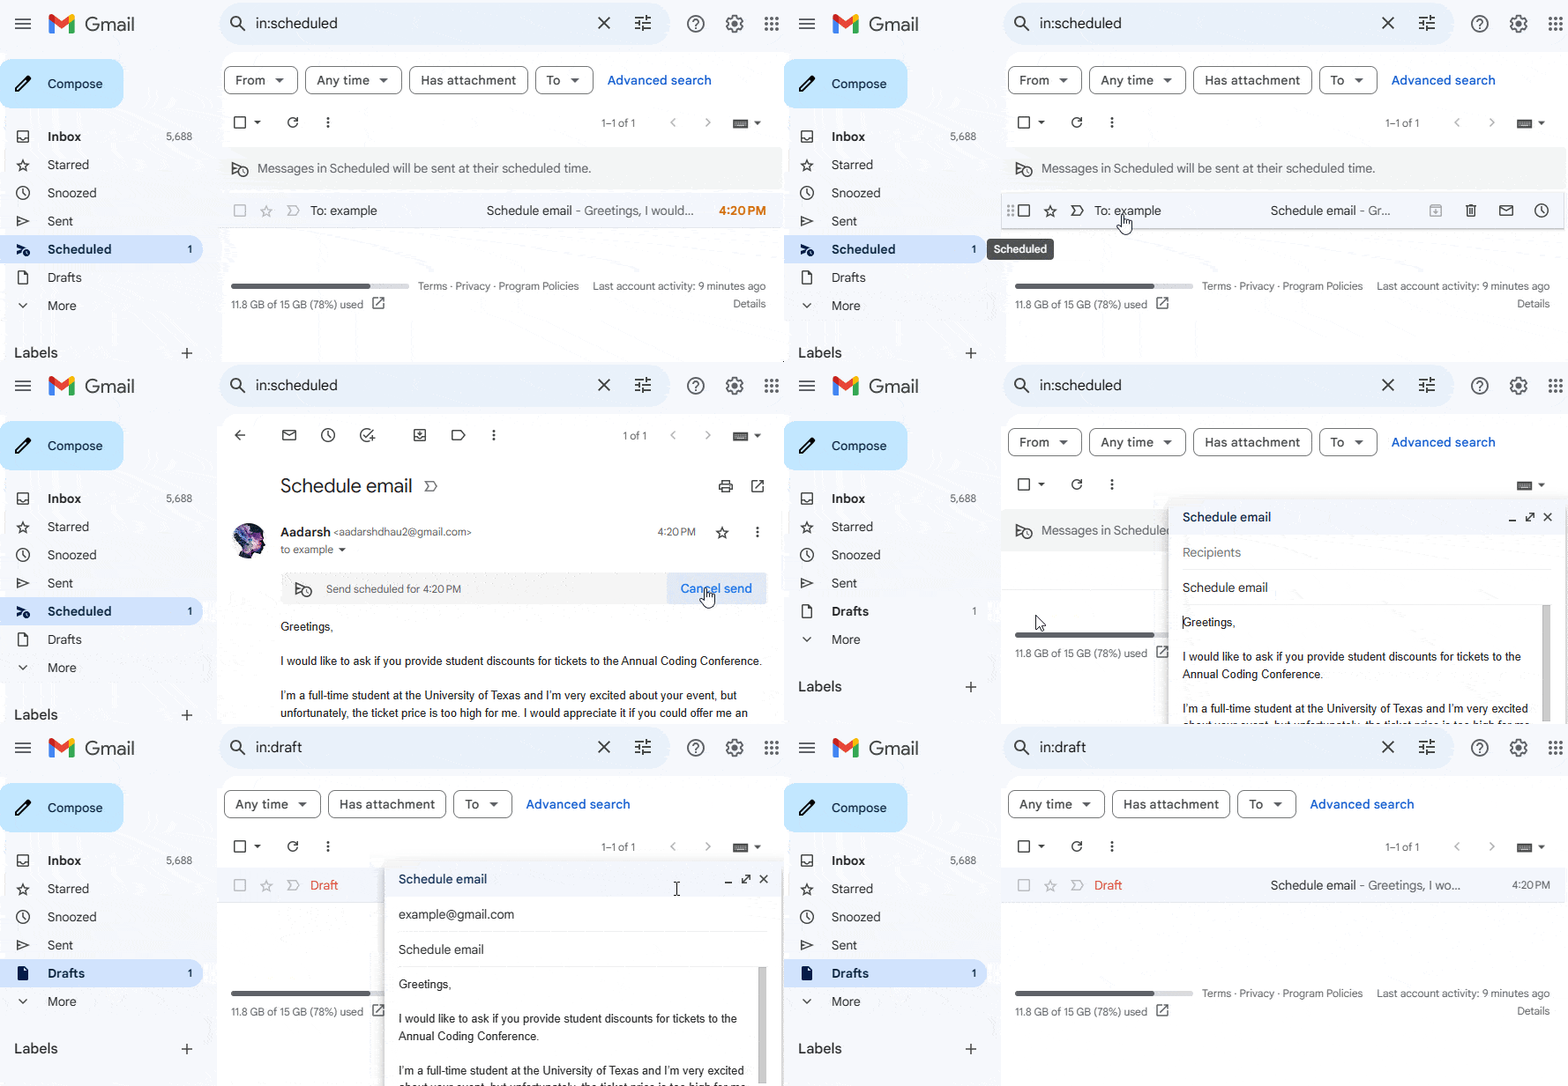
If there is a change of plans and you no longer need to send the email, you can simply delete it rather than cancel them. However, deleting them will remove all the contents inside the emails.
- Go to Gmail and click on Scheduled.
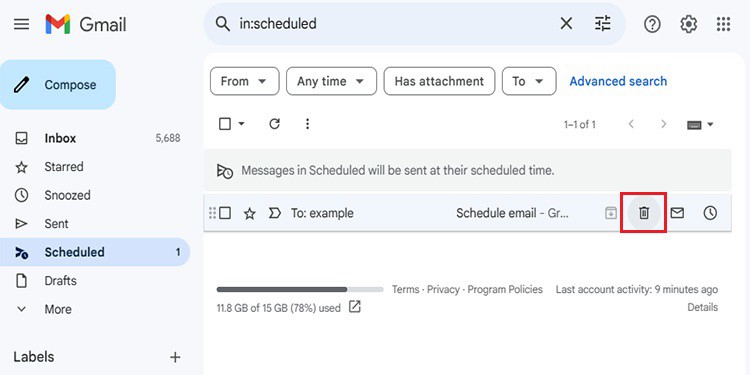
- Hover over the scheduled email.
- Click on the Delete icon.
Frequently Asked Questions
Do You Need to Change Time Zone While Scheduling Email?
You don’t need to change the time zone while scheduling emails, but changing the time zone makes the process much easier.
If the recipients are in a different time zone, adjusting the time zone of your Gmail will give you an estimate of when they will likely receive the email.
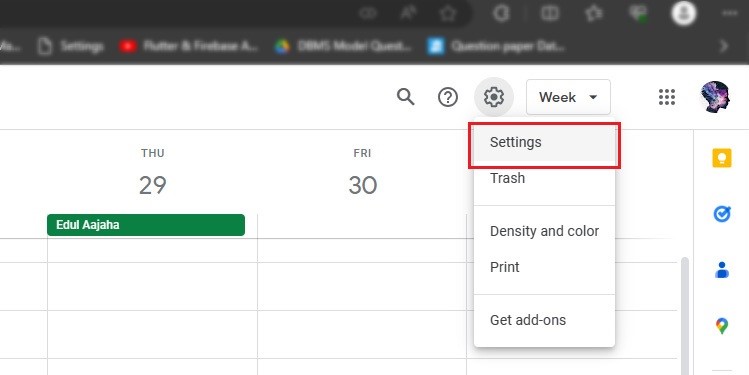
- Go to Google Calendar and click on Settings (gear icon).
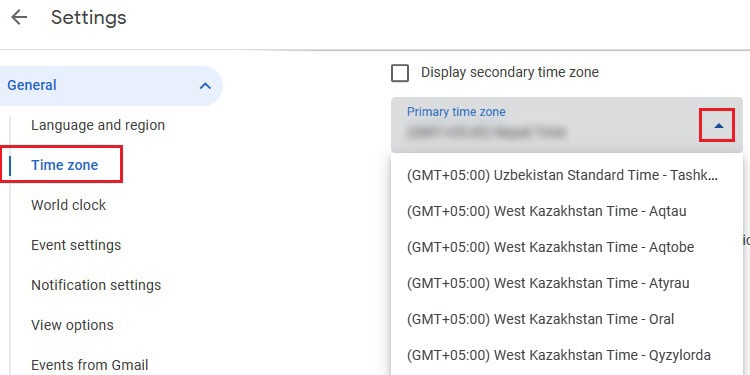
- Click on the Time Zone section and Select the required Time Zone from the dropdown.
Does Gmail Schedule Send Work Offline?
When you send a scheduled email, it will be sent off automatically at the specified time if you don’t decide to cancel it.
The scheduled send works offline, but you must have an internet connection while composing the email. Then Gmail servers will send the emails at the scheduled date and time.