While we usually send the message right after composing them, there are times when we need to send them later.
Maybe you are sending a Happy New Year email at midnight. Or dealing with a client that works on a different timezone.
Regardless of the situation, it’s not practical to wait around just to hit the Send button. Instead, there’s a better way — write the message and delay/schedule it to send automatically at a preferred time in the future.
On Outlook (Microsoft 365)
- Open the Outlook app.
- If you are using the new Outlook version, select the Mail tab and click New mail.

- In case you don’t find such options, you probably have the older version. So, switch to the new version by toggling on the Try the new Outlook option in the top right corner. Or, skip directly to Step 8.

- Under the Message tab, fill in the necessary details.
- Once done, click the down arrow icon next to Send and select Schedule send.

- Then, click Custom time.

- Choose your preferred date and time in the future by selecting a date from the calendar. Or, manually type out the date and time.
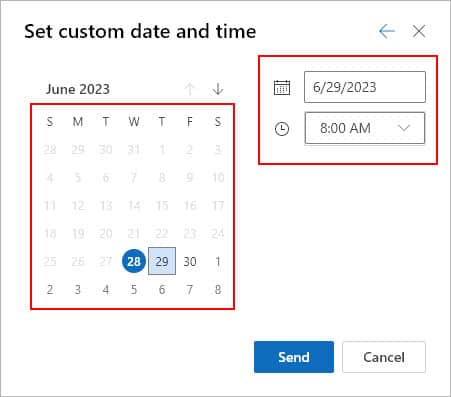
- Once done, click Send.
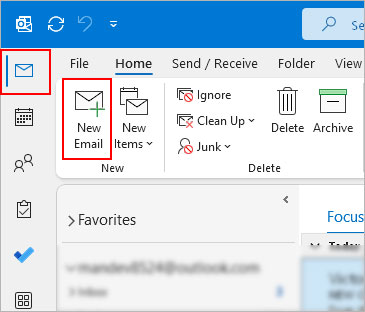
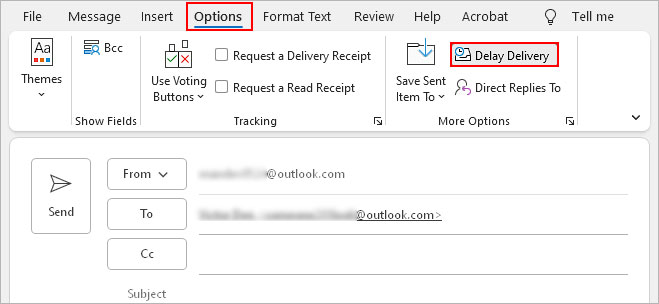
- Click New Email under the Home tab. Or, press the shortcut Ctrl + Shift + M to compose a new message.
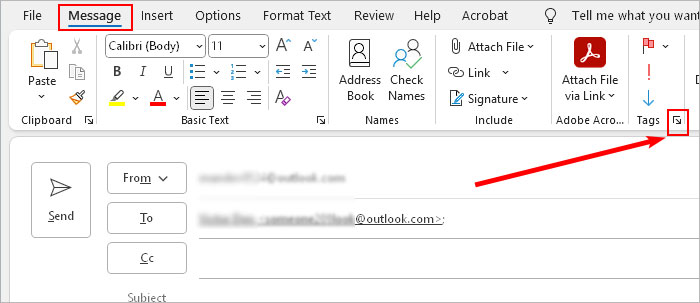
- Under the Message tab, click the More Options icon next to the Tags group. Alternatively, you can select the Delay Delivery option under the Options tab.
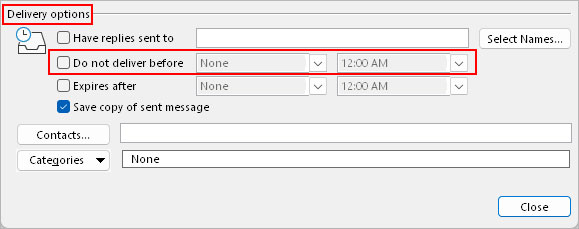
- Now, under the Delivery options, enable the Do not deliver before checkbox.

- Click the dropdown arrow to choose an appropriate date or time. Or, manually enter them into the respective year and time fields.
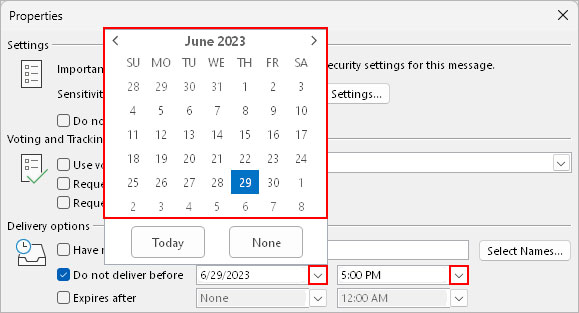
- Click Close when done.
- Review the message details if necessary and click Send.
On Outlook Web
- Open a browser and sign in to your Outlook web account.
- Select the Mail tab in the top left corner.
- Then, click New mail to compose a new message.

- Next, fill in the necessary fields like the To and message body.
- Once done, click the down arrow icon next to Send and select Schedule send.

- On the next prompt, choose Custom time.

- Select the appropriate date and time on the calendar.

- Click Send.
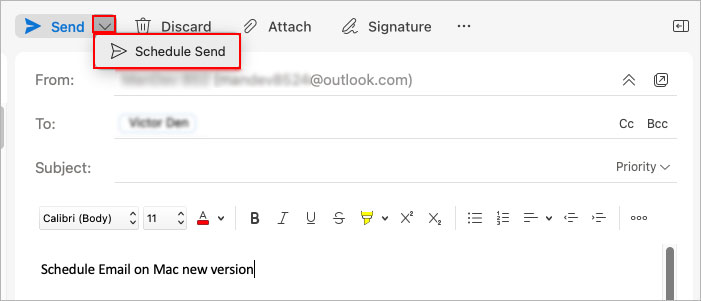
On Outlook (Mac)
- Open the Outlook app.
- Under the Home tab, click New Email.
- If you are using the new Outlook version, select the Mail icon in the sidebar and click New Message.

- Fill in the necessary message details.
- Click the down arrow icon next to the Send icon and select Schedule Send.
- Next, click the right/arrow to select an upcoming date in the calendar and choose an appropriate time below it. You can also start typing out the preferred time manually in the time field.

- Click Send.
On Outlook Mobile (Android and iOS)
Unfortunately, the Outlook mobile app doesn’t come with a built-in feature to schedule and send a message later. However, you can still sign in to your Outlook web account using a browser like Firefox, Edge, or Safari.
- Open a browser like Firefox. If you are using Safari, directly skip to Step 4.
- Tap the three vertical dots icon in the bottom-right corner. Look for a similar icon to open more settings in other browsers.
- Then, enable the Desktop site option.

- Now, type
outlook.comon the URL search bar and tap Enter.
- Once you have an interface similar to that of the Outlook web version, use the Schedule Send option as mentioned above.
Note: Some browsers like Chrome may not display the “schedule send” option.
How to Delay Every Email Message in Outlook?
While the above methods delay a single message, you can create an Outlook rule to delay every new message you compose.
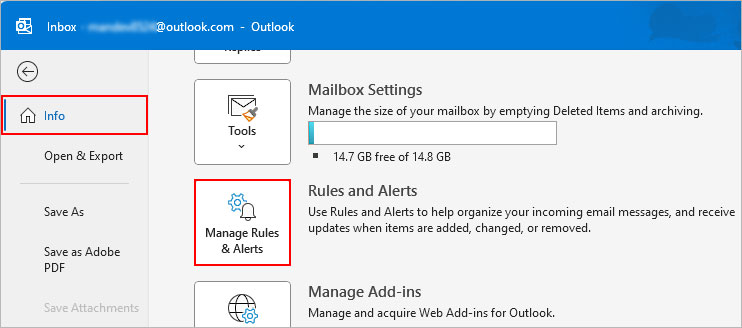
- Click the File menu.
- On the right pane, click Manage Rules & Alerts.
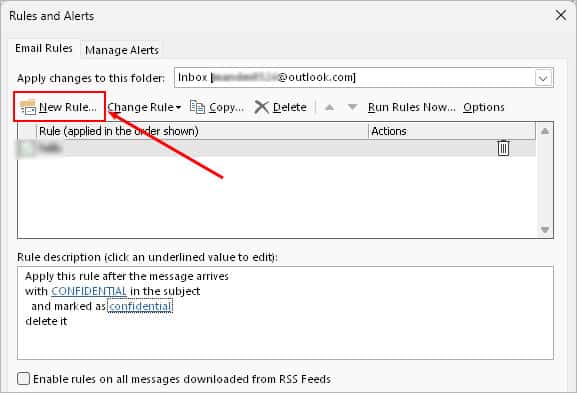
- On the next prompt, click New Rule.
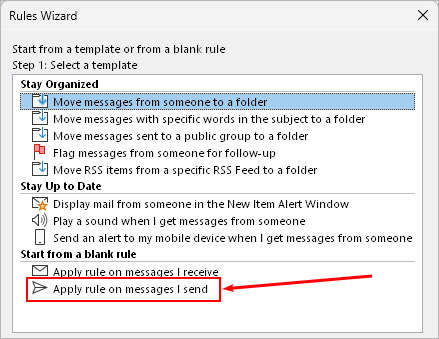
- Then, select Apply rule on messages I send under the Start from a blank rule section and click Next.
- If you want to delay certain types of emails, like one containing an attachment or including specific words, enable the respective checkboxes. Otherwise, just click Next.
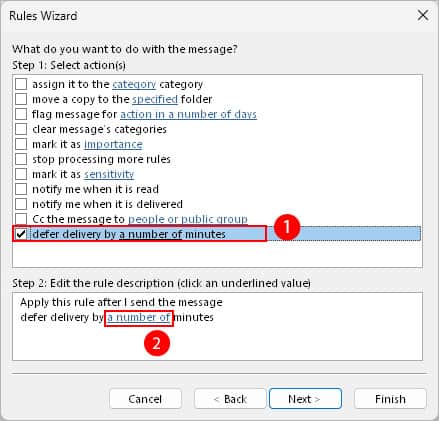
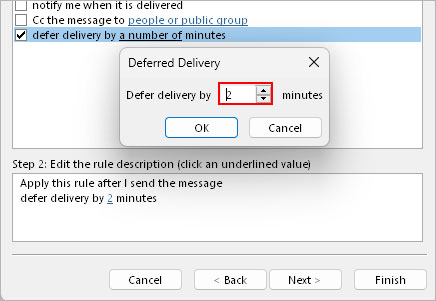
- Now, enable the defer delivery by a number of minutes checkbox. Below it, click a number of link with a blue underline.
- Next, choose the number of minutes you want to delay the message.
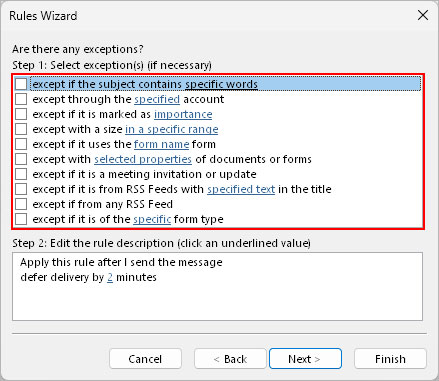
- Enable the conditions when a particular message shouldn’t be delayed. Or, click Next.
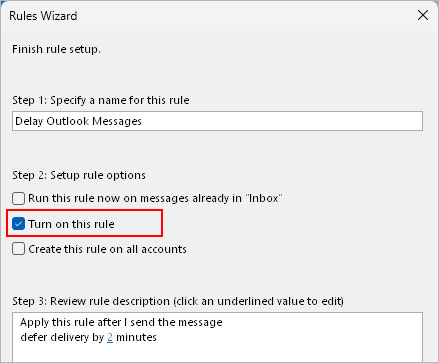
- Provide an appropriate name for the rule and make sure the Turn on this rule checkbox is enabled.
How to Change the Time of a Scheduled Message?
Once you schedule an email, you could go back to it and re-schedule it as per your requirement. This feature is only available before the actual schedule time.
On Outlook Old Version
- First, open the delayed message. You can find it in the Outbox folder when using the old Outlook version.

- Then, go to Options > Delay Delivery.
- If you need to send the message immediately, uncheck the Do not deliver before option and click Send. Otherwise, just update the timing with the delay option still enabled.
For Other Outlook Versions
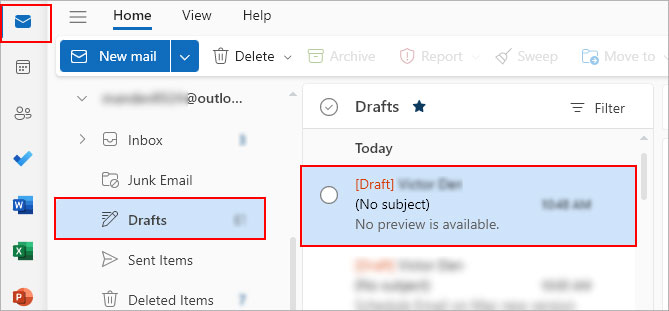
- Open the scheduled message. Look for it in the Drafts folder.
- Now, click the Edit icon (looks like a pencil icon).
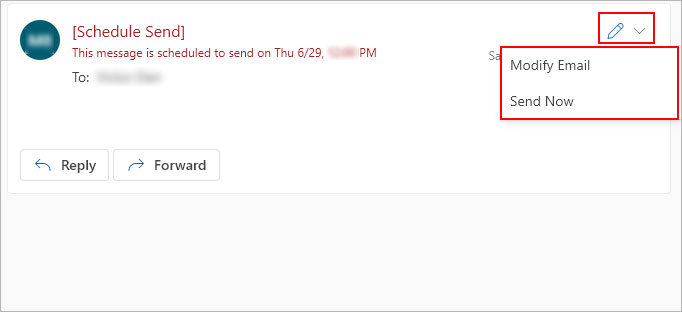
- To update the date and time, choose the Modify Email option. Then, click the down arrow icon next to Send and select Schedule send.
- Alternatively, click Send Now to send the scheduled message immediately
Related Questions
How to Schedule a Draft Message to Send at a Later Time?
Along with the new message, you can schedule your draft messages. Just open the desired message inside the Draft folder. Then, use the Delay delivery or Schedule send option under the Message tab as mentioned above for your particular device.