Headers provides context to a given data set. Unfortunately, row headers may go out of sight as your data gets large. This can be a problem during data analysis.
You may want to mitigate this confusion by repeating headed rows throughout your data. If you’re viewing your data on the Excel program itself, I will suggest you also look into freezing panes along with repeating the headers every few rows.
If you’re printing your document out, you can use the Page Setup window to repeat the header rows on each page that you print.
How to Repeat Header Rows in Excel
I have gathered two different ways you can repeat header rows in Excel. These methods include repeated header rows once every set number of rows, and repeating header rows on every page while printing.
Every Few Rows
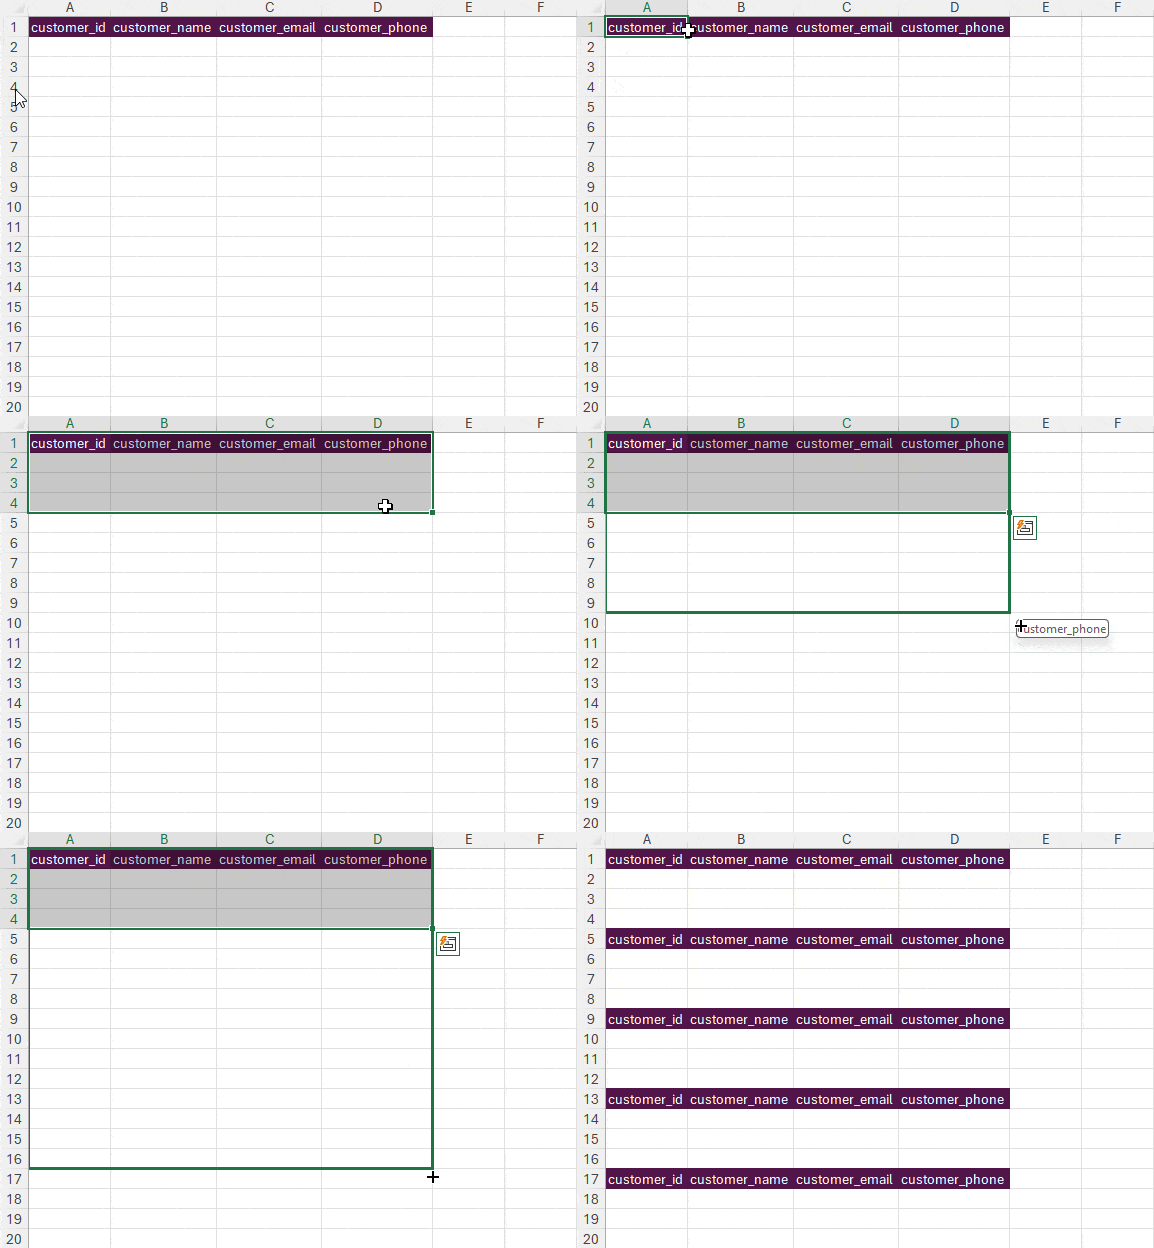
You can use the autofill feature to repeat headers every few rows in Excel. However, you must do this before you begin your data entry.
- Select your row header and the number of rows you wish to insert under the header.
- Place your cursor on the bottom-right corner of the last cell.
- Once the cursor changes to +, drag it below.

Every Few Rows in Multiple Worksheets
If you’re creating a similar data entry in multiple worksheets, you may have to repeat headers in multiple worksheets. In such cases, using the above-mentioned method for each worksheet can get quite tedious. Fortunately, you have another method to shorten this process.
If you select all worksheets from the worksheet view, any change you make in the active sheet will be reflected in the selected cells. This way, you don’t have to manually repeat the headers for each sheet.
- While being on your active sheet, hold down on the Shift key.
- On the worksheet view, select the last sheet.

- Enter your row header, then use autofill to replicate them
In Each Page
When printing your worksheet, you don’t want to keep looking at the first page to check the row header. With that said, as Excel does not have a fixed number of rows if prints, you may have problems manually inserting header rows on each page.
Luckily, you can save yourself from the hassle by defining print tiles. This Excel option allows you to repeat a set row header on each page while printing.
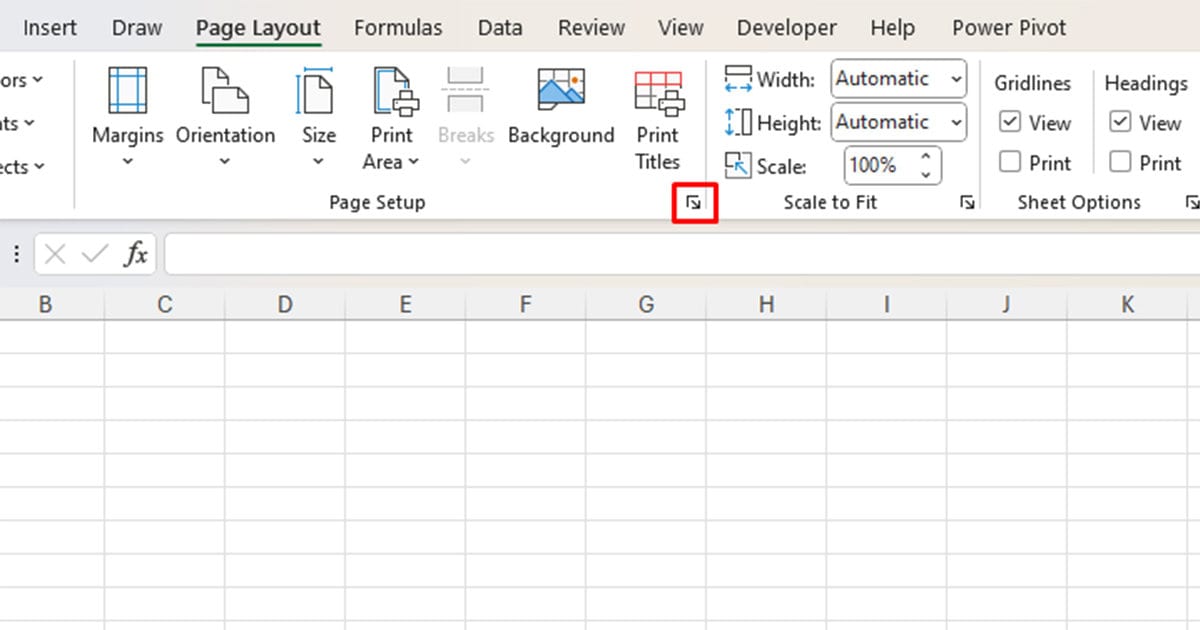
- Go to Page Layout from the menu bar.
- Expand the Page Setup section.

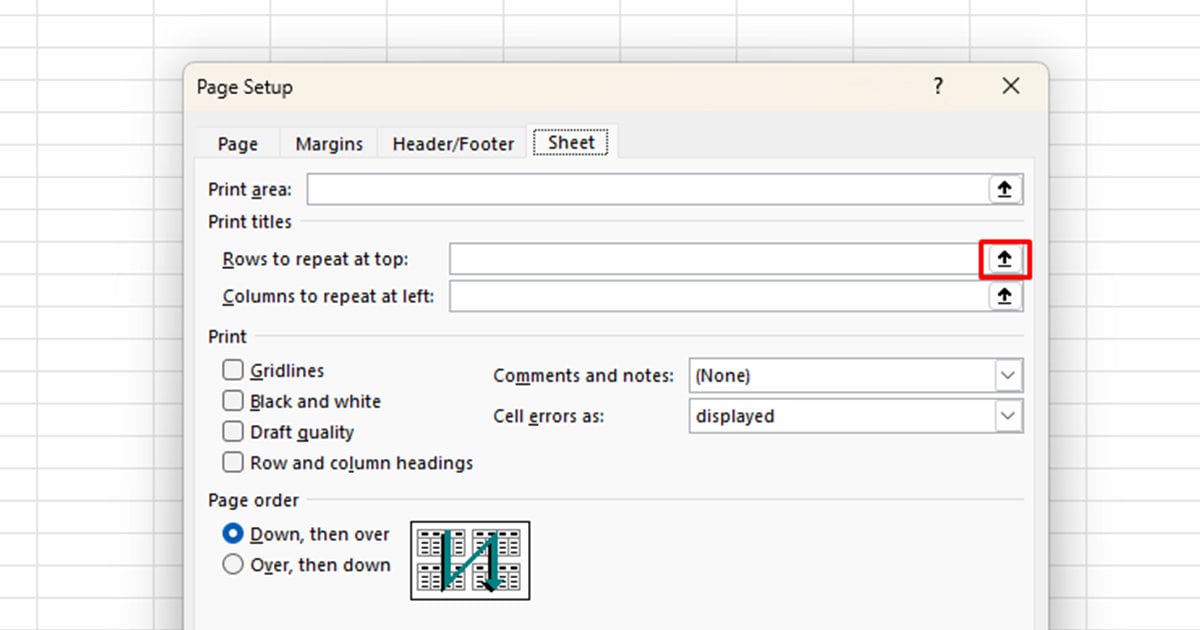
- Switch to the Sheet tab.
- Next to Rows to repeat at top, collapse the window.

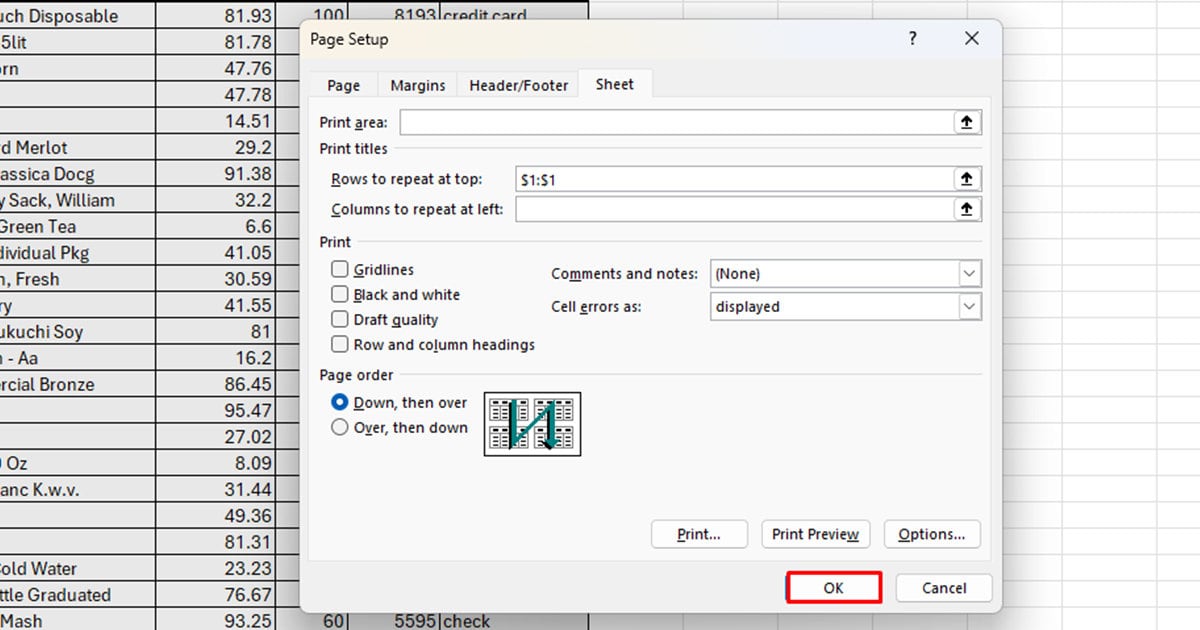
- Select the row that includes your header.

- Expand the window > OK.

After you’re done making this configuration, click Ctrl + P to open the print preview. Then, switch pages to verify if the header is repeating for each page.
Frequently Asked Questions (FAQ)
Why is the Page Setup Section Grayed Out?
If your page setup section is greyed out, or unclickable, you’re probably in the cell editing mode. You can solve this issue by selecting the F2 key on your keyboard or clicking elsewhere in the sheet.
Can I Repeat both Row and Column Headers?
If your data contains both, row and column headers, you can repeat them on each page while printing.
- Go to Page Layout and expand the Page Setup option.
- Head to the Sheets tab.
- To repeat rows, reference your rows next in the Rows to repeat at top section.
- To repeat columns, reference your columns in the Columns to repeat at the left section.
- Click OK.