Before sharing files with your teams, protecting sheet is the first thing you should do to avoid data loss. Excel offers different level of file protection like Protect Sheet, Protect Workbook, and Protect File.
Using them, you can encrypt your entire file with a password or protect only the worksheets. Keep reading the article to learn how to protect your Excel files in various circumstances.
Protect Sheet
If you want to control the ability of users to modify the worksheet, Worksheet Protection is best for you. Before protecting the sheet, you will have around 15 options to allow or restrict users from making changes to your worksheet. For instance, while giving users access to insert rows, you can limit them from deleting rows.
Normally, this type of protection has two steps – Lock Cells and Protect Sheets. As all the cells are already locked by Excel, you can proceed with the Protect Sheet. However, if you wish to lock only a specific area, we have a detailed article on How to lock cells on Excel.
To Protect Sheet,
- Open the Worksheet to protect.
- Navigate to Review Tab > Protect Sheet.

- Protect Sheet dialogue box will pop-up on the screen. On Allow all users of this worksheet to, pick any options.
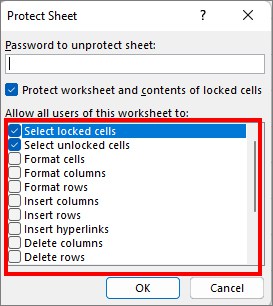
- Select locked cells: Select locked ranges. Excel allows this by default anyway.
- Select unlocked cells: Make a selection of unlocked ranges.
- Format cells: Modify Conditional Formatting or Format Cells.
- Format columns: Hide Columns, Reshape Column Width.
- Format rows: Hide Rows and apply Row Formatting.
- Insert columns: Extend columns.
- Insert rows: Insert additional rows.
- Insert hyperlinks: Add Hyperlinks.
- Delete columns: Cancel out Columns.
- Delete rows: Eliminate Rows.
- Sort: Use commands to rearrange data order. However, after protecting sheet, this option is greyed out.
- Use AutoFilter: Filter data when AutoFilter is on. However, protected sheet restricts users from turning on and off Auto Filter.
- Use PivotTable and PivotChart: Readjust PivotTable layouts and reports.
- Edit objects: Edit Graphs, charts, comments, notes, etc.
- Edit scenarios: Add, view, eliminate scenarios
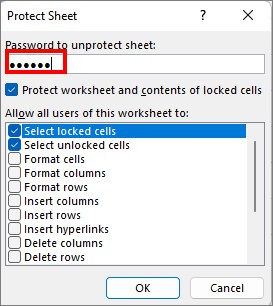
- Now, hover over Password to unprotect sheet field. Enter a new Passcode or Password to Protect Sheet. Click OK. (This is optional)
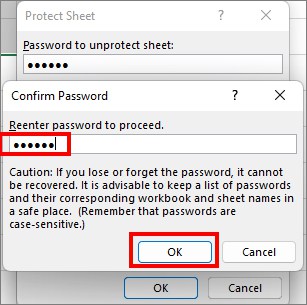
- Again, re-type the Password on confirmation pop-up and hit OK.
Protect Workbook
With Worksheet Protection, you will be able to control the user’s activities within one sheet only. But, if you have multiple sheets in a workbook, there are chances of users interfering with other worksheets too.
In such case, apply Workbook Structure Protection on your file by keeping a password. This feature will restrict others from inserting, hiding, eliminating, or customizing worksheets in your workbook. I use this protection when I want Person A to modify only Worksheet 1 and not the other sheets.
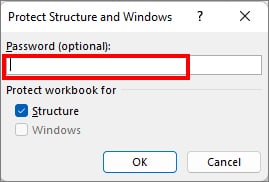
To Protect Workbook,
- Open Excel Workbook.
- Click Review tab > Protect Workbook.

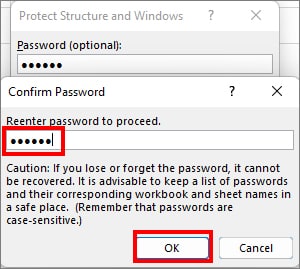
- On the Protect Structure and Windows box, type a Password in the field. Hit OK. (This is optional)
- If you kept password, Re-enter them again and click OK.
Protect File
If your Excel file contains confidential or sensitive information, we recommend File-level protection. You can password-protect the entire file to block other users from opening or viewing them.
Here, only you can open the workbook using the password. Most Excel users employ this protection while saving files in a shared location like Office PC.
Here’s how you protect files,
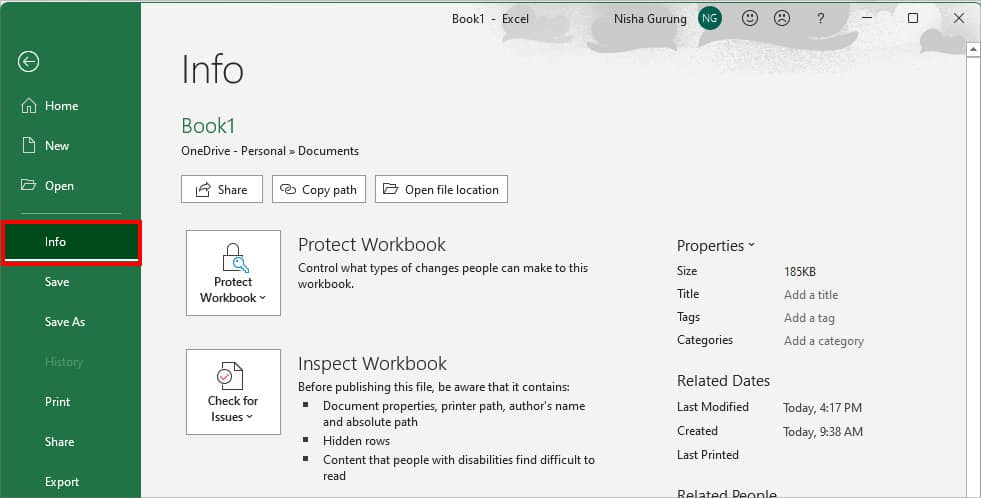
- On your worksheet, click File Tab.
- Select Info tab on left panel.
- Click on Protect Workbook > Encrypt with Password.
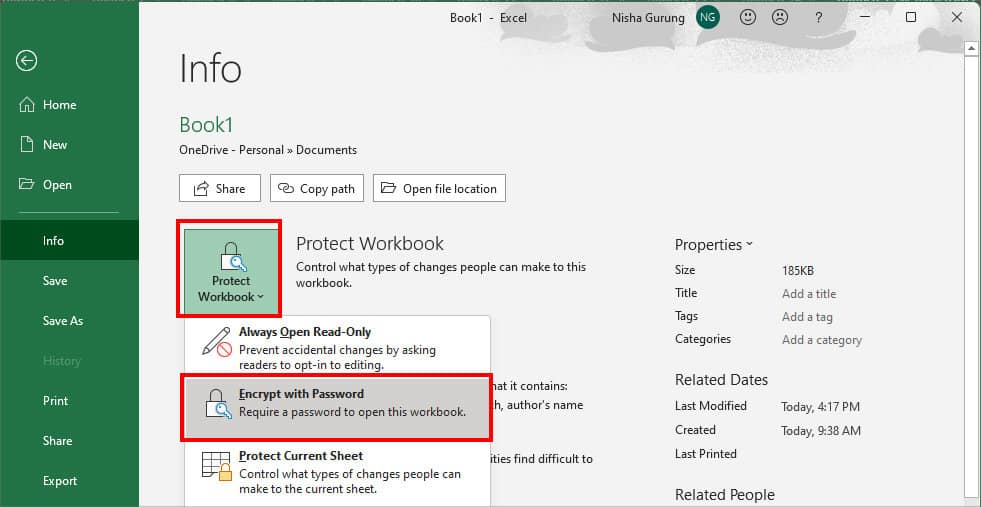
- Type a Password to lock the file with and click OK.
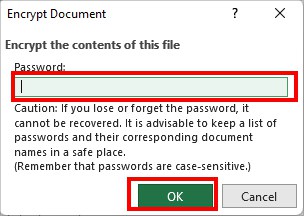
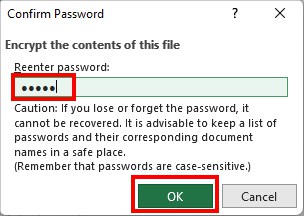
- Again, type in the same Password for confirmation. Then, hit OK.
In case, you want to share the file with your organization or teammates, you can allow them to open file while restricting the ability to modify it. To do so, follow the given steps.
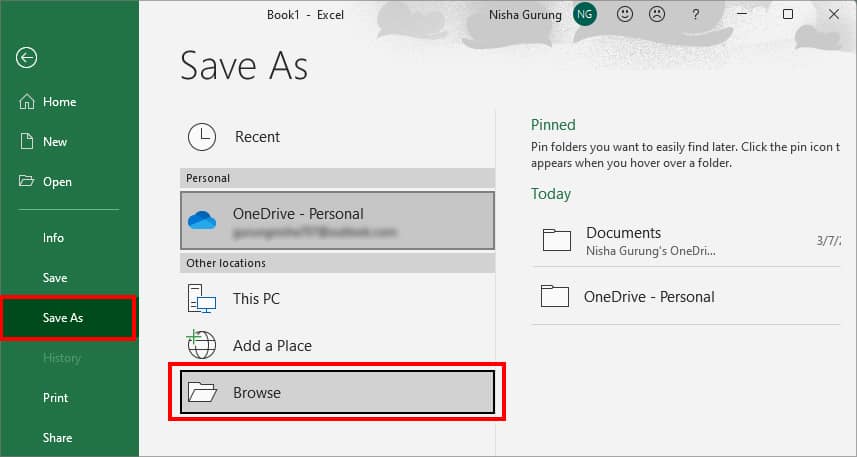
- On your Excel Workbook, click File Tab.
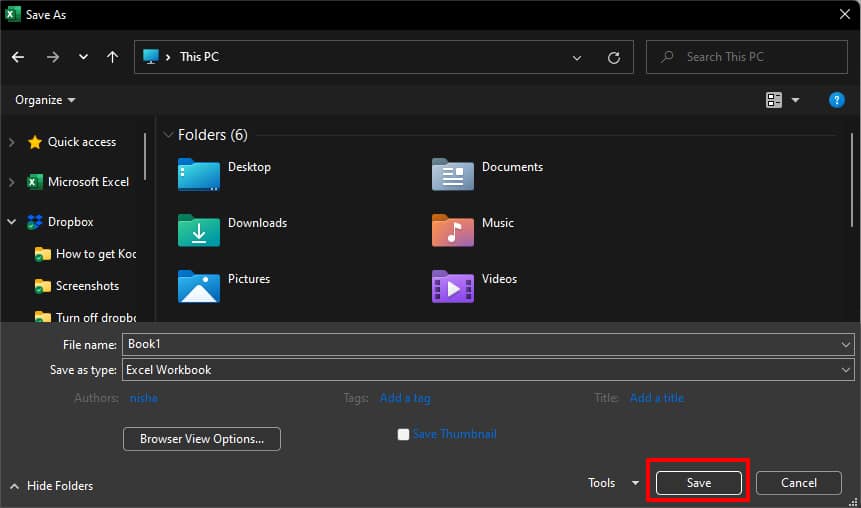
- Select Save As and pick Browse.
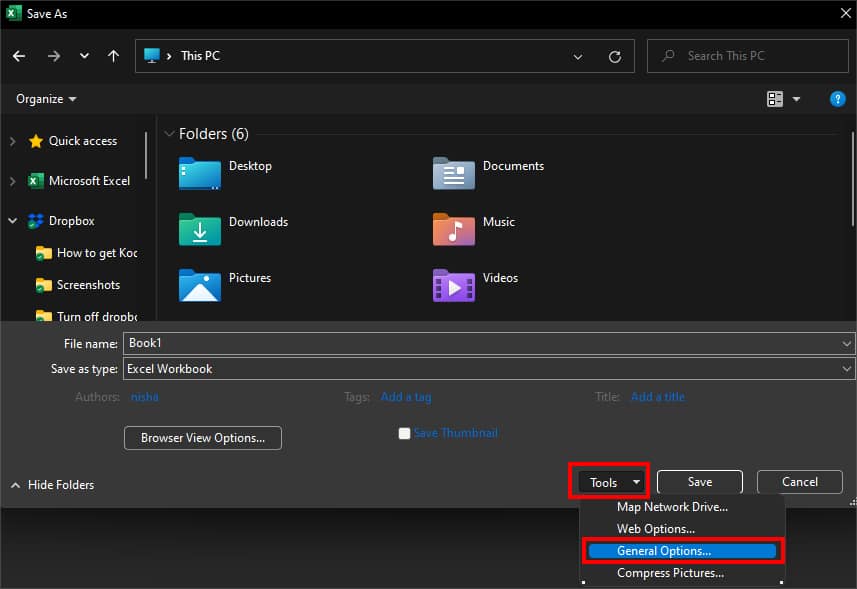
- At the bottom, expand Tools > General Options.
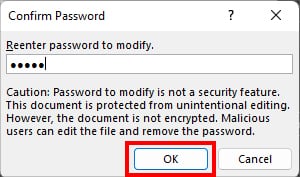
- On Password to modify, enter Password. Then, hit OK.
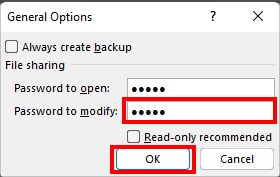
- Confirm Password and click OK.
- Hit Save button.
Other Ways to Protect Sheet
Apart from the default menu, there are other ways to Protect sheet which include protecting specific ranges or allowing only the view option.
Protect Ranges
Similar to locking cells in a worksheet, you can also protect certain ranges with a password. Here, you can specify only a few people for editing ranges.
- On your spreadsheet, select the Cell Ranges to lock.
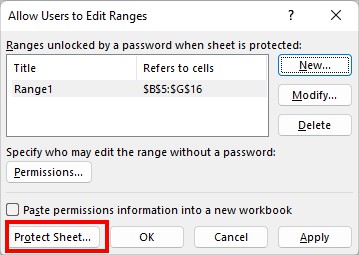
- Go to Review > Allow Edit Ranges.

- Click on New.
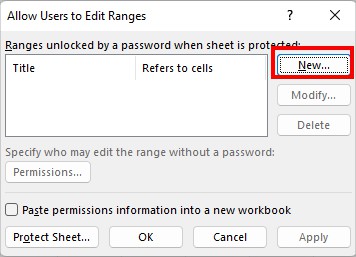
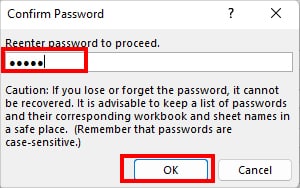
- On the Range password, type Password. Click OK.
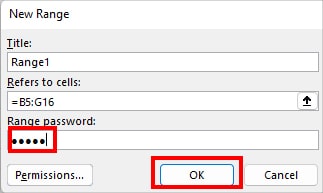
- Confirm Password and hit OK.
- Click Protect Sheet.
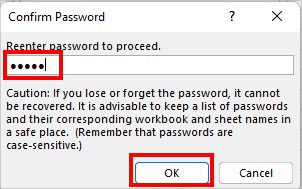
- Enter Password for Sheet and click OK.

- Re-confirm the Password and hit OK.
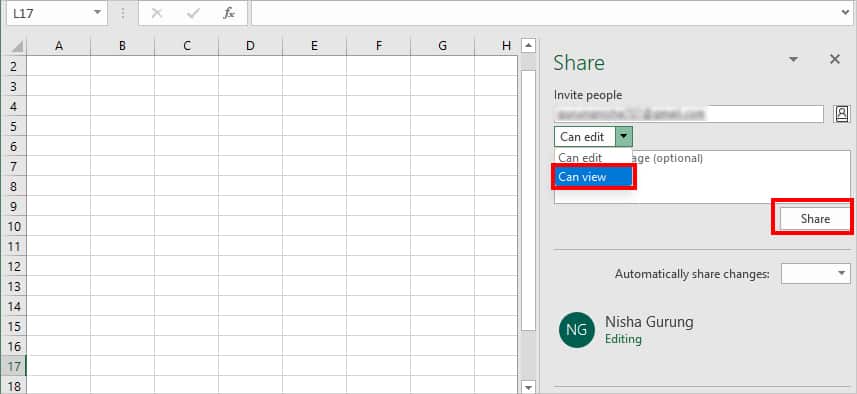
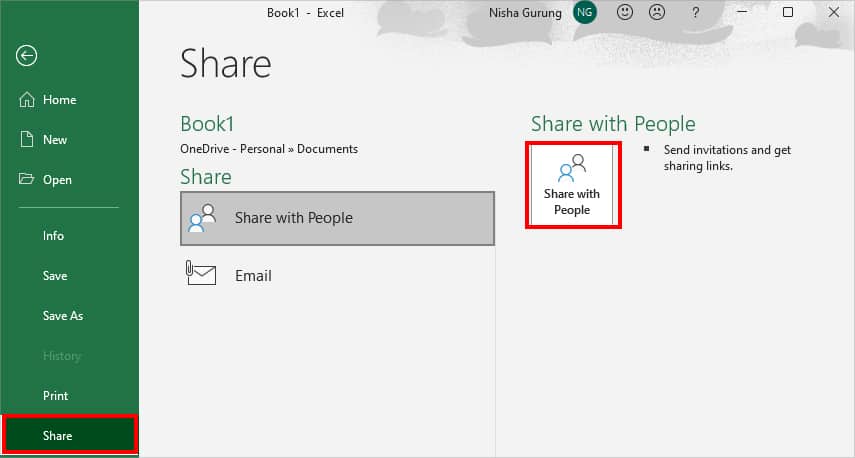
Set View Only option while sharing
Whenever you are sharing a workbook, set the option as Can view. It is a very minor yet significant thing you can consider while sharing files with others.
By doing so, other users will have the file in read-only format. Therefore, you don’t need to protect the worksheets with a password. But, this method is only effective if you’re sharing for viewing purposes.
- Navigate to File tab on your worksheet.
- Click on Share > Share with People.
- On Invite people, enter Email address.
- Then, set the option Can view. Click Share.