In Excel, even a tiniest change in the value can result in a formula error. So, if I have to view a shared sheet, we do recommend you to open them in read-only mode. This way, you can avoid making any accidental changes to the sheet as Excel won’t allow me to edit files. You could also do the same to be on the safe side.
If you have a file that is already in the Read-Only mode, you can launch them like how you would normally do. Simply, click on the folder to open it.
But, for workbooks with editing mode, there are a few steps you must undertake to launch them as read-only. You can either set a different Open file as option or run a VBA code.
In this article, we have covered three proven methods to launch the file in Read-Only. Keep reading to learn about them!
Set Workbook to Viewing Mode
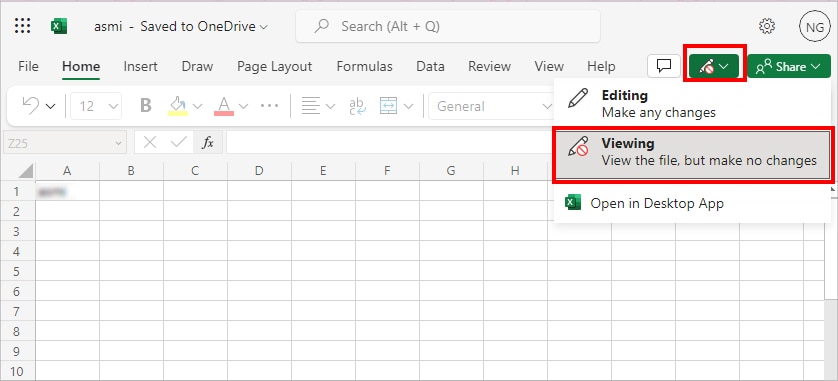
If you use the Microsoft Excel web version, you can simply switch your workbook from Editing to Viewing mode. To do so, next to the Comments icon, expand the drop-down menu for Editing and pick the Viewing option. Now, you won’t be able to make any changes to the workbook.
Open Workbook in Read-Only Mode
For Excel app users, you cannot change your workbook’s viewing mode. However, while opening the file, you can choose to open it in Read-Only mode.
Here are the steps for it.
- Launch Excel.
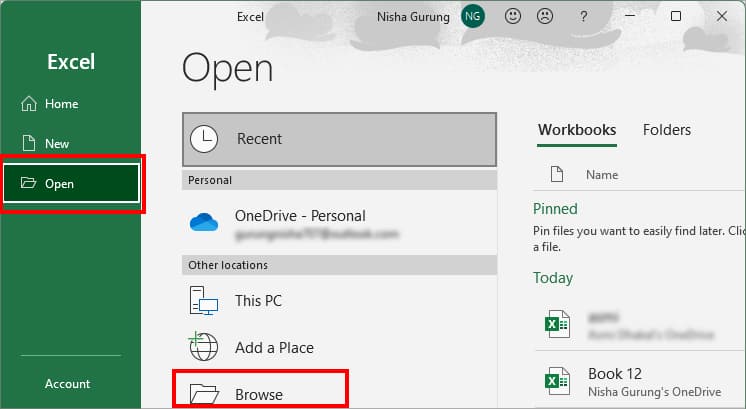
- Select Open > Browse.
- On your PC, choose an Excel File.
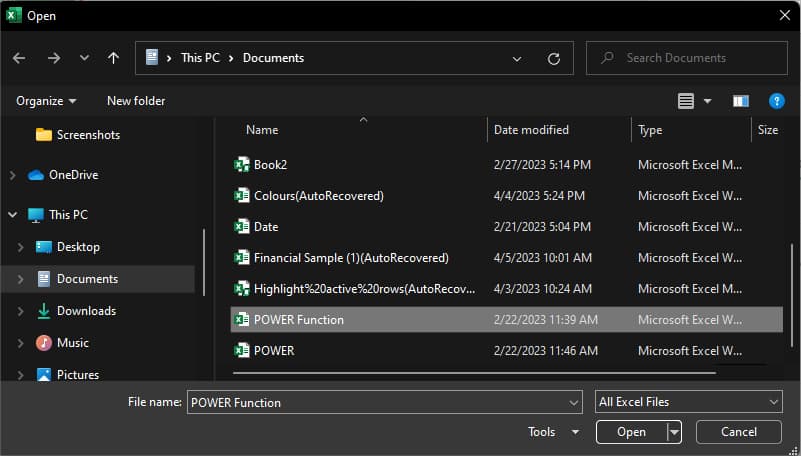
- Expand the drop-down menu of Open and pick Open Read-Only.
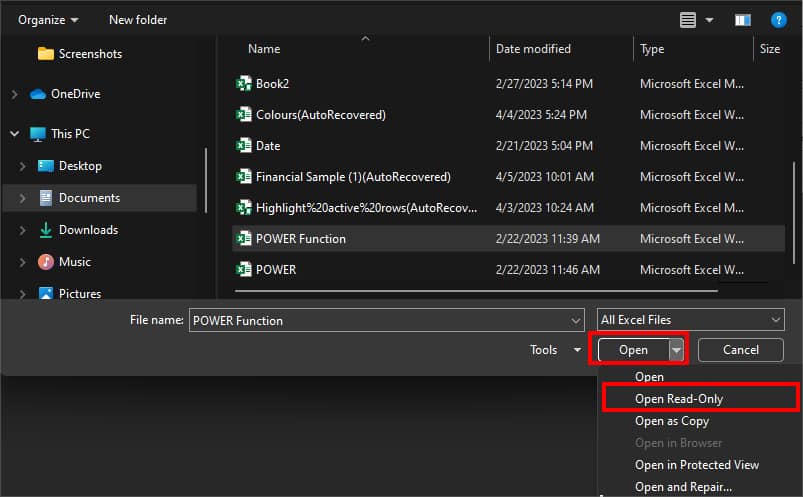
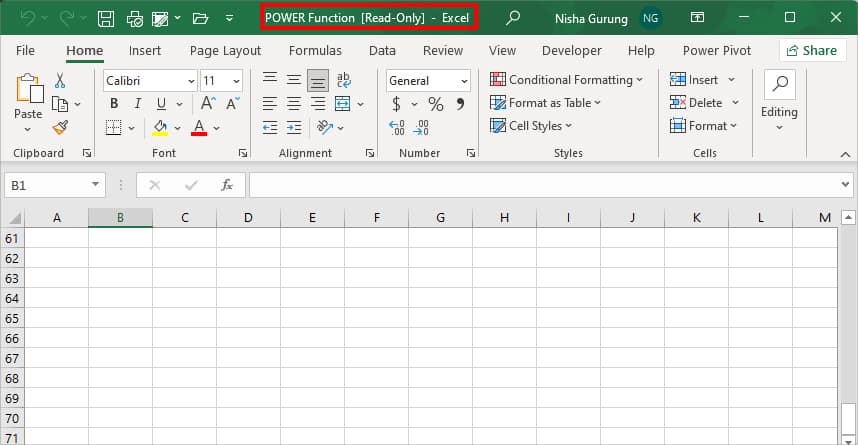
- It will open the file in Read-Only mode.
Using Visual Basic
Another method to open the Excel file in Read-Only mode is by using the Visual Basic tool. Although Visual Basics may sound intimidating, it isn’t quite as much as you think. Once you get how this works, I’m sure this powerful tool will help you master Excel.
Here, we’ve created a code that will automatically launch the Excel file in Read-Only. For this, you just need to copy your Excel file path and replace it in the code.
If it’s your first time using Developer Tab, you need to actually add the tab from the Options menu. However, for users who’ve already added the tab, you may proceed with the given steps.
- Launch Excel and create a New workbook.
- Go to Developer Tab > Visual Basic.

- Below Microsoft Excel Objects, click on ThisWorkbook twice.
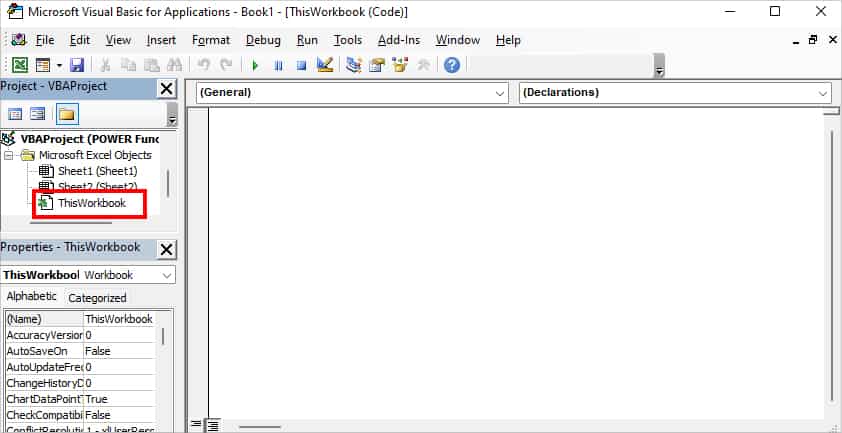
- Paste the given code in the empty space. On (Your Excel File Path) enter your file path like in the image.
Sub Open_Workbook_As_Read_Only() 'Open a Workbook as Read-Only Workbooks.Open "(Your Excel File Path)", ReadOnly:=True End Sub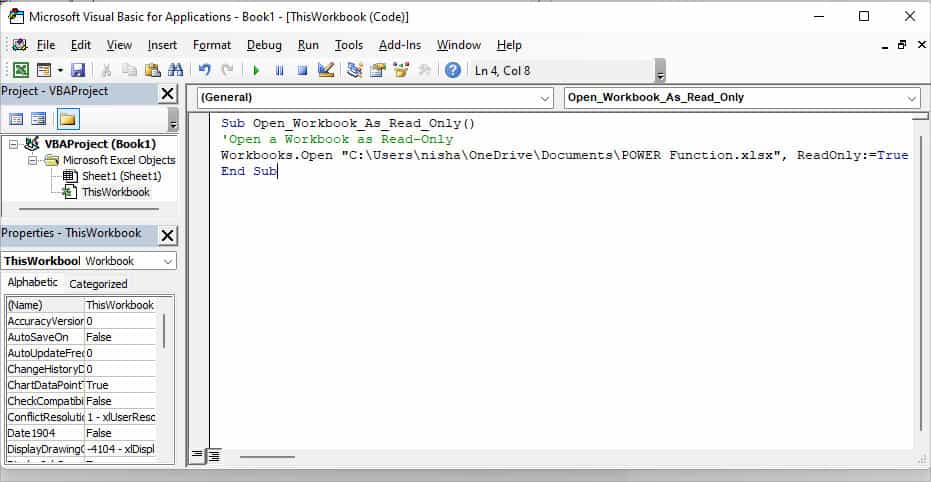
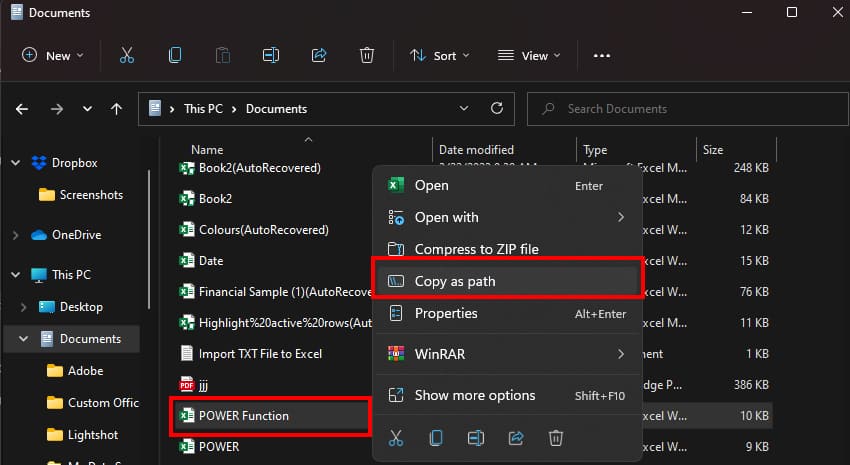
- To insert the file path in the code, locate the Excel file you wish to open in Read-Only mode on your PC. Right-click on the file and pick Copy as Path. Then, paste it into the code.
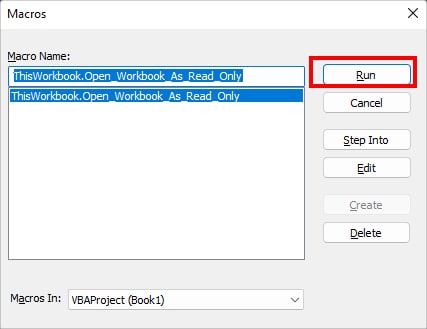
- Enter F5 to run the code.
- If prompted, click Run.
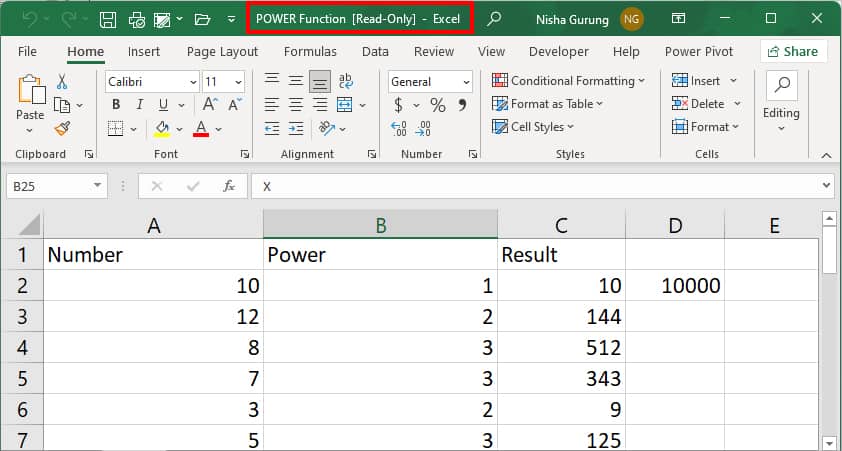
- Excel will launch the file in Read-Only mode.
How to Prompt Excel to Open a Workbook as Read-only?
By now, you must’ve figured out how to open the workbook in read-only mode. But, there are possible chances that you may forget and launch files in editing mode instead.
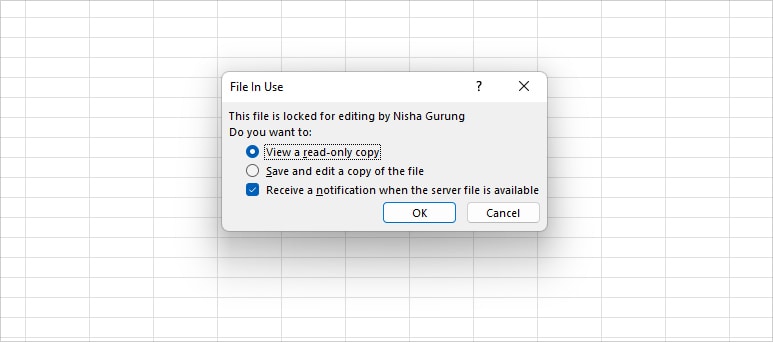
For this, you can actually force Excel to open the workbook as read-only. Meaning, whenever you click on a File, Excel will send a prompt box first to confirm the viewing mode of the workbook like in the given picture. Choose Yes to open in Read-Only. However, if you’re an author, you can also edit the files by picking the No option.
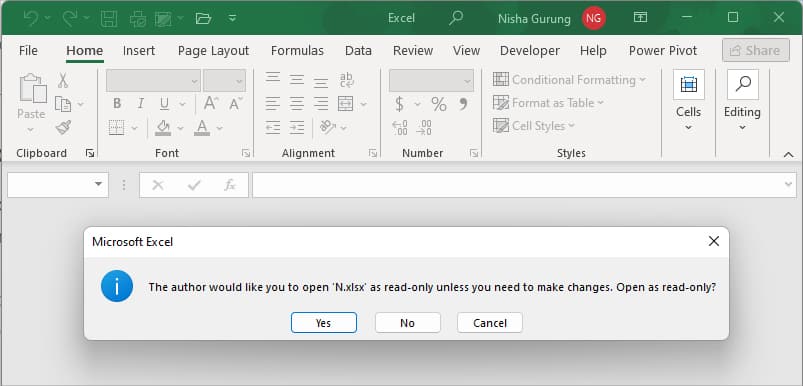
Apart from setting this option for yourself, it will also come in handy when you’re sharing a workbook with others without password protection. But, note that except for authors no one can Edit Files. If needed, other users can Save the file as copy and modify the workbook.
Save Workbook as Read-Only
- Navigate to File Tab.
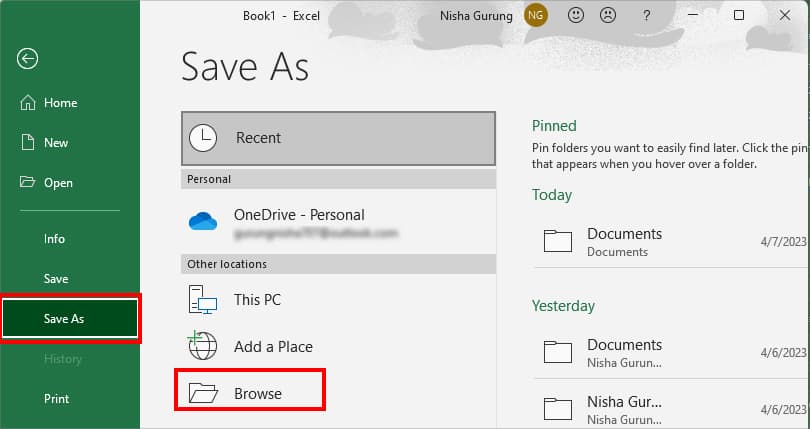
- Click on Save As > Browse.
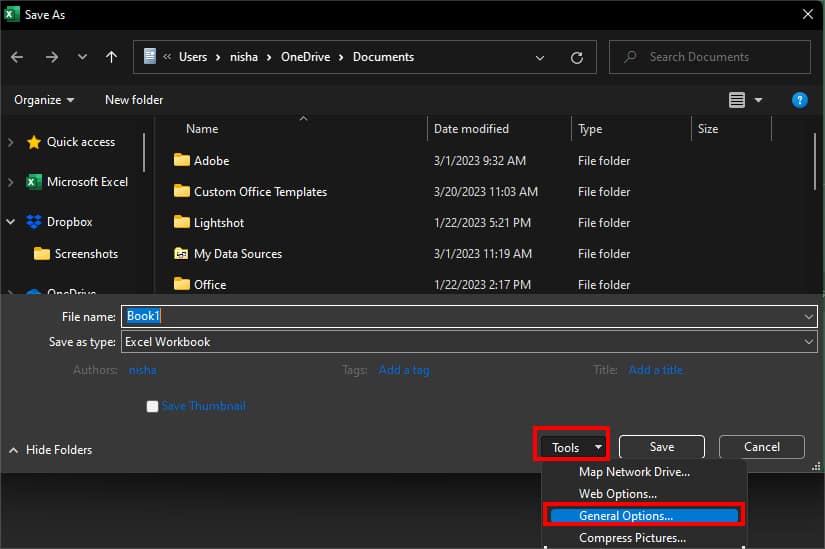
- On the Save As window, expand the Tools menu > General Options.
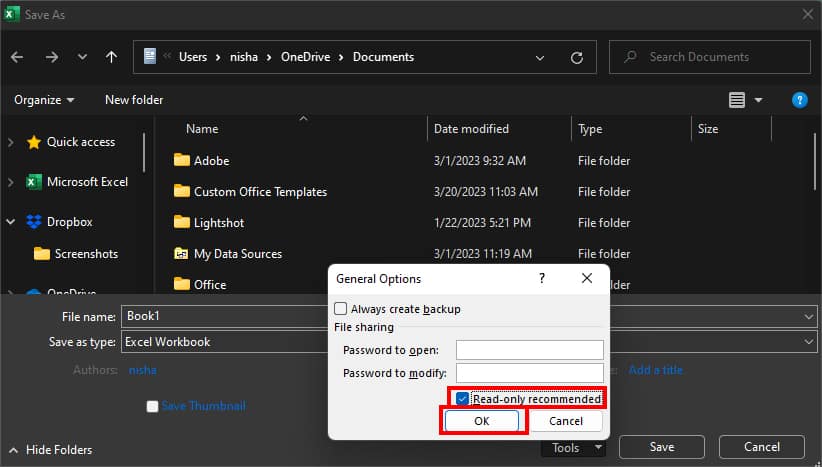
- On General Options, tick the box for Read-only recommended and click OK.
- To confirm, click Save.
Set Workbook to Always Open Read Only
- On your worksheet, head to File Tab.
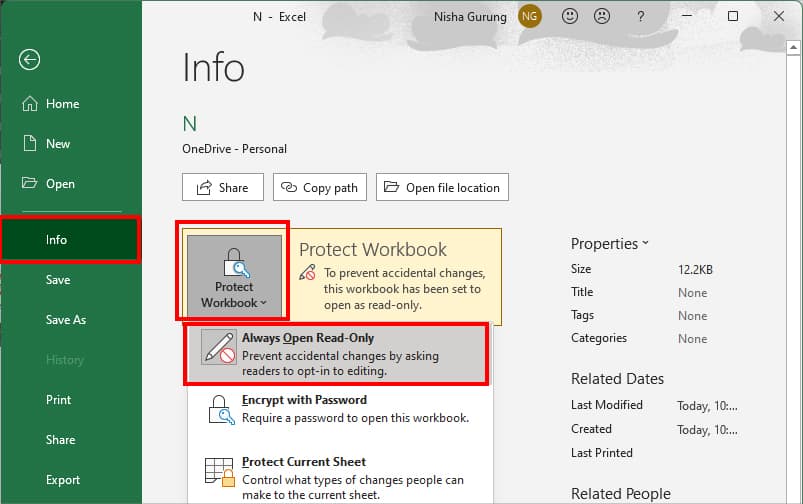
- Click on Info. Expand the Protect Workbook menu and pick Always Open Read Only.
