When you collaborate in group, you pose your spreadsheet to risk of losing it’s original format. There can be instances when a team member can accidentally or intentionally modify data, clear formulas, erase contents, and whatnot. Such scenarios can be a nightmare if you lack the means to undo the changes.
Locking your excel workbook can maintain the integrity of your data.
You can lock particular cells of your worksheet and restrict others from modifying the protected area. Excel locks all the cell ranges by default. However, there are a few steps you must adopt to enable this feature.
Step 1: Unlock Cells or Ranges
By default, Excel locks all cells of your spreadsheet. When you go to the Format Cells > Protection tab, you’ll see the Locked option is already enabled. However, this will come into effect only when you protect the worksheet.
Before you protect your worksheet, unlock all cells first. Then, you can choose only specific ranges to lock. Here’s how you do it.
- Enter Ctrl + A to select all ranges of your spreadsheet.
- Right-click on the selected area and choose Format Cells.
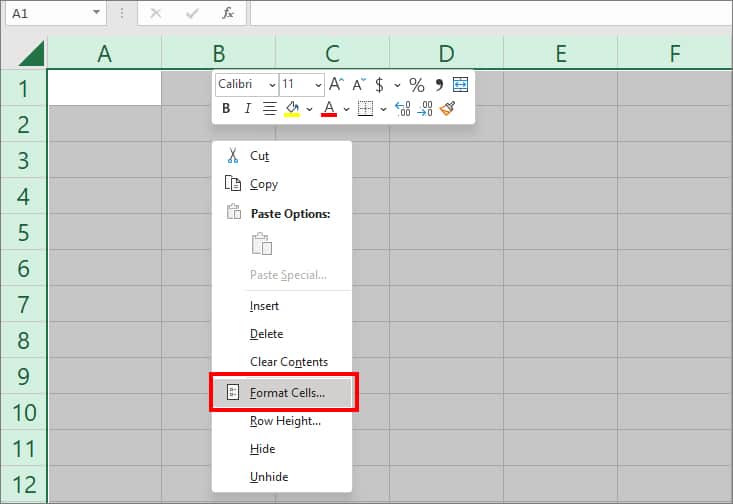
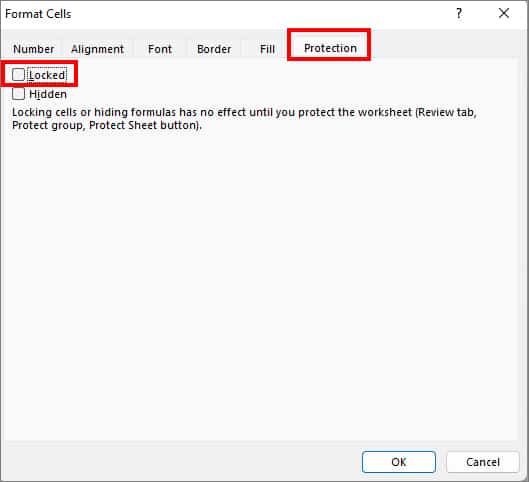
- Navigate to Protection tab and uncheck the box for Locked option.
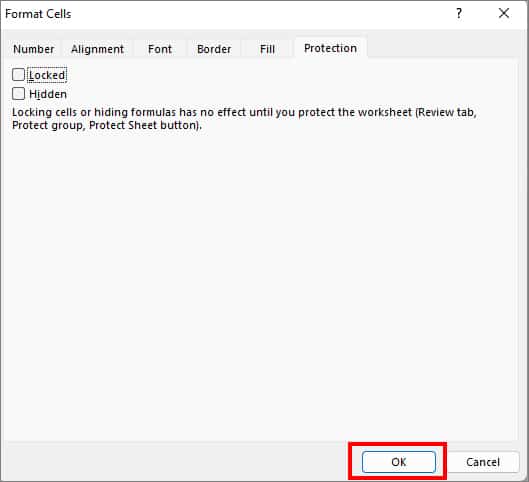
- Select OK.
Step 2: Lock Specific Cells or Ranges
The above step will unlock all ranges of your worksheet. Now, in this step, you can make a selection and lock only a particular cell or area of your document.
To select ranges based on specific conditions quickly, you can check out our other article on How to Select Multiple Cells in Excel easily? It can come in handy to highlight cells with Formulas.
Now, to lock cells,
- Right-click on your selected Cells or Ranges.
- Choose Format Cells.
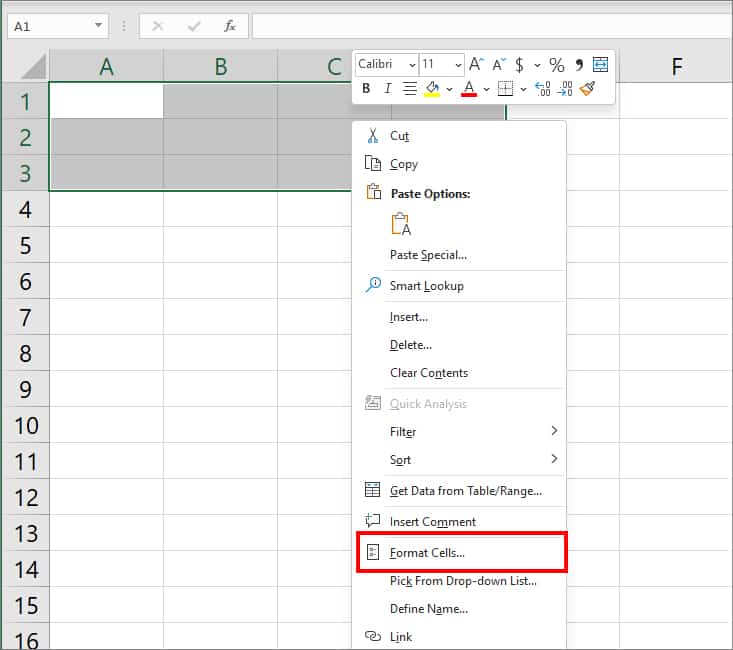
- On Protection Tab, check the box for Locked.
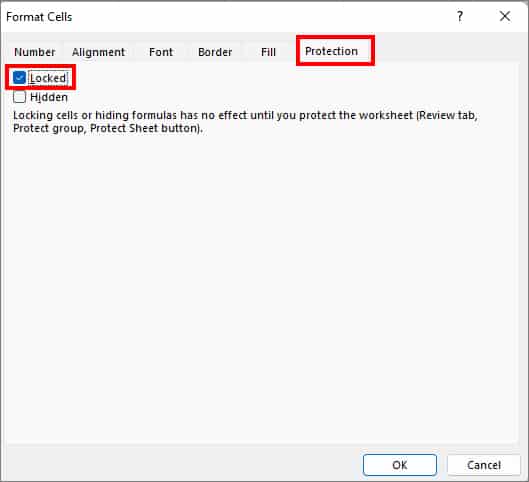
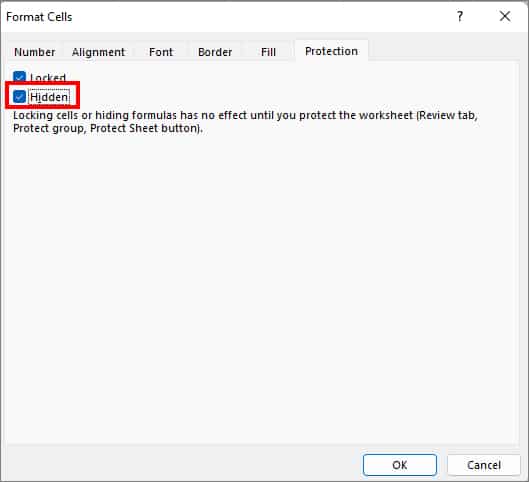
- If you want to hide data or formulas, check the box for Hidden menu. (This is Optional.)
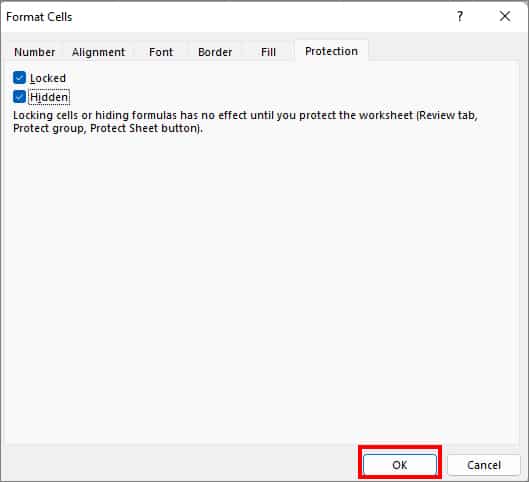
- Hit OK button.
Step 3: Protect Worksheet
After locking desired ranges on your worksheet, you need to protect the worksheet. By doing so, other users won’t be able to make changes. They’d have to unprotect the sheet in order to edit the document.
However, while protecting the sheet, there are a few options you can allow access to third-party users. For Instance, even though you’ve locked cells, you can still permit them to insert rows or columns, format cells, and many more. We will check all of them in more detail below.
- On your worksheet, highlight the Locked ranges.
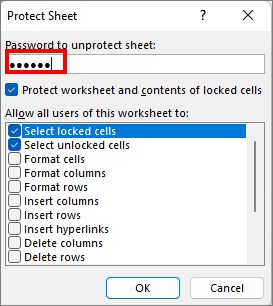
- Go to Review Tab. Then, from the Protect section, click on Protect Sheet.

- Now, under Allow all users of this worksheet to, check one of the given options:
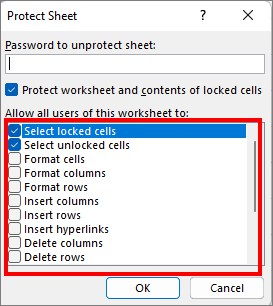
- Select locked cells: Highlight locked cells and ranges. Even if you do not check this option, Excel allows its users to do this by default.
- Select unlocked cells: Highlight and move between unlocked cells. By default, users can still do this even if you uncheck the option.
- Format cells: Edit Conditional Formatting and modify Format Cells.
- Format columns: Hide Columns, Adjust Column Width.
- Format rows: Hide Rows, Adjust Row heights, and apply Row formats.
- Insert columns: Add extra columns.
- Insert rows: Add more rows.
- Insert hyperlinks: Create Hyperlinks.
- Delete columns: Eliminate Columns.
- Delete rows: Eliminate Rows.
- Sort: Use Sort, and Filter commands. However, even if you enable this option, users won’t be able to rearrange data of locked cells using the sorting menu.
- Use AutoFilter: If there is AutoFilter in the data, users can modify Filters. However, this setting won’t allow the users to enable or turn off the AutoFilter.
- Use PivotTable and PivotChart: Change PivotTable layouts, reports, formats, etc.
- Edit objects: Format Graphs, objects, text box, maps, comments, etc.
- Edit scenarios: View, edit, or delete scenarios.
- On the Password to unprotect sheet field, type in a Pin or Password for your worksheet. (Keeping a Password is optional. You can simply hit OK to Protect Sheet)
- If you’ve entered the password, you will be prompted to Re-enter them to confirm. Then, Click OK.
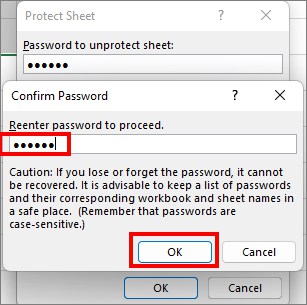
Quick Tip: For users who have kept passwords, we recommend you note them down. If you forget them, there’s no way to recover passwords. Step 4: Protect Workbook
Protecting Worksheets does a pretty good job to limit users from editing locked cells. But, if you want to prevent others from customizing worksheets, you can protect the workbook itself. By doing so, the users will not have access to insert, move, hide, or delete the worksheets of your workbook.
- On your worksheet, navigate to Review tab.
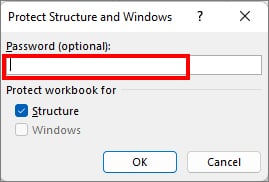
- From the Protect section, choose Protect Workbook.

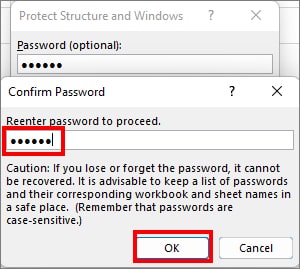
- Under the Password field, enter a Pin or Password. (Keeping password is optional. If you do not want to keep it, directly click OK to protect Workbook.)
- For users who entered password, Re-enter them to verify. Then, hit OK button to confirm Workbook protection.
Related Questions
How to Lock Cells in Excel While Scrolling?
If you want to lock rows and columns of your spreadsheet, there is a Freeze Panes option in Excel. After enabling this feature, the locked rows and columns will stay there even when scrolling through other sections of your spreadsheet. To turn this on, all you have to do is go to View Tab > Freeze Panes. Then, select one of the options – Freeze Panes, Freeze Top Row, Freeze First Column.
How to Lock Cell References in Excel?
When you add a dollar sign in a cell reference, it locks the cell reference for Rows and Columns. For Example, to lock cell reference A5, we will add a $ sign like this: $A$5. These locked cell references are known as “Absolute Cell Reference” which is mostly used to lock a formula during calculations. To know more about it, you can check out our other article on How to Absolute Reference in Excel.