Locking cells in your Google Sheets is important if you often collaborate with others. It can help you to prevent other users from altering or overwriting your data in your spreadsheet.
You can lock cells and sheets via the Protected sheets & ranges window. Here, you can add, change, and set permissions to the locked cell in your spreadsheet.
Lock Single or Multiple Cell
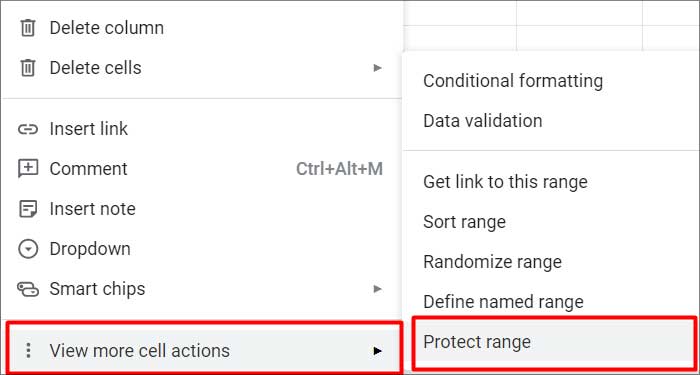
When you right-click a cell, Google Sheets will display a list of options you can use to make changes in the cell. You will find the option to lock cells under the View more cell action option.
- Open the worksheet in Google Sheets.
- Select a cell or multiple cells, then right-click on a selected cell.
- Expand View more cell action.
- Click on Protect range.
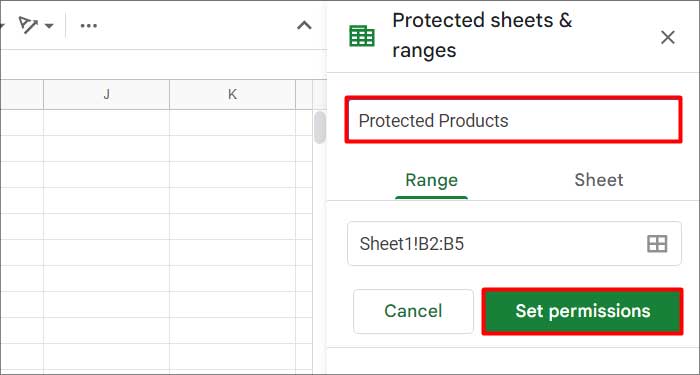
- Type in a description and hit the Set permissions button.
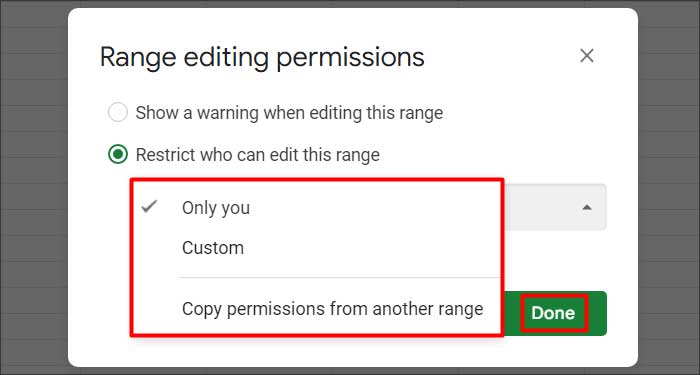
- In the prompt, you can choose to show a warning pop-up before editing a protected cell or restrict users from altering the cell.
- Pick the latter option if you want to restrict who can edit the range. From the dropdown menu, you can choose either of the following options:
- Only You
- Custom
- Copy Permission from another range
- After making your changes, click on Done.
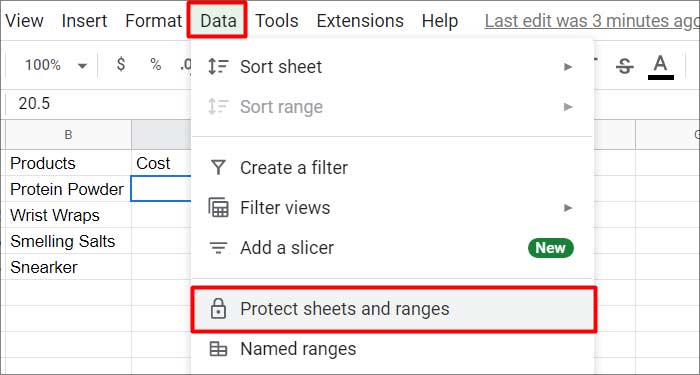
Additionally, you can lock cells through the Menu bar. You can find the option to protect sheets and ranges by clicking on Data on the menu bar.
- Open Google Sheets and select the cells you wish to protect.
- Click on Data on the menu bar.
- Select the Protect sheet and ranges option
- Click on the Select data range icon in the text field.
- You can select a custom range by entering it in the range text field.
- Hit the Ok button.
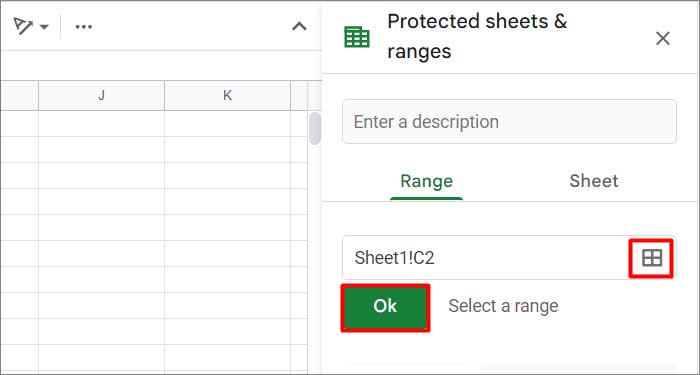
- Click on the Set Permissions button.
- After making changes, hit Done.
Edit a Locked Cell
You can make changes to a locked cell from the Protect sheets and ranges window. You can change the cell description, range, and permissions to edit the cell. Open the Protected sheets and ranges window then proceed with the steps below.
- Click on the cell that you wish to edit in the Protected sheets & ranges window.
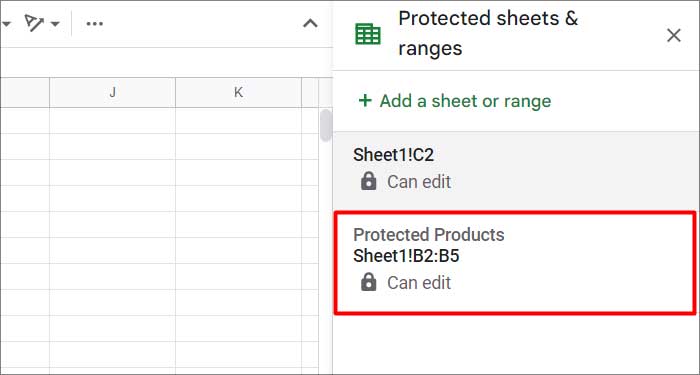
- Type in a new description or select a new range from the given window. You can also click the trash-bin icon beside the description to unlock the cell.
- If you like to alter permissions, click the Change permission button.
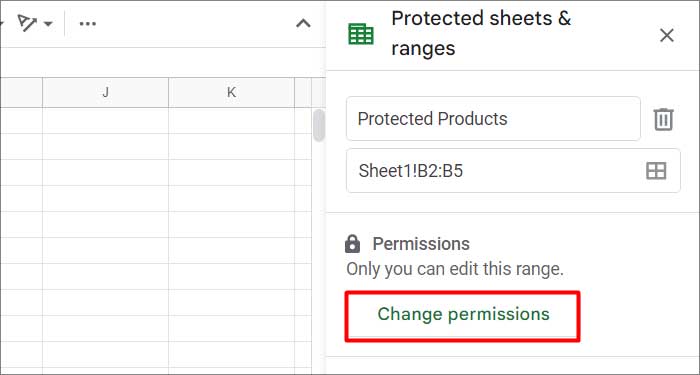
- After making your changes, hit the Done button.
Lock Entire Google Sheets
You can also lock worksheets instead of cells in Google Sheets. Locking your worksheets can be convenient when you need to lock multiple rows or columns of cells.
However, if you need some cells to remain unlocked in your worksheet, you can do so by including exceptions while locking the worksheet.
- Open the Google Sheets.
- Right-click on the sheet you wish to protect from the Sheets tab at the bottom.
- Select Protect sheet.
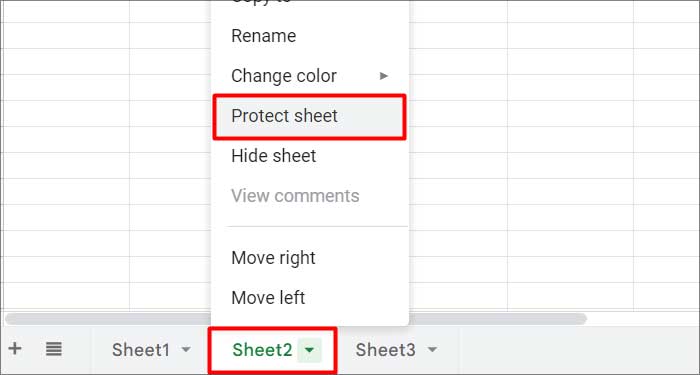
- You can also choose another sheet from the dropdown menu.
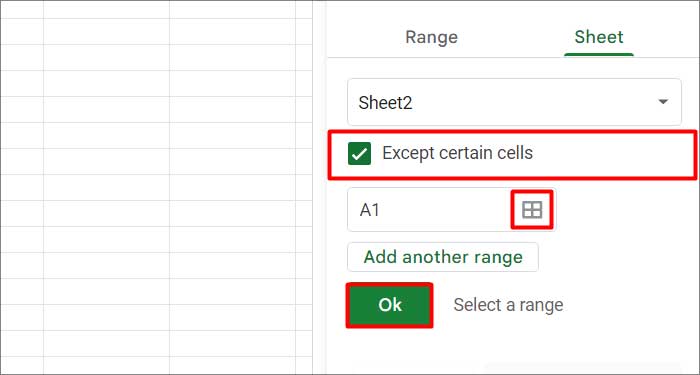
- To add exceptions, tick the Except certain cells checkbox and add the cell range.
- Click on the Ok button.
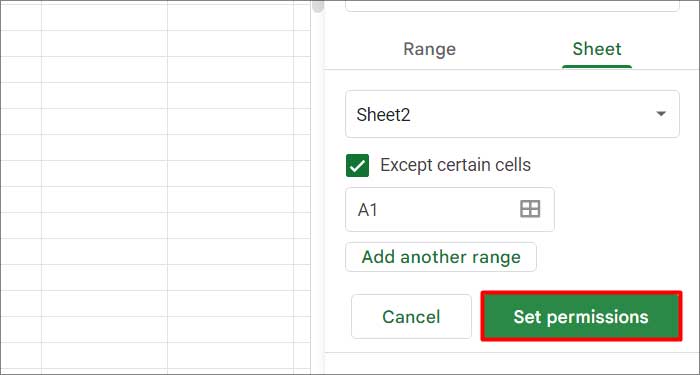
- Click on Set permissions.
- Hit Done after making changes.