While printing larger worksheets, you could be expected to insert page numbers as a matter of convenience. It would be a tedious job to individually insert text boxes to number each page in your document, so we won’t even go there!
Fortunately, Excel has a method to automate inserting page numbers in your workbook as footers. Footers are texts, typically reserved for page numbers, and are under the main information in a document. After you insert Header & Footer in your document, you can use the Header & Footer elements to add page numbers automatically.
Insert Page Numbers in Smaller Worksheets
You do not have the option to insert the footer individually. However, after you select this option, you can keep the header section empty to ignore adding headers.
- Open your spreadsheet and head to the Insert tab.
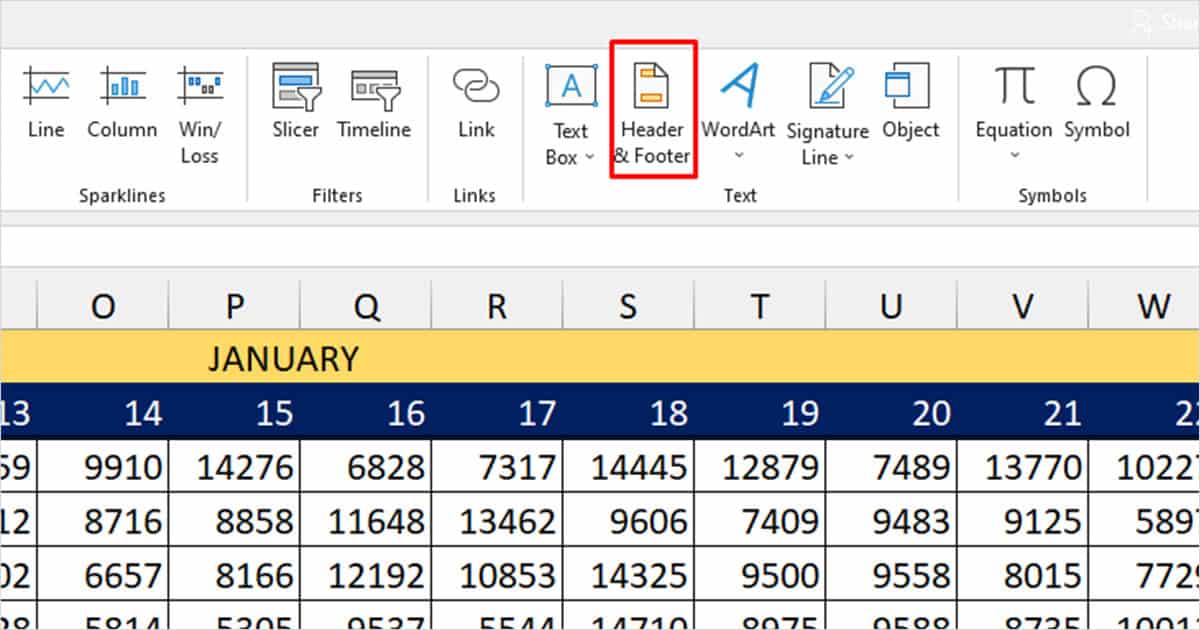
- From the Text section, select Header and Footer.
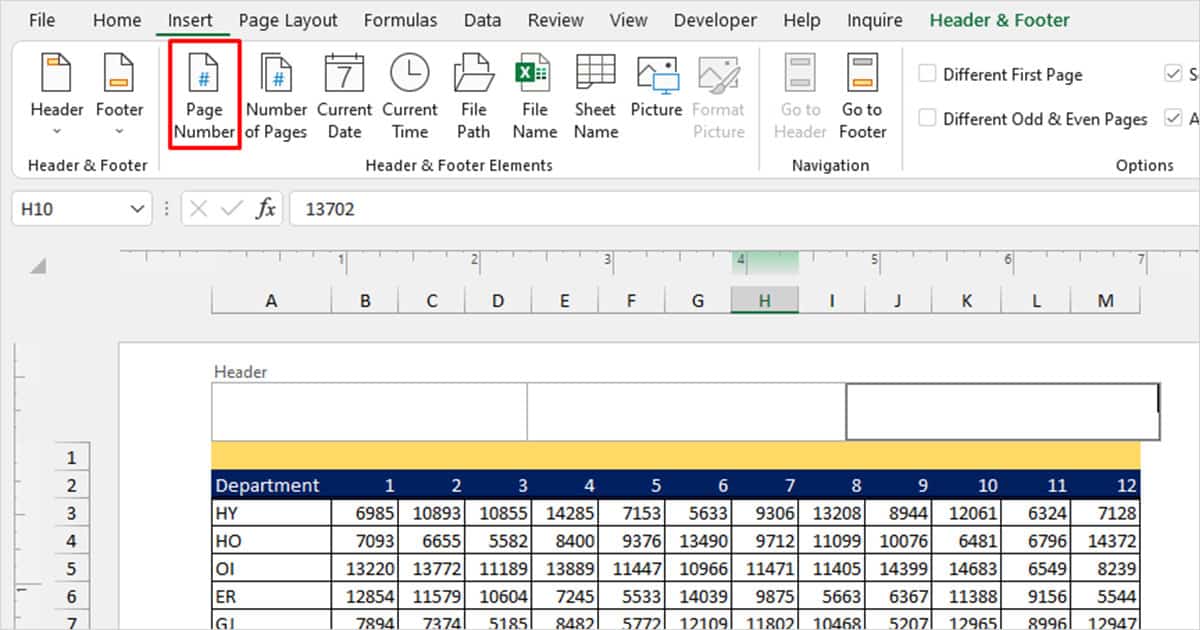
- Scroll down to the bottom of your page and select the left, center, or right box depending on where you wish to place your page number.
- Head to the Header & Footer tab.
- From the Header & Footer Elements section, select Page Number.
Insert Page Numbers in Bigger Worksheets
If you have created a spreadsheet with a larger number of pages, you would want to set the page numbers a bit differently. For example, if you have 5 worksheets, you would want to label the third page of a 15-page worksheet as 3 of 15.
In this section, we will also show you how you can insert page numbers in multiple worksheets at the same time.
- Select the first sheet you wish to insert page numbers in the hold the Shift key.
- Click on the last worksheet you wish to add page numbers in. This should select all worksheets in between.
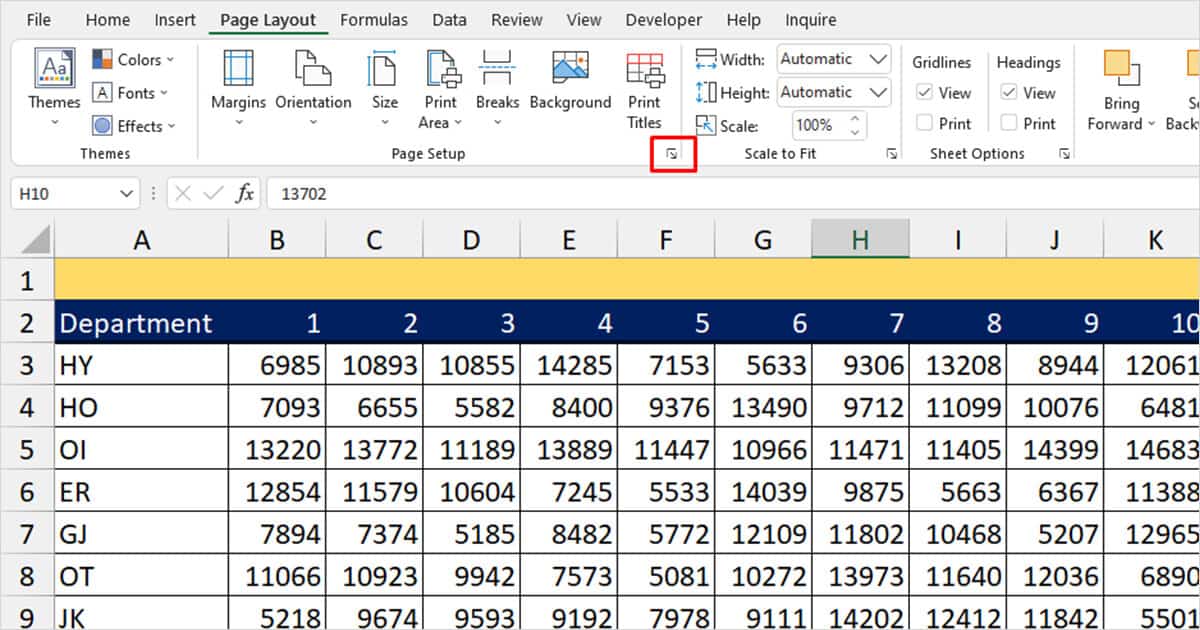
- Head to the Page Layout tab and select the expand icon in the Page Setup section.
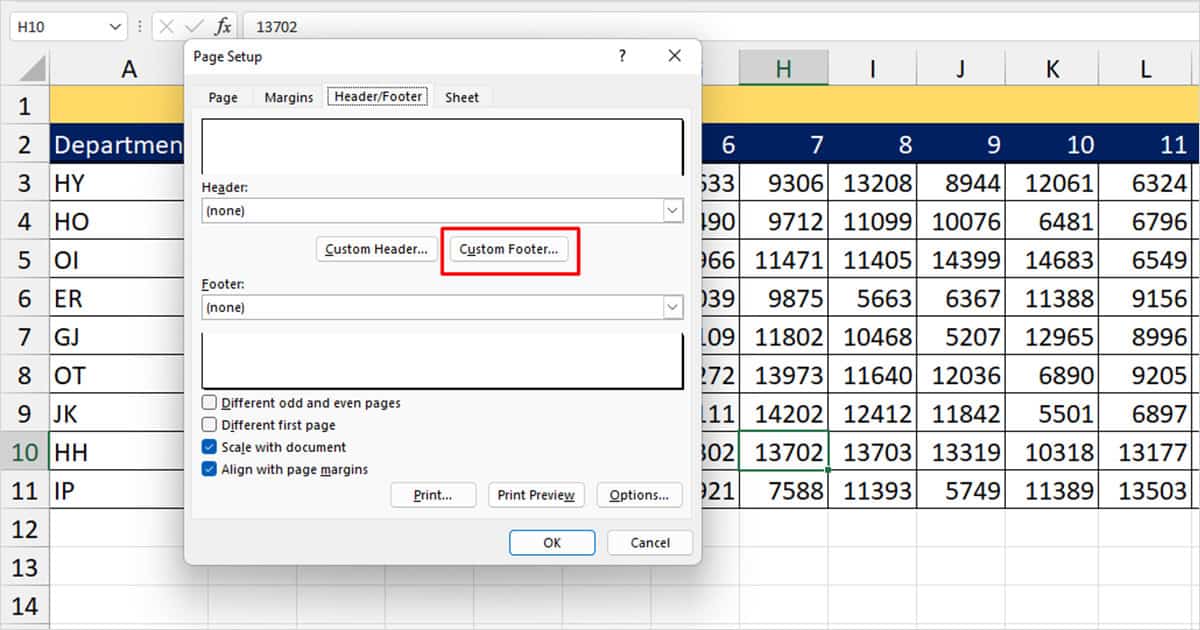
- Move to the Header/ Footer section.
- Choose Custom Footer.
- Click on the section you wish to insert your page number.
- Select the first icon, Insert Page Number.
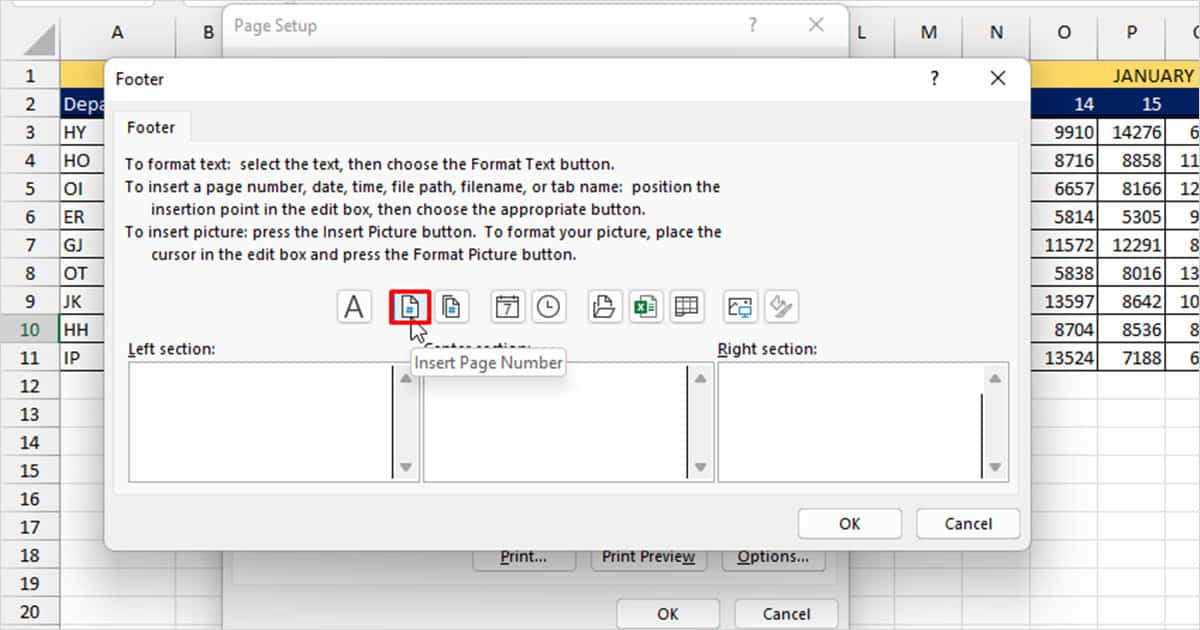
- Type in a separator. We add “of”
- Click on the second icon, Insert Number of Pages.

- Select the OK buttons.
Change the Starting Page Number
Say you’re working on a document that has already been covered before and you’re preparing a new data set to go along with the already created document. In that case, you wouldn’t want your page number to begin with 1. Here is how you can change the starting number when inserting page numbers in your Excel sheet:
- Head to the Page Layout tab and expand Page Setup.

- In the Page tab, locate First page number.
- Enter the start value in the section next to it.
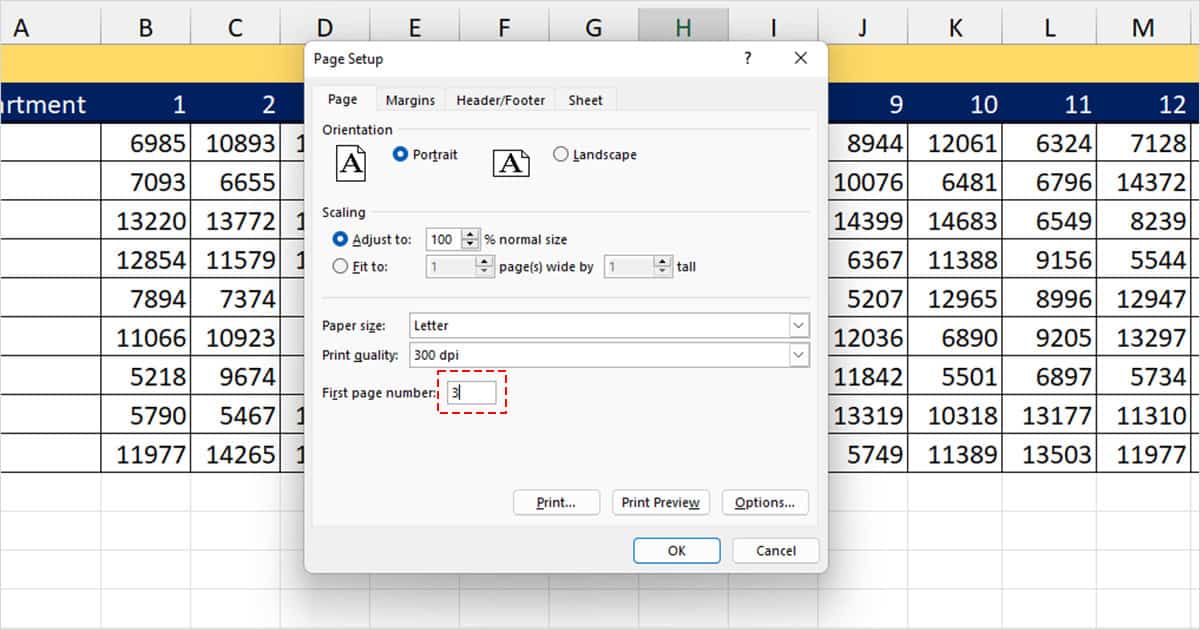
- Click OK.
Change the Appearance of Page Numbers
You can also change the way page numbers looks on each different page in Excel. You can either skip adding a page number on the first page or skip inserting a number on the even numbers of your pages. Although Excel will still count the skipped pages, the numbers will not appear on the set pages.
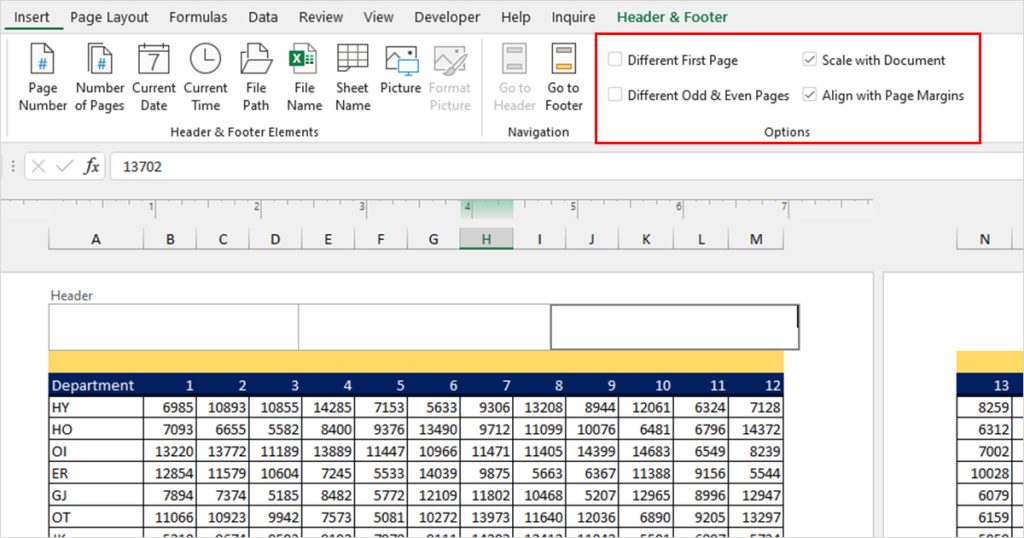
- Select your footer then head to the Header & Footer tab.
- Locate the Options tab.
- Choose from the following options depending on how you wish your page numbers to look:
- Different First Page: Skips inserting page number in the first page.
- Different Odd & Even Pages: Alternates displaying the page numbers according to odd and even page count.
- Scale with Document: Adjusts your footer according to the measurement of your document.
- Align with Page Margins: Matches the alignment of your footer with the measurement of margins you’ve set.
Change Page Order
After you’ve set the page numbers, you may notice that the pages aren’t numbered correctly. This could be because you have set your page order to Down, then over. This means, Excel will order your pages vertically than horizontally. To workaround this issue, you must change the order to Over, then down.
- Head to Page Layout then expand Page Setup.
- Switch to the Sheet tab.
- Under Page order, choose Over, then down.
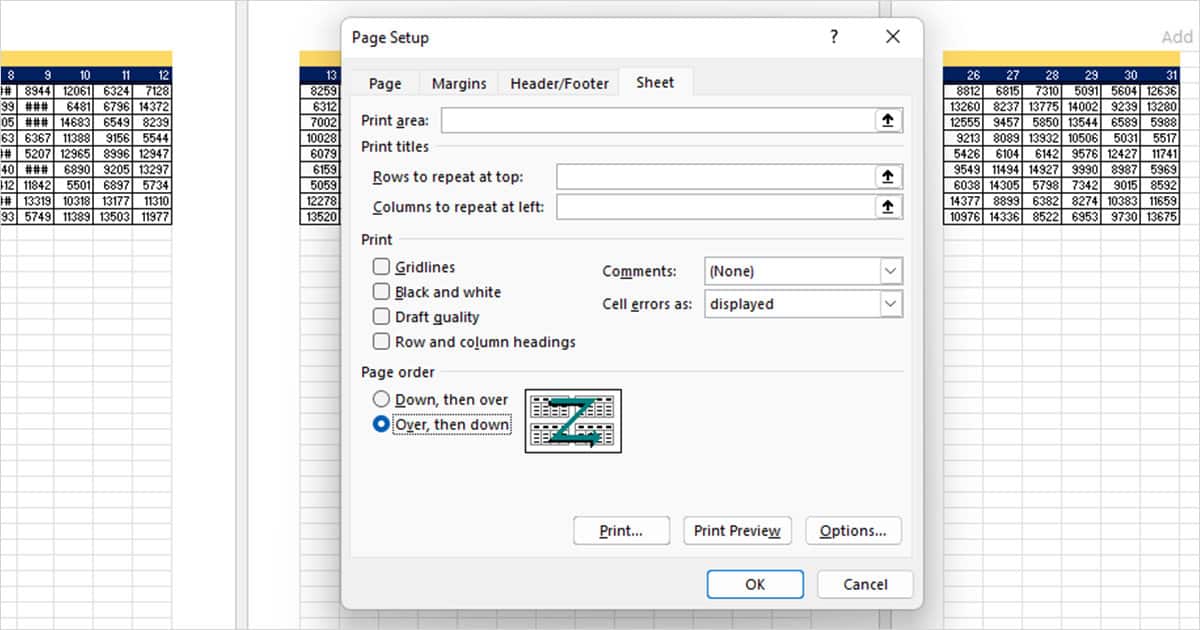
- Click OK.