Excel has made it easier to fill in the information you could’ve missed during data entry. If you’ve missed a row while inserting data in a table or sheet, you can add a new row using CTRL +SHIFT + ‘+’, or if your keyboard has a number pad, use CTRL + ‘+’.
However, there are instances where you could’ve missed multiple entries. In such cases, adding rows individually can be time-consuming.
Select an Equal Number of Rows
Excel inserts rows depending on the number of rows you have selected.
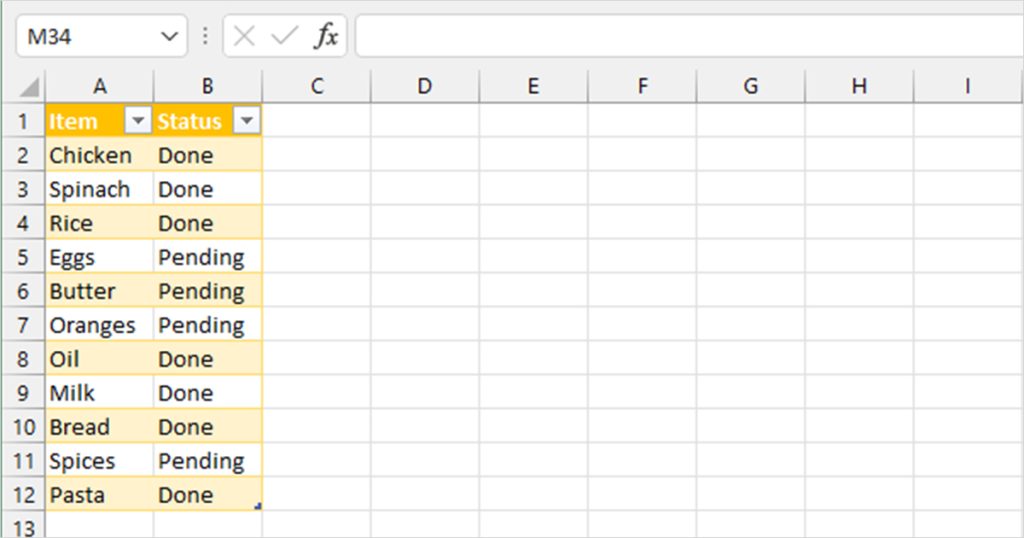
In this example, we’ve prepared a grocery list. Let’s assume the data is arranged according to its priority. During data analysis, we realized we missed 6 items before Oil. Here’s how we add six more rows before row 8 (Oil).
- Select row 8, the row we wish to insert blank rows above.
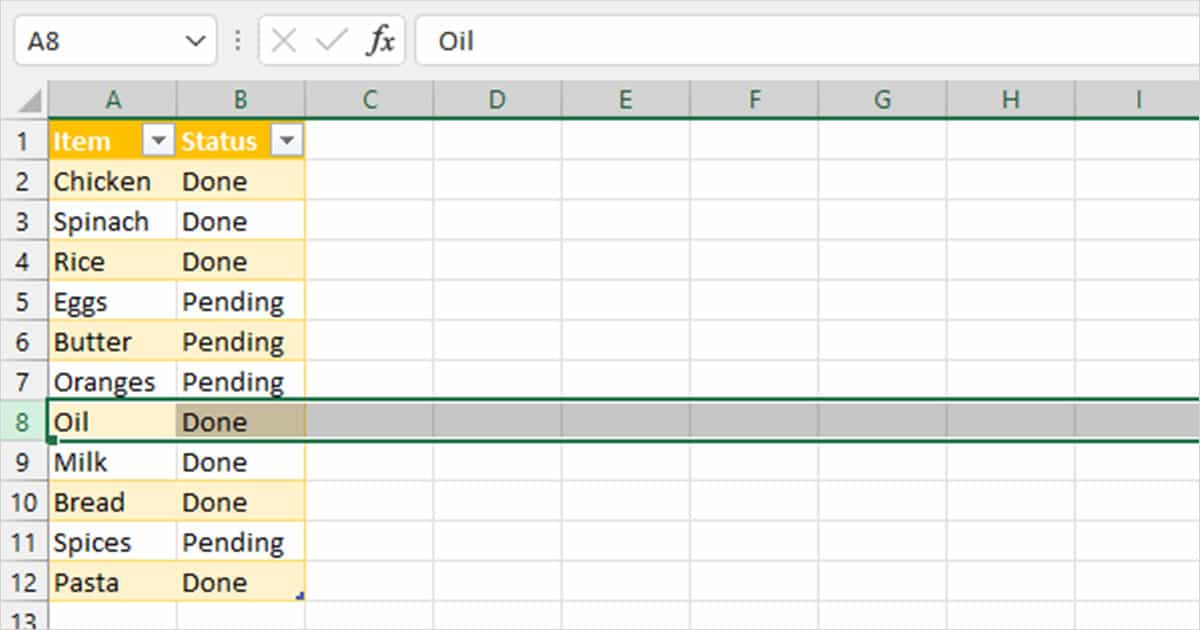
- Hold down the SHIFT key then, make a downward selection equal to the number of rows you want to insert (rows 9, 10, 11, 12, and 13).
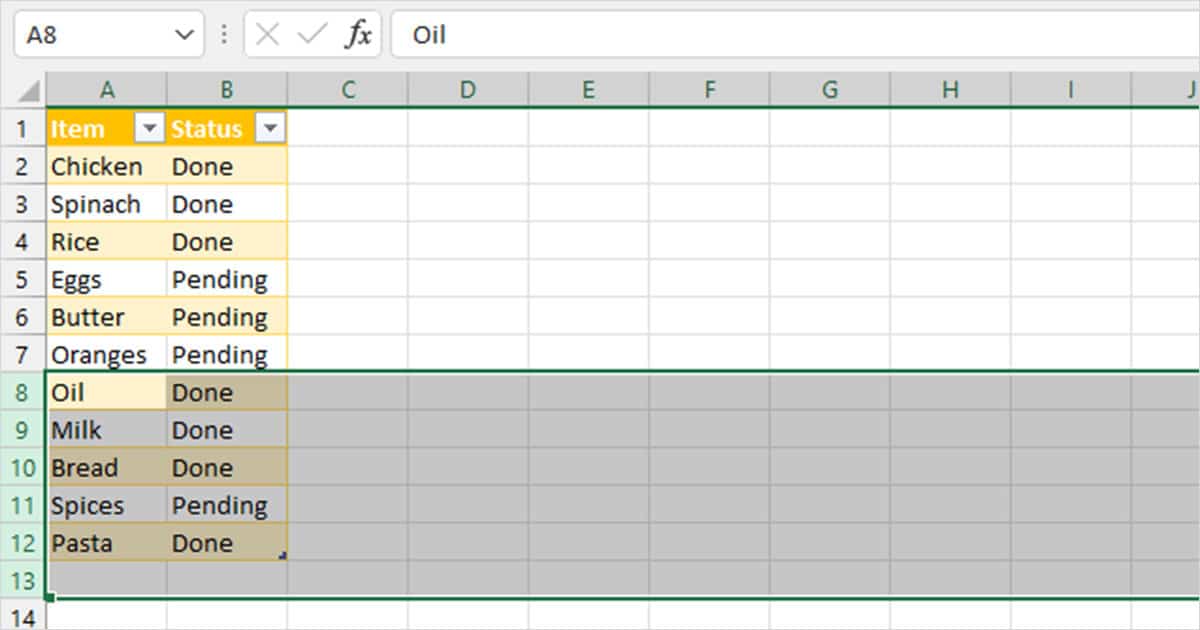
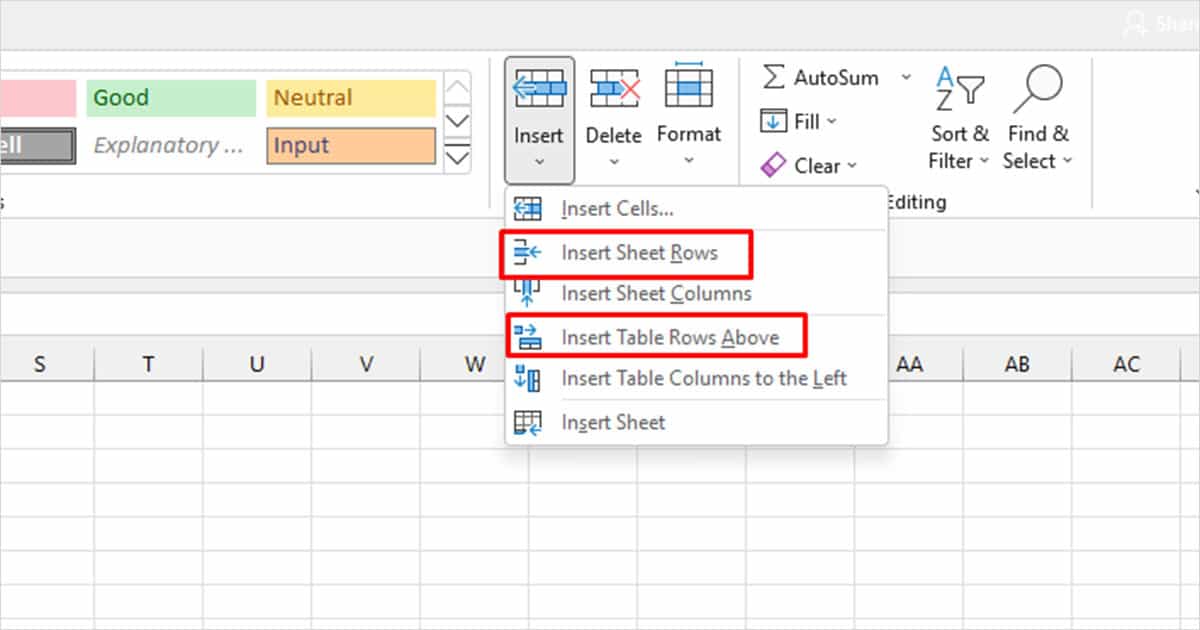
- To add rows, either:
- Use the shortcut: CTRL +SHIFT + ‘+’
- Navigate through the Home ribbon and select Insert.
Add Multiple Rows After Each Entry
In some scenarios, you may need to add multiple rows after a certain entry. While the easier way would be to leave room for these data while entering your data, you can still create these changes later. You can still apply the above-mentioned method to add the columns, but we have a method that could get the job done more quickly.
Use the first method to make your first set of row-entry. To add multiple rows again, select the equal number of rows you wish to insert above the selected row. On your keyboard, hit F4. This will replicate your last action and insert the rows above the first selection.
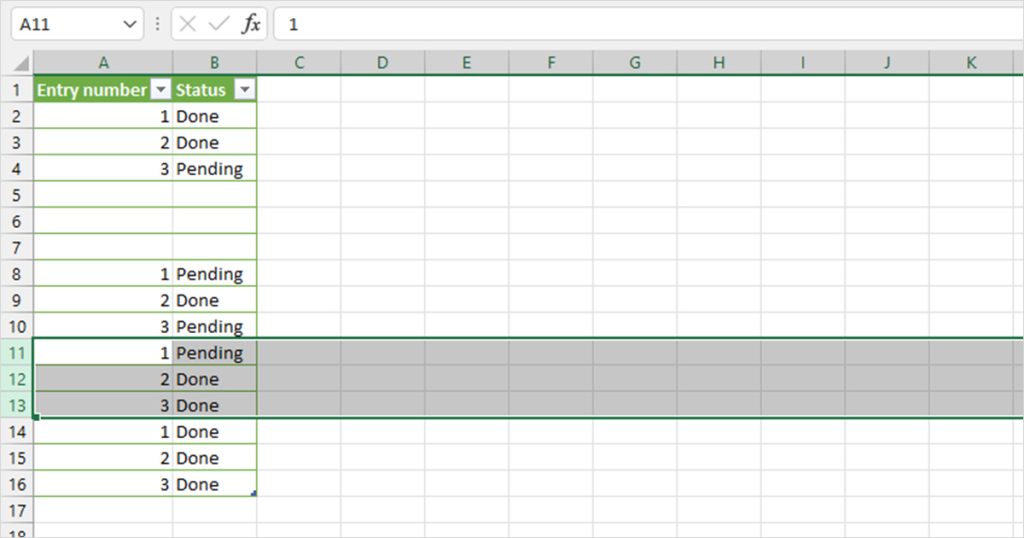
For instance, in this table, we need to insert three rows after every three entries. Following the first method, we selected the row we intended to add the rows above of then held SHIFT to select two more rows. After we use CTRL +SHIFT + ‘+’, three blank rows appeared in rows 5, 6, and 7.
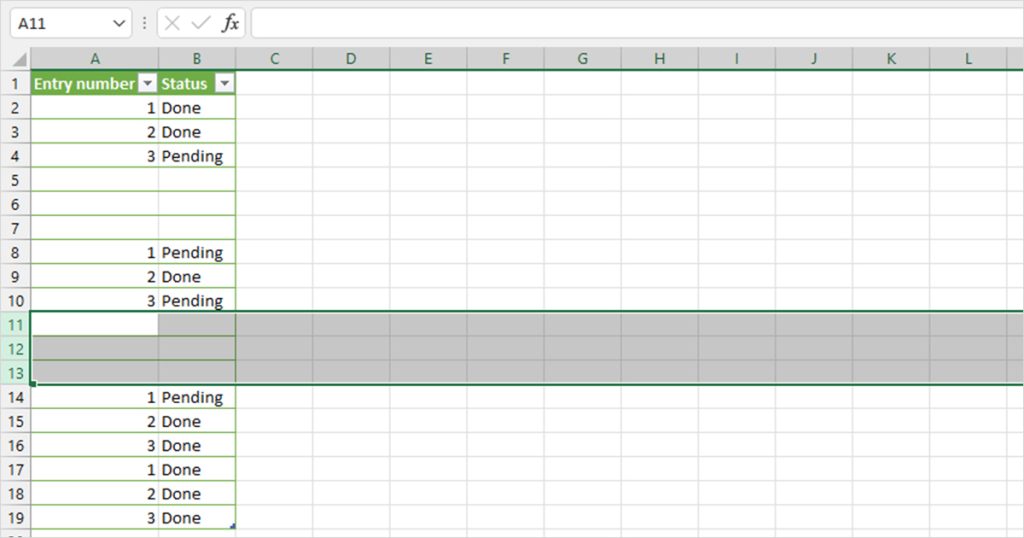
Now, we must replicate this for the next three entries. We selected rows 11, 12, and 13 and then use F4 to insert three rows above them.
Insert One Row After Multiple Entries
Does your table need to have an empty space after every record you make in the table? You could be leaving space for an entry that is yet to be calculated, or you could just like the looks of it.
The methods we mentioned above are a great fit for when you wish to add multiple rows between rows. But, to add multiple, individual rows after each entry, you will have to apply a completely different method.
- Select the first row in the grid.
- Hold down the CTRL key and select the remaining rows.

- Use CTRL + SHIFT + ‘+’ or, navigate to Home > Insert.
- In the pop-up, choose Entire row > OK.
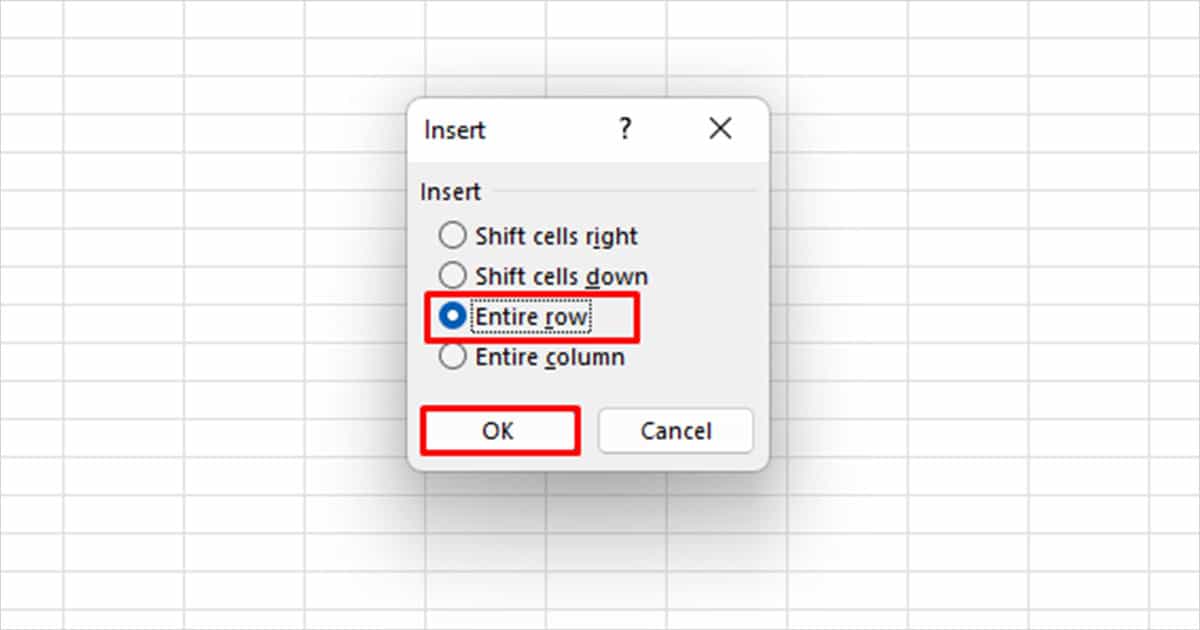
Excel will insert an empty row above each selected cell. From what we’ve gathered, if you’ve converted your data to a table, you cannot use this method if you select the entire sheet row. Instead, only select the cells that follow under the table row for this method to work just as fine.
