Whenever you need to pass on some new information/updates to other people, you could just forward the original message.
Like any other email client, forwarding an email in Outlook is as simple as clicking the Forward button. You can send it to a single person or multiple recipients at once.
In case, you want to automatically forward or redirect an incoming email from a specific sender, you can do so by setting up a rule. The good news is that this works even if you are trying to forward emails from Outlook to another email client like Gmail.
- Whenever you need to forward an email to multiple recipients who shouldn’t know about each other, consider using the Bcc option so that their emails aren’t exposed to other recipients.
- Outlook automatically includes all attachments in the original email when forwarding them to other people. If you don’t want to forward such files, consider removing them before sending them.
- If you try to forward multiple email messages at once or use the Forward as attachment option, Outlook will itself convert each of them into a file with
.emlextension and attach them in your message. While an Outlook user can preview or download such files, other email clients like Gmail may not be able to download and open it. - Even if you set up a rule to forward/redirect the emails to another account, a copy of the original message will remain in your inbox. To avoid such messages from taking up your Outlook storage space, you can add an action option in the rule to permanently delete them after forwarding.
On Outlook Desktop (Windows)
- Open the Outlook app.
- Select the Inbox icon. Look for it in the sidebar or bottom right corner.
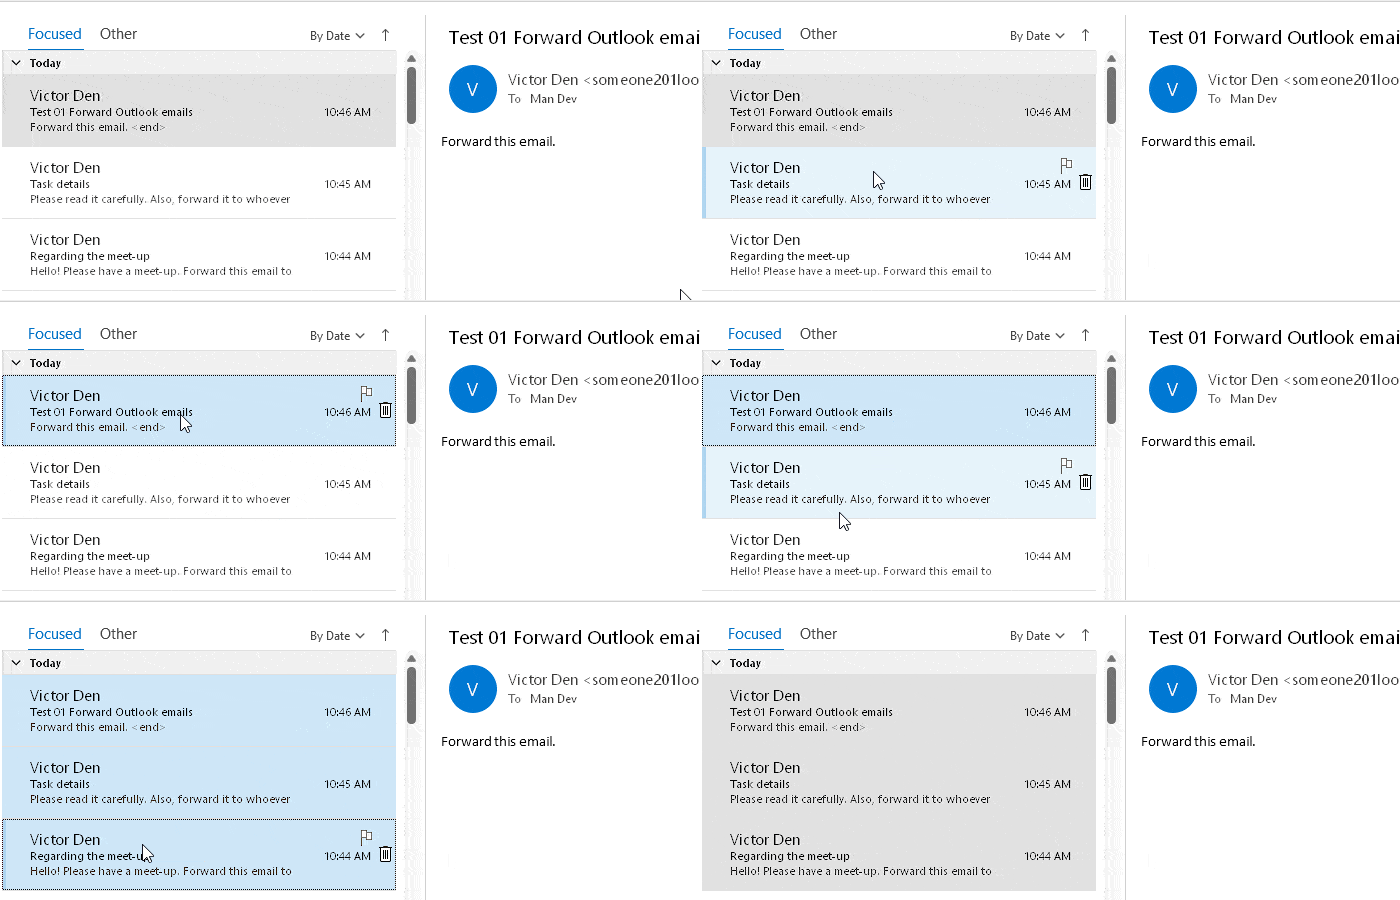
- Select the message (s) you want to forward.
- To select multiple items, press and hold the Shift key while selecting the first and last item.
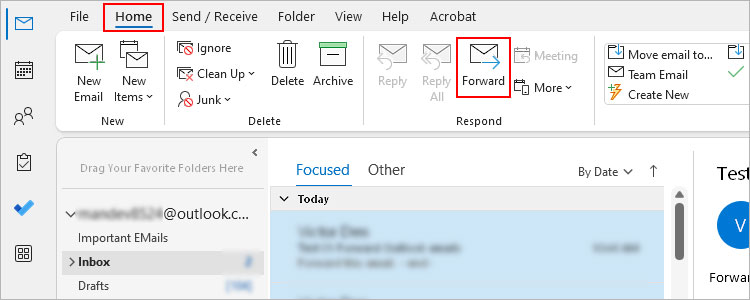
- Then, under the Home tab, click the Forward option. Or, just press the Ctrl + F keyboard shortcut.
- To forward the email as an attachment, press the Ctrl + Alt + F shortcut.
- Fill in other fields according to your preferences.
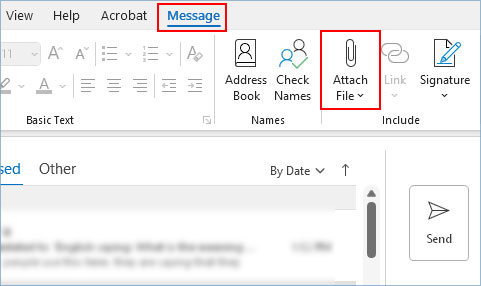
- To include additional attachments like documents or images while forwarding, drag them into the message body or use the Attach file option under the Message tab.
- When done, click Send.
On Outlook Desktop (Mac)
- Launch the Outlook app.
- Select the message you want to forward.
- To select multiple adjacent items, select the first item. Then, press and hold the Shift key while selecting another item.
- Right-click and select the Forward or Forward as Attachment option.
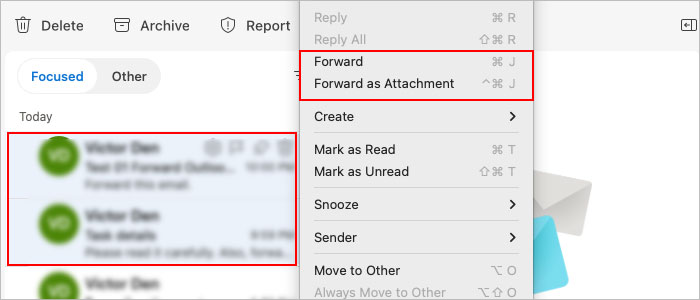
- Alternatively, you can use the respective keyboard shortcuts — Command + J and Control + Command + J.
- Then, enter the recipient (s) whom you want to forward and fill in other fields.
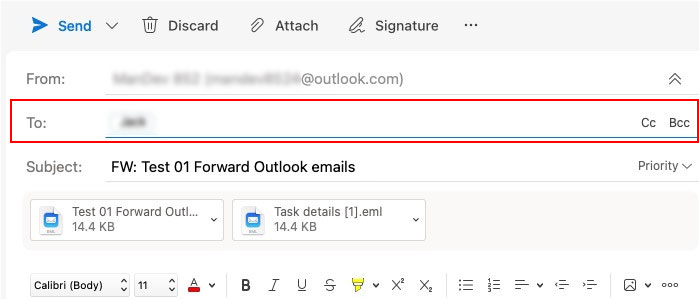
- Click Send.
On Outlook Web
- Open a browser and sign in to your online Outlook account.
- Select the Inbox tab in the sidebar.
- Select the email message you want to forward.
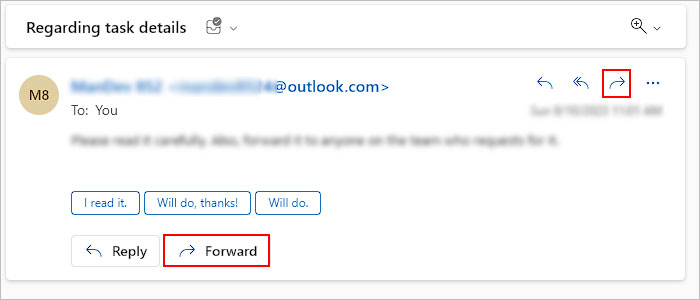
- Now, in the right pane, click the little right arrow icon next to the message. Or, scroll down and click Forward.
- Fill in the other remaining fields.
- Click Send.
On Outlook Mobile App
- Open the Outlook app.
- Tap to open the message you want to forward.
- Tap the three dots icon next to the profile.
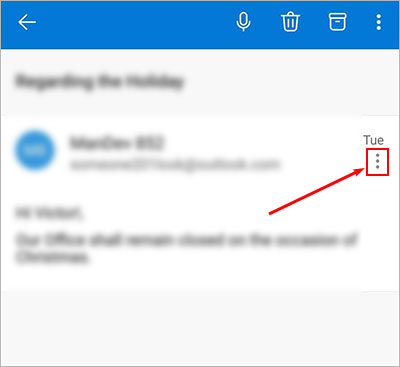
- Swipe up and choose Forward or Forward as attachment option.
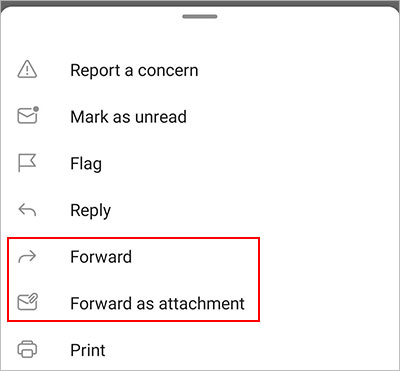
- Enter the recipients and fill in other fields.
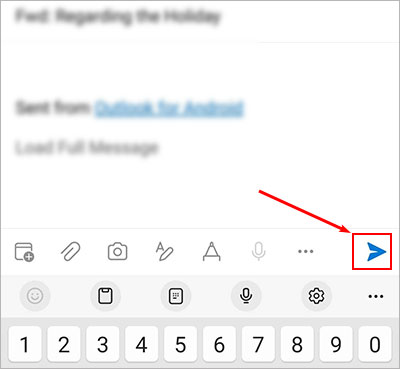
- When done, tap the little paper airplane icon above the keypad to forward the message.
How to Automatically Forward Emails in Outlook?
Sometimes, you may have an old Outlook account that you don’t use anymore or rarely use. However, people having your old email address could still send emails there.
In such cases, you can set up an auto-forwarding rule to directly receive such emails on another account and avoid having to unnecessarily check the old account once in a while.
While setting up the rule, choose the Forward option if you want the email to appear coming from you and receive all the reply messages to your email instead of the original sender.
The recipient will still know that they received a copy of the forwarded message from you as the message contains the FW prefix in the Subject field. But, they won’t know about the original sender of the message.
Alternatively, choose the Redirect option if you want the message to appear as if it’s coming from the original sender’s email. Then, all reply messages will go to the original sender instead of the one who forwarded it.
On Windows
- Open the Outlook app.
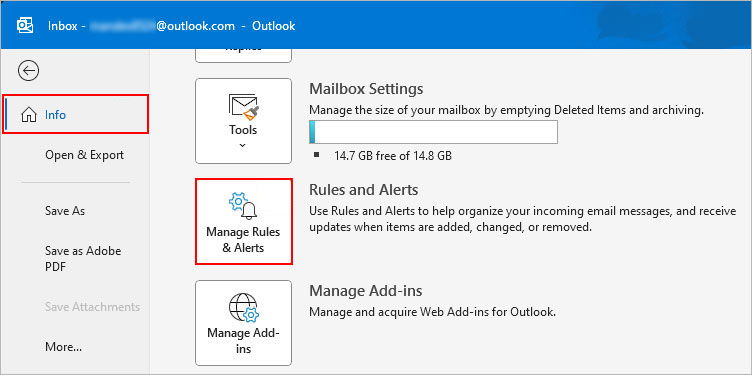
- Click the File menu.
- In the right pane, click Manage Rules & Alerts.
- On the next window, choose the account where you want to create the rule.
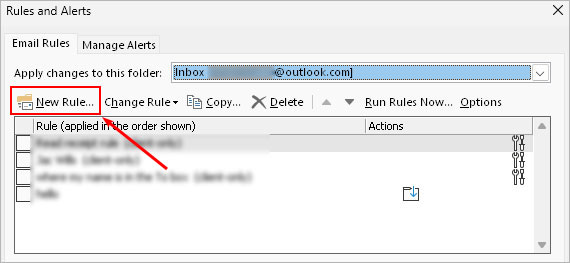
- Click New Rule.
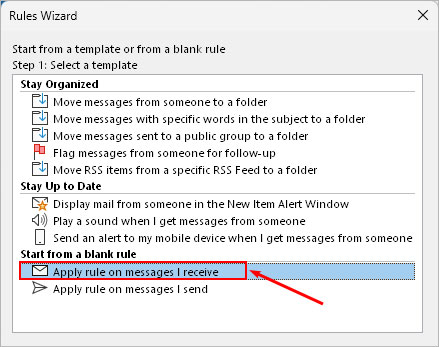
- Under the Start from a blank rule section, select the Apply rule on message I receive option and click Next.
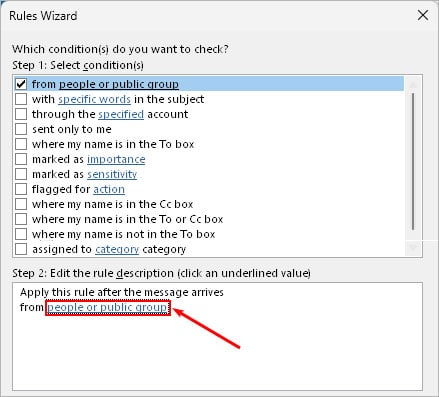
- Now, choose the from people or public group option. Once it appears under the Step 2 section, click it and add the people whose emails you want to forward.
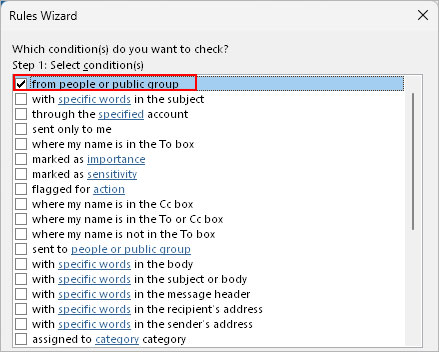
- Alternatively, you can also choose various other conditions to forward specific types of emails such as ones containing specific words.
- Then, click forward it to people or public group under Step 2 and enter the email address of the recipients whose emails you want to forward.
- Select forward it to people or public group or forward it to people or public with as an attachment option. Then, click its link to mention people whom you want to forward the message.
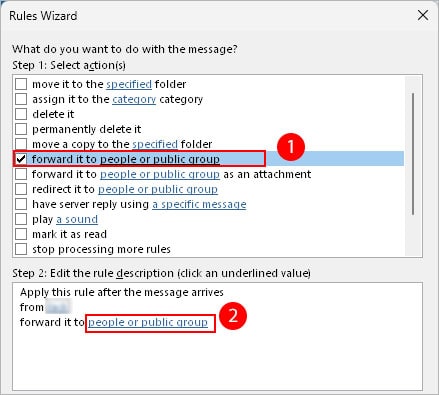
- Or, if you just want to forward it to one of your existing folders, choose the move or copy to the specified folder option instead.
- Choose any exception conditions where you don’t want to forward the email according to your preferences.
- Type an appropriate name for the rule. Here, we have used the name “Forward to Victor.”
- Under the Step 2: Setup rule options section, make sure the Turn on this rule checkbox is enabled. Additionally, enable the “Run this rule now… in inbox” checkbox to forward existing emails that match the rule’s conditions.
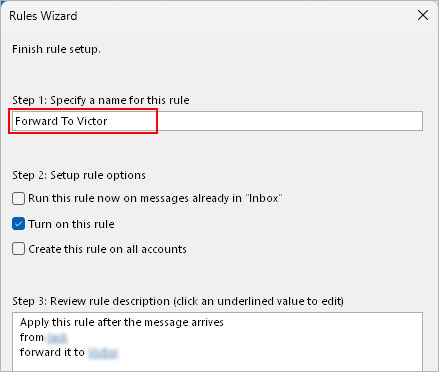
- When done, click Finish.
On Mac
- Open the Outlook app.
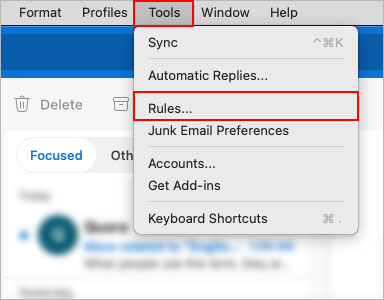
- Click the Tools menu at the top and choose the Rules option.
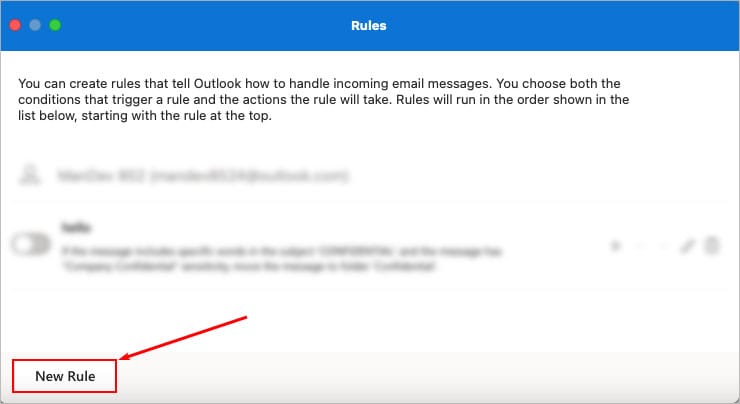
- Then, click New Rule in the bottom left corner.
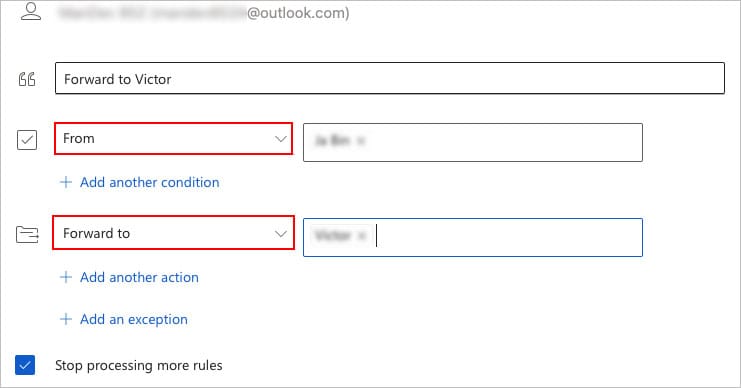
- Provide an appropriate name to rule.
- In the Select a condition field, choose the From option to forward the mail from a specific sender. You can also add other conditions to forward specific types of emails from that person.
- Next to From, type the name/email of the person whose emails you want to forward and press Enter.
- In the Select an action field, choose the Forward to or Forward as attachment option. Look for it under the Route section.
- Next to Forward to, enter the email (s) of the people where you want to forward the incoming mail.
- Click Add an exception to prevent forwarding in particular conditions.
- Click Save when done.
On Outlook Web
- Open a browser and sign in to your Outlook account.
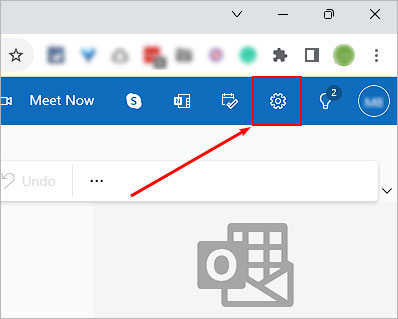
- Click the gear icon in the top right corner.
- Next, select Mail > Rules.
- Under the Rules section, click Add new rule.
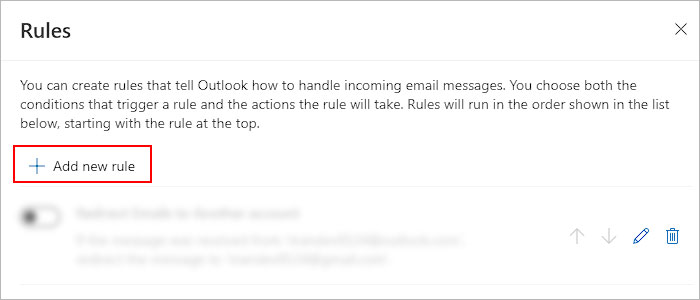
- Provide an appropriate name for the rule.
- In Step 2, choose the condition to apply the rule coming from the specific sender (s). Additionally, you can add multiple conditions as well.
- In Step 3, choose the Forward to or Forward as attachment option under Route section. Then, enter the name/email of the people to whom you want to forward such emails.
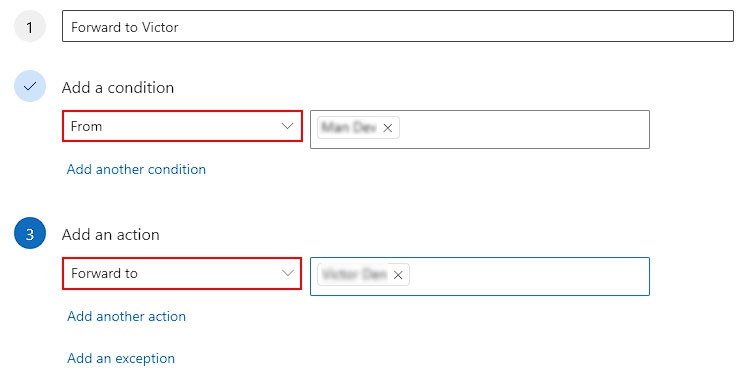
- Alternatively, choose the Move to option in Step 3 if you want such emails to go to a specific folder.
- Click Save.