Whenever you need to share/send a confidential email (containing sensitive information), it’s always a good idea to encrypt it before sending it.
This adds an extra layer of security by making the message unreadable to an unauthorized person (hacker).
To encrypt emails on Outlook, you can use the built-in “Encrypt” option. Additionally, you can even set up a rule to automatically encrypt every outgoing email with admin access.
If you are the admin, you can check your particular license on the Microsoft 365 admin center inside Billing > Licenses. To know about the specific licenses that support the Encrypt feature, refer to the table in the Microsoft Official page.
On Outlook Desktop (Windows)
- Open the Outlook app.
- Select the Mail tab and click New Email to compose a new message.
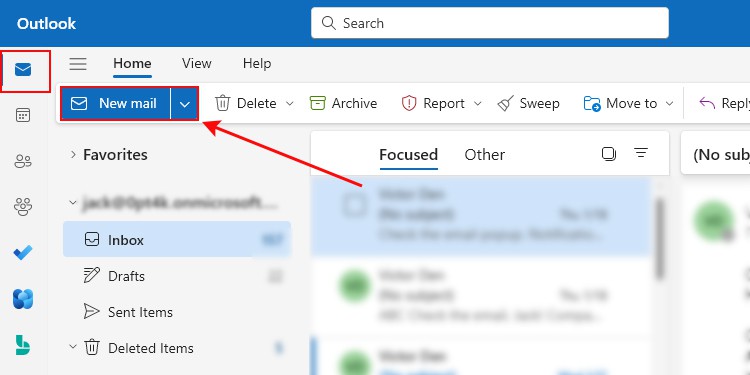
- On the next window, enter the message and fill in the necessary fields like the To and Subject fields.
- Now, to encrypt the message, select the Options tab.
- Then, click Encrypt and select one of the following options:
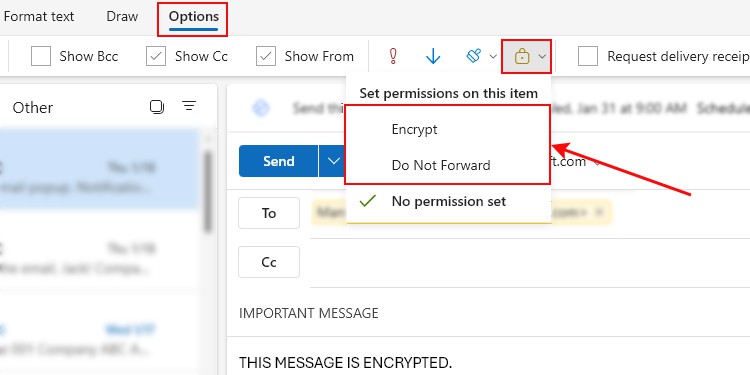
- Encrypt: Encrypt the message
- Do not forward: Encrypt the message and prevent recipients from forwarding, printing, or copying the message contents.
- When done, click Send.
On Outlook Web
- Open a browser and log in to your Outlook account.
- Click the Inbox icon in the top left corner and click New mail to compose a new message.
- Next, fill in the necessary details and enter the message.
- To encrypt the message, select the Options tab.
- Then, click the little lock icon and select Encrypt.
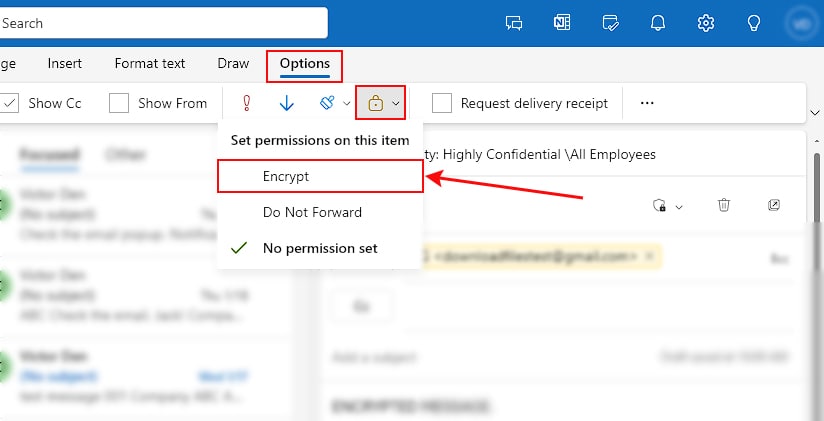
- Click Send.
On Mac
- Compose a new message.
- Enter the message and fill in other fields according to your preferences.
- To encrypt it, select the Options tab.
- Then, click Encrypt and select the Encrypt-Only option.
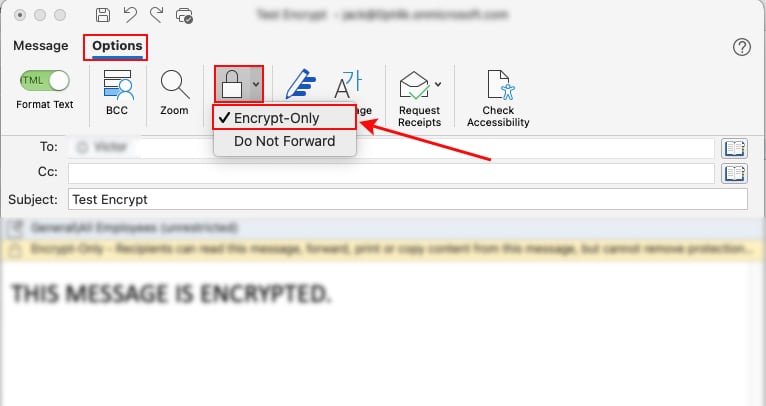
- When done, select the Message tab and click Send.
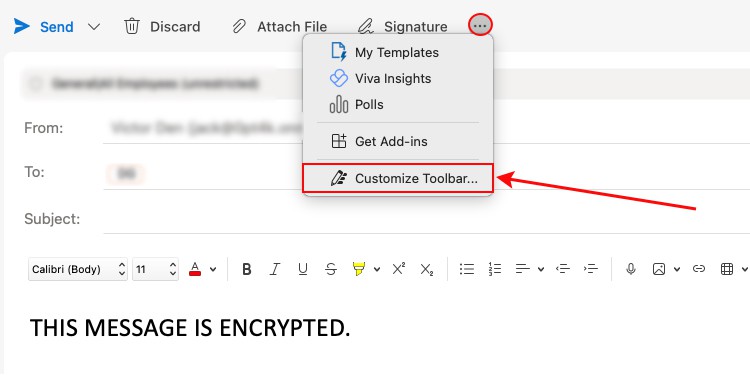
If you are using the new Outlook version, the Encryption option may not be immediately visible. In that case,
- Click the 3-dots icon above the message body and select Customize Toolbar.
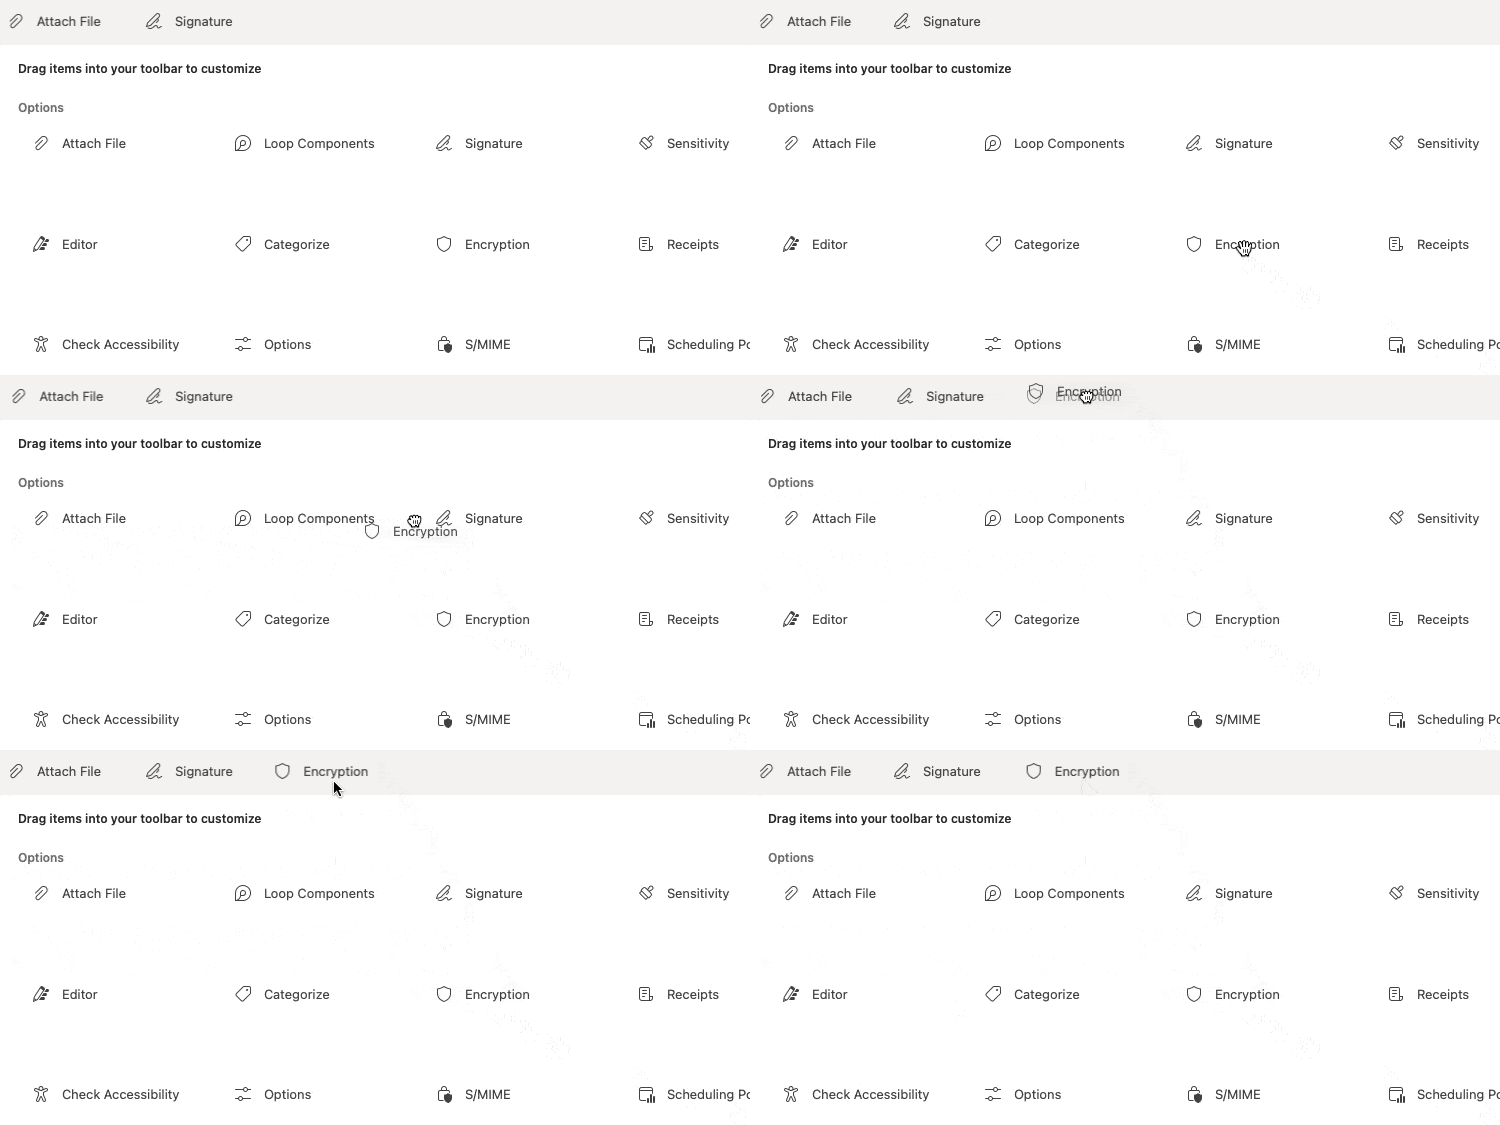
- On the next window prompt, drag the Encrypt option to the top bar.
How to Encrypt Every Outgoing Email on Outlook?
If you have access to the Microsoft 365 admin center, you can create a mail flow rule to automatically encrypt specific types of outgoing emails.
For instance, you can encrypt emails that are sent from your organization to people outside of the organization or a particular domain.
- Open a browser and sign in to the Microsoft Exchange admin center using your admin credentials.
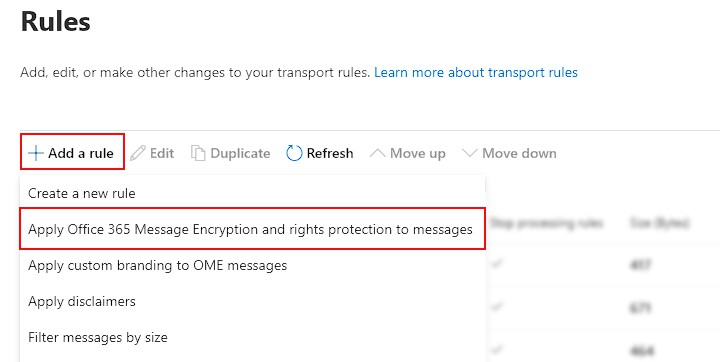
- Then, expand Mail flow from the sidebar and click Rules.
- In the right pane, click Add rule and select the Apply Office 365 Message Encryption and rights protection to messages option.
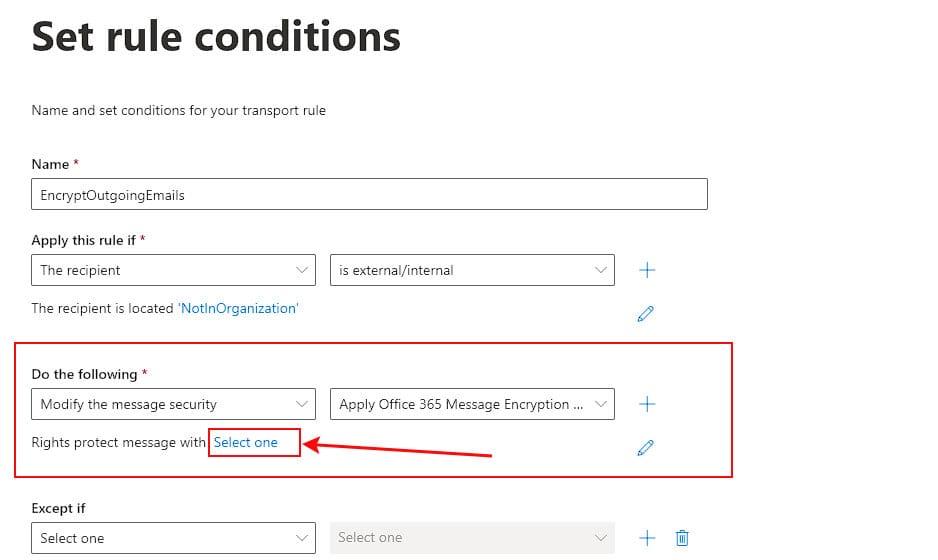
- Provide the appropriate name for the new rule.
- Choose the desired condition (s) to apply the rule — such as for senders outside the organization.
- Under Do the following section, click Select one next to the Right protect message with.
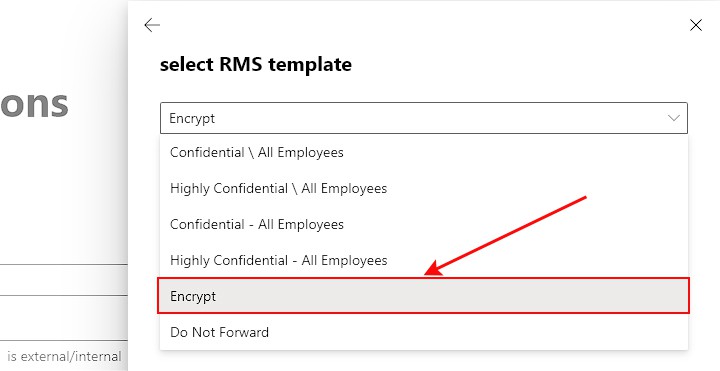
- Then, choose the Encrypt option.
- Specify any exceptions to prevent applying the rule in special conditions.
- Follow the on-screen instructions and finish setting up the rule according to your preferences.
Opening an Encrypted Message in Outlook
Once you send the encrypted message from Outlook, the recipients (both inside and outside your organization) can view your email in different ways depending on their particular email client.
If they are using the Outlook app, the message displays a message suggesting that the message is encrypted. Anyway, they can directly open and view/read the message.
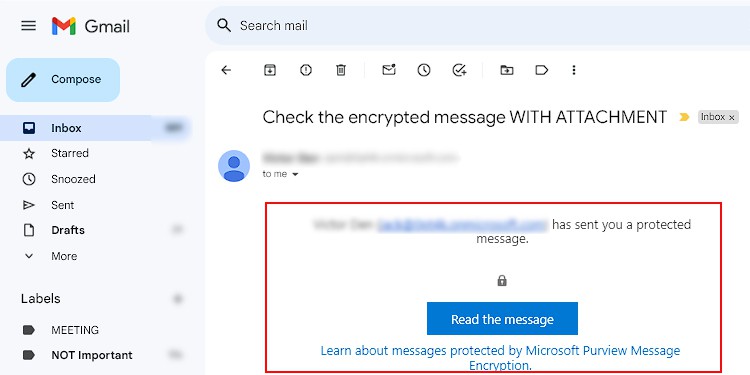
However, if the recipient is using a different email client such as Gmail, he/she won’t be able to read the message contents immediately.
They must use a One-Time Passcode (OTP) or authenticate again by signing into their Google account to decrypt and view the message.
