Excel’s Document Properties include all the information about the file. Just by looking at the file properties, you can know the Author, Date, Title, Category, Comments, Subject, Keywords, Tags, Dates, etc of that document.
You could check the document properties from Excel’s Info category. By default, some file properties like titles, tags, etc are empty at first.
However, Excel allows you to add information and customize these file properties. So, let’s learn how to edit document properties from this article.
What Are the Types of Document Properties in Excel?
Newer versions of Microsoft Excel documents include four different types of file properties. On the contrary, older Excel versions such as Office 2010-2013 have five types of File properties. So, before we jump onto the steps, let’s take a look at what these properties mean.
- Standard properties: Standard properties of files comprise basic information of a document. For Instance, Author, Subject, Title, etc in both older and newer Excel versions.
- Automatically updated properties: Automatically updated properties are the system file properties and statistics. For Instance, it includes File size, dates, and characters of the document. Unlike other properties, Excel does not allow you to change this information.
- Custom properties: Custom properties includes information like Client, Checked by, Date completed, Destination, Department, Project, Publisher, Source, Typist, and many more. You can also specify the value with Yes or No, Date, Text, and Number.
- Document library properties: Document library properties consists of the data related to the public folder or document library. If you add a new document library, you can also set the document properties and rules of your own. For Instance, Date, Description, Category, Submitted by, etc.
- Properties for your organization: These type of Document properties includes all the data and information related to your organization. Properties for your organization are available in only older Excel versions like 2010- 2013.
How to Edit Document Properties in Excel?
There are two ways you can edit document properties in Excel. You could customize the properties of your current or existing files from the Excel Info category itself. However, if you have saved the files on your PC, you could opt for the File Explorer method.
From Excel Info
You can edit document summaries, custom properties, or all standard properties from the Excel Info. Here, you can just open the existing workbook on your Excel application and customize the properties.
Edit All Properties
- Launch Excel and open a Workbook.
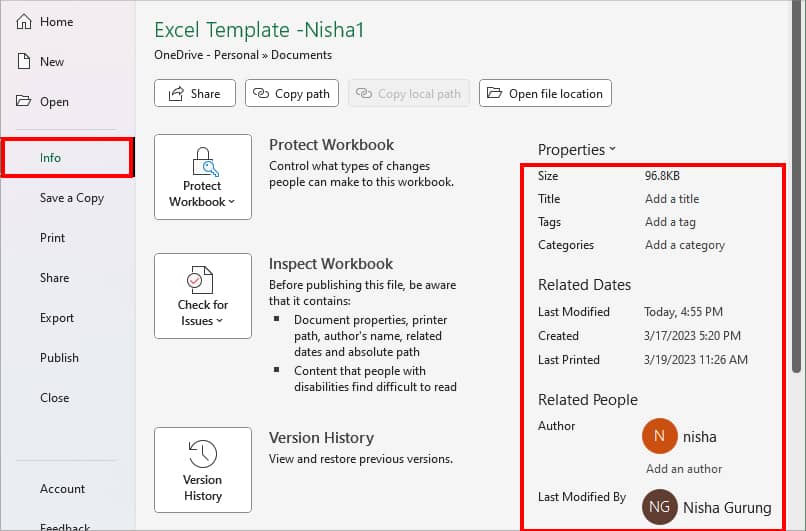
- Navigate to File Tab and click on Info. On the right side, you can see the Properties.
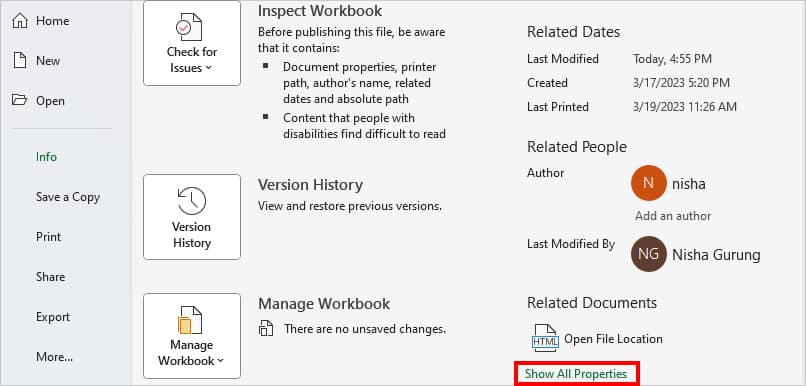
- Click on the Show All Properties option at the bottom.
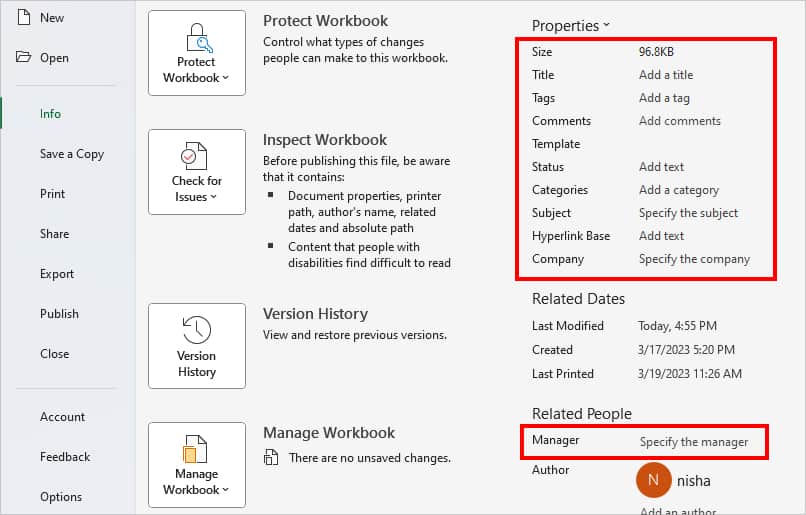
- Under Properties, you can see an additional menu. Edit Title, Tags, Comments, Template, Status, Categories, Subject, Hyperlink Base, Company, Manager, etc.
Edit Advanced Properties
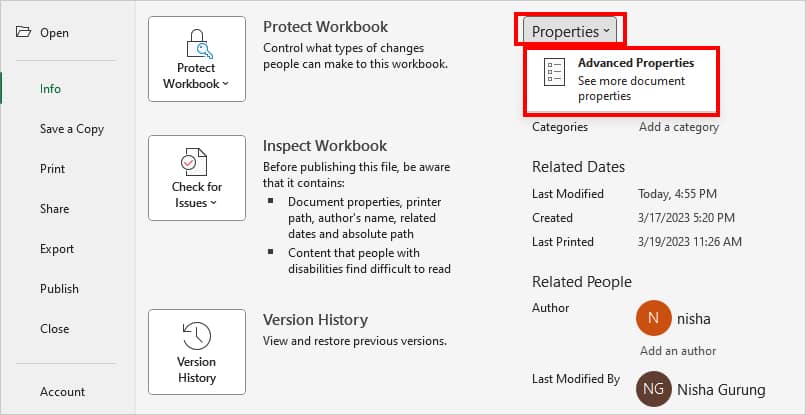
- From the Info menu, expand Properties > Advanced Properties.
- On the File Properties, head to Summary Tab. Fill in the Title, Subject, Author, Manager, Company, Category, Keywords, Comments, and Hyperlink base.
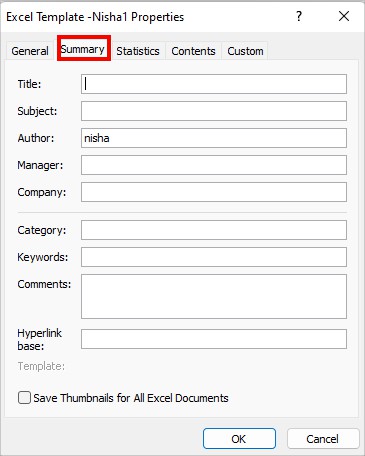
- Click OK to confirm.
Edit Custom Properties
- From the Info menu, click on Properties > Advanced Properties.
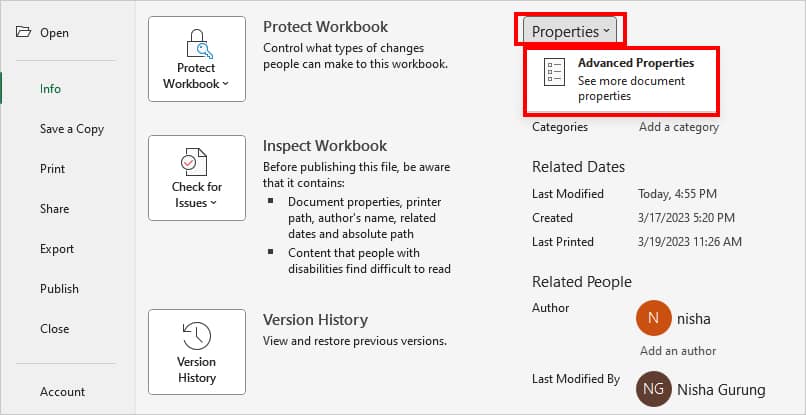
- Navigate to Custom Tab. Then, edit Name, Type, and Value.
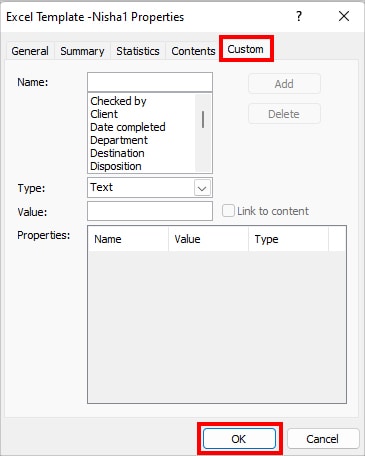
- Hit OK.
From File Explorer
- On your PC, go to File Explorer and locate an Excel file.
- Right-click on an Excel file and pick Properties.
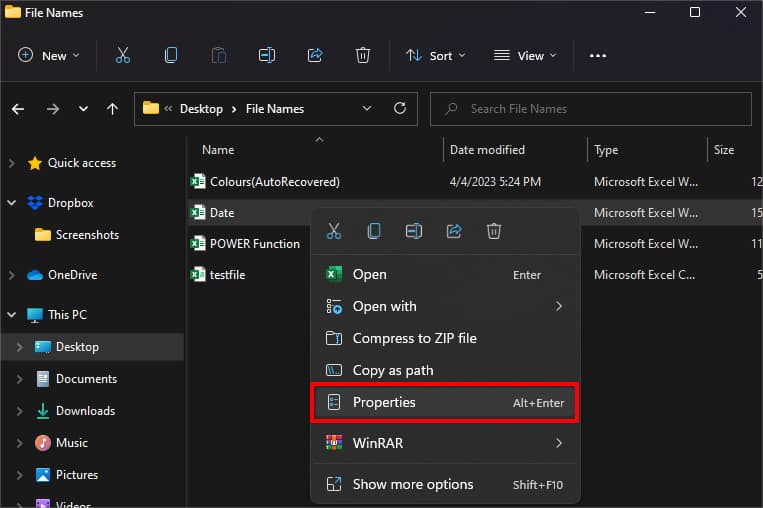
- On File Properties window, click on the Details Tab.
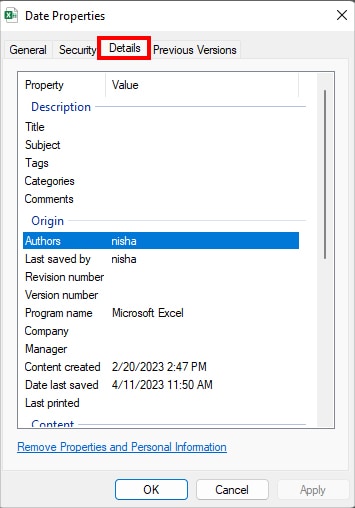
- Under Description, you can add the Title, Subject, Tags, Categories, and Comments.
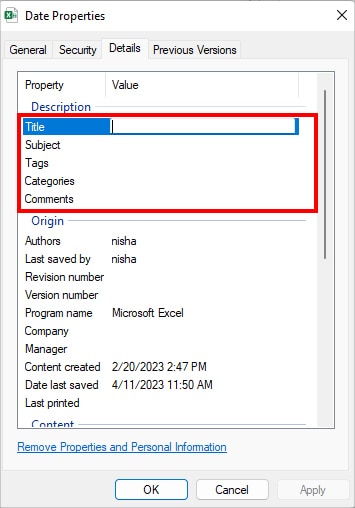
- Again, Below Origin, you can edit the Authors, Revision number, Version number, Company, Manager, etc.
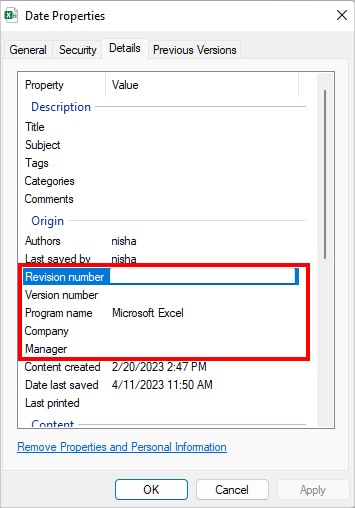
- Click OK.
How to Remove Document Properties?
Excel also allows you to remove the document properties. Check out the given steps if you no longer want to include properties like file summaries and statistics. Here, we will first check the changes made in a file using Document Inspector and remove them.
- Open Excel and launch a Workbook.
- Go to File > Info.
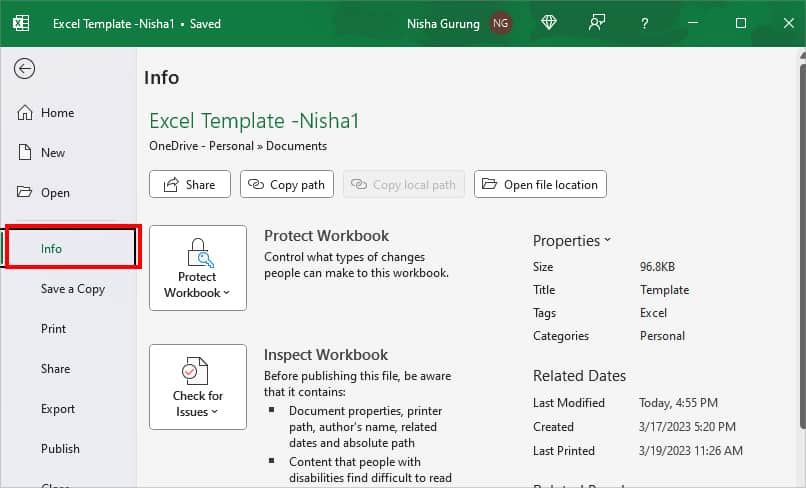
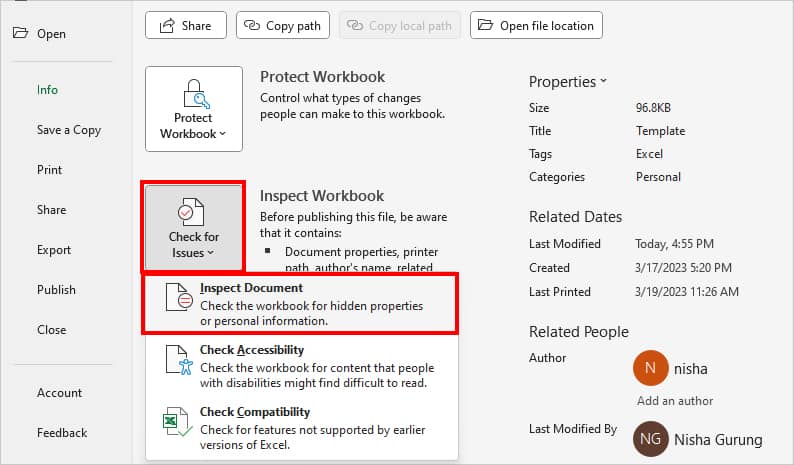
- On Inspect Workbook, expand the option for Check for Issues > Inspect Document.
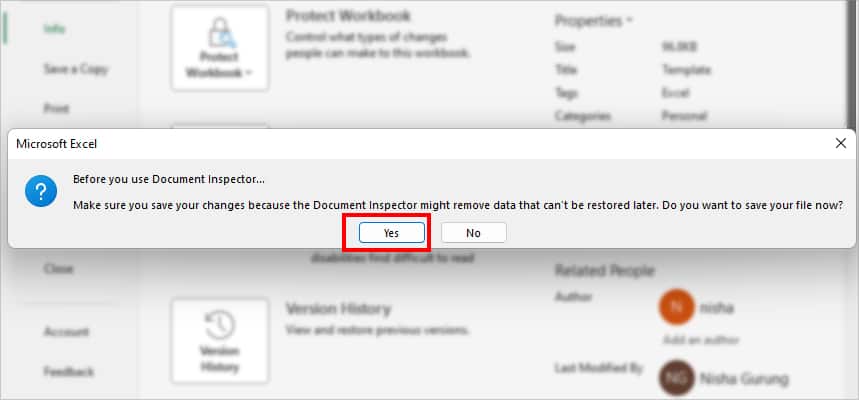
- Pick Yes on the Prompt box.
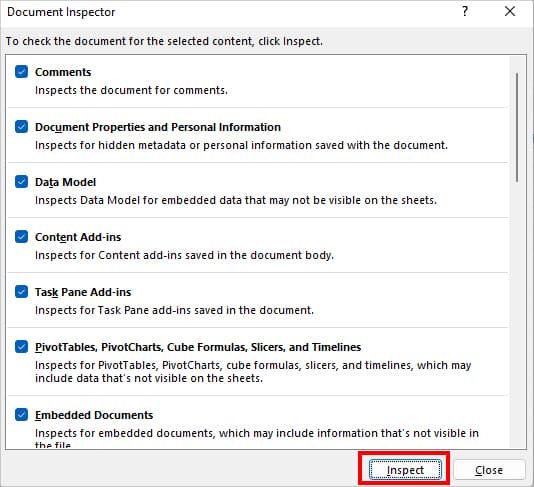
- On the Document Inspector window, hit Inspect button.
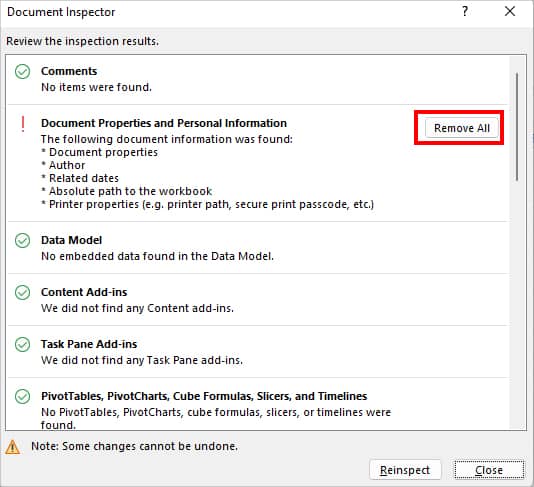
- On Document Properties and Personal Information, a red exclamation mark appears next to it. Hit Remove All.
- Click Close.